
PDFium 是 Chromium 的 PDF 渲染引擎,许可协议为 BSD 3-Clause。不同于 Mozilla 基于 HTML5 的 PDF.js,PDFium 是基于 Foxit Software (福昕软件)的渲染代码,Google 与其合作开源出的。
此外,Qt PDF 模块也选用了 PDFium ,可见 QtWebEngine / QtPdf。
本文将介绍如何用 PDFium 实现一个简单的 PDF 阅读器,代码见:https://github.com/ikuokuo/pdfium-reader 。
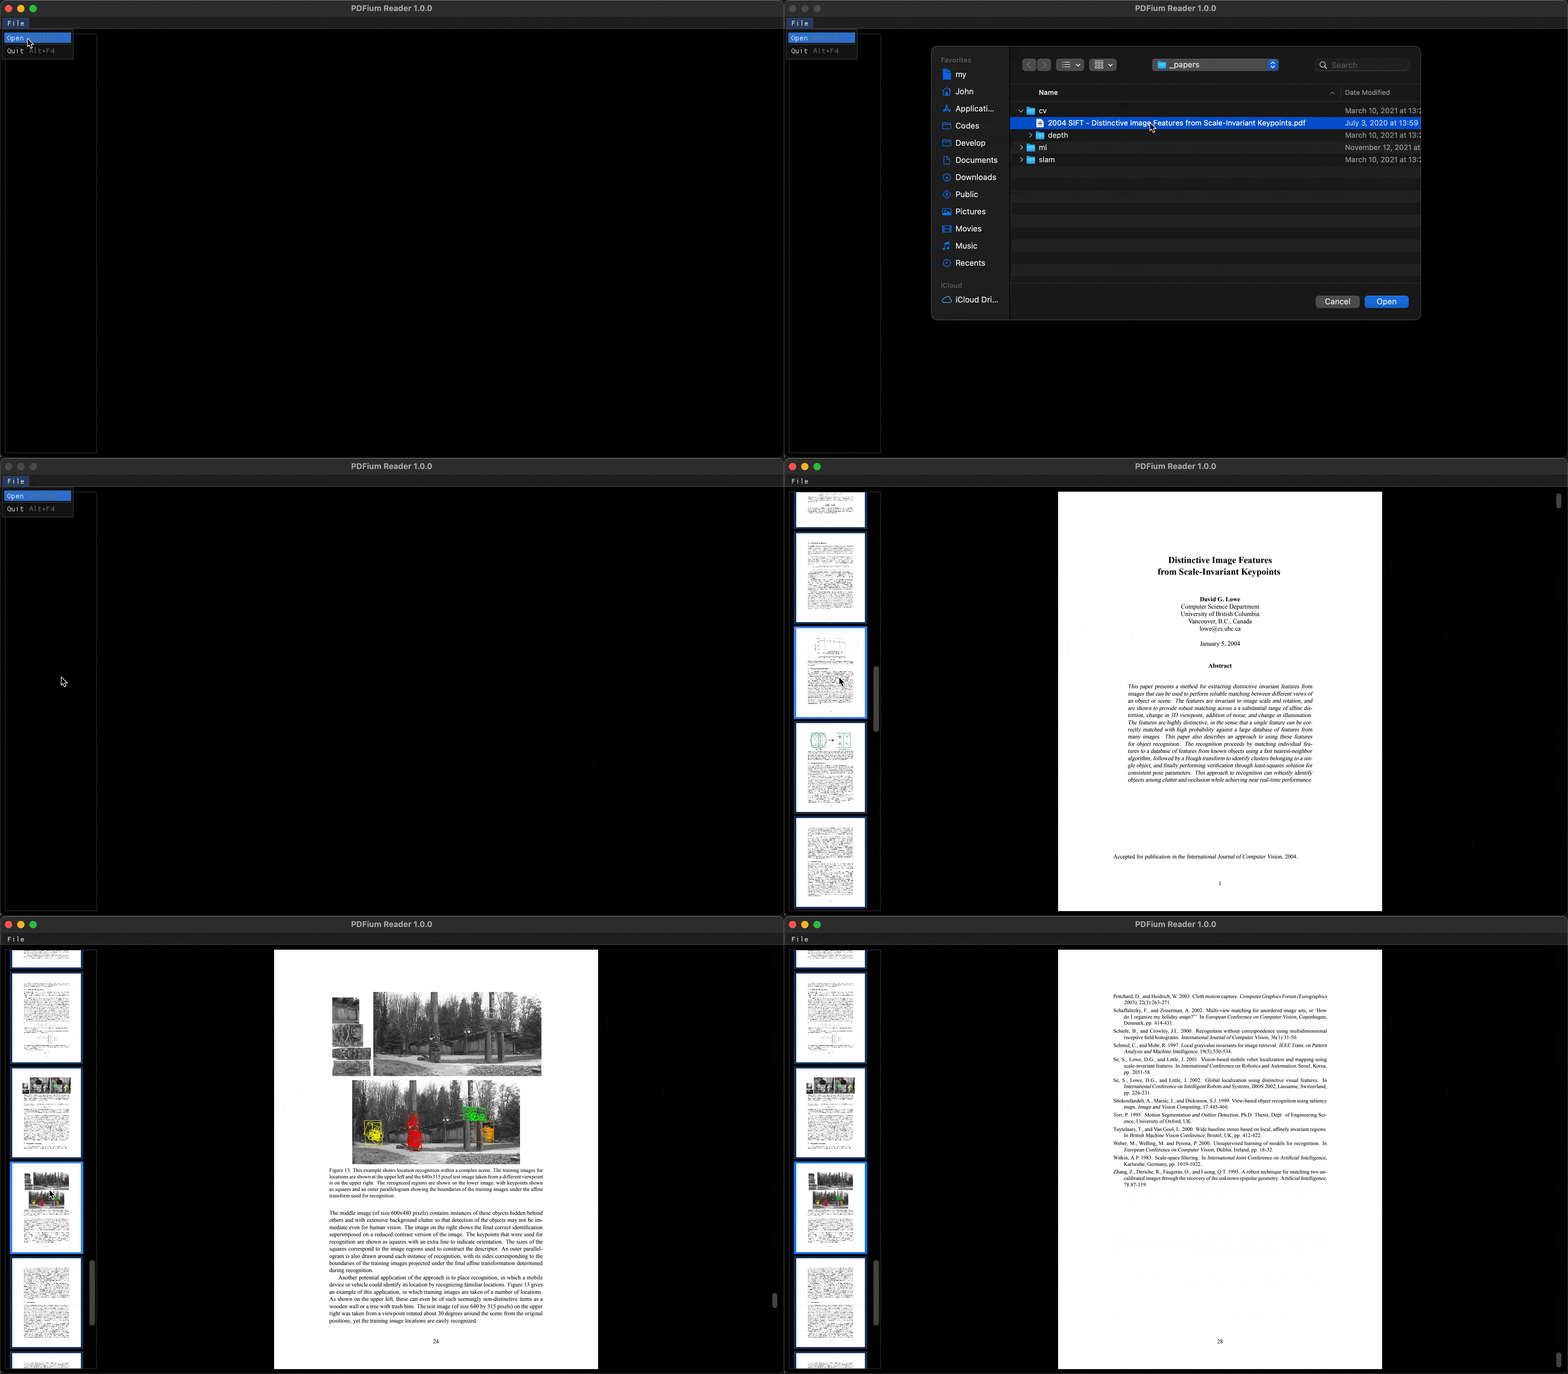
编译 PDFium
使用预编译库:https://github.com/bblanchon/pdfium-binaries
不然,参考 PDFium / README 自己编译,实践步骤如下:
1# get depot_tools, contains: gclient, ninja, gn, ...
2git clone --depth 1 https://chromium.googlesource.com/chromium/tools/depot_tools.git
3export PATH="$PATH:$HOME/Codes/Star/depot_tools"
4
5# get pdfium
6cd pdfium-reader/
7mkdir -p third_party/chromium
8cd third_party/chromium
9gclient config --unmanaged https://pdfium.googlesource.com/pdfium.git
10gclient sync
11cd pdfium
12
13# get deps
14#  on linux, install additional build dependencies
15./build/install-build-deps.sh
16
17# gn config
18#  args see the following `out/Release/args.gn`
19gn args out/Release
20
21# ninja build
22#  pdfium
23ninja -C out/Release pdfium
24#  pdfium_test
25ninja -C out/Release pdfium_test
26
27# run sample: pdf > ppm
28./out/Release/pdfium_test --ppm path/to/myfile.pdf
期间 out/Release/args.gn 内容如下:
1use_goma = false  # Googlers only. Make sure goma is installed and running first.
2is_debug = false  # Enable debugging features.
3
4# Set true to enable experimental Skia backend.
5pdf_use_skia = false
6# Set true to enable experimental Skia backend (paths only).
7pdf_use_skia_paths = false
8
9pdf_enable_xfa = false  # Set false to remove XFA support (implies JS support).
10pdf_enable_v8 = false  # Set false to remove Javascript support.
11pdf_is_standalone = true  # Set for a non-embedded build.
12pdf_is_complete_lib = true  # Set for a static library build.
13is_component_build = false  # Disable component build (Though it should work)
使用 PDFium
阅读 PDFium / Getting Started,了解如何初始化 PDFium 及载入文档。步骤如下,或见 pdfium_start.c:
1#include <fpdfview.h>
2#include <stdio.h>
3
4int main(int argc, char const *argv[]) {
5  FPDF_STRING test_doc = "test_doc.pdf";
6  if (argc >= 2) {
7    test_doc = argv[1];
8  }
9  printf("test_doc: %s\n", test_doc);
10
11  FPDF_InitLibrary();
12
13  FPDF_DOCUMENT doc = FPDF_LoadDocument(test_doc, NULL);
14  if (!doc) {
15    unsigned long err = FPDF_GetLastError();
16    // Load pdf docs unsuccessful: ...
17    goto EXIT;
18  }
19
20  FPDF_CloseDocument(doc);
21EXIT:
22  FPDF_DestroyLibrary();
23  return 0;
24}
获取信息
样例见 pdf_info.cc,可打印 PDF 元数据、页面信息等。
如 FPDF_GetMetaText 获取元数据(UTF-16LE 编码):
1void PrintPdfMetaData(FPDF_DOCUMENT doc) {
2  static constexpr const char *kMetaTags[] = {
3      "Title",   "Author",   "Subject",      "Keywords",
4      "Creator", "Producer", "CreationDate", "ModDate"};
5  for (const char *meta_tag : kMetaTags) {
6    const unsigned long len = FPDF_GetMetaText(doc, meta_tag, nullptr, 0);
7    if (!len)
8      continue;
9
10    std::vector<char16_t> buf(len);
11    FPDF_GetMetaText(doc, meta_tag, buf.data(), buf.size());
12    auto text = strings::FromUtf16(std::u16string(buf.data()));
13    if (strcmp(meta_tag, "CreationDate") == 0 ||
14        strcmp(meta_tag, "ModDate") == 0) {
15      text = fpdf::DateToRFC3399(text);
16    }
17    std::cout << " " << meta_tag << ": " << text << std::endl;
18  }
19}
渲染页面
样例见 pdf_render.cc,可渲染 PDF 页面并保存为 PNG。
FPDF_RenderPageBitmap 渲染某一页:
1void PdfRenderPage(const std::string &pdf_name, FPDF_DOCUMENT doc, int index) {
2  Timer t;
3
4  FPDF_PAGE page = FPDF_LoadPage(doc, index);
5
6  double scale = 1.0;
7  // double scale = 2.0;
8  int width = static_cast<int>(FPDF_GetPageWidth(page) * scale);
9  int height = static_cast<int>(FPDF_GetPageHeight(page) * scale);
10  int alpha = FPDFPage_HasTransparency(page) ? 1 : 0;
11  ScopedFPDFBitmap bitmap(FPDFBitmap_Create(width, height, alpha));  // BGRx
12
13  if (bitmap) {
14    FPDF_DWORD fill_color = alpha ? 0x00000000 : 0xFFFFFFFF;
15    FPDFBitmap_FillRect(bitmap.get(), 0, 0, width, height, fill_color);
16
17    int rotation = 0;
18    int flags = FPDF_ANNOT;
19    FPDF_RenderPageBitmap(bitmap.get(), page, 0, 0, width, height,
20        rotation, flags);
21    auto t_render = t.Elapsed();
22
23    int stride = FPDFBitmap_GetStride(bitmap.get());
24    void *buffer = FPDFBitmap_GetBuffer(bitmap.get());
25
26    char img_name[256];
27    int chars_formatted = snprintf(
28        img_name, sizeof(img_name), "%s.%d.png", pdf_name.c_str(), index);
29    if (chars_formatted < 0 ||
30        static_cast<size_t>(chars_formatted) >= sizeof(img_name)) {
31      fprintf(stderr, "Filename is too long: %s\n", img_name);
32      exit(EXIT_FAILURE);
33    }
34
35    auto ok = PdfWritePng(img_name, buffer, width, height, stride);
36    if (!ok) {
37      fprintf(stderr, "Write png failed: %s\n", img_name);
38      exit(EXIT_FAILURE);
39    }
40    auto t_write = t.Elapsed();
41
42    fprintf(stdout, "%s\n", img_name);
43    fprintf(stdout, " %02d: %dx%d, render=%lldms, write=%lldms\n",
44        index, width, height, t_render, t_write);
45  } else {
46    fprintf(stderr, "Page was too large to be rendered.\n");
47    exit(EXIT_FAILURE);
48  }
49
50  FPDF_ClosePage(page);
51}
stb_image_write.h 存为 PNG:
1bool PdfWritePng(const std::string &img_name, void *buffer,
2                 int width, int height, int stride) {
3  // BGRA > RGBA
4  auto buf = reinterpret_cast<uint8_t *>(buffer);
5  for (int r = 0; r < height; ++r) {
6    for (int c = 0; c < width; ++c) {
7      auto pixel = buf + (r*stride) + (c*4);
8      auto b = pixel[0];
9      pixel[0] = pixel[2];  // b = r
10      pixel[2] = b;         // r = b
11    }
12  }
13  return stbi_write_png(img_name.c_str(), width, height, 4, buf, stride) != 0;
14}
实现 UI
本文给出的 PDFium Reader 代码,用的 ImGui+GLFW+OpenGL3 实现的 UI,可跨三大桌面系统。
想进一步了解的,可以直接看代码,编译运行依照 README。
GoCoding 个人实践的经验分享,可关注公众号!