1.下载BeautifulReport模块
下载地址:https://github.com/TesterlifeRaymond/BeautifulReport
2.解压与存放路径
下载BeautifulReport的完整.ZIP文件,然后解压,把整个文件包放到本地python的/Lib/site-packages/目录下
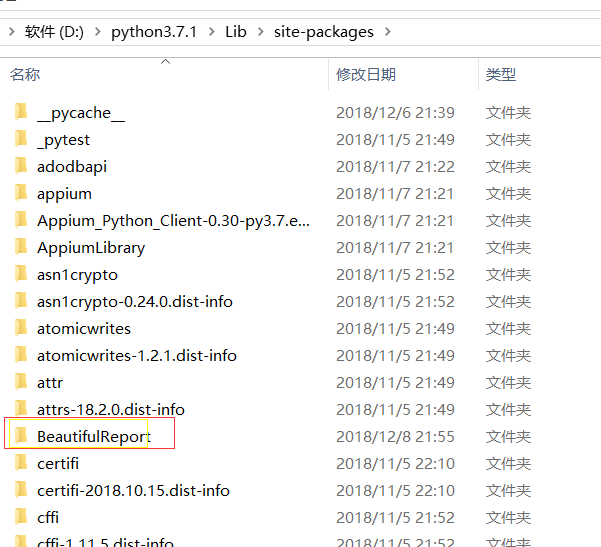
可能出现的错误,可以参考地址:https://blog.csdn.net/chenmozhe22/article/details/82888060
3.例子(web操作)
目录如下:
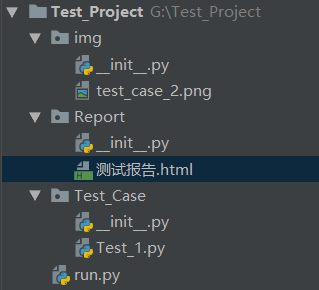
以下是Test_1.py文件代码:
1 1 import unittest,time,os
2 2 from selenium import webdriver
3 3 from BeautifulReport import BeautifulReport
4 4 from selenium.webdriver.common.action_chains import ActionChains
5 5 from selenium.webdriver.support.wait import WebDriverWait
6 6 from selenium.webdriver.common.by import By
7 7 from selenium.webdriver.support import expected_conditions as EC
8 8 class Test_01(unittest.TestCase):
9 9     def save_img(self, img_name):  #错误截图方法,这个必须先定义好
1010         """
1111             传入一个img_name, 并存储到默认的文件路径下
1212         :param img_name:
1313         :return:
1414         """
1515         self.driver.get_screenshot_as_file('{}/{}.png'.format(os.path.abspath(r"G:\student_project\Hao\img"), img_name))    #os.path.abspath(r"G:\Test_Project\img")截图存放路径
1616     def setUp(self):
1717         print("开始测试")
1818         self.driver = webdriver.Chrome()
1919         self.driver.maximize_window()
2020         self.driver.get("https://www.baidu.com/")
2121     def tearDown(self):
2222         print("结束测试")
2323         self.driver.close()
2424
2525     @BeautifulReport.add_test_img('test_case_1')     #装饰器,当你没有报错也要截图的话,那么你需要在用例里面调用save_img()方法
2626     def test_case_1(self):   #用例没有错截图示例
2727         WebDriverWait(self.driver,10).until(EC.visibility_of_element_located((By.XPATH,"//div[@id='u1']/a[@name='tj_settingicon' and @class='pf']")))
2828         ele=self.driver.find_element_by_xpath("//div[@id='u1']/a[@name='tj_settingicon' and @class='pf']")
2929         ActionChains(self.driver).move_to_element(ele).perform()
3030         self.driver.find_element_by_xpath('//a[@class="setpref"]').click()
3131         WebDriverWait(self.driver, 10).until(
3232             EC.visibility_of_element_located((By.XPATH, '//a[text()="保存设置"]')))
3333         text_data=self.driver.find_element_by_xpath('//a[text()="保存设置"]').text
3434         self.save_img("test_case_1")   #没有报错也要截图的话,直接在这里调用方法就行了
3535         self.assertEqual("保存设置",text_data)
3636     @BeautifulReport.add_test_img('test_case_2')     #装饰器,当你用例错误了,那么会自动调用save_img截图方法,存到指定目录下
3737     def test_case_2(self):   #用例错误截图示例
3838         time.sleep(1)
3939         text_data = self.driver.find_element_by_xpath('//div[@id="u1"]/a').text
4040         self.assertEqual("新闻1", text_data)
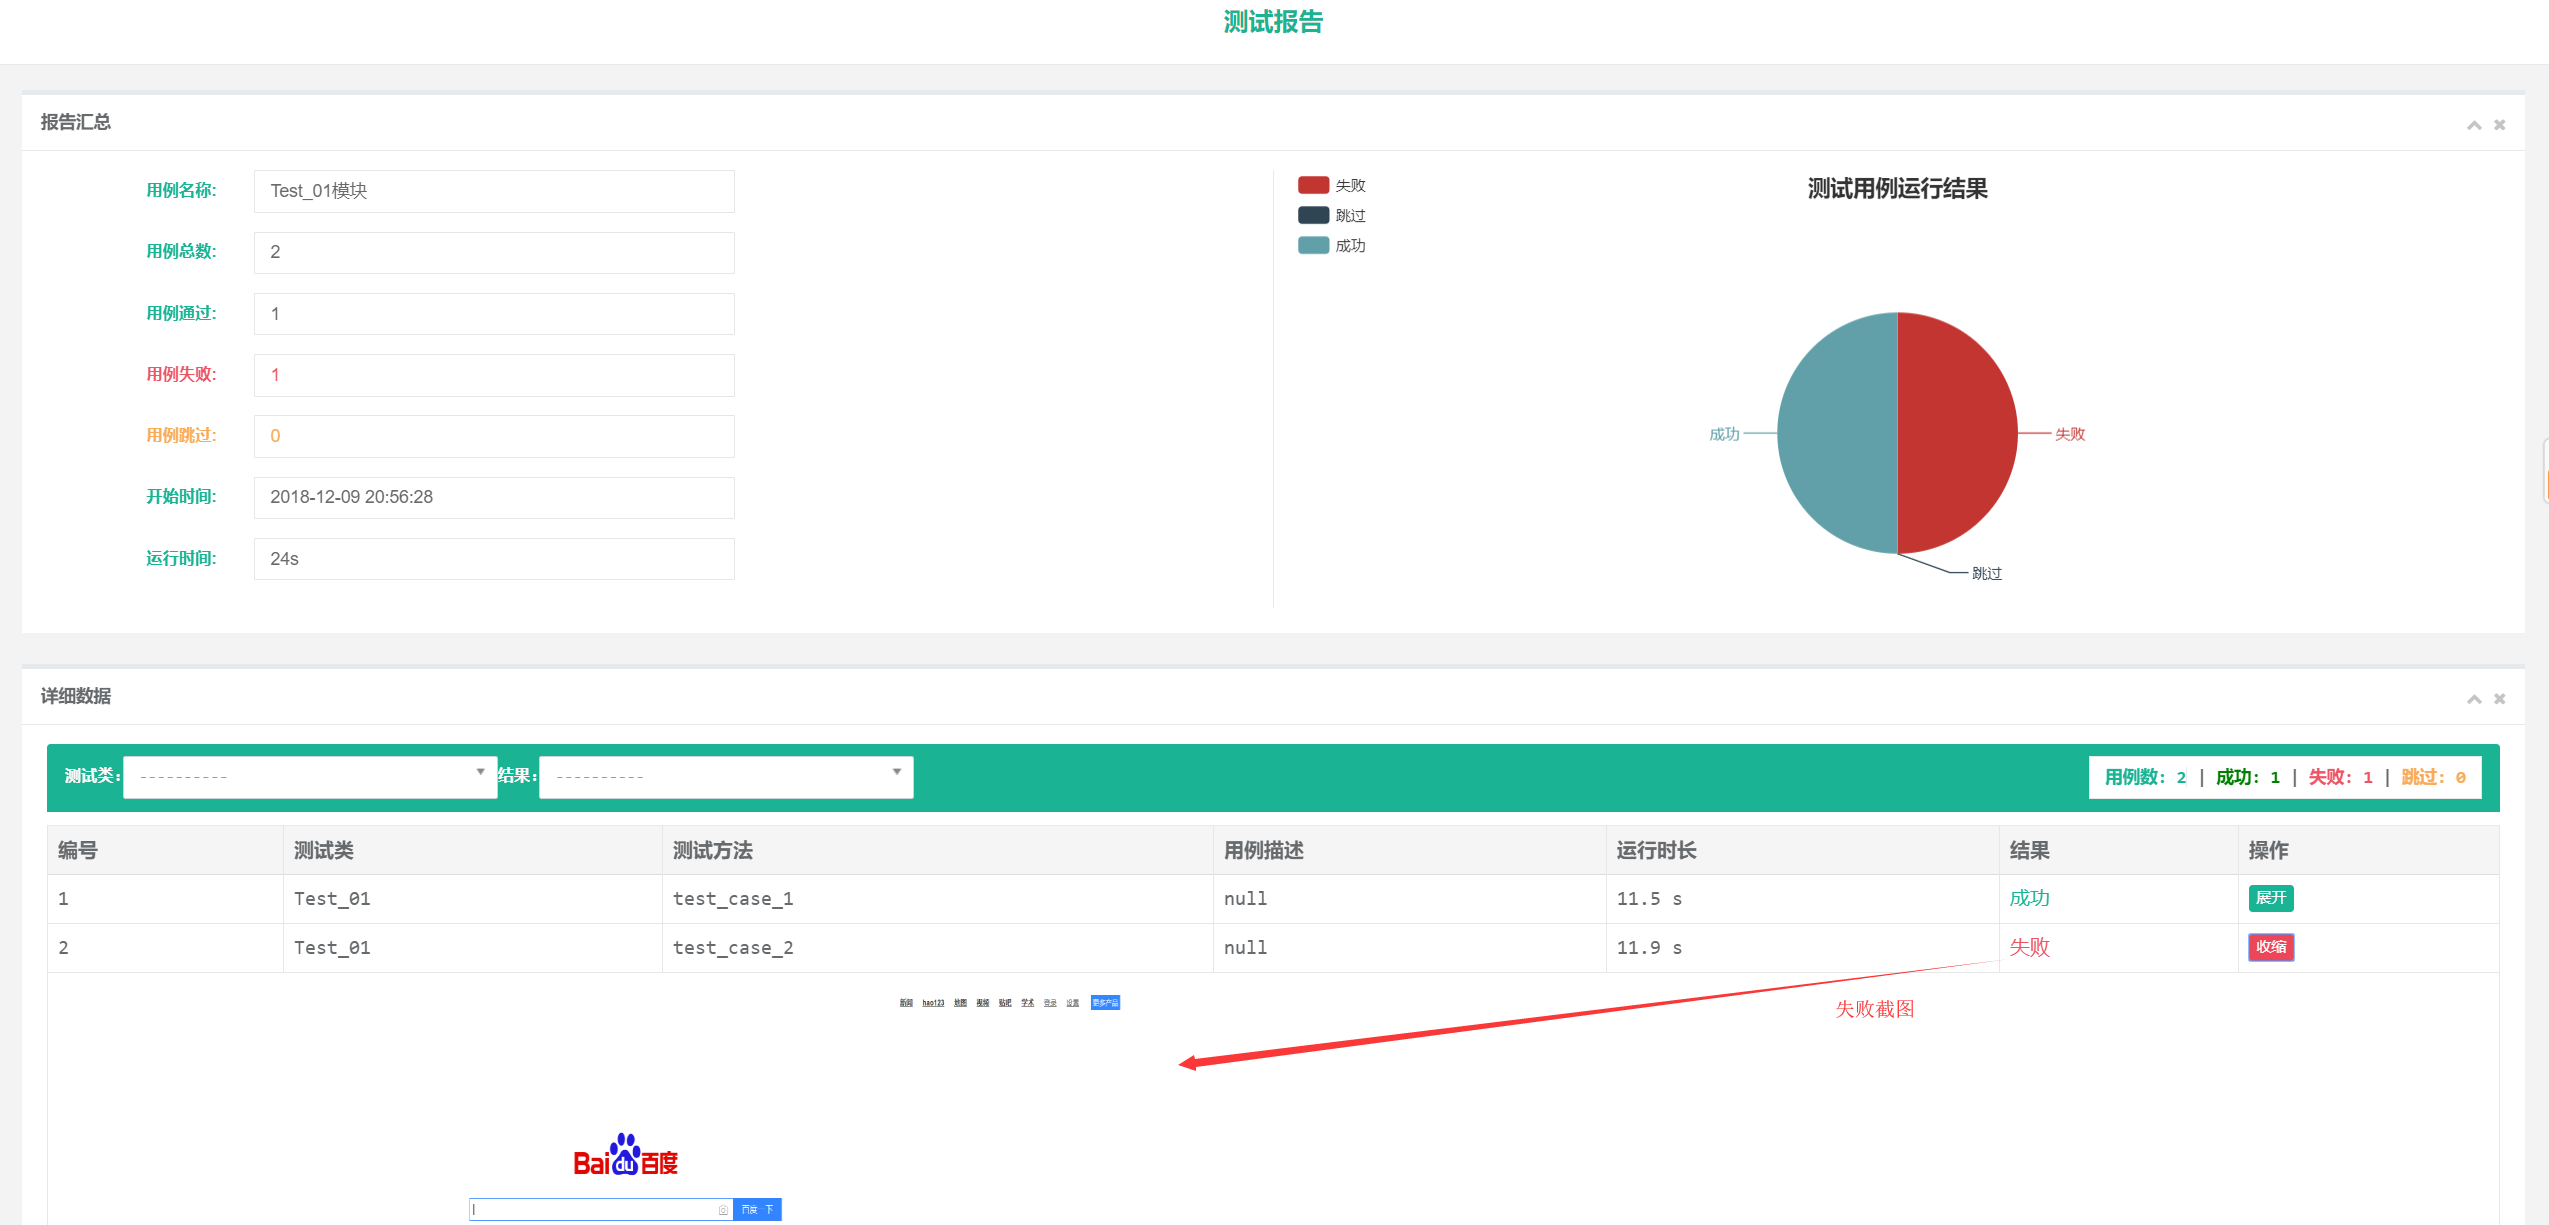
注意:如果想正确的用例也截图,那么你可以在用例上面添加装饰器,然后在用例里面调用save_img()方法就行了
以下是run.py文件代码:
1 1 import unittest,time,os
2 2 from BeautifulReport import BeautifulReport
3 3 from Test_Case import Test_1
4 4 current_path = os.getcwd()
5 5 report_path = os.path.join(current_path, "Report")
6 6 now = time.strftime("%Y-%m-%d %H-%M-%S", time.localtime(time.time()))
7 7 # 报告地址&名称
8 8 report_title = 'Example报告' + now + ".html"  # 如果不能打开这个文件,可能是now的格式,不支持:和空格
9 9 if __name__ == '__main__':
1010     suite = unittest.TestSuite()
1111     loader=unittest.TestLoader()
1212     suite.addTests(loader.loadTestsFromModule(Test_1))
1313     #运行用例filename=报告名称,description=所有用例总的名称,report_path=报告路径,如果不填写默认当前执行文件目录,theme=报告的主题,有四种可以选择:theme_default,theme_cyan,theme_candy,theme_memories  默认是第一种
1414     BeautifulReport(suite).report(filename="测试报告", description='Test_01模块',report_dir=report_path,theme="theme_cyan")
4.报告展示
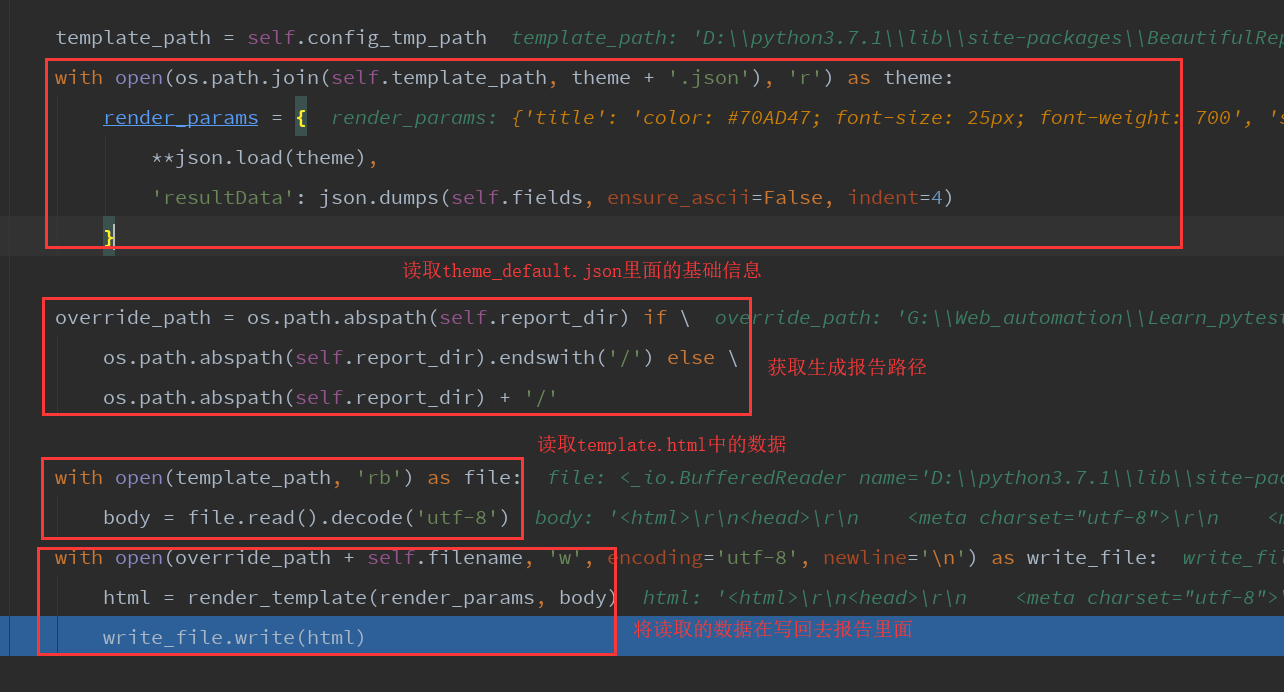
说明:生成报告原理:他是读取了D:\python3.7.1\Lib\site-packages\BeautifulReport\template路径下面的theme_default.json基础数据,在读取template.html的数据,然后在写入你运行用例后的结果+body到报告里面去,就生成了报告