
Kubernetes 是用于自动部署,扩展和管理容器化应用程序的开源系统。本文将介绍如何快速开始 K8s 的使用。
了解 K8s
搭建 K8s
本地开发测试,需要搭建一个 K8s 轻量服务。实际部署时,可以用云厂商的 K8s 服务。
本文以 k3d 为例,于 macOS 搭建 K8s 服务。于 Ubuntu 则推荐 MicroK8s。其他可替代方案有:
k3d
k3s 是 Rancher 推出的 K8s 轻量版。而 k3d 即 k3s in docker,以 docker 容器管理 k3s 集群。
以下搭建过程,是于 macOS 的笔记,供参考。其他平台,请依照官方文档进行。
1# 安装 kubectl: 命令行工具
2brew install kubectl
3# 安装 kubecm: 配置管理工具
4brew install kubecm
5
6# 安装 k3d
7brew install k3d
8❯ k3d version
9k3d version v4.4.8
10k3s version latest (default)
创建集群(1主2从):
1❯ k3d cluster create mycluster --api-port 6550 --servers 1 --agents 2 --port 8080:80@loadbalancer --wait
2INFO[0000] Prep: Network
3INFO[0000] Created network 'k3d-mycluster' (23dc5761582b1a4b74d9aa64d8dca2256b5bc510c4580b3228123c26e93f456e)
4INFO[0000] Created volume 'k3d-mycluster-images'
5INFO[0001] Creating node 'k3d-mycluster-server-0'
6INFO[0001] Creating node 'k3d-mycluster-agent-0'
7INFO[0001] Creating node 'k3d-mycluster-agent-1'
8INFO[0001] Creating LoadBalancer 'k3d-mycluster-serverlb'
9INFO[0001] Starting cluster 'mycluster'
10INFO[0001] Starting servers...
11INFO[0001] Starting Node 'k3d-mycluster-server-0'
12INFO[0009] Starting agents...
13INFO[0009] Starting Node 'k3d-mycluster-agent-0'
14INFO[0022] Starting Node 'k3d-mycluster-agent-1'
15INFO[0030] Starting helpers...
16INFO[0030] Starting Node 'k3d-mycluster-serverlb'
17INFO[0031] (Optional) Trying to get IP of the docker host and inject it into the cluster as 'host.k3d.internal' for easy access
18INFO[0036] Successfully added host record to /etc/hosts in 4/4 nodes and to the CoreDNS ConfigMap
19INFO[0036] Cluster 'mycluster' created successfully!
20INFO[0036] --kubeconfig-update-default=false --> sets --kubeconfig-switch-context=false
21INFO[0036] You can now use it like this:
22kubectl config use-context k3d-mycluster
23kubectl cluster-info
查看集群信息:
1❯ kubectl cluster-info
2Kubernetes control plane is running at https://0.0.0.0:6550
3CoreDNS is running at https://0.0.0.0:6550/api/v1/namespaces/kube-system/services/kube-dns:dns/proxy
4Metrics-server is running at https://0.0.0.0:6550/api/v1/namespaces/kube-system/services/https:metrics-server:/proxy
查看资源信息:
1# 查看 Nodes
2❯ kubectl get nodes
3NAME                     STATUS   ROLES                  AGE     VERSION
4k3d-mycluster-agent-0    Ready    <none>                 2m12s   v1.20.10+k3s1
5k3d-mycluster-server-0   Ready    control-plane,master   2m23s   v1.20.10+k3s1
6k3d-mycluster-agent-1    Ready    <none>                 2m4s    v1.20.10+k3s1
7# 查看 Pods
8❯ kubectl get pods --all-namespaces
9NAMESPACE     NAME                                      READY   STATUS      RESTARTS   AGE
10kube-system   coredns-6488c6fcc6-5n7d9                  1/1     Running     0          2m12s
11kube-system   metrics-server-86cbb8457f-dr7lh           1/1     Running     0          2m12s
12kube-system   local-path-provisioner-5ff76fc89d-zbxf4   1/1     Running     0          2m12s
13kube-system   helm-install-traefik-bfm4c                0/1     Completed   0          2m12s
14kube-system   svclb-traefik-zx98g                       2/2     Running     0          68s
15kube-system   svclb-traefik-7bx2r                       2/2     Running     0          68s
16kube-system   svclb-traefik-cmdrm                       2/2     Running     0          68s
17kube-system   traefik-6f9cbd9bd4-2mxhk                  1/1     Running     0          69s
测试 Nginx:
1# 创建 Nginx Deployment
2kubectl create deployment nginx --image=nginx
3# 创建 ClusterIP Service,暴露 Nginx 端口
4kubectl create service clusterip nginx --tcp=80:80
5# 创建 Ingress Object
6#  k3s 以 traefik 为默认 ingress controller
7cat <<EOF | kubectl apply -f -
8apiVersion: networking.k8s.io/v1
9kind: Ingress
10metadata:
11  name: nginx
12  annotations:
13    ingress.kubernetes.io/ssl-redirect: "false"
14spec:
15  rules:
16  - http:
17      paths:
18      - path: /
19        pathType: Prefix
20        backend:
21          service:
22            name: nginx
23            port:
24              number: 80
25EOF
26# 访问 Nginx Service
27#  kubectl get pods 确认 nginx STATUS=Running
28open http://127.0.0.1:8080
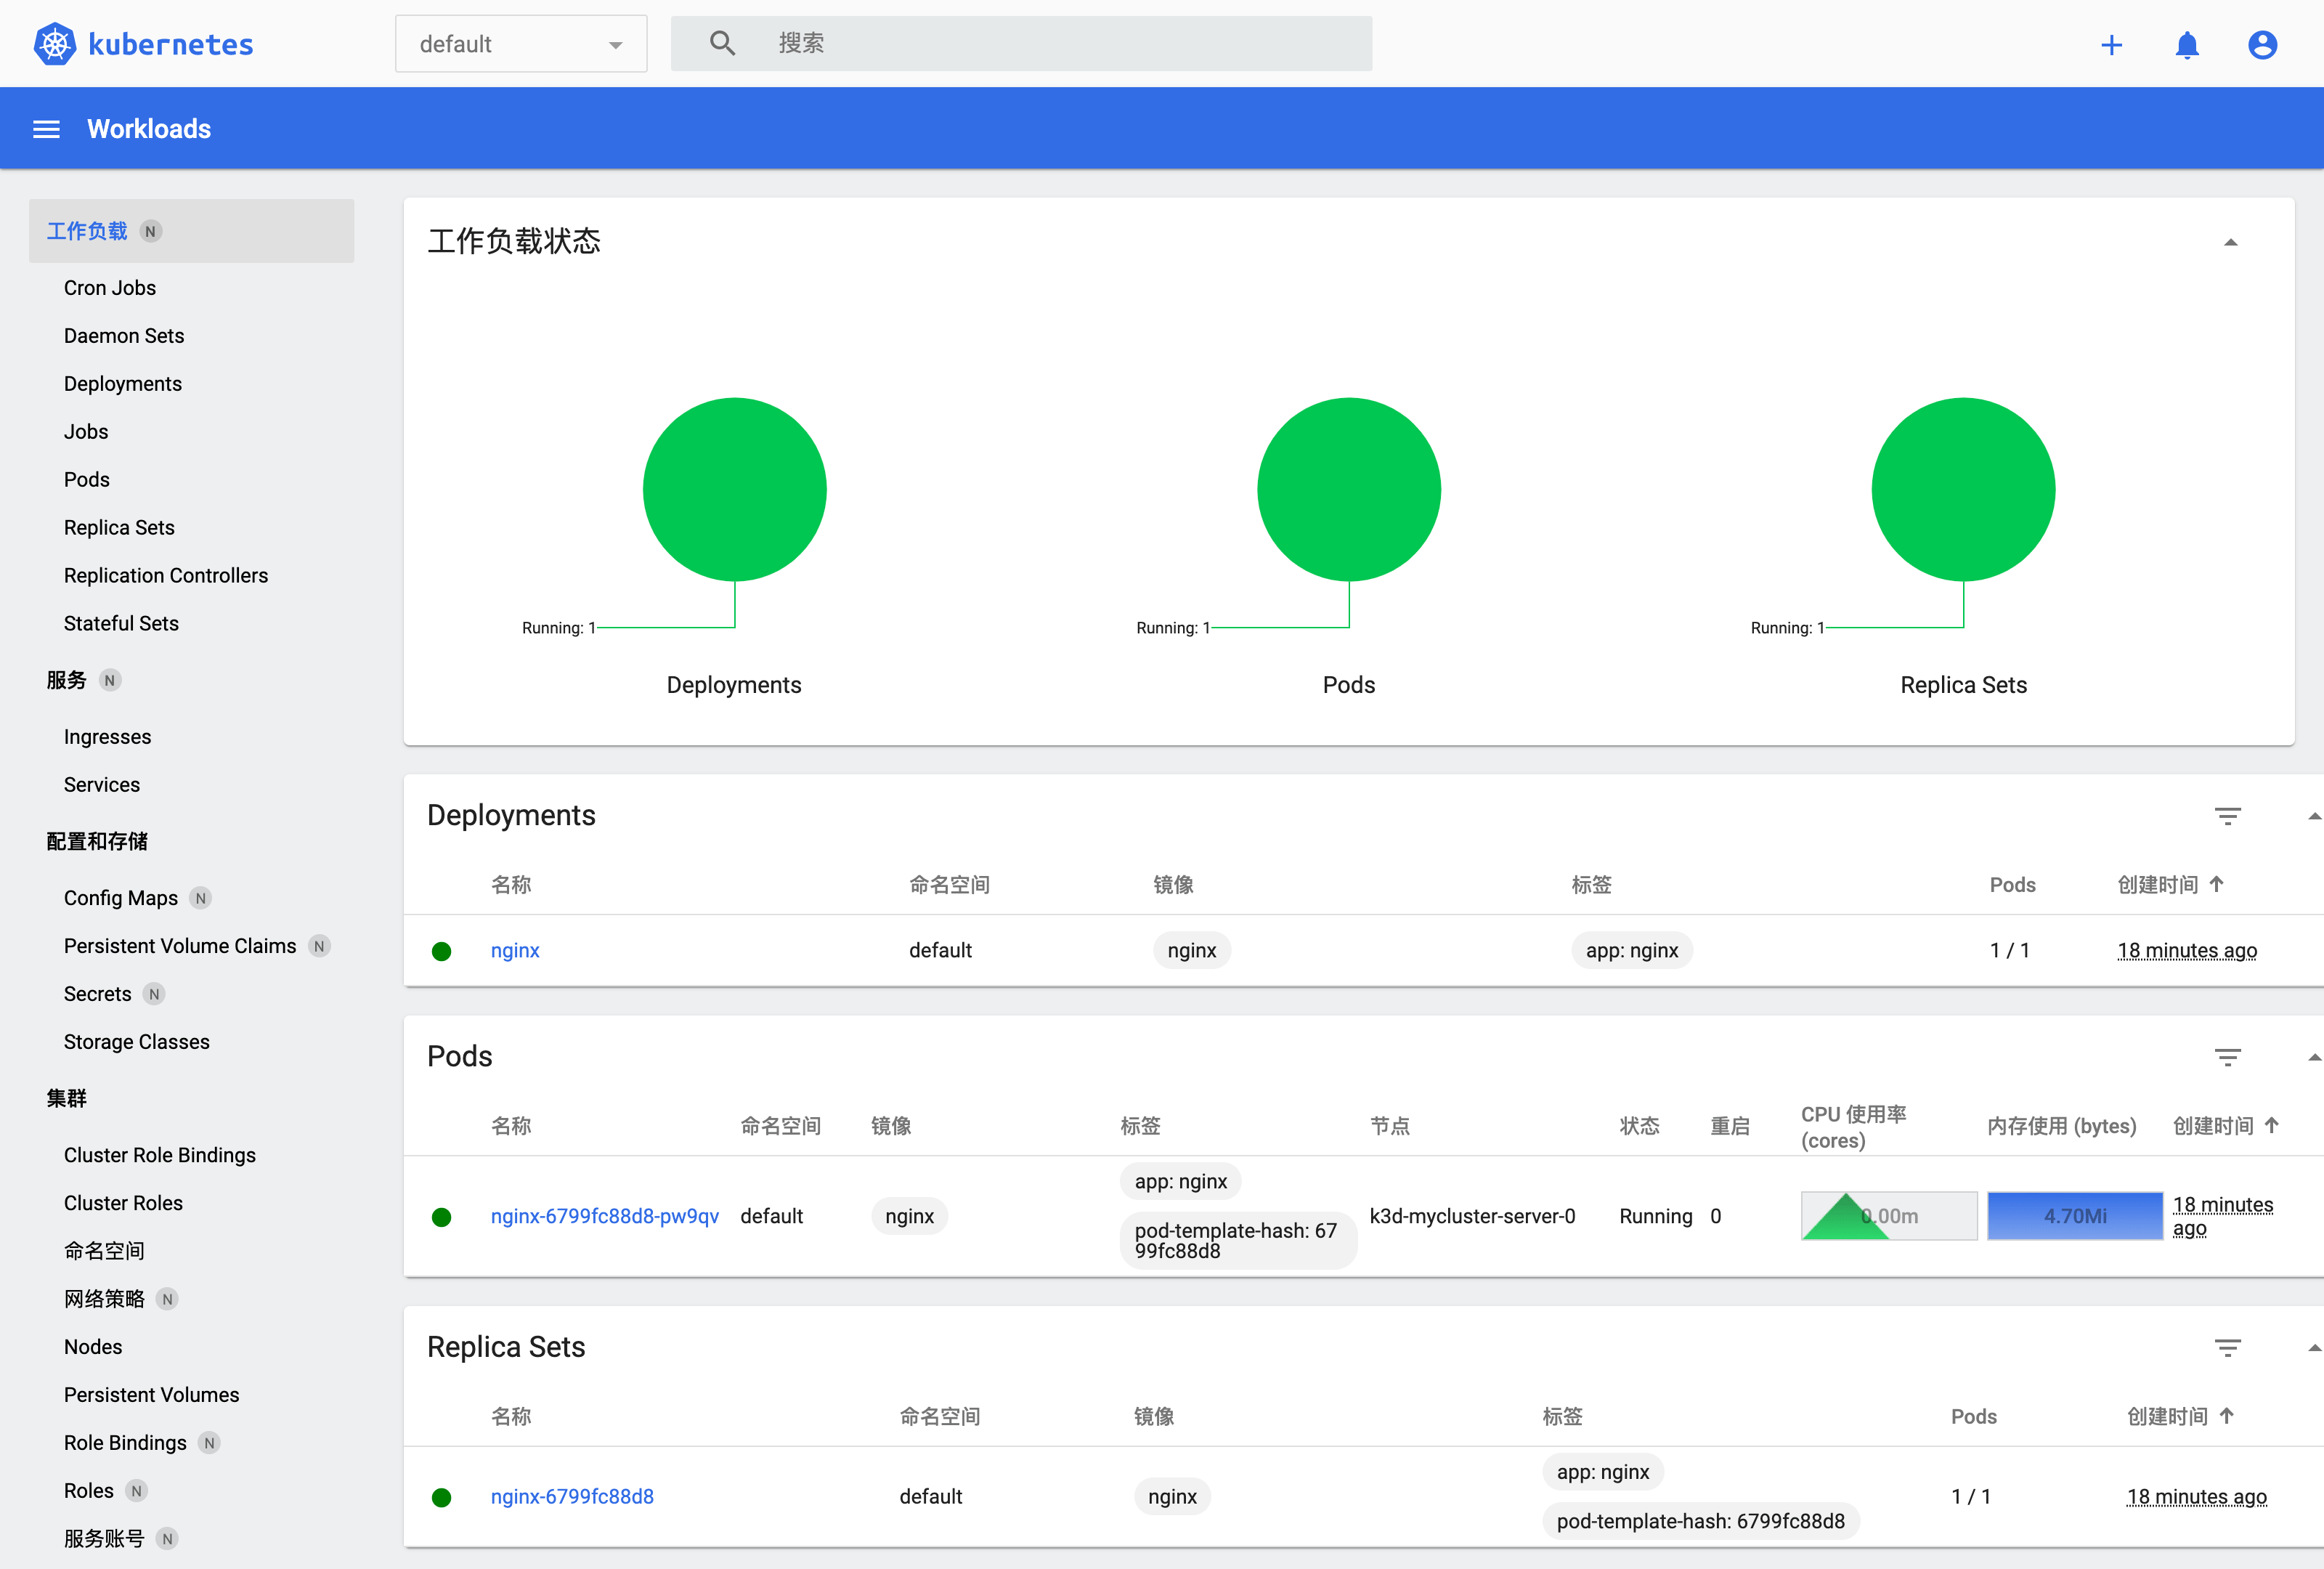
测试 Dashboard:
1# 创建 Dashboard
2GITHUB_URL=https://github.com/kubernetes/dashboard/releases
3VERSION_KUBE_DASHBOARD=$(curl -w '%{url_effective}' -I -L -s -S ${GITHUB_URL}/latest -o /dev/null | sed -e 's|.*/||')
4kubectl create -f https://raw.githubusercontent.com/kubernetes/dashboard/${VERSION_KUBE_DASHBOARD}/aio/deploy/recommended.yaml
5# 配置 RBAC
6#  admin user
7cat <<EOF > dashboard.admin-user.yml
8apiVersion: v1
9kind: ServiceAccount
10metadata:
11  name: admin-user
12  namespace: kubernetes-dashboard
13EOF
14#  admin user role
15cat <<EOF > dashboard.admin-user-role.yml
16apiVersion: rbac.authorization.k8s.io/v1
17kind: ClusterRoleBinding
18metadata:
19  name: admin-user
20roleRef:
21  apiGroup: rbac.authorization.k8s.io
22  kind: ClusterRole
23  name: cluster-admin
24subjects:
25- kind: ServiceAccount
26  name: admin-user
27  namespace: kubernetes-dashboard
28EOF
29# 配置部署
30kubectl create -f dashboard.admin-user.yml -f dashboard.admin-user-role.yml
31# 获取 Bearer Token
32kubectl -n kubernetes-dashboard describe secret admin-user-token | grep ^token
33# 访问代理
34kubectl proxy
35# 访问 Dashboard
36#  输入 Token 登录
37open http://127.0.0.1:8001/api/v1/namespaces/kubernetes-dashboard/services/https:kubernetes-dashboard:/proxy/
删除集群:
1k3d cluster delete mycluster
切换集群:
1kubecm s
参考:
MicroK8s
MicroK8s 是 Ubuntu 官方生态提供的 K8s 轻量版,适合用于开发工作站、IoT、Edge、CI/CD。
以下搭建过程,是于 Ubuntu 18/20 的笔记,供参考。其他平台,请依照官方文档进行。
1# 检查 hostname
2#  要求不含大写字母和下划线,不然依照后文修改
3hostname
4
5# 安装 microk8s
6sudo apt install snapd -y
7snap info microk8s
8sudo snap install microk8s --classic --channel=1.21/stable
9
10# 添加用户组
11sudo usermod -a -G microk8s $USER
12sudo chown -f -R $USER ~/.kube
13newgrp microk8s
14id $USER
15
16## 一些确保拉到镜像的方法
17# 配置代理(如果有)
18#  MicroK8s / Installing behind a proxy
19#   https://microk8s.io/docs/install-proxy
20#  Issue: Pull images from others than k8s.gcr.io
21#   https://github.com/ubuntu/microk8s/issues/472
22sudo vi /var/snap/microk8s/current/args/containerd-env
23  HTTPS_PROXY=http://127.0.0.1:7890
24  NO_PROXY=10.1.0.0/16,10.152.183.0/24
25# 添加镜像(docker.io)
26#  镜像加速器
27#   https://yeasy.gitbook.io/docker_practice/install/mirror
28#  还可改 args/ 里不同模板的 sandbox_image
29sudo vi /var/snap/microk8s/current/args/containerd-template.toml
30  [plugins."io.containerd.grpc.v1.cri"]
31    [plugins."io.containerd.grpc.v1.cri".registry]
32      [plugins."io.containerd.grpc.v1.cri".registry.mirrors]
33        [plugins."io.containerd.grpc.v1.cri".registry.mirrors."docker.io"]
34          endpoint = ["https://x.mirror.aliyuncs.com", "https://registry-1.docker.io", ]
35        [plugins."io.containerd.grpc.v1.cri".registry.mirrors."localhost:32000"]
36          endpoint = ["http://localhost:32000"]
37# 手动导入,见后文启用插件那
38
39# 重启服务
40microk8s stop
41microk8s start
检查状态:
1$ microk8s status
2microk8s is running
3high-availability: no
4  datastore master nodes: 127.0.0.1:19001
5  datastore standby nodes: none
6addons:
7  enabled:
8    ha-cluster           # Configure high availability on the current node
9  disabled:
10    ambassador           # Ambassador API Gateway and Ingress
11    cilium               # SDN, fast with full network policy
12    dashboard            # The Kubernetes dashboard
13    dns                  # CoreDNS
14    fluentd              # Elasticsearch-Fluentd-Kibana logging and monitoring
15    gpu                  # Automatic enablement of Nvidia CUDA
16    helm                 # Helm 2 - the package manager for Kubernetes
17    helm3                # Helm 3 - Kubernetes package manager
18    host-access          # Allow Pods connecting to Host services smoothly
19    ingress              # Ingress controller for external access
20    istio                # Core Istio service mesh services
21    jaeger               # Kubernetes Jaeger operator with its simple config
22    keda                 # Kubernetes-based Event Driven Autoscaling
23    knative              # The Knative framework on Kubernetes.
24    kubeflow             # Kubeflow for easy ML deployments
25    linkerd              # Linkerd is a service mesh for Kubernetes and other frameworks
26    metallb              # Loadbalancer for your Kubernetes cluster
27    metrics-server       # K8s Metrics Server for API access to service metrics
28    multus               # Multus CNI enables attaching multiple network interfaces to pods
29    openebs              # OpenEBS is the open-source storage solution for Kubernetes
30    openfaas             # openfaas serverless framework
31    portainer            # Portainer UI for your Kubernetes cluster
32    prometheus           # Prometheus operator for monitoring and logging
33    rbac                 # Role-Based Access Control for authorisation
34    registry             # Private image registry exposed on localhost:32000
35    storage              # Storage class; allocates storage from host directory
36    traefik              # traefik Ingress controller for external access
如果 status 不正确时,可以如下排查错误:
1microk8s inspect
2grep -r error /var/snap/microk8s/2346/inspection-report
如果要修改 hostname:
1# 改名称
2sudo hostnamectl set-hostname ubuntu-vm
3# 改 host
4sudo vi /etc/hosts
5
6# 云主机的话,还要改下配置
7sudo vi /etc/cloud/cloud.cfg
8  preserve_hostname: true
9  # 如果只修改 preserve_hostname 不生效,那就直接注释掉 set/update_hostname
10  cloud_init_modules:
11  #  - set_hostname
12  #  - update_hostname
13
14# 重启,验证生效
15sudo reboot
接着,启用些基础插件:
1microk8s enable dns dashboard
2
3# 查看 Pods ,确认 running
4microk8s kubectl get pods --all-namespaces
5# 不然,详情里看下错误原因
6microk8s kubectl describe pod --all-namespaces
直到全部正常 running:
1$ kubectl get pods --all-namespaces
2NAMESPACE     NAME                                         READY   STATUS    RESTARTS   AGE
3kube-system   kubernetes-dashboard-85fd7f45cb-snqrv        1/1     Running   1          15h
4kube-system   dashboard-metrics-scraper-78d7698477-tmb7k   1/1     Running   1          15h
5kube-system   metrics-server-8bbfb4bdb-wlf8g               1/1     Running   1          15h
6kube-system   calico-node-p97kh                            1/1     Running   1          6m18s
7kube-system   coredns-7f9c69c78c-255fg                     1/1     Running   1          15h
8kube-system   calico-kube-controllers-f7868dd95-st9p7      1/1     Running   1          16h
如果拉取镜像失败,可以 microk8s ctr image pull <mirror>。或者,docker pull 后导入 containerd:
1docker pull registry.cn-hangzhou.aliyuncs.com/google_containers/pause:3.1
2docker tag registry.cn-hangzhou.aliyuncs.com/google_containers/pause:3.1 k8s.gcr.io/pause:3.1
3docker save k8s.gcr.io/pause:3.1 > pause:3.1.tar
4microk8s ctr image import pause:3.1.tar
5
6docker pull calico/cni:v3.13.2
7docker save calico/cni:v3.13.2 > cni:v3.13.2.tar
8microk8s ctr image import cni:v3.13.2.tar
9
10docker pull calico/node:v3.13.2
11docker save calico/node:v3.13.2 > node:v3.13.2.tar
12microk8s ctr image import node:v3.13.2.tar
如果 calico-node CrashLoopBackOff,可能网络配置问题:
1# 查具体日志
2microk8s kubectl logs -f -n kube-system calico-node-l5wl2 -c calico-node
3# 如果有 Unable to auto-detect an IPv4 address,那么 ip a 找出哪个网口有 IP 。修改:
4sudo vi /var/snap/microk8s/current/args/cni-network/cni.yaml
5  - name: IP_AUTODETECTION_METHOD
6  value: "interface=wlo.*"
7# 重启服务
8microk8s stop; microk8s start
9
10## 参考
11# Issue: Microk8s 1.19 not working on Ubuntu 20.04.1
12#  https://github.com/ubuntu/microk8s/issues/1554
13# Issue: CrashLoopBackOff for calico-node pods
14#  https://github.com/projectcalico/calico/issues/3094
15# Changing the pods CIDR in a MicroK8s cluster
16#  https://microk8s.io/docs/change-cidr
17# MicroK8s IPv6 DualStack HOW-TO
18#  https://discuss.kubernetes.io/t/microk8s-ipv6-dualstack-how-to/14507
然后,可以打开 Dashboard 看看:
1# 获取 Token (未启用 RBAC 时)
2token=$(microk8s kubectl -n kube-system get secret | grep default-token | cut -d " " -f1)
3microk8s kubectl -n kube-system describe secret $token
4# 转发端口
5microk8s kubectl port-forward -n kube-system service/kubernetes-dashboard 10443:443
6# 打开网页,输入 Token 登录
7xdg-open https://127.0.0.1:10443
8
9# 更多说明 https://microk8s.io/docs/addon-dashboard
10# Issue: Your connection is not private
11#  https://github.com/kubernetes/dashboard/issues/3804
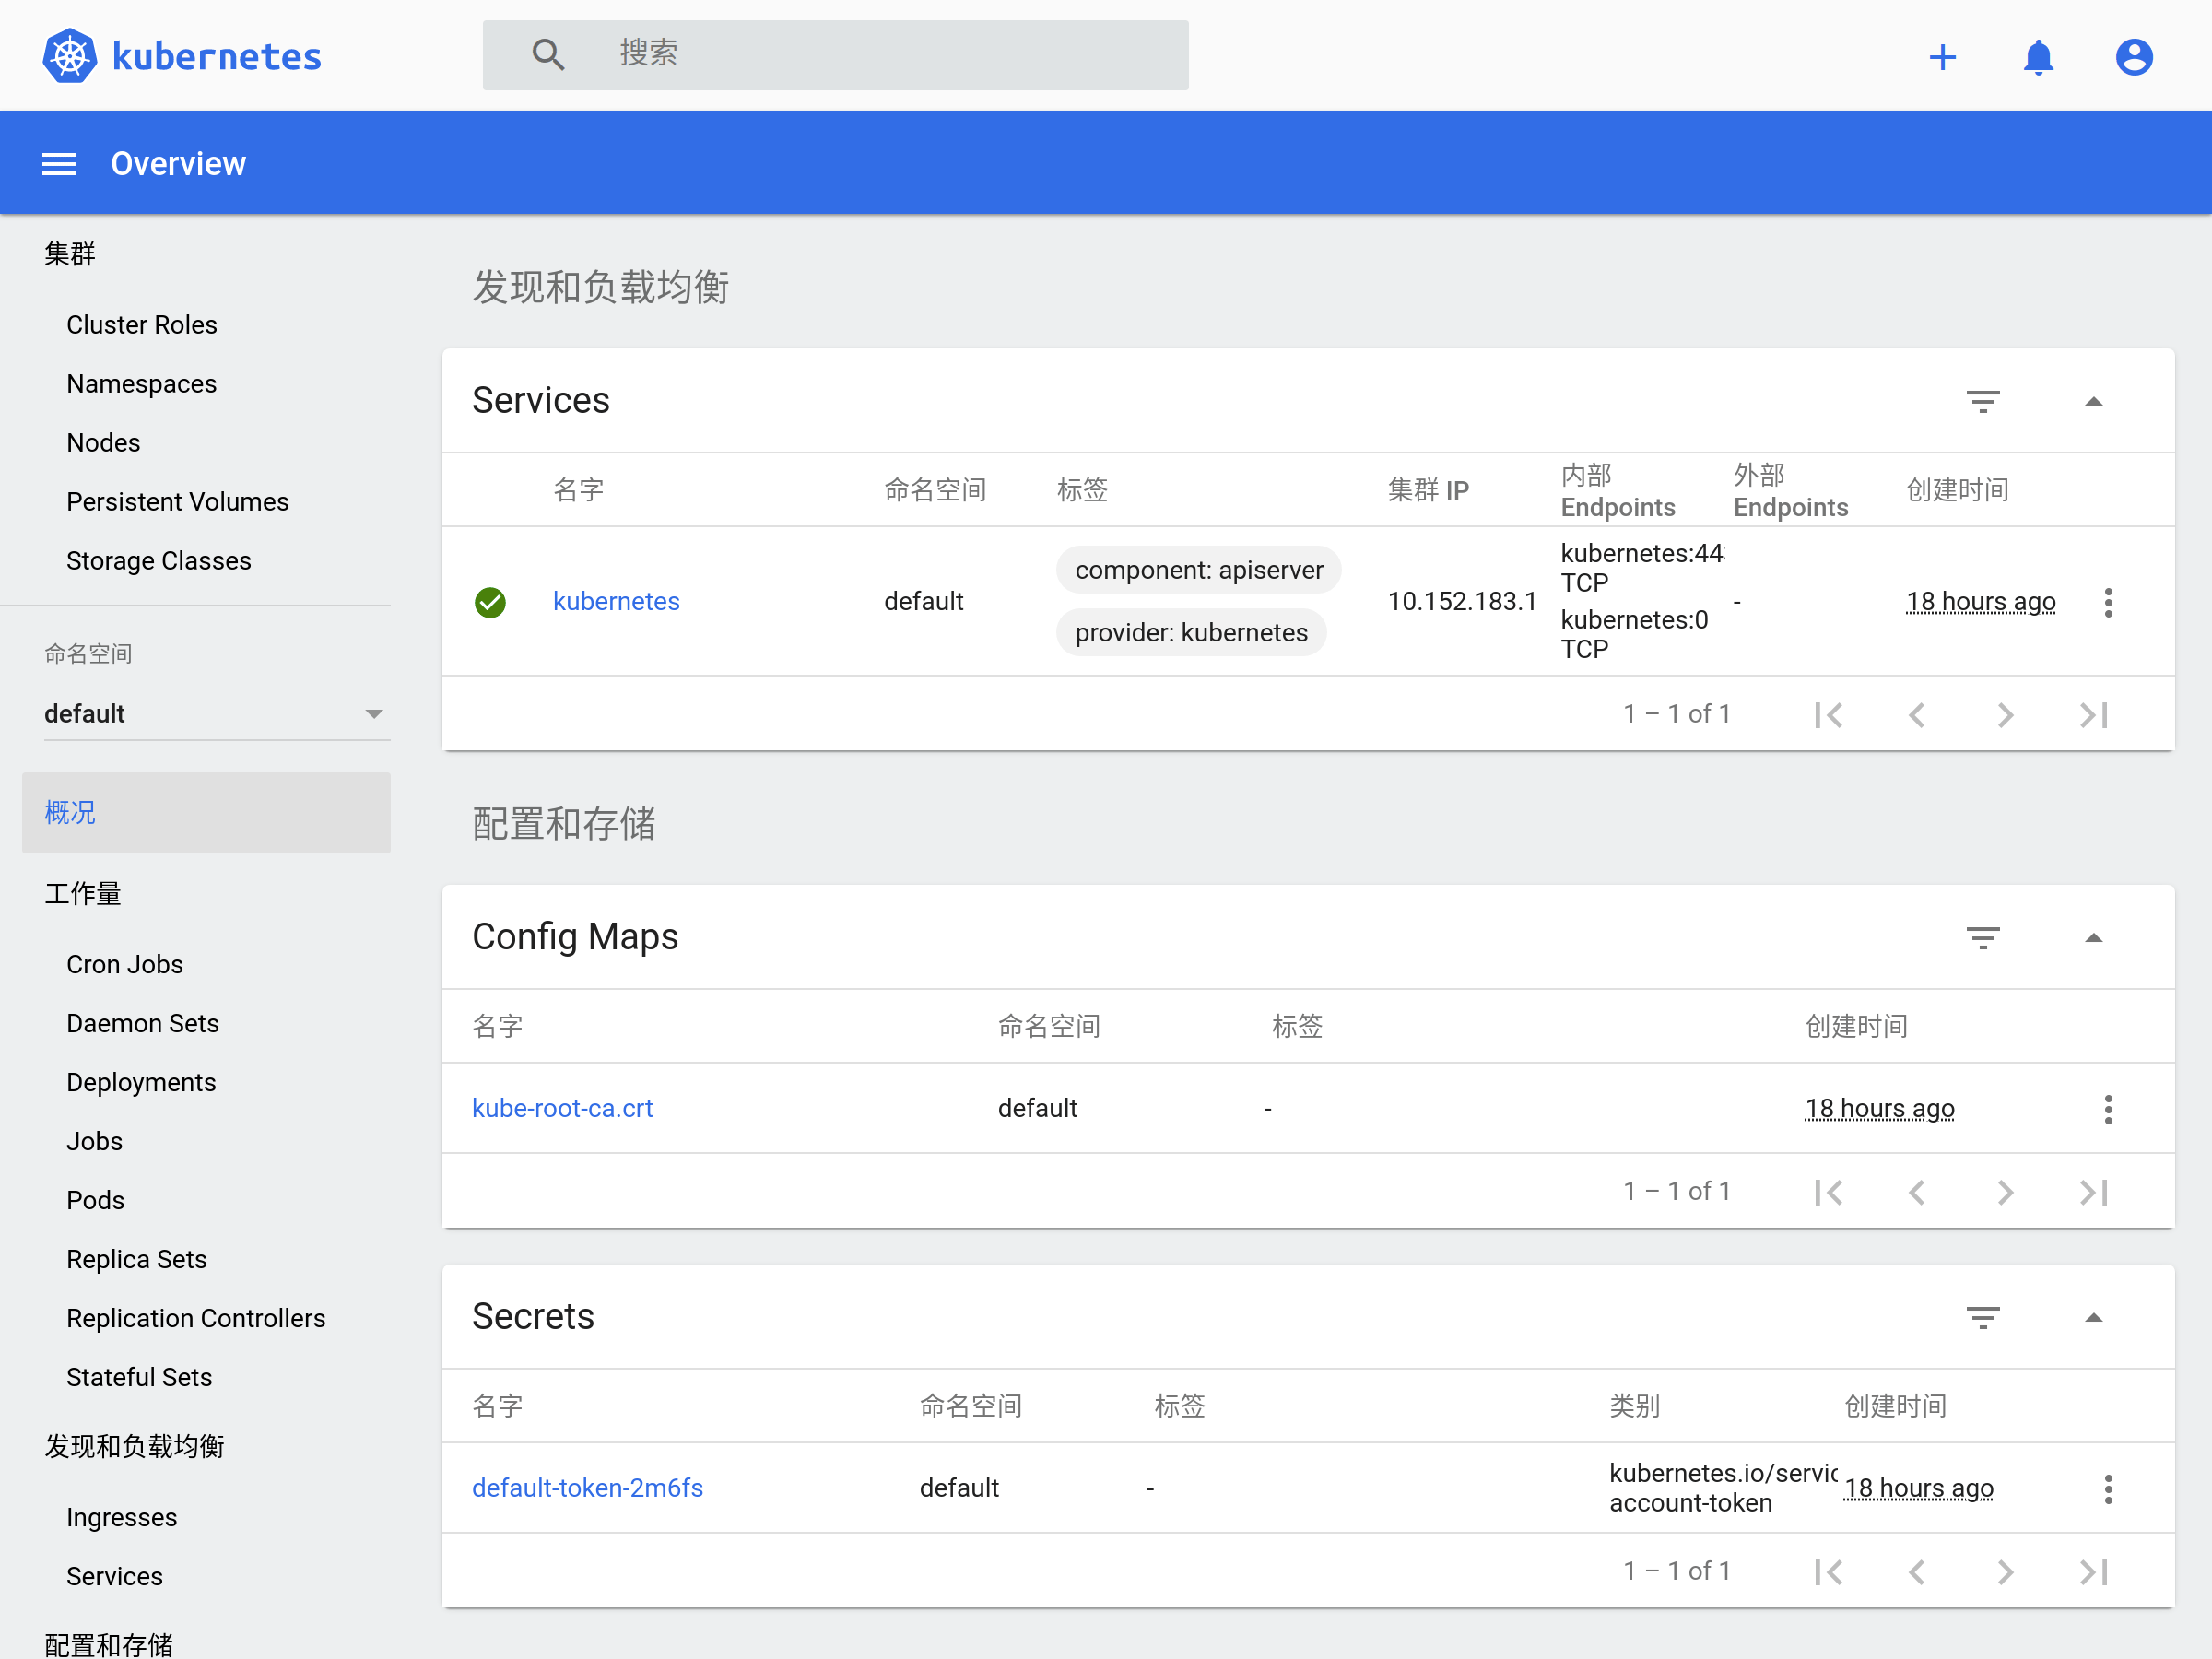
更多操作,请阅读官方文档。本文之后仍以 k3d 为例。
准备 K8s 应用
Go 应用
http_server.go:
1package main
2
3import (
4	"fmt"
5	"log"
6	"net/http"
7)
8
9func handler(w http.ResponseWriter, r *http.Request) {
10	fmt.Fprintf(w, "Hi there, I love %s!", r.URL.Path[1:])
11}
12
13func main() {
14	http.HandleFunc("/", handler)
15	fmt.Println("HTTP Server running ...")
16	log.Fatal(http.ListenAndServe(":3000", nil))
17}
构建镜像
http_server.dockerfile:
1FROM golang:1.17-alpine AS builder 2WORKDIR /app 3ADD ./http_server.go /app 4RUN cd /app && go build http_server.go 5 6FROM alpine:3.14 7WORKDIR /app 8COPY /app/http_server /app/ 9EXPOSE 3000 10ENTRYPOINT ./http_server
1# 编译镜像
2docker build -t http_server:1.0 -f http_server.dockerfile .
3# 运行应用
4docker run --rm -p 3000:3000 http_server:1.0
5# 测试应用
6❯ curl http://127.0.0.1:3000/go
7Hi there, I love go!
部署 K8s 应用
了解概念
之后,参照官方教程,我们将使用 Deployment 运行 Go 应用(无状态)。
导入镜像
首先,我们手动导入镜像进集群:
1docker save http_server:1.0 > http_server:1.0.tar
2k3d image import http_server:1.0.tar -c mycluster
如果有自己的私有仓库,参见 k3d / Registries 进行配置。
创建 Deployment
1# 配置 Deployment (2个副本)
2cat <<EOF > go-http-deployment.yaml
3apiVersion: apps/v1
4kind: Deployment
5metadata:
6  name: go-http
7  labels:
8    app: go-http
9spec:
10  replicas: 2
11  selector:
12    matchLabels:
13      app: go-http
14  template:
15    metadata:
16      labels:
17        app: go-http
18    spec:
19      containers:
20      - name: go-http
21        image: http_server:1.0
22        ports:
23        - containerPort: 3000
24EOF
25# 应用 Deployment
26#  --record: 记录命令
27kubectl apply -f go-http-deployment.yaml --record
查看 Deployment:
1# 查看 Deployment
2❯ kubectl get deploy
3NAME      READY   UP-TO-DATE   AVAILABLE   AGE
4nginx     1/1     1            1           2d
5go-http   2/2     2            2           22s
6
7# 查看 Deployment 信息
8kubectl describe deploy go-http
9# 查看 Deployment 创建的 ReplicaSet (2个)
10kubectl get rs
11# 查看 Deployment 创建的 Pods (2个)
12kubectl get po -l app=go-http -o wide --show-labels
13# 查看某一 Pod 信息
14kubectl describe po go-http-5848d49c7c-wzmxh
创建 Service
1# 创建 Service,名为 go-http
2#  将请求代理到 app=go-http, tcp=3000 的 Pod 上
3kubectl expose deployment go-http --name=go-http
4# 或
5cat <<EOF | kubectl create -f -
6apiVersion: v1
7kind: Service
8metadata:
9  name: go-http
10  labels:
11    app: go-http
12spec:
13  selector:
14    app: go-http
15  ports:
16    - protocol: TCP
17      port: 3000
18      targetPort: 3000
19EOF
20
21# 查看 Service
22kubectl get svc
23# 查看 Service 信息
24kubectl describe svc go-http
25# 查看 Endpoints 对比看看
26#  kubectl get ep go-http
27#  kubectl get po -l app=go-http -o wide
28
29# 删除 Service (如果)
30kubectl delete svc go-http
访问 Service (DNS):
1❯ kubectl run curl --image=radial/busyboxplus:curl -i --tty
2
3If you don't see a command prompt, try pressing enter.
4
5[ root@curl:/ ]$ nslookup go-http
6Server:    10.43.0.10
7Address 1: 10.43.0.10 kube-dns.kube-system.svc.cluster.local
8
9Name:      go-http
10Address 1: 10.43.102.17 go-http.default.svc.cluster.local
11
12[ root@curl:/ ]$ curl http://go-http:3000/go
13Hi there, I love go!
暴露 Service (Ingress):
1# 创建 Ingress Object
2cat <<EOF | kubectl apply -f -
3apiVersion: networking.k8s.io/v1
4kind: Ingress
5metadata:
6  name: go-http
7  annotations:
8    ingress.kubernetes.io/ssl-redirect: "false"
9spec:
10  rules:
11  - http:
12      paths:
13      - path: /go
14        pathType: Prefix
15        backend:
16          service:
17            name: go-http
18            port:
19              number: 3000
20EOF
21# 查看 Ingress
22kubectl get ingress
23# 查看 Ingress 信息
24kubectl describe ingress go-http
25
26# 删除 Ingress (如果)
27kubectl delete ingress go-http
访问 Service (Ingress):
1❯ open http://127.0.0.1:8080/go
2# 或,
3❯ curl http://127.0.0.1:8080/go
4Hi there, I love go!
5# Nginx 是在 http://127.0.0.1:8080
更新
仅当 Deployment Pod 模板发生改变时,例如模板的标签或容器镜像被更新,才会触发 Deployment 上线。其他更新(如对 Deployment 执行扩缩容的操作)不会触发上线动作。
所以,我们准备 http_server:2.0 镜像导入集群,然后更新:
1❯ kubectl set image deployment/go-http go-http=http_server:2.0 --record
2deployment.apps/go-http image updated
之后,可以查看上线状态:
1# 查看上线状态
2❯ kubectl rollout status deployment/go-http
3deployment "go-http" successfully rolled out
4
5# 查看 ReplicaSet 状态:新的扩容,旧的缩容,完成更新
6❯ kubectl get rs
7NAME                 DESIRED   CURRENT   READY   AGE
8go-http-586694b4f6   2         2         2       10s
9go-http-5848d49c7c   0         0         0       6d
测试服务:
1❯ curl http://127.0.0.1:8080/go
2Hi there v2, I love go!
回滚
查看 Deployment 修订历史:
1❯ kubectl rollout history deployment.v1.apps/go-http
2deployment.apps/go-http
3REVISION  CHANGE-CAUSE
41         kubectl apply --filename=go-http-deployment.yaml --record=true
52         kubectl set image deployment/go-http go-http=http_server:2.0 --record=true
6
7# 查看修订信息
8kubectl rollout history deployment.v1.apps/go-http --revision=2
回滚到之前的修订版本:
1# 回滚到上一版
2kubectl rollout undo deployment.v1.apps/go-http
3# 回滚到指定版本
4kubectl rollout undo deployment.v1.apps/go-http --to-revision=1
缩放
1# 缩放 Deployment 的 ReplicaSet 数
2kubectl scale deployment.v1.apps/go-http --replicas=10
3
4# 如果集群启用了 Pod 的水平自动缩放,可以根据现有 Pods 的 CPU 利用率选择上下限
5# Horizontal Pod Autoscaler Walkthrough
6#  https://kubernetes.io/docs/tasks/run-application/horizontal-pod-autoscale-walkthrough/
7kubectl autoscale deployment.v1.apps/nginx-deployment --min=10 --max=15 --cpu-percent=80
暂停、恢复
1# 暂停 Deployment
2kubectl rollout pause deployment.v1.apps/go-http
3# 恢复 Deployment
4kubectl rollout resume deployment.v1.apps/go-http
期间可以更新 Deployment ,但不会触发上线。
删除
1kubectl delete deployment go-http
金丝雀部署
灰度部署,用多标签区分多个部署,新旧版可同时运行。部署新版时,用少量流量验证,没问题再全量更新。
Helm 发布
Helm 是 K8s 的包管理工具,包格式称为 charts。现在来发布我们的 Go 服务吧。
安装 Helm
1# macOS
2brew install helm
3# Ubuntu
4sudo snap install helm --classic
执行 helm 了解命令。
创建 Chart
1helm create go-http
查看内容:
1❯ tree go-http -aF --dirsfirst
2go-http
3├── charts/     # 包依赖的 charts,称 subcharts
4├── templates/  # 包的 K8s 文件模板,用的 Go 模板
5│   ├── tests/
6│   │   └── test-connection.yaml
7│   ├── NOTES.txt       # 包的帮助文本
8│   ├── _helpers.tpl    # 模板可重用的片段,模板里 include 引用
9│   ├── deployment.yaml
10│   ├── hpa.yaml
11│   ├── ingress.yaml
12│   ├── service.yaml
13│   └── serviceaccount.yaml
14├── .helmignore # 打包忽略说明
15├── Chart.yaml  # 包的描述文件
16└── values.yaml # 变量默认值,可安装时覆盖,模板里 .Values 引用
修改内容:
- 修改
Chart.yaml里的描述 - 修改
values.yaml里的变量- 修改
image为发布的 Go 服务 - 修改
ingress为true,及一些配置 - 删除
serviceAccountautoscaling,templates/里也搜索删除相关内容
- 修改
- 修改
templates/里的模板- 删除
tests/,剩余deployment.yamlservice.yamlingress.yaml有用
- 删除
结果可见 start-k8s/helm/go-http。
检查错误:
1❯ helm lint --strict go-http
2==> Linting go-http
3[INFO] Chart.yaml: icon is recommended
4
51 chart(s) linted, 0 chart(s) failed
渲染模板:
1# --set 覆盖默认配置,或者用 -f 选择自定的 values.yaml
2helm template go-http-helm ./go-http \
3--set replicaCount=2 \
4--set "ingress.hosts[0].paths[0].path=/helm" \
5--set "ingress.hosts[0].paths[0].pathType=Prefix"
安装 Chart:
1helm install go-http-helm ./go-http \
2--set replicaCount=2 \
3--set "ingress.hosts[0].paths[0].path=/helm" \
4--set "ingress.hosts[0].paths[0].pathType=Prefix"
5
6# 或,打包后安装
7helm package go-http
8helm install go-http-helm go-http-1.0.0.tgz \
9--set replicaCount=2 \
10--set "ingress.hosts[0].paths[0].path=/helm" \
11--set "ingress.hosts[0].paths[0].pathType=Prefix"
12
13# 查看安装列表
14helm list
测试服务:
1❯ kubectl get deploy go-http-helm
2NAME           READY   UP-TO-DATE   AVAILABLE   AGE
3go-http-helm   2/2     2            2           2m42s
4
5❯ curl http://127.0.0.1:8080/helm
6Hi there, I love helm!
卸载 Chart:
1helm uninstall go-http-helm
发布 Chart
官方仓库 ArtifactHub 上有很多分享的 Helm charts 。可见 velkoz1108/helm-chart 把我们的 Go 服务发布到 Hub 上。
最后
开始 K8s 吧!本文样例在 ikuokuo/start-k8s。
GoCoding 个人实践的经验分享,可关注公众号!