
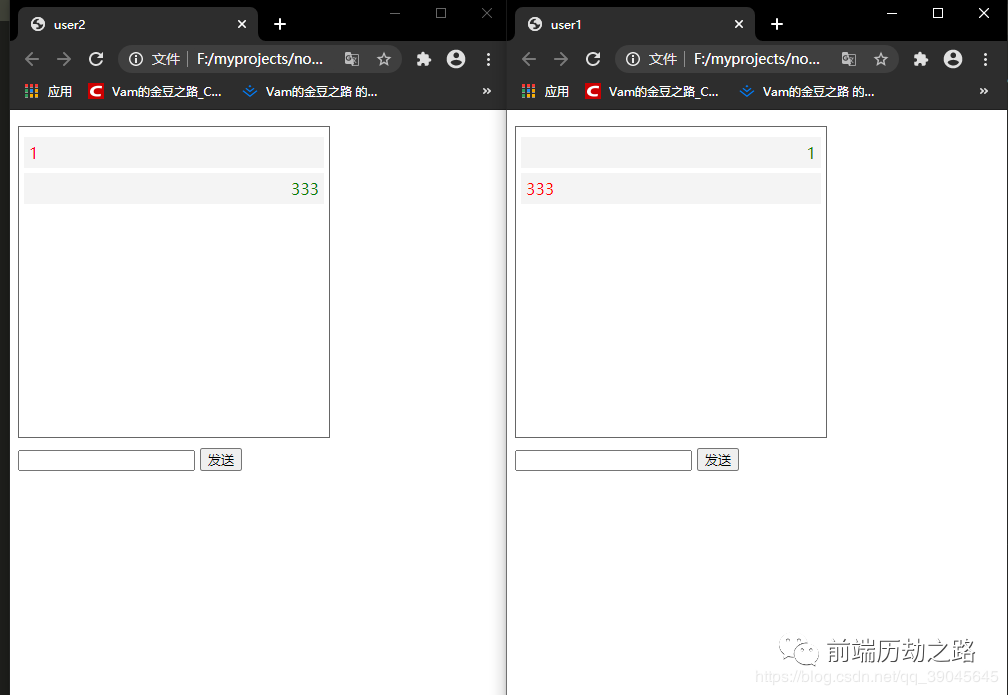
初始化项目
1npm init
2
安装nodejs-websocket
1npm install nodejs-websocket
2
创建并编辑启动文件
创建一个名为app.js文件,并且编辑它。
1var ws = require("nodejs-websocket");
2console.log("开始建立连接...")
3
4var [user1,user2,user1Ready,user2Ready] = [null,null,false,false];
5
6ws.createServer(function(conn){
7    conn.on("text", function (str) {
8        console.log("收到的信息为:"+str)
9        if(str==="user1"){
10            user1 = conn;
11            user1Ready = true;
12        }
13        if(str==="user2"){
14            user2 = conn;
15            user2Ready = true;
16        }
17        if(user2Ready){
18            user2.sendText(str);
19        }
20        if(user1Ready){
21          user1.sendText(str);
22        }
23    })
24    conn.on("close", function (code, reason) {
25        console.log("关闭连接")
26    });
27    conn.on("error", function (code, reason) {
28        console.log("异常关闭")
29    });
30}).listen(8001)
31console.log("WebSocket建立完毕")
32
分别创建并编辑两个用户页面文件
分别创建user1.html和user2.html, 并且编辑它们。
「user1.html」
1<!doctype html>
2<html lang="en">
3<head>
4    <meta charset="UTF-8">
5    <title>user1</title>
6    <style> #mes{
7            width: 300px;
8            height: 300px;
9            border: 1px solid #666;
10            overflow: auto;
11            margin-bottom:10px;
12            padding: 5px;
13        }
14        li{
15            text-decoration: none;
16            background: #f4f4f4;
17            padding: 5px;
18            margin-top: 5px;
19        }
20        .tl{
21            color: red;
22            text-align: left;
23        }
24        .tr{
25            color: green;
26            text-align: right;
27        } </style>
28</head>
29<body>
30    <ul id="mes"></ul>
31    <div class="kuang">
32        <input type="text" value="" class="int">
33        <button class="send">发送</button>
34    </div>
35    <script> var mes = document.getElementById("mes");
36        if(window.WebSocket){
37            var ws = new WebSocket('ws://localhost:8001');
38
39            ws.onopen = function(e){
40                console.log("连接服务器成功");
41                ws.send("user1");
42            }
43
44            ws.onmessage = function(e){
45                if(e.data!=="user1"&&e.data!=="user2"){
46                    console.log(e);
47                    var newData = JSON.parse(e.data);
48                    var node=document.createElement("LI");
49                    var textnode=document.createTextNode(newData.mes);
50                    node.appendChild(textnode);
51                    if(newData.name==="user2"){
52                        node.classList.add("tl")
53                        mes.appendChild(node);
54                    } else{
55                        node.classList.add("tr")
56                        mes.appendChild(node);
57                    }
58                }
59                document.querySelector(".send").onclick = function(e){
60                    var obj = {
61                        name:"user1",
62                        mes:document.querySelector(".int").value
63                    }
64                    ws.send(JSON.stringify(obj));
65                    document.querySelector(".int").value="";
66                }
67            }
68
69            ws.onclose = function(e){
70                console.log("服务器关闭");
71            }
72
73            ws.onerror = function(){
74                console.log("连接出错");
75            }
76        } </script>
77</body>
78</html>
79
「user2.html」
1<!doctype html>
2<html lang="en">
3<head>
4    <meta charset="UTF-8">
5    <title>user2</title>
6    <style> #mes{
7            width: 300px;
8            height: 300px;
9            border: 1px solid #666;
10            overflow: auto;
11            margin-bottom:10px;
12            padding: 5px;
13        }
14        li{
15            text-decoration: none;
16            background: #f4f4f4;
17            padding: 5px;
18            margin-top: 5px;
19        }
20        .tl{
21            color: red;
22            text-align: left;
23        }
24        .tr{
25            color: green;
26            text-align: right;
27        } </style>
28</head>
29<body>
30    <ul id="mes"></ul>
31    <div class="kuang">
32      <input type="text" value="" class="int">
33      <button class="send">发送</button>
34  </div>
35    <script> var mes = document.getElementById("mes");
36        if(window.WebSocket){
37            var ws = new WebSocket('ws://localhost:8001');
38            ws.onopen = function(e){
39                console.log("连接服务器成功");
40                ws.send("user2");
41            }
42
43            ws.onmessage = function(e){
44                if(e.data!=="user1"&&e.data!=="user2"){
45                    console.log(e);
46                    var newData = JSON.parse(e.data);
47                    var node=document.createElement("LI");
48                    var textnode=document.createTextNode(newData.mes);
49                    node.appendChild(textnode);
50                    if(newData.name==="user1"){
51                        node.classList.add("tl")
52                        mes.appendChild(node);
53                    } else{
54                        node.classList.add("tr")
55                        mes.appendChild(node);
56                    }
57                }
58                document.querySelector(".send").onclick = function(e){
59                    var obj = {
60                        name:"user2",
61                        mes:document.querySelector(".int").value
62                    }
63                    ws.send(JSON.stringify(obj));
64                    document.querySelector(".int").value="";
65                }
66            }
67
68            ws.onclose = function(e){
69                console.log("服务器关闭");
70            }
71
72            ws.onerror = function(){
73                console.log("连接出错");
74            }
75        } </script>
76</body>
77</html>
78
启动项目
1node app.js
2
❝
作者:「Vam的金豆之路」
主要领域:「前端开发」
我的微信:「maomin9761」
微信公众号:「前端历劫之路」
❞
本文转转自微信公众号前端历劫之路原创https://mp.weixin.qq.com/s/oZ3Zht4MRLJLOhy4B7QMxw,如有侵权,请联系删除。