
TensorRT 是 NVIDIA 自家的高性能推理库,其 Getting Started 列出了各资料入口,如下:
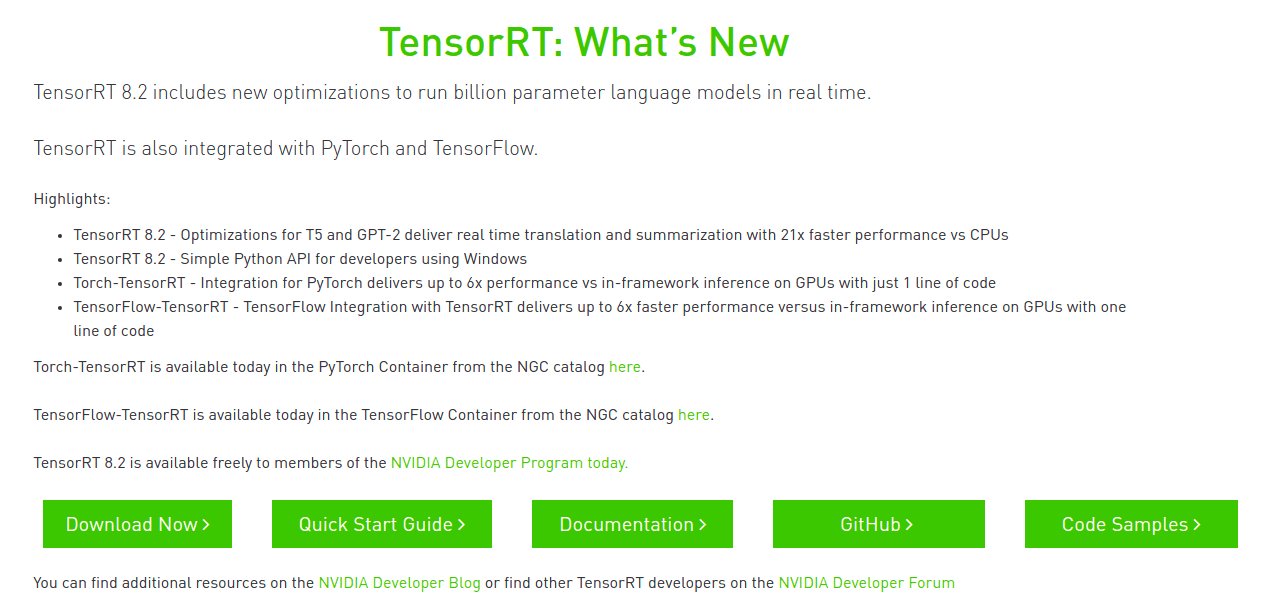
本文基于当前的 TensorRT 8.2 版本,将一步步介绍从安装,直到加速推理自己的 ONNX 模型。
安装
进 TensorRT 下载页 选择版本下载,需注册登录。
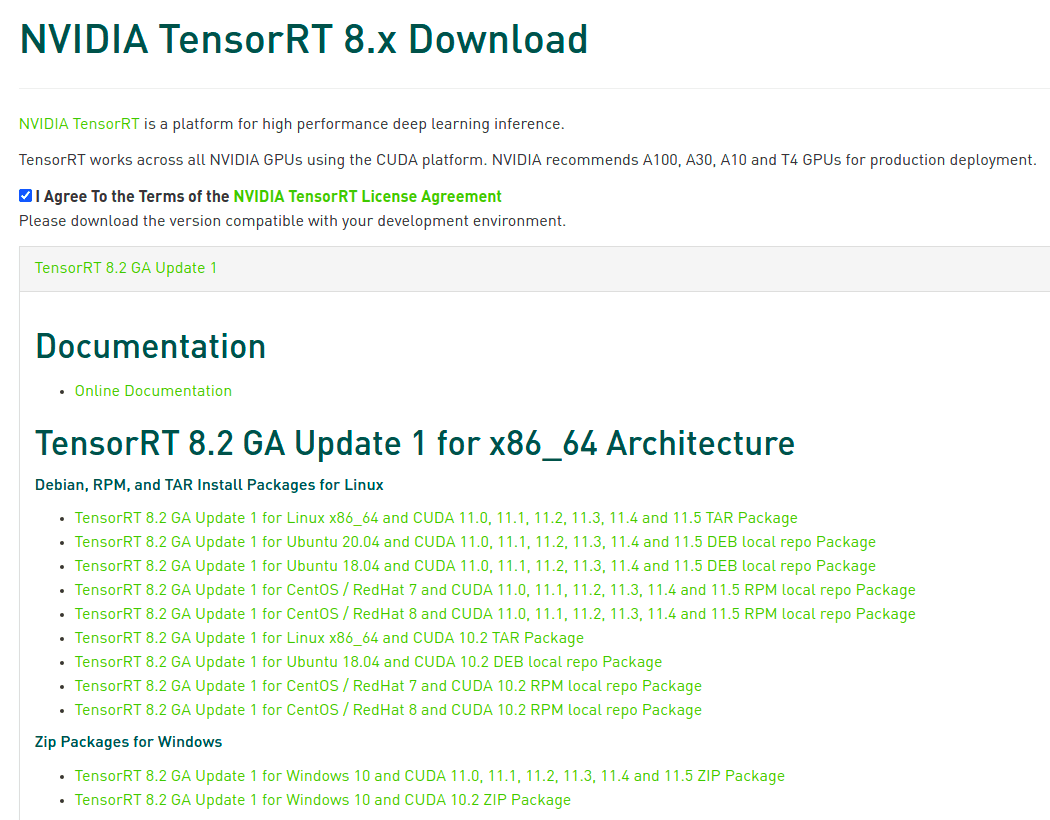
本文选择了 TensorRT-8.2.2.1.Linux.x86_64-gnu.cuda-11.4.cudnn8.2.tar.gz,可以注意到与 CUDA cuDNN 要匹配好版本。也可以准备 NVIDIA Docker 拉取对应版本的 nvidia/cuda 镜像,再 ADD TensorRT 即可。
1# 解压进 $HOME (以免 sudo 编译样例,为当前用户)
2tar -xzvf TensorRT-*.tar.gz -C $HOME/
3# 软链到 /usr/local/TensorRT (以固定一个路径)
4sudo ln -s $HOME/TensorRT-8.2.2.1 /usr/local/TensorRT
之后,编译运行样例,保证 TensorRT 安装正确。
编译样例
样例在 TensorRT/samples,说明见 Sample Support Guide 或各样例目录里的 README.md。
1cd /usr/local/TensorRT/samples/
2
3# 设定环境变量,可见 Makefile.config
4export CUDA_INSTALL_DIR=/usr/local/cuda
5export CUDNN_INSTALL_DIR=/usr/local/cuda
6export ENABLE_DLA=
7export TRT_LIB_DIR=../lib
8export PROTOBUF_INSTALL_DIR=
9
10# 编译
11make -j`nproc`
12
13# 运行
14export LD_LIBRARY_PATH=/usr/local/TensorRT/lib:$LD_LIBRARY_PATH
15cd /usr/local/TensorRT/
16./bin/trtexec -h
17./bin/sample_mnist -d data/mnist/ --fp16
运行结果参考:
1$ ./bin/sample_mnist -d data/mnist/ --fp16
2&&&& RUNNING TensorRT.sample_mnist [TensorRT v8202] # ./bin/sample_mnist -d data/mnist/ --fp16
3[12/23/2021-20:20:16] [I] Building and running a GPU inference engine for MNIST
4[12/23/2021-20:20:16] [I] [TRT] [MemUsageChange] Init CUDA: CPU +322, GPU +0, now: CPU 333, GPU 600 (MiB)
5[12/23/2021-20:20:16] [I] [TRT] [MemUsageSnapshot] Begin constructing builder kernel library: CPU 333 MiB, GPU 600 MiB
6[12/23/2021-20:20:16] [I] [TRT] [MemUsageSnapshot] End constructing builder kernel library: CPU 468 MiB, GPU 634 MiB
7[12/23/2021-20:20:17] [I] [TRT] [MemUsageChange] Init cuBLAS/cuBLASLt: CPU +518, GPU +224, now: CPU 988, GPU 858 (MiB)
8[12/23/2021-20:20:17] [I] [TRT] [MemUsageChange] Init cuDNN: CPU +114, GPU +52, now: CPU 1102, GPU 910 (MiB)
9[12/23/2021-20:20:17] [I] [TRT] Local timing cache in use. Profiling results in this builder pass will not be stored.
10[12/23/2021-20:20:33] [I] [TRT] Some tactics do not have sufficient workspace memory to run. Increasing workspace size may increase performance, please check verbose output.
11[12/23/2021-20:20:34] [I] [TRT] Detected 1 inputs and 1 output network tensors.
12[12/23/2021-20:20:34] [I] [TRT] Total Host Persistent Memory: 8448
13[12/23/2021-20:20:34] [I] [TRT] Total Device Persistent Memory: 1626624
14[12/23/2021-20:20:34] [I] [TRT] Total Scratch Memory: 0
15[12/23/2021-20:20:34] [I] [TRT] [MemUsageStats] Peak memory usage of TRT CPU/GPU memory allocators: CPU 2 MiB, GPU 13 MiB
16[12/23/2021-20:20:34] [I] [TRT] [BlockAssignment] Algorithm ShiftNTopDown took 0.01595ms to assign 3 blocks to 8 nodes requiring 57857 bytes.
17[12/23/2021-20:20:34] [I] [TRT] Total Activation Memory: 57857
18[12/23/2021-20:20:34] [I] [TRT] [MemUsageChange] Init cuBLAS/cuBLASLt: CPU +0, GPU +8, now: CPU 1621, GPU 1116 (MiB)
19[12/23/2021-20:20:34] [I] [TRT] [MemUsageChange] Init cuDNN: CPU +0, GPU +8, now: CPU 1621, GPU 1124 (MiB)
20[12/23/2021-20:20:34] [I] [TRT] [MemUsageChange] TensorRT-managed allocation in building engine: CPU +0, GPU +4, now: CPU 0, GPU 4 (MiB)
21[12/23/2021-20:20:34] [I] [TRT] [MemUsageChange] Init CUDA: CPU +0, GPU +0, now: CPU 1622, GPU 1086 (MiB)
22[12/23/2021-20:20:34] [I] [TRT] Loaded engine size: 1 MiB
23[12/23/2021-20:20:34] [I] [TRT] [MemUsageChange] Init cuBLAS/cuBLASLt: CPU +0, GPU +8, now: CPU 1622, GPU 1096 (MiB)
24[12/23/2021-20:20:34] [I] [TRT] [MemUsageChange] Init cuDNN: CPU +1, GPU +8, now: CPU 1623, GPU 1104 (MiB)
25[12/23/2021-20:20:34] [I] [TRT] [MemUsageChange] TensorRT-managed allocation in engine deserialization: CPU +0, GPU +1, now: CPU 0, GPU 1 (MiB)
26[12/23/2021-20:20:34] [I] [TRT] [MemUsageChange] Init cuBLAS/cuBLASLt: CPU +0, GPU +8, now: CPU 1485, GPU 1080 (MiB)
27[12/23/2021-20:20:34] [I] [TRT] [MemUsageChange] Init cuDNN: CPU +0, GPU +8, now: CPU 1485, GPU 1088 (MiB)
28[12/23/2021-20:20:34] [I] [TRT] [MemUsageChange] TensorRT-managed allocation in IExecutionContext creation: CPU +0, GPU +2, now: CPU 0, GPU 3 (MiB)
29[12/23/2021-20:20:34] [I] Input:
30@@@@@@@@@@@@@@@@@@@@@@@@@@@@
31@@@@@@@@@@@@@@@@@@@@@@@@@@@@
32@@@@@@@@@@@@@@@@@@@@@@@@@@@@
33@@@@@@@@@@@@@@@@@@@@@@@@@@@@
34@@@@@@@@@@@@@@@@@@@@@@@@@@@@
35@@@@@@@@@@@@@@@@@@@@@@@@@@@@
36@@@@@@@@@%+-:  =@@@@@@@@@@@@
37@@@@@@@%=      -@@@**@@@@@@@
38@@@@@@@   :%#@-#@@@. #@@@@@@
39@@@@@@*  +@@@@:*@@@  *@@@@@@
40@@@@@@#  +@@@@ @@@%  @@@@@@@
41@@@@@@@.  :%@@.@@@. *@@@@@@@
42@@@@@@@@-   =@@@@. -@@@@@@@@
43@@@@@@@@@%:   +@- :@@@@@@@@@
44@@@@@@@@@@@%.  : -@@@@@@@@@@
45@@@@@@@@@@@@@+   #@@@@@@@@@@
46@@@@@@@@@@@@@@+  :@@@@@@@@@@
47@@@@@@@@@@@@@@+   *@@@@@@@@@
48@@@@@@@@@@@@@@: =  @@@@@@@@@
49@@@@@@@@@@@@@@ :@  @@@@@@@@@
50@@@@@@@@@@@@@@ -@  @@@@@@@@@
51@@@@@@@@@@@@@# +@  @@@@@@@@@
52@@@@@@@@@@@@@* ++  @@@@@@@@@
53@@@@@@@@@@@@@*    *@@@@@@@@@
54@@@@@@@@@@@@@#   =@@@@@@@@@@
55@@@@@@@@@@@@@@. +@@@@@@@@@@@
56@@@@@@@@@@@@@@@@@@@@@@@@@@@@
57@@@@@@@@@@@@@@@@@@@@@@@@@@@@
58
59[12/23/2021-20:20:34] [I] Output:
600:
611:
622:
633:
644:
655:
666:
677:
688: **********
699:
70
71&&&& PASSED TensorRT.sample_mnist [TensorRT v8202] # ./bin/sample_mnist -d data/mnist/ --fp16
快速开始
Quick Start Guide / Using The TensorRT Runtime API
准备教程代码,编译:
1git clone --depth 1 https://github.com/NVIDIA/TensorRT.git
2
3export CUDA_INSTALL_DIR=/usr/local/cuda
4export CUDNN_INSTALL_DIR=/usr/local/cuda
5export TRT_LIB_DIR=/usr/local/TensorRT/lib
6
7# 编译 quickstart
8cd TensorRT/quickstart
9# Makefile.config
10#  INCPATHS += -I"/usr/local/TensorRT/include"
11# common/logging.h
12#  void log(Severity severity, const char* msg) noexcept override
13make
14
15# 运行环境
16export PATH=/usr/local/TensorRT/bin:$PATH
17export LD_LIBRARY_PATH=/usr/local/TensorRT/lib:$LD_LIBRARY_PATH
18cd SemanticSegmentation
获取预训练 FCN-ResNet-101 模型,转成 ONNX:
1# 创建本地环境
2#  conda create -n torch python=3.9 -y
3#  conda activate torch
4#  conda install pytorch torchvision torchaudio cudatoolkit=11.3 -c pytorch -y
5# 不然,容器环境
6#  docker run --rm -it --gpus all -p 8888:8888 -v `pwd`:/workspace/SemanticSegmentation -w /workspace nvcr.io/nvidia/pytorch:20.12-py3 bash
7$ python export.py
8Exporting ppm image input.ppm
9Downloading: "https://github.com/pytorch/vision/archive/v0.6.0.zip" to /home/john/.cache/torch/hub/v0.6.0.zip
10Downloading: "https://download.pytorch.org/models/resnet101-5d3b4d8f.pth" to /home/john/.cache/torch/hub/checkpoints/resnet101-5d3b4d8f.pth
11100%|████████████████████████████████████████| 170M/170M [00:27<00:00, 6.57MB/s]
12Downloading: "https://download.pytorch.org/models/fcn_resnet101_coco-7ecb50ca.pth" to /home/john/.cache/torch/hub/checkpoints/fcn_resnet101_coco-7ecb50ca.pth
13100%|████████████████████████████████████████| 208M/208M [02:26<00:00, 1.49MB/s]
14Exporting ONNX model fcn-resnet101.onnx
再用 trtexec 将 ONNX 转成 TensorRT engine:
1$ trtexec --onnx=fcn-resnet101.onnx --fp16 --workspace=64 --minShapes=input:1x3x256x256 --optShapes=input:1x3x1026x1282 --maxShapes=input:1x3x1440x2560 --buildOnly --saveEngine=fcn-resnet101.engine
2...
3[01/07/2022-20:20:00] [I] Engine built in 406.011 sec.
4&&&& PASSED TensorRT.trtexec [TensorRT v8202] ...
随机输入,测试 engine:
1$ trtexec --shapes=input:1x3x1026x1282 --loadEngine=fcn-resnet101.engine
2...
3[01/07/2022-20:20:00] [I] === Performance summary ===
4[01/07/2022-20:20:00] [I] Throughput: 12.4749 qps
5[01/07/2022-20:20:00] [I] Latency: min = 76.9746 ms, max = 98.8354 ms, mean = 79.5844 ms, median = 78.0542 ms, percentile(99%) = 98.8354 ms
6[01/07/2022-20:20:00] [I] End-to-End Host Latency: min = 150.942 ms, max = 188.431 ms, mean = 155.834 ms, median = 152.444 ms, percentile(99%) = 188.431 ms
7[01/07/2022-20:20:00] [I] Enqueue Time: min = 0.390625 ms, max = 1.61279 ms, mean = 1.41182 ms, median = 1.46136 ms, percentile(99%) = 1.61279 ms
8[01/07/2022-20:20:00] [I] H2D Latency: min = 1.25977 ms, max = 1.53467 ms, mean = 1.27415 ms, median = 1.26514 ms, percentile(99%) = 1.53467 ms
9[01/07/2022-20:20:00] [I] GPU Compute Time: min = 75.2869 ms, max = 97.1318 ms, mean = 77.8847 ms, median = 76.3599 ms, percentile(99%) = 97.1318 ms
10[01/07/2022-20:20:00] [I] D2H Latency: min = 0.408447 ms, max = 0.454346 ms, mean = 0.425577 ms, median = 0.423004 ms, percentile(99%) = 0.454346 ms
11[01/07/2022-20:20:00] [I] Total Host Walltime: 3.2866 s
12[01/07/2022-20:20:00] [I] Total GPU Compute Time: 3.19327 s
13[01/07/2022-20:20:00] [I] Explanations of the performance metrics are printed in the verbose logs.
14[01/07/2022-20:20:00] [I]
15&&&& PASSED TensorRT.trtexec [TensorRT v8202] ...
运行教程,使用 engine:
1$ ./bin/segmentation_tutorial
2[01/07/2022-20:20:34] [I] [TRT] [MemUsageChange] Init CUDA: CPU +322, GPU +0, now: CPU 463, GPU 707 (MiB)
3[01/07/2022-20:20:34] [I] [TRT] Loaded engine size: 132 MiB
4[01/07/2022-20:20:35] [I] [TRT] [MemUsageChange] Init cuBLAS/cuBLASLt: CPU +520, GPU +224, now: CPU 984, GPU 1065 (MiB)
5[01/07/2022-20:20:35] [I] [TRT] [MemUsageChange] Init cuDNN: CPU +115, GPU +52, now: CPU 1099, GPU 1117 (MiB)
6[01/07/2022-20:20:35] [I] [TRT] [MemUsageChange] TensorRT-managed allocation in engine deserialization: CPU +0, GPU +131, now: CPU 0, GPU 131 (MiB)
7[01/07/2022-20:20:35] [I] Running TensorRT inference for FCN-ResNet101
8[01/07/2022-20:20:35] [I] [TRT] [MemUsageChange] Init cuBLAS/cuBLASLt: CPU +0, GPU +10, now: CPU 966, GPU 1109 (MiB)
9[01/07/2022-20:20:35] [I] [TRT] [MemUsageChange] Init cuDNN: CPU +0, GPU +8, now: CPU 966, GPU 1117 (MiB)
10[01/07/2022-20:20:35] [I] [TRT] [MemUsageChange] TensorRT-managed allocation in IExecutionContext creation: CPU +0, GPU +722, now: CPU 0, GPU 853 (MiB)
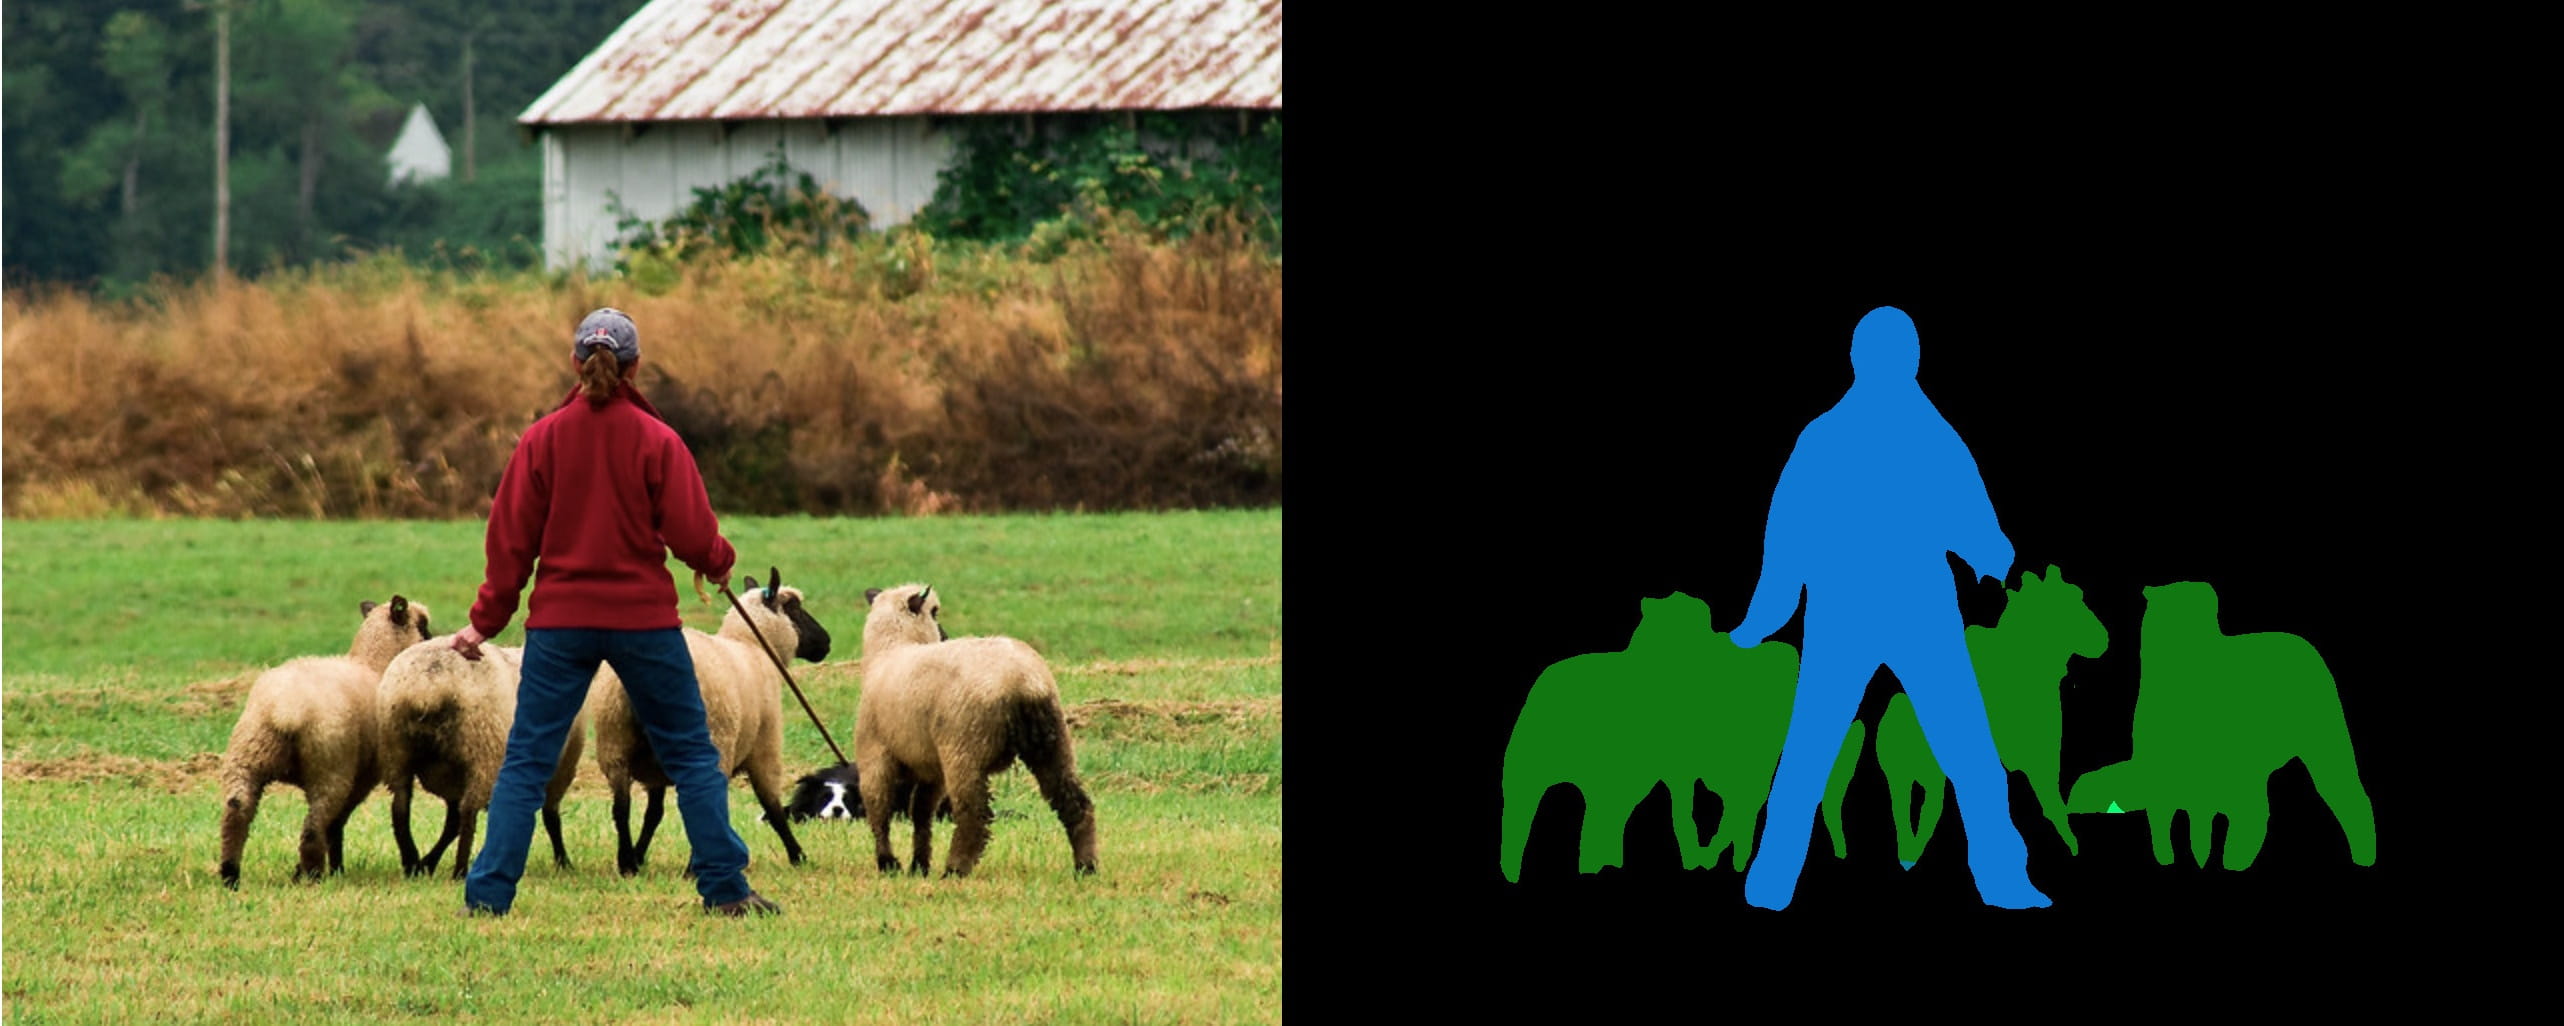
实践
以上给到了官方样例与教程的编译使用。这里,另外找了个 RVM 的模型,从头开始试一试。
准备模型
Robust Video Matting (RVM) 稳定视频抠像,可在任意视频上做实时高清抠像。有 Webcam Demo 可以网页上体验。
准备 ONNX 模型 rvm_mobilenetv3_fp32.onnx,其 推断文档 给出了模型输入输出:
- 输入: [
src,r1i,r2i,r3i,r4i,downsample_ratio]src:输入帧,RGB 通道,形状为[B, C, H, W],范围为0~1rXi:记忆输入,初始值是是形状为[1, 1, 1, 1]的零张量downsample_ratio下采样比,张量形状为[1]- 只有
downsample_ratio必须是FP32,其他输入必须和加载的模型使用一样的dtype
- 输出: [
fgr,pha,r1o,r2o,r3o,r4o]fgr, pha:前景和透明度通道输出,范围为0~1rXo:记忆输出
准备输入图像 input.jpg 。不用视频,保持代码简单些。

准备环境
1conda create -n torch python=3.9 -y
2conda activate torch
3
4conda install pytorch torchvision torchaudio cudatoolkit=11.3 -c pytorch -y
5
6# Requirements
7#  https://onnxruntime.ai/docs/execution-providers/CUDA-ExecutionProvider.html#requirements
8pip install onnx onnxruntime-gpu==1.10
运行 ONNX 模型
1import onnxruntime as ort
2import numpy as np
3from PIL import Image
4
5# 读取图像
6with Image.open('input.jpg') as img:
7    img.load()
8#  HWC [0,255] > BCHW [0,1]
9src = np.array(img)
10src = np.moveaxis(src, -1, 0) .astype(np.float32)
11src = src[np.newaxis, :] / 255.
12
13# 载入模型
14sess = ort.InferenceSession('rvm_mobilenetv3_fp32.onnx', providers=['CUDAExecutionProvider'])
15
16# 创建 io binding
17io = sess.io_binding()
18
19# 在 CUDA 上创建张量
20rec = [ ort.OrtValue.ortvalue_from_numpy(np.zeros([1, 1, 1, 1], dtype=np.float32), 'cuda') ] * 4
21downsample_ratio = ort.OrtValue.ortvalue_from_numpy(np.asarray([0.25], dtype=np.float32), 'cuda')
22
23# 设置输出项
24for name in ['fgr', 'pha', 'r1o', 'r2o', 'r3o', 'r4o']:
25    io.bind_output(name, 'cuda')
26
27# 推断
28io.bind_cpu_input('src', src)
29io.bind_ortvalue_input('r1i', rec[0])
30io.bind_ortvalue_input('r2i', rec[1])
31io.bind_ortvalue_input('r3i', rec[2])
32io.bind_ortvalue_input('r4i', rec[3])
33io.bind_ortvalue_input('downsample_ratio', downsample_ratio)
34
35sess.run_with_iobinding(io)
36
37fgr, pha, *rec = io.get_outputs()
38
39# 只将 `fgr` 和 `pha` 回传到 CPU
40fgr = fgr.numpy()
41pha = pha.numpy()
42
43# 合成 RGBA
44com = np.where(pha > 0, fgr, pha)
45com = np.concatenate([com, pha], axis=1) # + alpha
46#  BCHW [0,1] > HWC [0,255]
47com = np.squeeze(com, axis=0)
48com = np.moveaxis(com, 0, -1) * 255
49
50img = Image.fromarray(com.astype(np.uint8))
51img.show()
运行:
1python rvm_onnx_infer.py --model "rvm_mobilenetv3_fp32.onnx" --input-image "input.jpg" --precision float32 --show
结果(背景透明):

ONNX 转成 TRT 模型
trtexec 将 ONNX 转成 TensorRT engine:
1export PATH=/usr/local/TensorRT/bin:$PATH
2export LD_LIBRARY_PATH=/usr/local/TensorRT/lib:$LD_LIBRARY_PATH
3
4trtexec --onnx=rvm_mobilenetv3_fp32.onnx --workspace=64 --saveEngine=rvm_mobilenetv3_fp32.engine --verbose
发生问题:
1[01/08/2022-20:20:36] [E] [TRT] ModelImporter.cpp:773: While parsing node number 3 [Resize -> "389"]:
2[01/08/2022-20:20:36] [E] [TRT] ModelImporter.cpp:774: --- Begin node ---
3[01/08/2022-20:20:36] [E] [TRT] ModelImporter.cpp:775: input: "src"
4input: "386"
5input: "388"
6output: "389"
7name: "Resize_3"
8op_type: "Resize"
9attribute {
10  name: "coordinate_transformation_mode"
11  s: "pytorch_half_pixel"
12  type: STRING
13}
14attribute {
15  name: "cubic_coeff_a"
16  f: -0.75
17  type: FLOAT
18}
19attribute {
20  name: "mode"
21  s: "linear"
22  type: STRING
23}
24attribute {
25  name: "nearest_mode"
26  s: "floor"
27  type: STRING
28}
29
30[01/08/2022-20:20:36] [E] [TRT] ModelImporter.cpp:776: --- End node ---
31[01/08/2022-20:20:36] [E] [TRT] ModelImporter.cpp:779: ERROR: builtin_op_importers.cpp:3608 In function importResize:
32[8] Assertion failed: scales.is_weights() && "Resize scales must be an initializer!"
这时,需要动手改动模型了。
首先,安装必要工具:
1snap install netron
2pip install onnx-simplifier
3pip install onnx_graphsurgeon --index-url https://pypi.ngc.nvidia.com
之后,Netron 查看模型 Resize_3 节点:
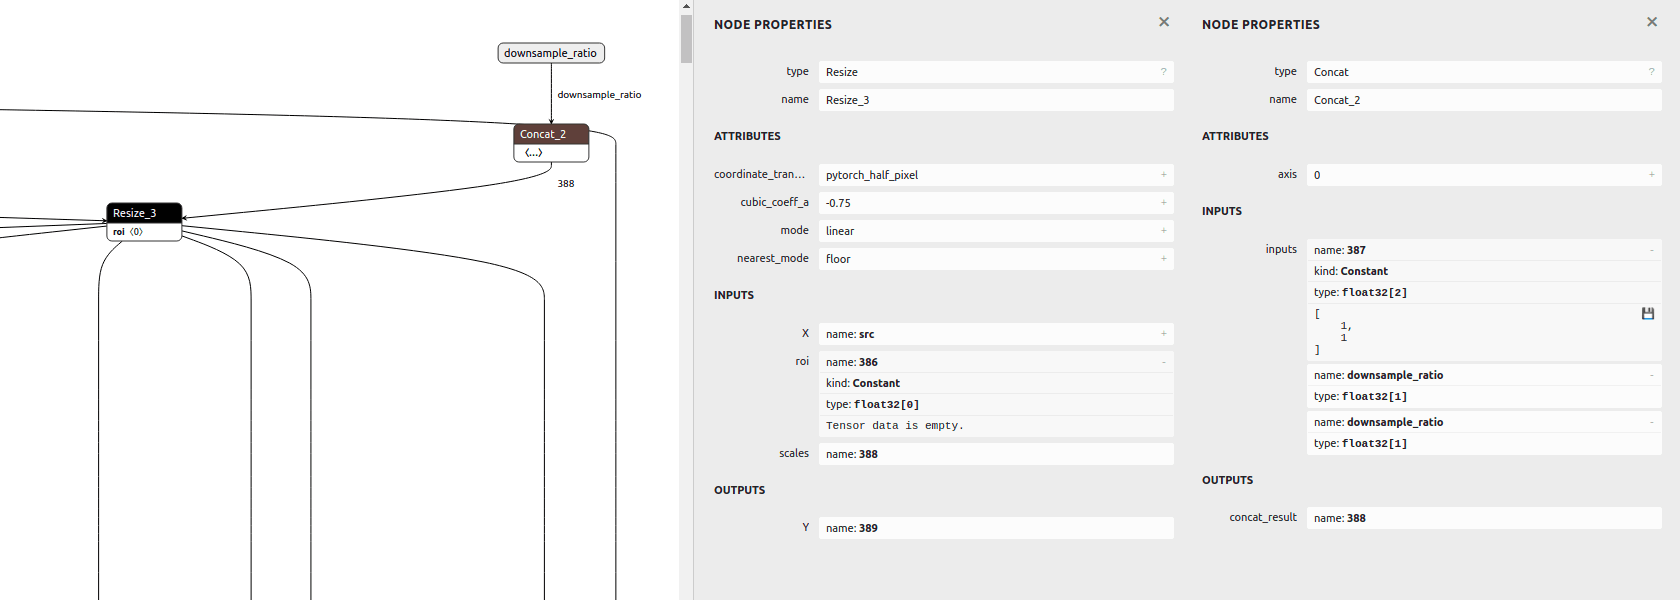
发现其 scales 输入是依据 downsample_ratio 得到的,即 [1,1,downsample_ratio,downsample_ratio],可用 ONNX GraphSurgeon 修改成常量。
最后,模型改动步骤如下:
1# ONNX 模型简化,并改为静态输入尺寸
2python -m onnxsim rvm_mobilenetv3_fp32.onnx rvm_mobilenetv3_fp32_sim.onnx \
3--input-shape src:1,3,1080,1920 r1i:1,1,1,1 r2i:1,1,1,1 r3i:1,1,1,1 r4i:1,1,1,1
4
5# ONNX GraphSurgeon 修改模型
6python rvm_onnx_modify.py -i rvm_mobilenetv3_fp32_sim.onnx --input-size 1920 1280
7
8# trtexec 将 ONNX 转成 TensorRT engine
9trtexec --onnx=rvm_mobilenetv3_fp32_sim_modified.onnx --workspace=64 --saveEngine=rvm_mobilenetv3_fp32_sim_modified.engine
1def modify(input: str, output: str, downsample_ratio: float = 0.25) -> None:
2    print(f'\nonnx load: {input}')
3    graph = gs.import_onnx(onnx.load(input))
4
5    _print_graph(graph)
6
7    # update node Resize_3: scales
8    resize_3 = [n for n in graph.nodes if n.name == 'Resize_3'][0]
9    print()
10    print(resize_3)
11
12    scales = gs.Constant('388',
13        np.asarray([1, 1, downsample_ratio, downsample_ratio], dtype=np.float32))
14
15    resize_3.inputs = [i if i.name != '388' else scales for i in resize_3.inputs]
16    print()
17    print(resize_3)
18
19    # remove input downsample_ratio
20    graph.inputs = [i for i in graph.inputs if i.name != 'downsample_ratio']
21
22    # remove node Concat_2
23    concat_2 = [n for n in graph.nodes if n.name == 'Concat_2'][0]
24    concat_2.outputs.clear()
25
26    # remove unused nodes/tensors
27    graph.cleanup()
28
29    onnx.save(gs.export_onnx(graph), output)
ONNX 与 TRT 模型输出差异
可用 Polygraphy 查看 ONNX 与 TRT 模型的输出差异。
首先,安装
1# 安装 TensorRT Python API
2cd /usr/local/TensorRT/python/
3pip install tensorrt-8.2.2.1-cp39-none-linux_x86_64.whl
4
5export LD_LIBRARY_PATH=/usr/local/TensorRT/lib:$LD_LIBRARY_PATH
6python -c "import tensorrt; print(tensorrt.__version__)"
7
8# 安装 Polygraphy,或者通过 TensorRT/tools/Polygraphy 源码安装
9python -m pip install colored polygraphy --extra-index-url https://pypi.ngc.nvidia.com
运行 ONNX 与 TRT 模型,对比输出误差:
1# 运行 ONNX 模型,保存输入输出
2polygraphy run rvm_mobilenetv3_fp32_sim_modified.onnx --onnxrt --val-range [0,1] --save-inputs onnx_inputs.json --save-outputs onnx_outputs.json
3# 运行 TRT 模型,载入 ONNX 输入输出,对比输出的相对误差与绝对误差
4polygraphy run rvm_mobilenetv3_fp32_sim_modified.engine --model-type engine --trt --load-inputs onnx_inputs.json --load-outputs onnx_outputs.json --rtol 1e-3 --atol 1e-3
可见 fp32 精度误差在 1e-3 以内,PASSED:
1[I]     PASSED | All outputs matched | Outputs: ['r4o', 'r3o', 'r2o', 'r1o', 'fgr', 'pha']
2[I] PASSED | Command: /home/john/anaconda3/envs/torch/bin/polygraphy run rvm_mobilenetv3_fp32_sim_modified.engine --model-type engine --trt --load-inputs onnx_inputs.json --load-outputs onnx_outputs.json --rtol 1e-3 --atol 1e-3
也试了 fp16,其精度损失就比较大,FAILED:
1[E]     FAILED | Mismatched outputs: ['r4o', 'r3o', 'r2o', 'r1o', 'fgr', 'pha']
2[!] FAILED | Command: /home/john/anaconda3/envs/torch/bin/polygraphy run rvm_mobilenetv3_fp16_sim_modified.engine --model-type engine --trt --load-inputs onnx_inputs.json --load-outputs onnx_outputs.json --rtol 1e-3 --atol 1e-3
运行 TRT 模型
这里以 TensorRT C++ runtime APIs 为例,将转出的 RVM TRT 模型运行起来。完整代码见 rvm_infer.cc。
1. 载入模型:创建 runtime,反序列化 TRT 模型文件的数据
1static Logger logger{Logger::Severity::kINFO};
2auto runtime = std::unique_ptr<nvinfer1::IRuntime>(nvinfer1::createInferRuntime(logger));
3auto engine = runtime->deserializeCudaEngine(engine_data.data(), fsize, nullptr);
遍历全部输入输出 bindings:
1auto nb = engine->getNbBindings();
2for (int32_t i = 0; i < nb; i++) {
3  auto is_input = engine->bindingIsInput(i);
4  auto name = engine->getBindingName(i);
5  auto dims = engine->getBindingDimensions(i);
6  auto datatype = engine->getBindingDataType(i);
7  // ...
8}
1Engine
2 Name=Unnamed Network 0
3 DeviceMemorySize=148 MiB
4 MaxBatchSize=1
5Bindings
6 Input[0] name=src dims=[1,3,1080,1920] datatype=FLOAT
7 Input[1] name=r1i dims=[1,1,1,1] datatype=FLOAT
8 Input[2] name=r2i dims=[1,1,1,1] datatype=FLOAT
9 Input[3] name=r3i dims=[1,1,1,1] datatype=FLOAT
10 Input[4] name=r4i dims=[1,1,1,1] datatype=FLOAT
11 Output[5] name=r4o dims=[1,64,18,32] datatype=FLOAT
12 Output[6] name=r3o dims=[1,40,36,64] datatype=FLOAT
13 Output[7] name=r2o dims=[1,20,72,128] datatype=FLOAT
14 Output[8] name=r1o dims=[1,16,144,256] datatype=FLOAT
15 Output[9] name=fgr dims=[1,3,1080,1920] datatype=FLOAT
16 Output[10] name=pha dims=[1,1,1080,1920] datatype=FLOAT
之后,分配好所有 bindings 的 device 内存:
1auto nb = engine->getNbBindings();
2std::vector<void *> bindings(nb, nullptr);
3std::vector<int32_t> bindings_size(nb, 0);
4for (int32_t i = 0; i < nb; i++) {
5  auto dims = engine->getBindingDimensions(i);
6  auto size = GetMemorySize(dims, sizeof(float));
7  if (cudaMalloc(&bindings[i], size) != cudaSuccess) {
8    std::cerr << "ERROR: cuda memory allocation failed, size = " << size
9        << " bytes" << std::endl;
10    return false;
11  }
12  bindings_size[i] = size;
13}
到此,准备工作就好了。
2. 前处理:输入数据处理成输入格式,存进输入 bindings
用 OpenCV 读取图像,缩放成 src 的输入尺寸。再把数据从 BGR [0,255] 处理成 RGB [0,1]。因 batch=1,所以处理时可忽略。
1// img: HWC BGR [0,255] u8
2auto img = cv::imread(input_filename, cv::IMREAD_COLOR);
3if (src_h != img.rows || src_w != img.cols) {
4  cv::resize(img, img, cv::Size(src_w, src_h));
5}
6
7// src: BCHW RGB [0,1] fp32
8auto src = cv::Mat(img.rows, img.cols, CV_32FC3);
9{
10  auto src_data = (float*)(src.data);
11  for (int y = 0; y < src_h; ++y) {
12    for (int x = 0; x < src_w; ++x) {
13      auto &&bgr = img.at<cv::Vec3b>(y, x);
14      /*r*/ *(src_data + y*src_w + x) = bgr[2] / 255.;
15      /*g*/ *(src_data + src_n + y*src_w + x) = bgr[1] / 255.;
16      /*b*/ *(src_data + src_n*2 + y*src_w + x) = bgr[0] / 255.;
17    }
18  }
19}
20if (cudaMemcpyAsync(bindings[0], src.data, bindings_size[0],
21    cudaMemcpyHostToDevice, stream) != cudaSuccess) {
22  std::cerr << "ERROR: CUDA memory copy of src failed, size = "
23      << bindings_size[0] << " bytes" << std::endl;
24  return false;
25}
3. 推理:将 bindings 给到 engine 执行上下文进行推理
1auto context = std::unique_ptr<nvinfer1::IExecutionContext>(
2    engine->createExecutionContext());
3if (!context) {
4  return false;
5}
6
7bool status = context->enqueueV2(bindings.data(), stream, nullptr);
8if (!status) {
9  std::cout << "ERROR: TensorRT inference failed" << std::endl;
10  return false;
11}
4. 后处理:从输出 bindings 取出数据,根据输出格式处理数据
用 cv::Mat 接收输出的前景 fgr 和透明通道 pha:
1auto fgr = cv::Mat(src_h, src_w, CV_32FC3);  // BCHW RGB [0,1] fp32
2if (cudaMemcpyAsync(fgr.data, bindings[9], bindings_size[9],
3    cudaMemcpyDeviceToHost, stream) != cudaSuccess) {
4  std::cerr << "ERROR: CUDA memory copy of output failed, size = "
5      << bindings_size[9] << " bytes" << std::endl;
6  return false;
7}
8auto pha = cv::Mat(src_h, src_w, CV_32FC1);  // BCHW A [0,1] fp32
9if (cudaMemcpyAsync(pha.data, bindings[10], bindings_size[10],
10    cudaMemcpyDeviceToHost, stream) != cudaSuccess) {
11  std::cerr << "ERROR: CUDA memory copy of output failed, size = "
12      << bindings_size[10] << " bytes" << std::endl;
13  return false;
14}
15cudaStreamSynchronize(stream);
再将 fgr pha 合成 RGBA 数据,并复原成原尺寸:
1// Compose `fgr` and `pha`
2auto com = cv::Mat(src_h, src_w, CV_8UC4);  // HWC BGRA [0,255] u8
3{
4  auto fgr_data = (float*)(fgr.data);
5  auto pha_data = (float*)(pha.data);
6  for (int y = 0; y < com.rows; ++y) {
7    for (int x = 0; x < com.cols; ++x) {
8      auto &&elem = com.at<cv::Vec4b>(y, x);
9      auto alpha = *(pha_data + y*src_w + x);
10      if (alpha > 0) {
11        /*r*/ elem[2] = *(fgr_data + y*src_w + x) * 255;
12        /*g*/ elem[1] = *(fgr_data + src_n + y*src_w + x) * 255;
13        /*b*/ elem[0] = *(fgr_data + src_n*2 + y*src_w + x) * 255;
14      } else {
15        /*r*/ elem[2] = 0;
16        /*g*/ elem[1] = 0;
17        /*b*/ elem[0] = 0;
18      }
19      /*a*/ elem[3] = alpha * 255;
20    }
21  }
22}
23if (dst_h != com.rows || dst_w != com.cols) {
24  cv::resize(com, com, cv::Size(dst_w, dst_h));
25}
5. 运行得到的抠像结果(背景透明):

最后
想入门 TensorRT 的,动手实践一下吧!
GoCoding 个人实践的经验分享,可关注公众号!