
12.5 Nginx介绍
Nginx("engine x")是一款轻量级的Web 服务器/反向代理服务器及电子邮件(IMAP/POP3)代理服务器,并在一个BSD-like 协议下发行。其特点是占有内存少,并发能力强,事实上nginx的并发能力确实在同类型的网页服务器中表现较好,中国大陆使用nginx网站用户有:百度、新浪、网易、腾讯、 淘宝等。
Nginx应用场景:
web服务器、反向代理、负载均衡
Nginx分支
淘宝基于Nginx开发的Tengine,使用上和Nginx一致,服务名,配置文件名都一样,和Nginx的最大区别在于Tengine增加了一些定制化模块,在安全限速方面表现突出,另外它支持对js,css合并。
Nginx核心+lua相关的组件和模块组成了一个支持lua的高性能web容器openresty,参考http://jinnianshilongnian.iteye.com/blog/2280928
OpenResty
OpenResty是一个基于Nginx与Lua的高性能Web平台,其内部集成了大量精良的Lua库、第三方模块以及大多数的依赖项。用于方便地搭建能够处理超高并发、扩展性极高的动态 Web 应用、Web 服务和动态网关。
OpenResty通过汇聚各种设计精良的Nginx模块(主要由OpenResty团队自主开发),从而将Nginx有效地变成一个强大的通用Web应用平台。这样,Web开发人员和系统工程师可以使用Lua脚本语言调动Nginx支持的各种C以及Lua模块,快速构造出足以胜任10K乃至1000K以上单机并发连接的高性能Web应用系统。
OpenResty® 的目标是让你的Web服务直接跑在 Nginx 服务内部,充分利用 Nginx 的非阻塞 I/O 模型,不仅仅对 HTTP 客户端请求,甚至于对远程后端诸如 MySQL、PostgreSQL、Memcached 以及 Redis 等都进行一致的高性能响应。
本节摘自: http://openresty.org/cn/
Lua
Lua是一种轻量级、可嵌入式的脚本语言,这样可以非常容易的嵌入到其他语言中使用。另外Lua提供了协程并发,即以同步调用的方式进行异步执行,从而实现并发,比起回调机制的并发来说代码更容易编写和理解,排查问题也会容易。Lua还提供了闭包机制,函数可以作为First Class Value 进行参数传递,另外其实现了标记清除垃圾收集。
因为Lua的小巧轻量级,可以在Nginx中嵌入Lua VM,请求的时候创建一个VM,请求结束的时候回收VM。
ngx_lua
ngx_lua是Nginx的一个模块,将Lua嵌入到Nginx中,从而可以使用Lua来编写脚本,这样就可以使用Lua编写应用脚本,部署到Nginx中运行,即Nginx变成了一个Web容器;这样开发人员就可以使用Lua语言开发高性能Web应用了。
ngx_lua提供了与Nginx交互的很多的API(API就是操作系统留给应用程序的一个调用接口,应用程序通过调用操作系统的API而使操作系统去执行应用程序的命令/动作。),对于开发人员来说只需要学习这些API就可以进行功能开发,而对于开发web应用来说,如果接触过Servlet的话,其开发和Servlet类似,无外乎就是知道接收请求、参数解析、功能处理、返回响应这几步的API是什么样子的。
12.6 Nginx安装
安装包
1[root@cham002 ~]# cd /usr/local/src
2[root@cham002 src]#  wget http://nginx.org/download/nginx-1.12.1.tar.gz
3[root@cham002 src]# tar zxf nginx-1.12.1.tar.gz
4安装
5
6环境配置
7[root@cham002 src]# cd nginx-1.12.1/
8[root@cham002 nginx-1.12.1]# ls
9auto  CHANGES  CHANGES.ru  conf  configure  contrib  html  LICENSE  man  README  src
10[root@cham002 nginx-1.12.1]#  ./configure --prefix=/usr/local/nginx
11#如果需要支持某模块,可以在此添加,如HTTPS、SSL等
12[root@cham002 nginx-1.12.1]# echo $?
130
14[root@cham002 nginx-1.12.1]# make
15[root@cham002 nginx-1.12.1]# echo $?
160
17[root@cham002 nginx-1.12.1]# make install
18[root@cham002 nginx-1.12.1]# echo $?
190
20[root@cham002 nginx-1.12.1]# ls /usr/local/nginx/   看一下它的目录
21conf  html  logs  sbin
22[root@cham002 nginx-1.12.1]# /usr/local/nginx/sbin/nginx -t   查看配置文件是否有错
23nginx: the configuration file /usr/local/nginx/conf/nginx.conf syntax is ok
24nginx: configuration file /usr/local/nginx/conf/nginx.conf test is successful
25
26
27
28配置
29
30添加&启动服务
31
32创建启动脚本:
33[root@cham002 nginx-1.12.1]# vim /etc/init.d/nginx
34
35
36#!/bin/bash
37# chkconfig: - 30 21
38# description: http service.
39# Source Function Library
40. /etc/init.d/functions
41# Nginx Settings
42NGINX_SBIN="/usr/local/nginx/sbin/nginx"
43NGINX_CONF="/usr/local/nginx/conf/nginx.conf"
44NGINX_PID="/usr/local/nginx/logs/nginx.pid"
45RETVAL=0
46prog="Nginx"
47start()
48{
49    echo -n $"Starting $prog: "
50    mkdir -p /dev/shm/nginx_temp
51    daemon $NGINX_SBIN -c $NGINX_CONF
52    RETVAL=$?
53    echo
54    return $RETVAL
55}
56stop()
57{
58    echo -n $"Stopping $prog: "
59    killproc -p $NGINX_PID $NGINX_SBIN -TERM
60    rm -rf /dev/shm/nginx_temp
61    RETVAL=$?
62    echo
63    return $RETVAL
64}
65reload()
66{
67    echo -n $"Reloading $prog: "
68    killproc -p $NGINX_PID $NGINX_SBIN -HUP
69    RETVAL=$?
70    echo
71    return $RETVAL
72}
73restart()
74{
75    stop
76    start
77}
78configtest()
79{
80    $NGINX_SBIN -c $NGINX_CONF -t
81    return 0
82}
83case "$1" in
84  start)
85        start
86        ;;
87  stop)
88        stop
89        ;;
90  reload)
91        reload
92        ;;
93  restart)
94        restart
95        ;;
96  configtest)
97        configtest
98        ;;
99  *)
100        echo $"Usage: $0 {start|stop|reload|restart|configtest}"
101        RETVAL=1
102esac
103exit $RETVAL
104
105
106更改权限:
107[root@cham002 nginx-1.12.1]# chmod 755 /etc/init.d/nginx
108添加到系统服务:
109[root@cham002 nginx-1.12.1]# chkconfig --add nginx
110[root@cham002 nginx-1.12.1]# chkconfig nginx on
111
112
113更改配置文件
114[root@cham002 nginx-1.12.1]# cd /usr/local/nginx/conf/
115[root@cham002 conf]# ls
116fastcgi.conf          fastcgi_params.default  mime.types          nginx.conf.default   uwsgi_params
117fastcgi.conf.default  koi-utf                 mime.types.default  scgi_params          uwsgi_params.default
118fastcgi_params        koi-win                 nginx.conf          scgi_params.default  win-utf
119注释掉Nginx自带脚本,创建自己的脚本:
120[root@cham002 conf]# mv nginx.conf nginx.conf.1
121[root@cham002 conf]# ls
122fastcgi.conf          fastcgi_params.default  mime.types          nginx.conf.default   uwsgi_params
123fastcgi.conf.default  koi-utf                 mime.types.default  scgi_params          uwsgi_params.default
124fastcgi_params        koi-win                 nginx.conf.1        scgi_params.default  win-utf
125
126创建自己的脚本:
127[root@cham002 conf]# vim nginx.conf
128
129
130user nobody nobody;
131#定义启动Nginx的用户
132worker_processes 2;
133#定义子进程数目
134error_log /usr/local/nginx/logs/nginx_error.log crit;
135pid /usr/local/nginx/logs/nginx.pid;
136worker_rlimit_nofile 51200;
137#指定Nginx最多可打开的文件数目
138events
139{
140    use epoll;
141    worker_connections 6000;
142#进程最大连接数
143}
144http
145{
146    include mime.types;
147    default_type application/octet-stream;
148    server_names_hash_bucket_size 3526;
149    server_names_hash_max_size 4096;
150    log_format combined_realip '$remote_addr $http_x_forwarded_for [$time_local]'
151    ' $host "$request_uri" $status'
152    ' "$http_referer" "$http_user_agent"';
153    sendfile on;
154    tcp_nopush on;
155    keepalive_timeout 30;
156    client_header_timeout 3m;
157    client_body_timeout 3m;
158    send_timeout 3m;
159    connection_pool_size 256;
160    client_header_buffer_size 1k;
161    large_client_header_buffers 8 4k;
162    request_pool_size 4k;
163    output_buffers 4 32k;
164    postpone_output 1460;
165    client_max_body_size 10m;
166    client_body_buffer_size 256k;
167    client_body_temp_path /usr/local/nginx/client_body_temp;
168    proxy_temp_path /usr/local/nginx/proxy_temp;
169    fastcgi_temp_path /usr/local/nginx/fastcgi_temp;
170    fastcgi_intercept_errors on;
171    tcp_nodelay on;
172    gzip on;
173    gzip_min_length 1k;
174    gzip_buffers 4 8k;
175    gzip_comp_level 5;
176    gzip_http_version 1.1;
177    gzip_types text/plain application/x-javascript text/css text/htm
178    application/xml;
179    server
180  #虚拟主机
181    {
182        listen 80;
183        server_name localhost;
184        index index.html index.htm index.php;
185        root /usr/local/nginx/html;
186        location ~ \.php$
187#配置PHP解析
188        {
189
190            include fastcgi_params;
191            fastcgi_pass unix:/tmp/php-fcgi.sock;
192            fastcgi_index index.php;
193            fastcgi_param SCRIPT_FILENAME /usr/local/nginx/html$fastcgi_script_name;
194        }
195    }
196}
197
198检测语法:
199[root@cham002 conf]# /usr/local/nginx/sbin/nginx -t
200nginx: the configuration file /usr/local/nginx/conf/nginx.conf syntax is ok
201nginx: configuration file /usr/local/nginx/conf/nginx.conf test is successful
启动Nginx服务:
1[root@cham002 conf]# /etc/init.d/nginx start
2Starting nginx (via systemctl):  Job for nginx.service failed because the control process exited with error code. See "systemctl status nginx.service" and "journalctl -xe" for details.
3                                                           [失败]
4
5原因是因为httpd(apache)同样监听80端口
6root@cham002 conf]# ps aux |grep httpd
7root      2717  0.0  0.0 258996   156 ?        Ss   1月01   0:08 /usr/local/apache2.4/bin/httpd -k start
8daemon    9345  0.0  0.0 545824    56 ?        Sl   1月02   0:00 /usr/local/apache2.4/bin/httpd -k start
9daemon    9346  0.0  0.0 545824    52 ?        Sl   1月02   0:00 /usr/local/apache2.4/bin/httpd -k start
10daemon    9347  0.0  0.0 681120    60 ?        Sl   1月02   0:00 /usr/local/apache2.4/bin/httpd -k start
11root     39678  0.0  0.0 112684   972 pts/0    S+   15:37   0:00 grep --color=auto httpd
12[root@cham002 conf]# killall httpd
13[root@cham002 conf]# ps aux |grep httpd
14root     39687  0.0  0.0 112680   972 pts/0    S+   15:40   0:00 grep --color=auto httpd
15再次启动
16[root@cham002 conf]# /etc/init.d/nginx start
17Starting nginx (via systemctl):                            [  确定  ]
18
19[root@cham002 conf]# ps aux |grep nginx
20root     39707  0.0  0.0  20500   624 ?        Ss   15:40   0:00 nginx: master process /usr/local/nginx/sbin/nginx -c /usr/local/nginx/conf/nginx.conf
21nobody   39708  0.0  0.3  22944  3208 ?        S    15:40   0:00 nginx: worker process
22nobody   39709  0.0  0.3  22944  3208 ?        S    15:40   0:00 nginx: worker process
23root     39712  0.0  0.0 112680   976 pts/0    S+   15:41   0:00 grep --color=auto nginx
24[root@cham002 conf]# netstat -lntp
25Active Internet connections (only servers)
26Proto Recv-Q Send-Q Local Address           Foreign Address         State       PID/Program name
27tcp        0      0 0.0.0.0:80              0.0.0.0:*               LISTEN      39707/nginx: master
28tcp        0      0 0.0.0.0:22              0.0.0.0:*               LISTEN      1682/sshd
29tcp        0      0 127.0.0.1:25            0.0.0.0:*               LISTEN      2477/master
30tcp6       0      0 :::3306                 :::*                    LISTEN      49801/mysqld
31tcp6       0      0 :::22                   :::*                    LISTEN      1682/sshd
32tcp6       0      0 ::1:25                  :::*                    LISTEN      2477/master
至此,Nginx基础配置完成!
检测
1[root@cham002 conf]# curl localhost
2<!DOCTYPE html>
3<html>
4<head>
5<title>Welcome to nginx!</title>
6<style>
7    body {
8        width: 35em;
9        margin: 0 auto;
10        font-family: Tahoma, Verdana, Arial, sans-serif;
11    }
12</style>
13</head>
14<body>
15<h1>Welcome to nginx!</h1>
16<p>If you see this page, the nginx web server is successfully installed and
17working. Further configuration is required.</p>
18
19<p>For online documentation and support please refer to
20<a href="http://nginx.org/">nginx.org</a>.<br/>
21Commercial support is available at
22<a href="http://nginx.com/">nginx.com</a>.</p>
23
24<p><em>Thank you for using nginx.</em></p>
25</body>
26</html>
27[root@cham002 conf]# ls /usr/local/nginx/html/
2850x.html  index.html
29
30[root@cham002 conf]# cat /usr/local/nginx/html/index.html
31<!DOCTYPE html>
32<html>
33<head>
34<title>Welcome to nginx!</title>
35<style>
36    body {
37        width: 35em;
38        margin: 0 auto;
39        font-family: Tahoma, Verdana, Arial, sans-serif;
40    }
41</style>
42</head>
43<body>
44<h1>Welcome to nginx!</h1>
45<p>If you see this page, the nginx web server is successfully installed and
46working. Further configuration is required.</p>
47
48<p>For online documentation and support please refer to
49<a href="http://nginx.org/">nginx.org</a>.<br/>
50Commercial support is available at
51<a href="http://nginx.com/">nginx.com</a>.</p>
52
53<p><em>Thank you for using nginx.</em></p>
54</body>
55</html>
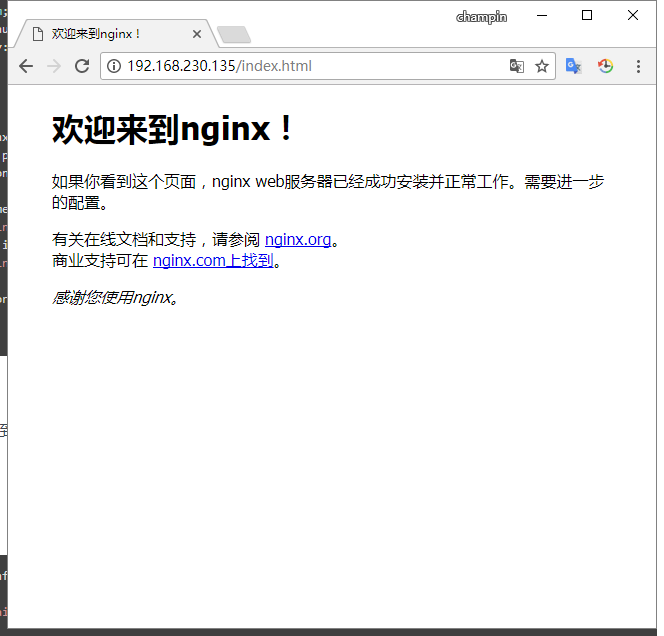
使用浏览器检测:
先将虚拟主机IP添加到本地hosts,然后访问:
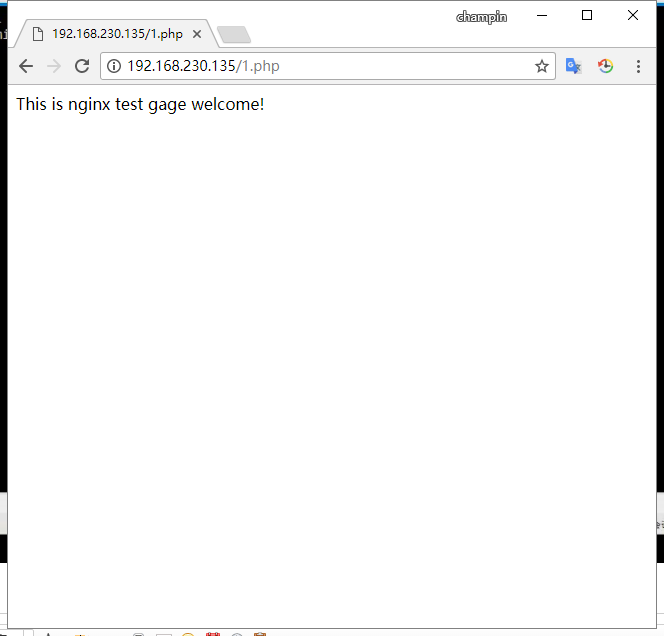
检测PHP解析
1[root@cham002 conf]# vim /usr/local/nginx/html/1.php
2
3<?php
4echo "This is nginx test gage welcome!";
5
6[root@cham002 conf]# curl localhost/1.php
7This is nginx test gage welcome![root@cham002 conf]#
12.7 Nginx默认虚拟主机
编辑Nginx配置文件,删除原有server内容,添加如下内容:
创建虚拟主机
添加虚拟主机目录
1[root@cham002 conf]# vim nginx.conf
2
3include vhost/*.conf;
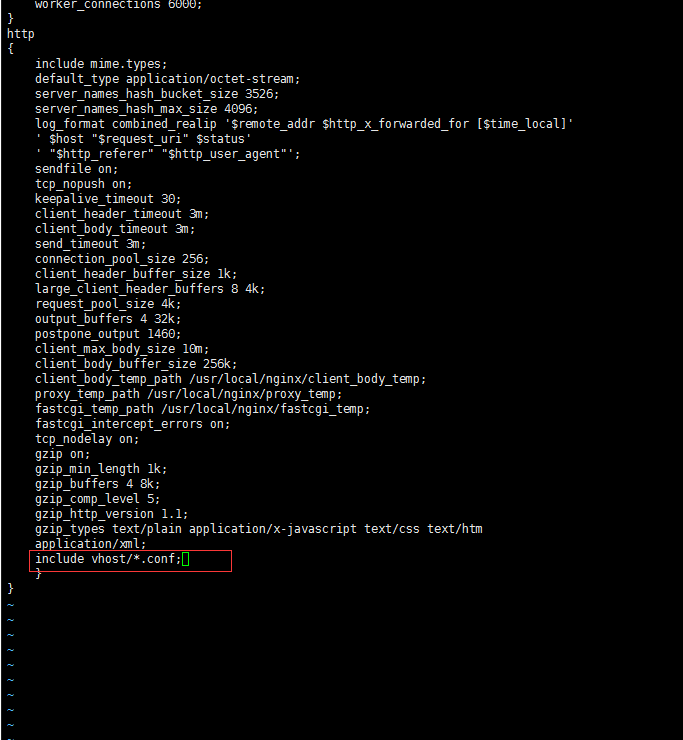
注: “nginx.conf”文件中支持“include”语法。
1[root@cham002 conf]# pwd
2/usr/local/nginx/conf
3
4增加一台虚拟主机:
5[root@cham002 conf]# mkdir vhost
6[root@cham002 conf]# cd vhost/
7[root@cham002 vhost]# ls
8[root@cham002 vhost]# vim aaa.com.conf
9server
10{
11    listen 80 default_server;   #有'default_server'标记的就是默认虚拟主机
12    server_name aaa.com;
13    index index.html index.htm index.php;
14    root /data/wwwroot/default;
15}
16
17[root@cham002 vhost]# mkdir /data/wwwroot/default  创建配置文件中指定的root目录:
18[root@cham002 vhost]# cd /data/wwwroot/default/   为虚拟主机添加内容
19[root@cham002 default]# ls
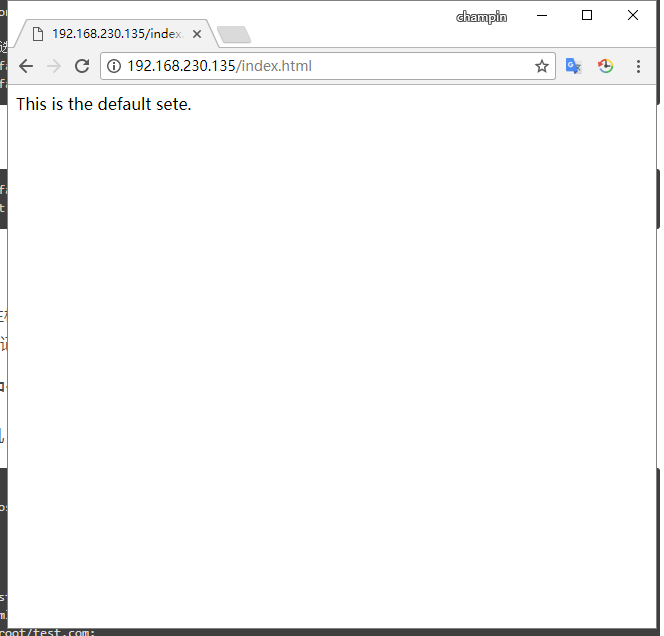
20进入目录,添加索引页:
21[root@cham002 default]# vim index.html
22
23This is the default sete.
24~
25~
26
27[root@cham002 default]# /usr/local/nginx/sbin/nginx -t
28nginx: [emerg] unexpected "}" in /usr/local/nginx/conf/nginx.conf:48
29nginx: configuration file /usr/local/nginx/conf/nginx.conf test failed
30
31[root@cham002 default]# cd /usr/local/nginx/conf
32[root@cham002 conf]# vim nginx.conf
33多了一个}号,删掉
34[root@cham002 conf]# cd -
35/data/wwwroot/default
36[root@cham002 default]# /usr/local/nginx/sbin/nginx -t
37nginx: the configuration file /usr/local/nginx/conf/nginx.conf syntax is ok
38nginx: configuration file /usr/local/nginx/conf/nginx.conf test is successful
39
40[root@cham002 default]# /usr/local/nginx/sbin/nginx -s reload
41
42检测
43[root@cham002 default]# curl localhost
44This is the default sete.
45[root@cham002 default]# ls
46index.html
47[root@cham002 default]# curl -x127.0.0.1:80 bbb.com
48This is the default sete.
49[root@cham002 default]# curl -x127.0.0.1:80 aaa.com
50This is the default sete.
51[root@cham002 default]# curl -x127.0.0.1:80 aaa.com -I
52HTTP/1.1 200 OK
53Server: nginx/1.12.1
54Date: Wed, 03 Jan 2018 08:19:32 GMT
55Content-Type: text/html
56Content-Length: 26
57Last-Modified: Wed, 03 Jan 2018 08:04:37 GMT
58Connection: keep-alive
59ETag: "5a4c8e95-1a"
60
61
62
12.8 Nginx用户认证
创建一台虚拟主机:
1[root@cham002 /]# cd /usr/local/nginx/conf
2[root@cham002 conf]# ls
3fastcgi.conf            koi-utf             nginx.conf          scgi_params.default   win-utf
4fastcgi.conf.default    koi-win             nginx.conf.1        uwsgi_params
5fastcgi_params          mime.types          nginx.conf.default  uwsgi_params.default
6fastcgi_params.default  mime.types.default  scgi_params         vhost
7[root@cham002 conf]# cd vhost
8[root@cham002 vhost]# ls
9aaa.com.conf
10
11[root@cham002 vhost]# vim test.com.conf
12
13server
14{
15    listen 80;
16    server_name test.com;
17    index index.html index.htm index.php;
18    root /data/wwwroot/test.com;
19
20    location  /
21     #指定设置用户认证的目录
22    {
23        auth_basic              "Auth";
24        #指定用户名
25        auth_basic_user_file   /usr/local/nginx/conf/htpasswd;
26    }     #指定用户的密码文件
27}
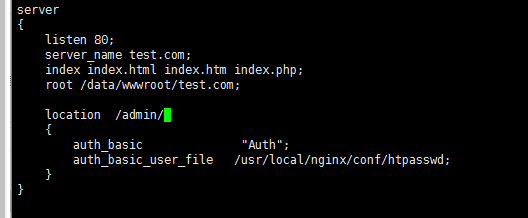
说明: 上述“location”中的内容即为设定用户认证。在此是为整个站点设定的用户认证,如果只是为某个目录设置用户认证,在location所在行进行编辑就好,如:location /admin 目录。也可以对某种请求(即对一个普通文件)设定用户认证,如location ~ admin.php()使用 ~ 进行匹配)。
创建密码文件
在此需要使用Apache的/usr/local/apache/bin/htpasswd命令,如果机器中已经有Apache,可以直接使用,如果没有,需要使用yum安装httpd命令:yum install -y httpd
1[root@cham002 vhost]# yum install -y httpd ^C
2[root@cham002 vhost]# /usr/local/apache2.4/bin/htpasswd -c /usr/local/nginx/conf/htpasswd cham
3New password:
4Re-type new password:
5Adding password for user cham
6[root@cham002 vhost]# cat /usr/local/nginx/conf/htpasswd
7cham:$apr1$9zJyJls9$TPi18h9GEZhXeQSV.
8第2次就不需要-c如果用会重置
9[root@cham002 vhost]# /usr/local/apache2.4/bin/htpasswd  /usr/local/nginx/conf/htpasswd cham1
10New password:
11Re-type new password:
12Adding password for user cham1
13[root@cham002 vhost]# cat /usr/local/nginx/conf/htpasswd
14cham:$apr1$9zJyJls9$TPi18h9GEZhXeQSV.Q.8j0
15cham1:$apr1$7OS/n2CY$BZxcBAS3lh6f2l8LdhOez0
16[root@cham002 vhost]#
重新加载检测
1[root@cham002 vhost]# /usr/local/nginx/sbin/nginx -t
2nginx: the configuration file /usr/local/nginx/conf/nginx.conf syntax is ok
3nginx: configuration file /usr/local/nginx/conf/nginx.conf test is successful
4[root@cham002 vhost]# /usr/local/nginx/sbin/nginx -s reload
说明: 使用reload而不使用restart的好处是能避免因配置文件中存在错误而无法正常启动!reload不会破坏原有运行环境。
1[root@cham002 vhost]# curl -x127.0.0.1:80 test.com
2<html>
3<head><title>401 Authorization Required</title></head>
4<body bgcolor="white">
5<center><h1>401 Authorization Required</h1></center>
6<hr><center>nginx/1.12.1</center>
7</body>
8</html>
9[root@cham002 vhost]# curl -u cham:123456 -x127.0.0.1:80 test.com
10<html>
11<head><title>404 Not Found</title></head>
12<body bgcolor="white">
13<center><h1>404 Not Found</h1></center>
14<hr><center>nginx/1.12.1</center>
15</body>
16</html>
17[root@cham002 vhost]# mkdir /data/wwwroot/test.com
18[root@cham002 vhost]# echo "test.com" > /data/wwwroot/test.com/index.html
19[root@cham002 vhost]# curl -u cham:123456 -x127.0.0.1:80 test.com
20test.com
注: 如果不指定用户名和密码,会报错401(需要用户认证);如果为创建虚拟主机根目录会报错404(找不到指定目录);如果指定目录中没有添加索引页(.html或.php文件)会报错404(文件存在错误)。
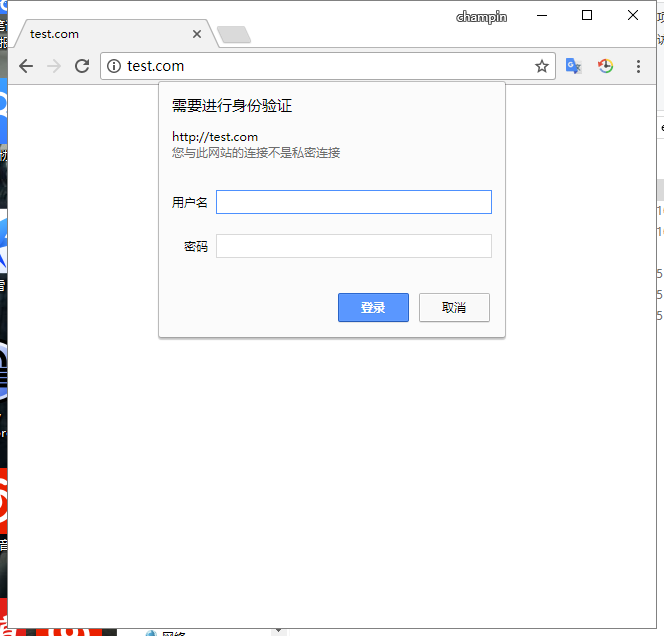
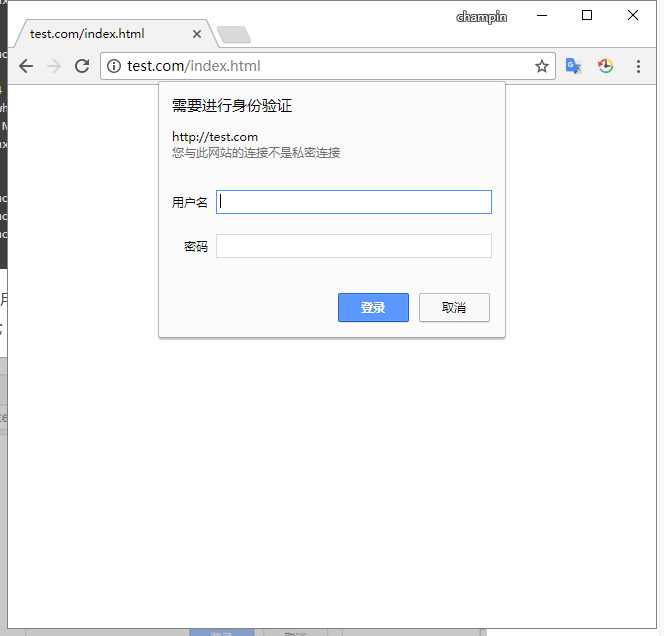
还有一种针对目录的
1[root@cham002 vhost]# /usr/local/nginx/sbin/nginx -t
2nginx: the configuration file /usr/local/nginx/conf/nginx.conf syntax is ok
3nginx: configuration file /usr/local/nginx/conf/nginx.conf test is successful
4[root@cham002 vhost]# /usr/local/nginx/sbin/nginx -s reload
5
6[root@cham002 vhost]# mkdir /data/wwwroot/test.com/admin
7[root@cham002 vhost]# echo "hello.com admin dir" > /data/wwwroot/test.com/admin/index.html
8
9
10测试
11[root@cham002 vhost]# curl -x127.0.0.1:80 test.com/admin/
12<html>
13<head><title>401 Authorization Required</title></head>
14<body bgcolor="white">
15<center><h1>401 Authorization Required</h1></center>
16<hr><center>nginx/1.12.1</center>
17</body>
18</html>
19[root@cham002 vhost]# curl -u cham:123456 -x127.0.0.1:80 test.com/admin/
20hello.com admin dir
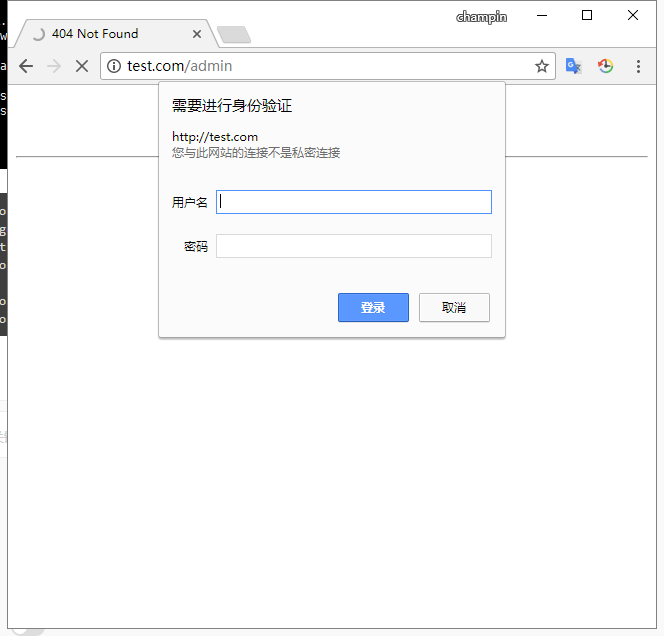
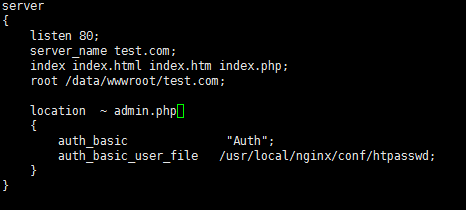
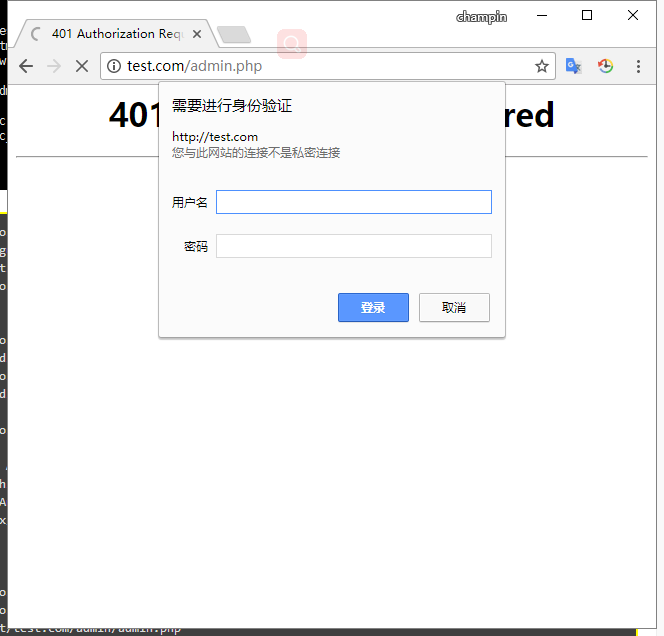
这是针对url的(匹配admin.php)的时候需要账号密码
1[root@cham002 vhost]# /usr/local/nginx/sbin/nginx -t
2nginx: the configuration file /usr/local/nginx/conf/nginx.conf syntax is ok
3nginx: configuration file /usr/local/nginx/conf/nginx.conf test is successful
4[root@cham002 vhost]# /usr/local/nginx/sbin/nginx -s reload
5
6测试
7[root@cham002 vhost]# curl -u cham:123456 -x127.0.0.1:80 test.com/admin/
8hello.com admin dir
9[root@cham002 vhost]# curl -x127.0.0.1:80 test.com/admin/
10hello.com admin dir
11
12[root@cham002 vhost]# curl -x127.0.0.1:80 test.com/admin.php
13<html>
14<head><title>401 Authorization Required</title></head>
15<body bgcolor="white">
16<center><h1>401 Authorization Required</h1></center>
17<hr><center>nginx/1.12.1</center>
18</body>
19</html>
20
21[root@cham002 vhost]# vim /data/wwwroot/test.com/admin/admin.php
22[root@cham002 vhost]# cat !$
23cat /data/wwwroot/test.com/admin/admin.php
24<?php
25echo "hello.com admin.php.";
26?>
27
28[root@cham002 vhost]# /usr/local/nginx/sbin/nginx -t
29nginx: the configuration file /usr/local/nginx/conf/nginx.conf syntax is ok
30nginx: configuration file /usr/local/nginx/conf/nginx.conf test is successful
31
32[root@cham002 vhost]# /usr/local/nginx/sbin/nginx -s reload
12.9 Nginx域名重定向
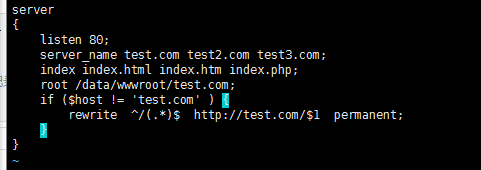
编辑虚拟主机配置文件:
1[root@cham002 vhost]# vim test.com.conf
2server
3{
4    listen 80;
5    server_name test.com test2.com test3.com;
6 #为一个IP配置多个域名,此时权重会改变,所以需要使用户访问其他域名时全部跳转到第一个域名
7    index index.html index.htm index.php;
8    root /data/wwwroot/test.com;
9    if ($host != 'test.com' ) {
10        rewrite  ^/(.*)$  http://test.com/$1  permanent;
11    } #使用rewrite模块
12}
13
14
15:wq
16[root@cham002 vhost]# /usr/local/nginx/sbin/nginx -t
17nginx: the configuration file /usr/local/nginx/conf/nginx.conf syntax is ok
18nginx: configuration file /usr/local/nginx/conf/nginx.conf test is successful
19[root@cham002 vhost]# /usr/local/nginx/sbin/nginx -s reload
测试
1[root@cham002 vhost]# curl -x127.0.0.1:80 test2.com/index.html -I
2HTTP/1.1 301 Moved Permanently
3Server: nginx/1.12.1
4Date: Wed, 03 Jan 2018 09:19:05 GMT
5Content-Type: text/html
6Content-Length: 185
7Connection: keep-alive
8Location: http://test.com/index.html
9
10
11[root@cham002 vhost]# curl -x127.0.0.1:80 test2.com/index.html/dfdsfdsfdsf -I
12HTTP/1.1 301 Moved Permanently
13Server: nginx/1.12.1
14Date: Wed, 03 Jan 2018 09:19:44 GMT
15Content-Type: text/html
16Content-Length: 185
17Connection: keep-alive
18Location: http://test.com/index.html/dfdsfdsfdsf
19
20[root@cham002 vhost]# curl -x127.0.0.1:80 test4.com/index.html/dfdsfdsfdsf -I
21HTTP/1.1 404 Not Found
22Server: nginx/1.12.1
23Date: Wed, 03 Jan 2018 09:21:01 GMT
24Content-Type: text/html
25Content-Length: 169
26Connection: keep-alive
即,301:永久域名跳转,跳转后的地址为:Location: http://test.com/。
转:扩展:Nginx配置文件详解
1#定义Nginx运行的用户和用户组
2user www www;
3
4#nginx进程数,建议设置为等于CPU总核心数。
5worker_processes 8;
6
7#全局错误日志定义类型,[ debug | info | notice | warn | error | crit ]
8error_log /var/log/nginx/error.log info;
9
10#进程文件
11pid /var/run/nginx.pid;
12
13#一个nginx进程打开的最多文件描述符数目,理论值应该是最多打开文件数(系统的值ulimit -n)与nginx进程数相除,但是nginx分配请求并不均匀,所以建议与ulimit -n的值保持一致。
14worker_rlimit_nofile 65535;
15
16#工作模式与连接数上限
17events
18{
19#参考事件模型,use [ kqueue | rtsig | epoll | /dev/poll | select | poll ]; epoll模型是Linux 2.6以上版本内核中的高性能网络I/O模型,如果跑在FreeBSD上面,就用kqueue模型。
20use epoll;
21#单个进程最大连接数(最大连接数=连接数*进程数)
22worker_connections 65535;
23}
24
25#设定http服务器
26http
27{
28include mime.types; #文件扩展名与文件类型映射表
29default_type application/octet-stream; #默认文件类型
30#charset utf-8; #默认编码
31server_names_hash_bucket_size 128; #服务器名字的hash表大小
32client_header_buffer_size 32k; #上传文件大小限制
33large_client_header_buffers 4 64k; #设定请求缓
34client_max_body_size 8m; #设定请求缓
35sendfile on; #开启高效文件传输模式,sendfile指令指定nginx是否调用sendfile函数来输出文件,对于普通应用设为 on,如果用来进行下载等应用磁盘IO重负载应用,可设置为off,以平衡磁盘与网络I/O处理速度,降低系统的负载。注意:如果图片显示不正常把这个改成off。
36autoindex on; #开启目录列表访问,合适下载服务器,默认关闭。
37tcp_nopush on; #防止网络阻塞
38tcp_nodelay on; #防止网络阻塞
39keepalive_timeout 120; #长连接超时时间,单位是秒
40
41#FastCGI相关参数是为了改善网站的性能:减少资源占用,提高访问速度。下面参数看字面意思都能理解。
42fastcgi_connect_timeout 300;
43fastcgi_send_timeout 300;
44fastcgi_read_timeout 300;
45fastcgi_buffer_size 64k;
46fastcgi_buffers 4 64k;
47fastcgi_busy_buffers_size 128k;
48fastcgi_temp_file_write_size 128k;
49
50#gzip模块设置
51gzip on; #开启gzip压缩输出
52gzip_min_length 1k; #最小压缩文件大小
53gzip_buffers 4 16k; #压缩缓冲区
54gzip_http_version 1.0; #压缩版本(默认1.1,前端如果是squid2.5请使用1.0)
55gzip_comp_level 2; #压缩等级
56gzip_types text/plain application/x-javascript text/css application/xml;
57#压缩类型,默认就已经包含text/html,所以下面就不用再写了,写上去也不会有问题,但是会有一个warn。
58gzip_vary on;
59#limit_zone crawler $binary_remote_addr 10m; #开启限制IP连接数的时候需要使用
60
61upstream blog.ha97.com {
62#upstream的负载均衡,weight是权重,可以根据机器配置定义权重。weigth参数表示权值,权值越高被分配到的几率越大。
63server 192.168.80.121:80 weight=3;
64server 192.168.80.122:80 weight=2;
65server 192.168.80.123:80 weight=3;
66}
67
68#虚拟主机的配置
69server
70{
71#监听端口
72listen 80;
73#域名可以有多个,用空格隔开
74server_name www.ha97.com ha97.com;
75index index.html index.htm index.php;
76root /data/www/ha97;
77location ~ .*\.(php|php5)?$
78{
79fastcgi_pass 127.0.0.1:9000;
80fastcgi_index index.php;
81include fastcgi.conf;
82}
83#图片缓存时间设置
84location ~ .*\.(gif|jpg|jpeg|png|bmp|swf)$
85{
86expires 10d;
87}
88#JS和CSS缓存时间设置
89location ~ .*\.(js|css)?$
90{
91expires 1h;
92}
93#日志格式设定
94log_format access '$remote_addr - $remote_user [$time_local] "$request" '
95'$status $body_bytes_sent "$http_referer" '
96'"$http_user_agent" $http_x_forwarded_for';
97#定义本虚拟主机的访问日志
98access_log /var/log/nginx/ha97access.log access;
99
100#对 "/" 启用反向代理
101location / {
102proxy_pass http://127.0.0.1:88;
103proxy_redirect off;
104proxy_set_header X-Real-IP $remote_addr;
105#后端的Web服务器可以通过X-Forwarded-For获取用户真实IP
106proxy_set_header X-Forwarded-For $proxy_add_x_forwarded_for;
107#以下是一些反向代理的配置,可选。
108proxy_set_header Host $host;
109client_max_body_size 10m; #允许客户端请求的最大单文件字节数
110client_body_buffer_size 128k; #缓冲区代理缓冲用户端请求的最大字节数,
111proxy_connect_timeout 90; #nginx跟后端服务器连接超时时间(代理连接超时)
112proxy_send_timeout 90; #后端服务器数据回传时间(代理发送超时)
113proxy_read_timeout 90; #连接成功后,后端服务器响应时间(代理接收超时)
114proxy_buffer_size 4k; #设置代理服务器(nginx)保存用户头信息的缓冲区大小
115proxy_buffers 4 32k; #proxy_buffers缓冲区,网页平均在32k以下的设置
116proxy_busy_buffers_size 64k; #高负荷下缓冲大小(proxy_buffers*2)
117proxy_temp_file_write_size 64k;
118#设定缓存文件夹大小,大于这个值,将从upstream服务器传
119}
120
121#设定查看Nginx状态的地址
122location /NginxStatus {
123stub_status on;
124access_log on;
125auth_basic "NginxStatus";
126auth_basic_user_file conf/htpasswd;
127#htpasswd文件的内容可以用apache提供的htpasswd工具来产生。
128}
129
130#本地动静分离反向代理配置
131#所有jsp的页面均交由tomcat或resin处理
132location ~ .(jsp|jspx|do)?$ {
133proxy_set_header Host $host;
134proxy_set_header X-Real-IP $remote_addr;
135proxy_set_header X-Forwarded-For $proxy_add_x_forwarded_for;
136proxy_pass http://127.0.0.1:8080;
137}
138#所有静态文件由nginx直接读取不经过tomcat或resin
139location ~ .*.(htm|html|gif|jpg|jpeg|png|bmp|swf|ioc|rar|zip|txt|flv|mid|doc|ppt|pdf|xls|mp3|wma)$
140{ expires 15d; }
141location ~ .*.(js|css)?$
142{ expires 1h; }
143}
144}