
@[toc]
前言
本文的内容主要包含3部分:声明并渲染变量,包括条件渲染;通过class和style定义样式并动态绑定;事件的绑定,包含了事件传参。三部分均具有动态绑定的特性。
一、模板语法及数据绑定
1.声明和渲染变量
在使用变量前,需要先声明,一般在data块中进行声明,如hello uniapp项目中index.vue中定义的title变量如下:
1data() {
2    return {
3        title: 'Hello'
4    }
5},
可以在script语言块的data块中定义多个变量,并且在template语言块的视图中用{{}}调用变量,并且可以绑定多种类型的变量,包括基本数据类型、数组等。
先测试基础数据调用,index.vue如下:
1<template>
2	<view class="content">
3		<image class="logo" src="/static/logo.png"></image>
4		<view class="text-area">
5			<text class="title">{{title}}</text>
6		</view>
7		<view class="red">
8			hello-{{name}}
9		</view>
10	</view>
11</template>
12
13<script>
14	export default {
15		data() {
16			return {
17				title: 'Hello',
18				name: 'Corley'
19			}
20		},
21		onLoad() {
22			console.log('index onload')
23		},
24		onShow() {
25			console.log('index onshow')
26		},
27		onHide() {
28			console.log('index onhide')
29		},
30		methods: {
31
32		}
33	}
34</script>
35
36<style>
37	.content {
38		display: flex;
39		flex-direction: column;
40		align-items: center;
41		justify-content: center;
42	}
43
44	.logo {
45		height: 200rpx;
46		width: 200rpx;
47		margin-top: 200rpx;
48		margin-left: auto;
49		margin-right: auto;
50		margin-bottom: 50rpx;
51	}
52
53	.text-area {
54		display: flex;
55		justify-content: center;
56	}
57
58	.title {
59		font-size: 36rpx;
60		color: #8f8f94;
61	}
62</style>
63
显示:
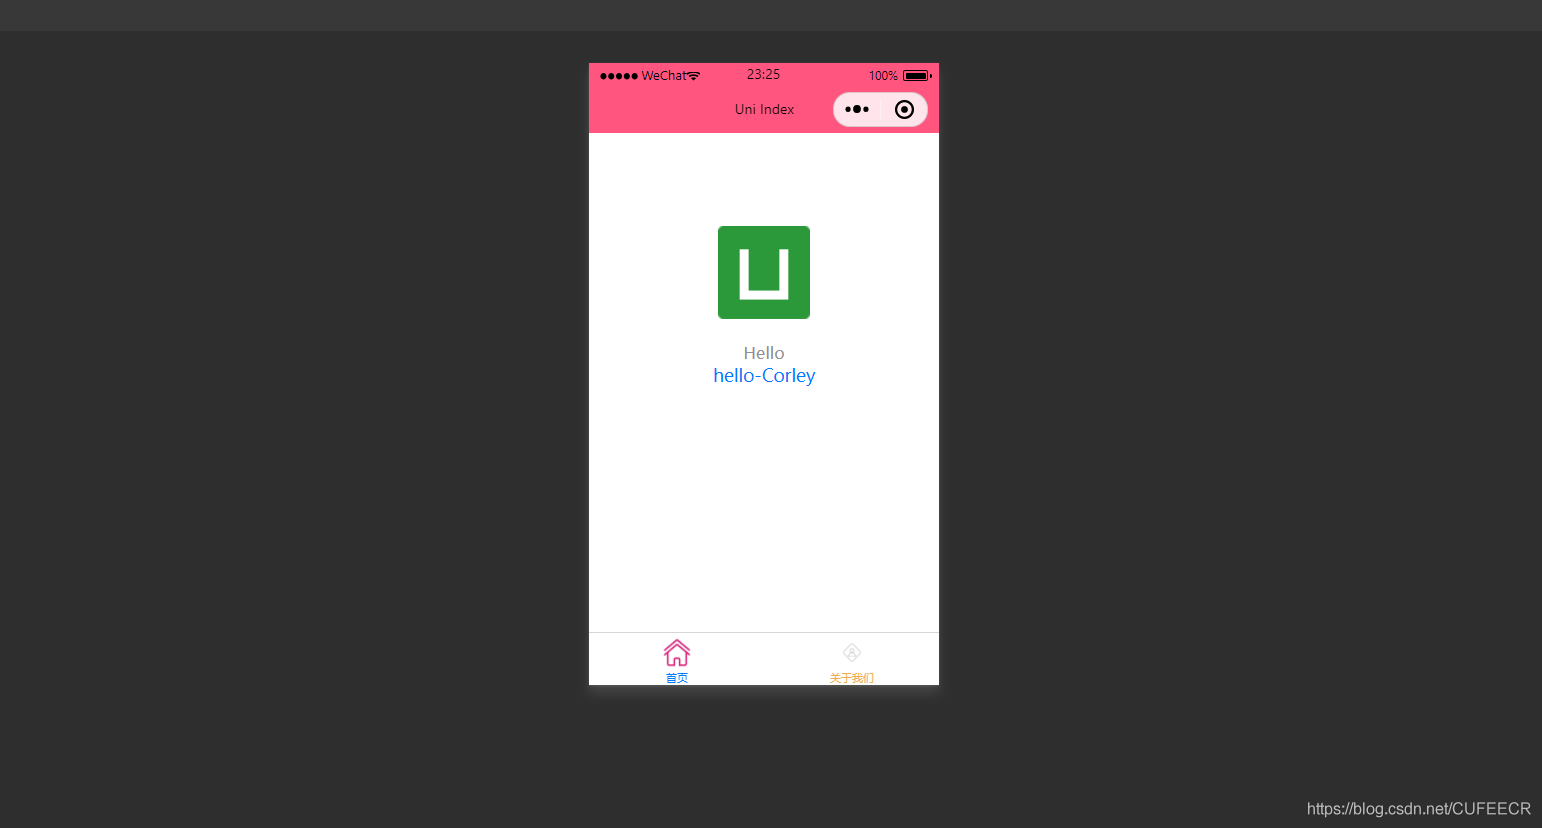
可以看到,定义的title和name变量渲染到了视图中。
需要注意,声明的变量都是响应式的,即视图中渲染的结果与变量本身是绑定的,会同步变化,index.vue如下:
1<template>
2	<view class="content">
3		<image class="logo" src="/static/logo.png"></image>
4		<view class="text-area">
5			<text class="title">{{title}}</text>
6		</view>
7		<view class="red">
8			hello-{{name}}-{{age}}
9		</view>
10	</view>
11</template>
12<script>
13	var _self;
14	export default {
15		data() {
16			return {
17				title: 'Hello',
18				name: 'Corley',
19				age: 18
20			}
21		},
22		onLoad() {
23			_self = this;
24			setTimeout(function(){
25				_self.age = 20
26			}, 3000);
27		},
28		onShow() {
29			console.log('index onshow')
30		},
31		onHide() {
32			console.log('index onhide')
33		},
34		methods: {
35
36		}
37	}
38</script>
39
40<style>
41	.content {
42		display: flex;
43		flex-direction: column;
44		align-items: center;
45		justify-content: center;
46	}
47
48	.logo {
49		height: 200rpx;
50		width: 200rpx;
51		margin-top: 200rpx;
52		margin-left: auto;
53		margin-right: auto;
54		margin-bottom: 50rpx;
55	}
56
57	.text-area {
58		display: flex;
59		justify-content: center;
60	}
61
62	.title {
63		font-size: 36rpx;
64		color: #8f8f94;
65	}
66</style>
67
显示:
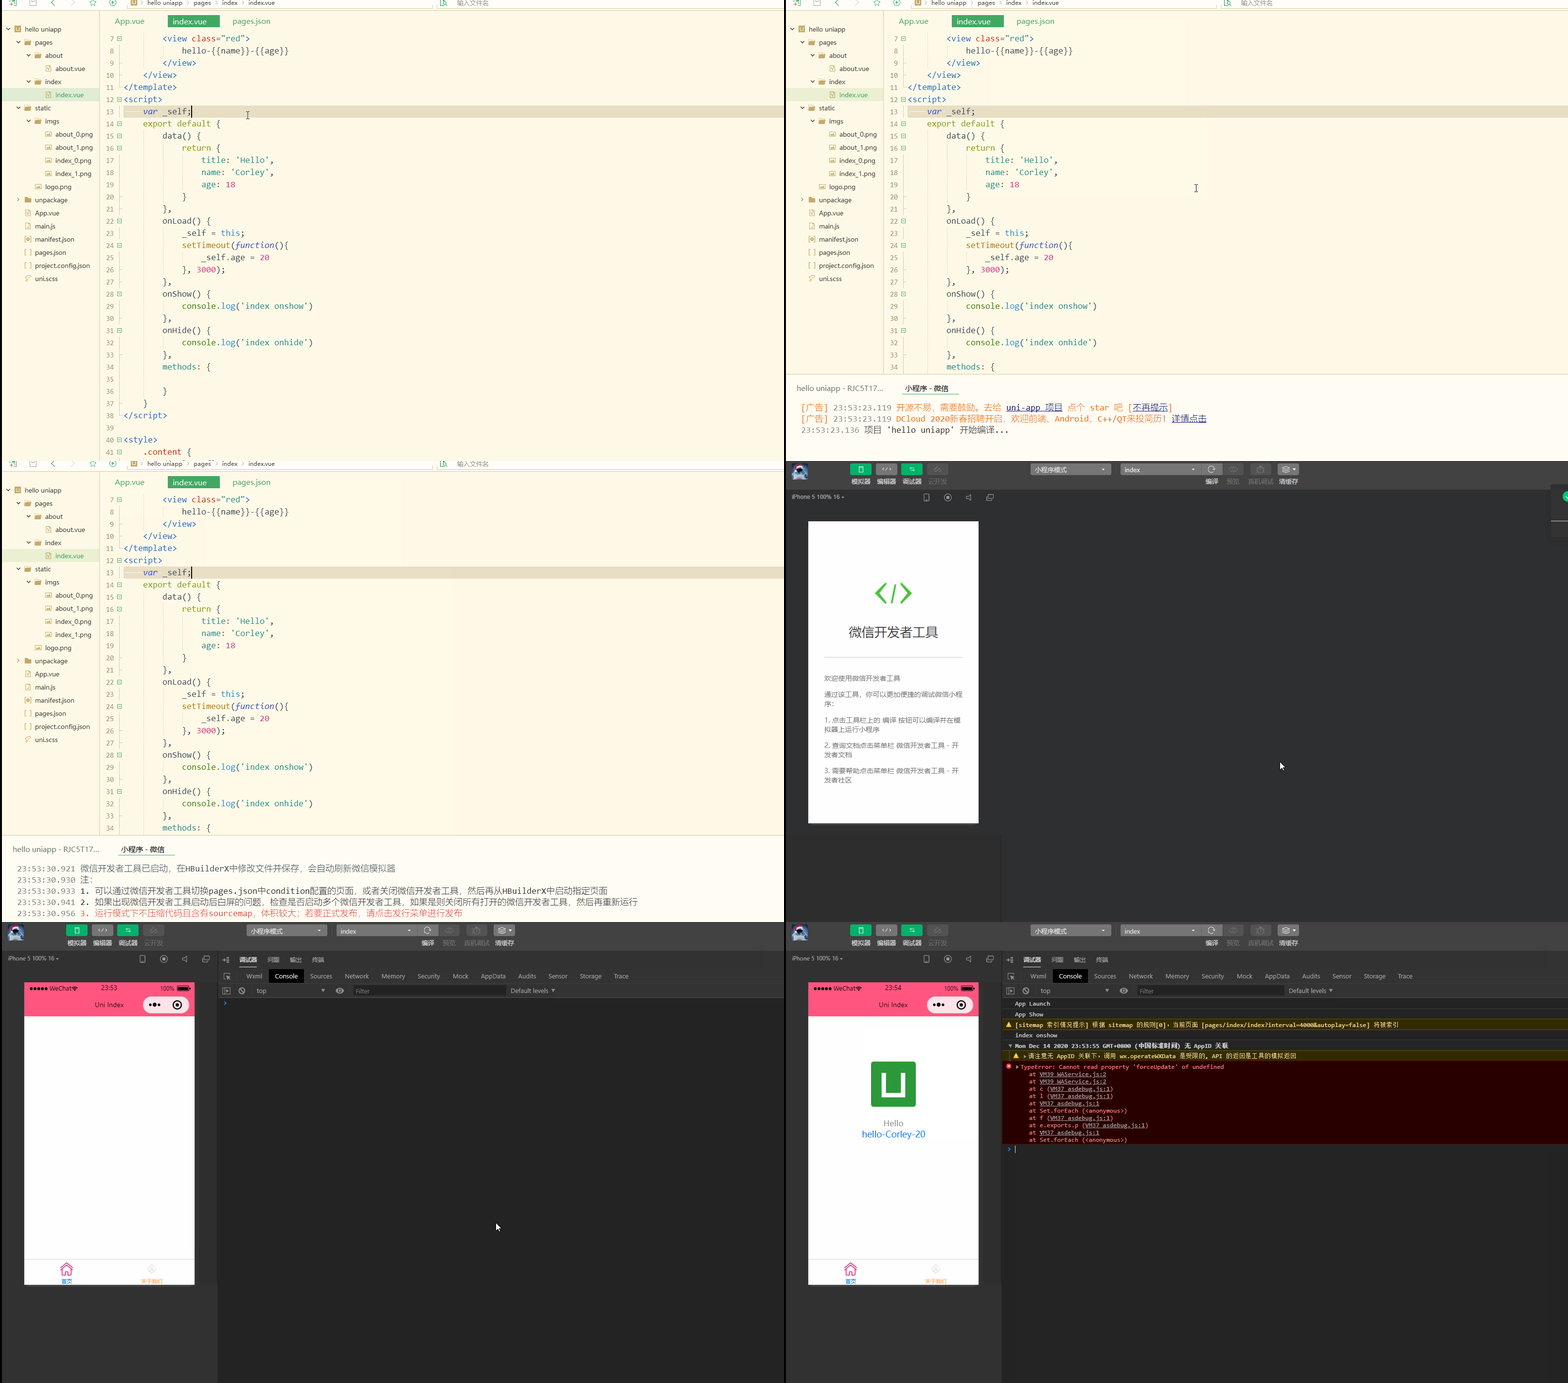
可以看到,在进入onLoad阶段后,渲染的age变量也发生变化,变为20。
还可以对数组进行数据绑定,可以获取数组的单个元素及其属性,如下:
1<template>
2	<view class="content">
3		<image class="logo" src="/static/logo.png"></image>
4		<view class="text-area">
5			<text class="title">{{title}}</text>
6		</view>
7		<view class="red">
8			{{students[0]}}<br>
9			{{students[0].name}}
10		</view>
11	</view>
12</template>
13<script>
14	var _self;
15	export default {
16		data() {
17			return {
18				title: 'Hello',
19				name: 'Corley',
20				age: 18,
21				students: [{
22						name: "张三",
23						age: 18
24					},
25					{
26						name: "李四",
27						age: 20
28					}
29				]
30			}
31		},
32		onLoad() {
33			_self = this;
34			setTimeout(function() {
35				_self.age = 20
36			}, 3000);
37		},
38		onShow() {
39			console.log('index onshow')
40		},
41		onHide() {
42			console.log('index onhide')
43		},
44		methods: {
45
46		}
47	}
48</script>
49
50<style>
51	.content {
52		display: flex;
53		flex-direction: column;
54		align-items: center;
55		justify-content: center;
56	}
57
58	.logo {
59		height: 200rpx;
60		width: 200rpx;
61		margin-top: 200rpx;
62		margin-left: auto;
63		margin-right: auto;
64		margin-bottom: 50rpx;
65	}
66
67	.text-area {
68		display: flex;
69		justify-content: center;
70	}
71
72	.title {
73		font-size: 36rpx;
74		color: #8f8f94;
75	}
76</style>
77
显示:
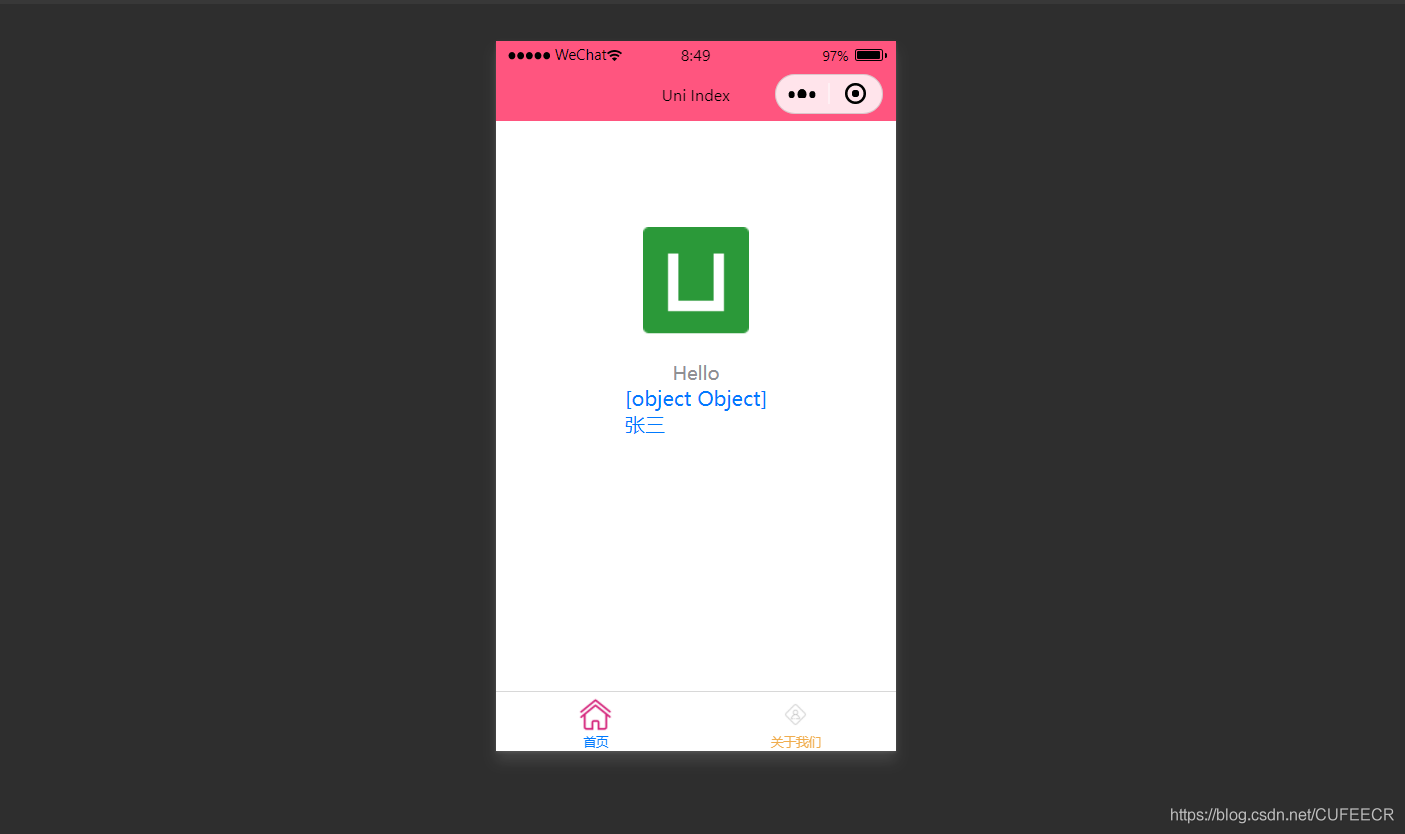
也可以使用循环来遍历数组,即使用v-for进行遍历。
index.vue如下:
1<template>
2	<view class="content">
3		<image class="logo" src="/static/logo.png"></image>
4		<view class="text-area">
5			<text class="title">{{title}}</text>
6		</view>
7		<view v-for="(item, index) in students">
8			{{index}} - {{item.name}} : {{item.age}}
9		</view>
10	</view>
11</template>
12<script>
13	var _self;
14	export default {
15		data() {
16			return {
17				title: 'Hello',
18				name: 'Corley',
19				age: 18,
20				students: [{
21						name: "张三",
22						age: 18
23					},
24					{
25						name: "李四",
26						age: 20
27					}
28				]
29			}
30		},
31		onLoad() {
32			_self = this;
33			setTimeout(function() {
34				_self.age = 20
35			}, 3000);
36		},
37		onShow() {
38			console.log('index onshow')
39		},
40		onHide() {
41			console.log('index onhide')
42		},
43		methods: {
44
45		}
46	}
47</script>
48
49<style>
50	.content {
51		display: flex;
52		flex-direction: column;
53		align-items: center;
54		justify-content: center;
55	}
56
57	.logo {
58		height: 200rpx;
59		width: 200rpx;
60		margin-top: 200rpx;
61		margin-left: auto;
62		margin-right: auto;
63		margin-bottom: 50rpx;
64	}
65
66	.text-area {
67		display: flex;
68		justify-content: center;
69	}
70
71	.title {
72		font-size: 36rpx;
73		color: #8f8f94;
74	}
75</style>
76
显示:
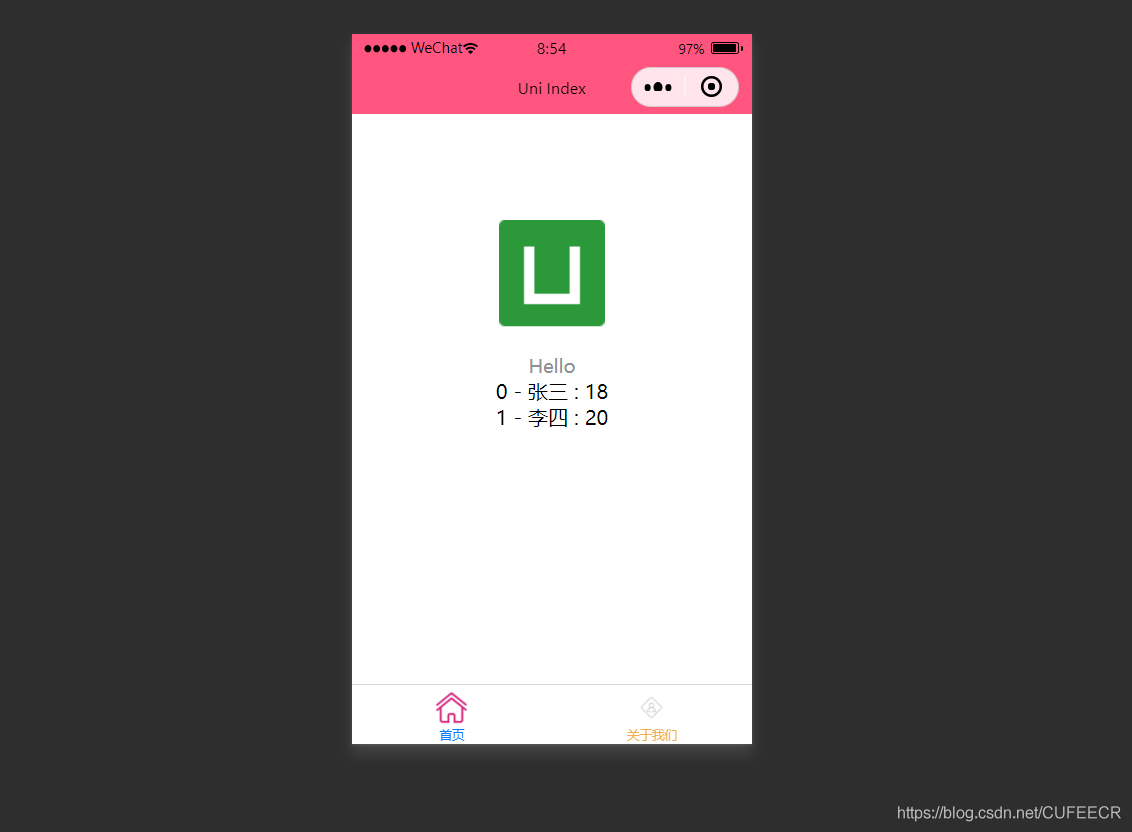
显然,此时遍历出了数组中的所有元素。
2.条件渲染
条件渲染是指满足某个条件才渲染某个元素,使用v-if。
如下:
1<template>
2	<view class="content">
3		<image class="logo" src="/static/logo.png"></image>
4		<view class="text-area">
5			<text class="title">{{title}}</text>
6		</view>
7		<view v-if="show1">
8			show1...
9		</view>
10		<view v-if="show2">
11			show2...
12		</view>
13	</view>
14</template>
15<script>
16	var _self;
17	export default {
18		data() {
19			return {
20				title: 'Hello',
21				name: 'Corley',
22				age: 18,
23				show1: true,
24				show2: false
25			}
26		},
27		onLoad() {
28			_self = this;
29			setTimeout(function() {
30				_self.age = 20
31			}, 3000);
32		},
33		onShow() {
34			console.log('index onshow')
35		},
36		onHide() {
37			console.log('index onhide')
38		},
39		methods: {
40
41		}
42	}
43</script>
44
45<style>
46	.content {
47		display: flex;
48		flex-direction: column;
49		align-items: center;
50		justify-content: center;
51	}
52
53	.logo {
54		height: 200rpx;
55		width: 200rpx;
56		margin-top: 200rpx;
57		margin-left: auto;
58		margin-right: auto;
59		margin-bottom: 50rpx;
60	}
61
62	.text-area {
63		display: flex;
64		justify-content: center;
65	}
66
67	.title {
68		font-size: 36rpx;
69		color: #8f8f94;
70	}
71</style>
72
显示:
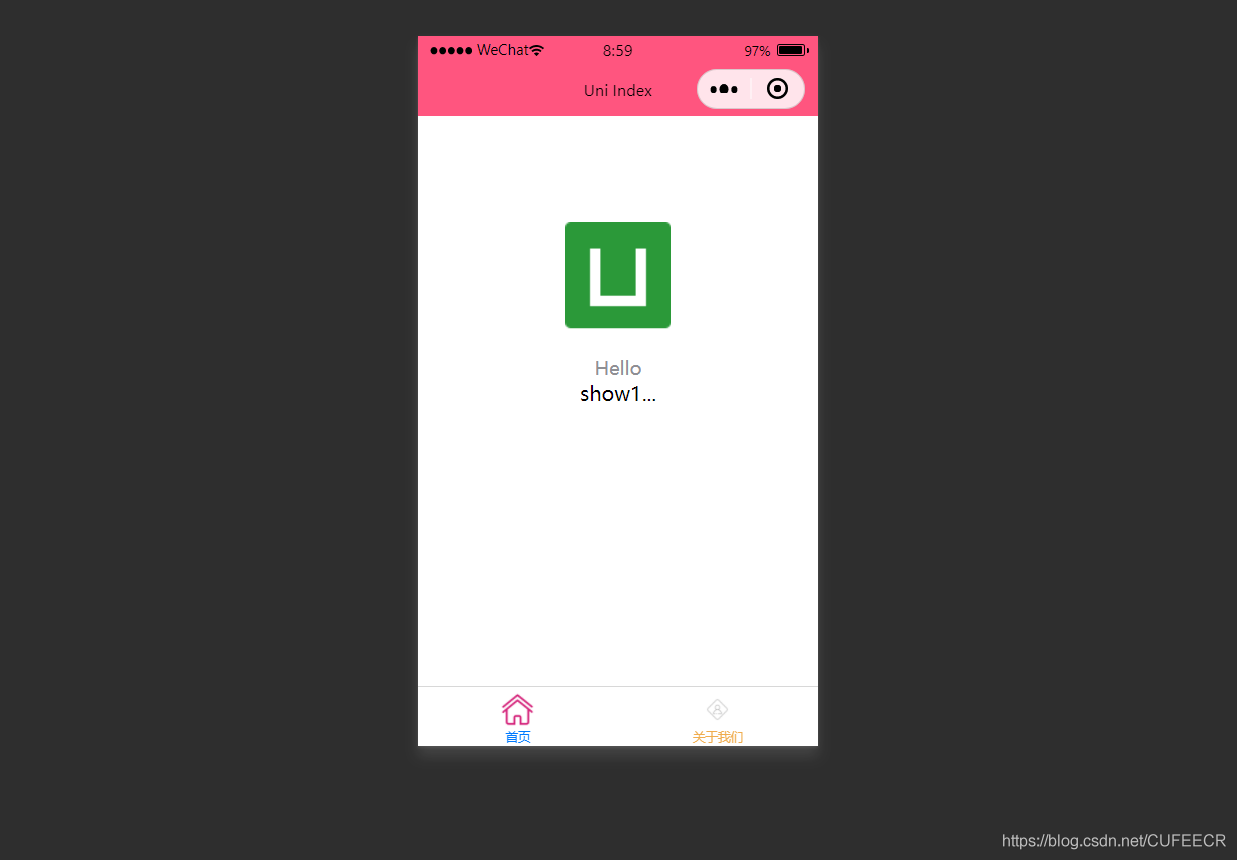
此时根据v-if中传的值判断是否渲染。
:hidden属性用来定义是否隐藏某个元素,如下:
1<template>
2	<view class="content">
3		<image class="logo" src="/static/logo.png"></image>
4		<view class="text-area">
5			<text class="title">{{title}}</text>
6		</view>
7		<view :hidden="show1">
8			show1...
9		</view>
10		<view :hidden="show2">
11			show2...
12		</view>
13	</view>
14</template>
15<script>
16	var _self;
17	export default {
18		data() {
19			return {
20				title: 'Hello',
21				name: 'Corley',
22				age: 18,
23				show1: true,
24				show2: false
25			}
26		},
27		onLoad() {
28			_self = this;
29			setTimeout(function() {
30				_self.age = 20
31			}, 3000);
32		},
33		onShow() {
34			console.log('index onshow')
35		},
36		onHide() {
37			console.log('index onhide')
38		},
39		methods: {
40
41		}
42	}
43</script>
44
45<style>
46	.content {
47		display: flex;
48		flex-direction: column;
49		align-items: center;
50		justify-content: center;
51	}
52
53	.logo {
54		height: 200rpx;
55		width: 200rpx;
56		margin-top: 200rpx;
57		margin-left: auto;
58		margin-right: auto;
59		margin-bottom: 50rpx;
60	}
61
62	.text-area {
63		display: flex;
64		justify-content: center;
65	}
66
67	.title {
68		font-size: 36rpx;
69		color: #8f8f94;
70	}
71</style>
72
显示:

可以看到,v-if和:hidden的效果相反,但是原理上还是有一定区别:
v-if是根据条件决定是否渲染,:hidden会渲染但根据条件决定是否展示,可以根据具体需要进行选择。
二、class和style绑定
前面已经提到过,可以在template语言块的某个标签中通过style属性直接定义样式,也可以在style语言块中通过选择器定义样式,再在template语言块中使用。
为节约性能,可以将Class与Style的表达式通过compiler硬编码到uni-app中,通过条件判断来决定是否显示某个样式。
1.class语法
class支持的语法方式如下:
1<!-- 1 -->
2<view class="static" v-bind:class="{ active: isActive, 'text-danger': hasError }">111</view>
3<!-- 2 -->
4<view class="static" v-bind:class="[isActive ? activeClass : '', errorClass]">222</view>
5<!-- 3 -->
6<view class="static" v-bind:class="[{ active: isActive }, errorClass]">333</view>
7<!-- 4 -->
8<view :class="{ active: isActive }">444</view>
9<!-- 5 -->
10<view class="static" :class="[activeClass, errorClass]">555</view>
其中,前3种为完整形式,后2种为简写形式;
isActive ? activeClass : ''为三元运算符。
index.vue如下:
1<template>
2	<view class="content">
3		<image class="logo" src="/static/logo.png"></image>
4		<view class="text-area">
5			<text class="title">{{title}}</text>
6		</view>
7		<view :class="{'red' : isRed}">
8			class bind 2...
9		</view>
10		<view :class="[isBlue ? 'blue' : 'red']">
11			class bind 3...
12		</view>
13	</view>
14</template>
15<script>
16	export default {
17		data() {
18			return {
19				title: 'Hello',
20				name: 'Corley',
21				age: 18,
22				isRed: true,
23				isBlue: true
24			}
25		},
26		onLoad() {
27		},
28		onShow() {
29			console.log('index onshow')
30		},
31		onHide() {
32			console.log('index onhide')
33		},
34		methods: {
35
36		}
37	}
38</script>
39
40<style>
41	.content {
42		display: flex;
43		flex-direction: column;
44		align-items: center;
45		justify-content: center;
46	}
47
48	.logo {
49		height: 200rpx;
50		width: 200rpx;
51		margin-top: 200rpx;
52		margin-left: auto;
53		margin-right: auto;
54		margin-bottom: 50rpx;
55	}
56
57	.text-area {
58		display: flex;
59		justify-content: center;
60	}
61
62	.title {
63		font-size: 36rpx;
64		color: #8f8f94;
65	}
66	.blue {
67		color: #007AFF;
68	}
69</style>
70
显示:

可以看到,在进行编译选然后,微信开发者工具中wxml显示的是被渲染后的class值。
2.style语法
style 支持的语法如下:
1<!-- 1 -->
2<view v-bind:style="{ color: activeColor, fontSize: fontSize + 'px' }">111</view>
3<!-- 2 -->
4<view v-bind:style="[{ color: activeColor, fontSize: fontSize + 'px' }]">222</view>
5<!-- 3 -->
6<view :style="{ color: activeColor, fontSize: fontSize + 'px' }">333</view>
7<!-- 4 -->
8<view :style="[{ color: activeColor, fontSize: fontSize + 'px' }]">444</view>
其中,前2种为完整形式,后2种为简写形式。
index.vue如下:
1<template>
2	<view class="content">
3		<image class="logo" src="/static/logo.png"></image>
4		<view class="text-area">
5			<text class="title">{{title}}</text>
6		</view>
7		<view style="font-size: 10px;">
8			style static...
9		</view>
10		<view :style="{fontSize: fontSize+'px'}">
11			class dynamic...
12		</view>
13	</view>
14</template>
15<script>
16	var _self;
17	export default {
18		data() {
19			return {
20				title: 'Hello',
21				name: 'Corley',
22				age: 18,
23				fontSize: 20
24			}
25		},
26		onLoad() {
27			_self = this;
28			setTimeout(function(){
29				_self.fontSize = 30;
30			}, 3000)
31		},
32		onShow() {
33			console.log('index onshow')
34		},
35		onHide() {
36			console.log('index onhide')
37		},
38		methods: {
39
40		}
41	}
42</script>
43
44<style>
45	.content {
46		display: flex;
47		flex-direction: column;
48		align-items: center;
49		justify-content: center;
50	}
51
52	.logo {
53		height: 200rpx;
54		width: 200rpx;
55		margin-top: 200rpx;
56		margin-left: auto;
57		margin-right: auto;
58		margin-bottom: 50rpx;
59	}
60
61	.text-area {
62		display: flex;
63		justify-content: center;
64	}
65
66	.title {
67		font-size: 36rpx;
68		color: #8f8f94;
69	}
70	.blue {
71		color: #007AFF;
72	}
73</style>
74
显示:

显然,样式可以动态发生变化。
需要注意,uni-app不支持 Vue官方文档中Class 与 Style 绑定 中的 classObject 和 styleObject 语法,但是可以用 computed 方法生成 class 或者 style 字符串,插入到页面中,如下:
1<template>
2	<view>
3		<!-- 支持 -->
4		<view class="container" :class="computedClassStr"></view>
5		<view class="container" :class="{active: isActive}"></view>
6		<!-- 不支持 -->
7		<view class="container" :class="computedClassObject"></view>
8	</view>
9</template>
关于Class和Style动态绑定的进一步讲解和更多用法可参考uni-app入门教程(8)在uni-app中使用Vue。
3.案例--动态菜单切换
本案例实现动态切换导航栏。
先展示横向排列的导航栏,index.vue如下:
1<template>
2	<view>
3		<view v-for="(item, index) in menus" class="menu">
4			{{item}}
5		</view>
6	</view>
7</template>
8<script>
9	var _self;
10	export default {
11		data() {
12			return {
13				menus: [
14					'新闻', '汽车', '读书'
15				]
16			}
17		},
18		onLoad() {
19
20		},
21		onShow() {
22			console.log('index onshow')
23		},
24		onHide() {
25			console.log('index onhide')
26		},
27		methods: {
28
29		}
30	}
31</script>
32
33<style>
34	.menu {
35		padding: 10px;
36		float: left;
37		margin: 5px;
38		line-height: 36px;
39	}
40</style>
41
显示:
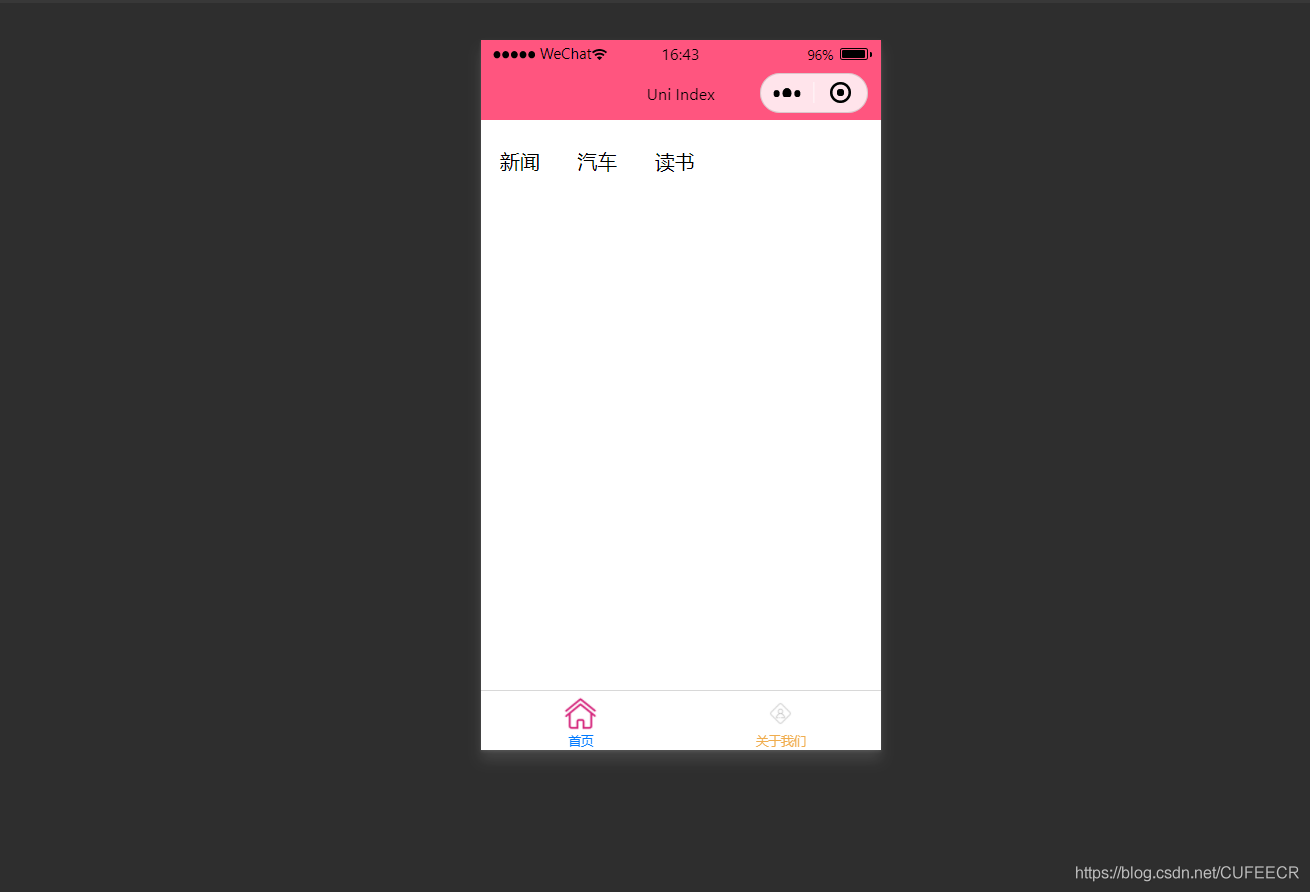
此时已经可以将导航栏横向展示了。
再实现当前的导航栏显示不一样的颜色,如下:
1<template>
2	<view>
3		<view v-for="(item, index) in menus" class="menu" :class="[activeIndex==index?'menuActive':'']">
4			{{item}}
5		</view>
6	</view>
7</template>
8<script>
9	var _self;
10	export default {
11		data() {
12			return {
13				menus: [
14					'新闻', '汽车', '读书'
15				],
16				activeIndex: 0
17			}
18		},
19		onLoad() {
20
21		},
22		onShow() {
23			console.log('index onshow')
24		},
25		onHide() {
26			console.log('index onhide')
27		},
28		methods: {
29
30		}
31	}
32</script>
33
34<style>
35	.menu {
36		padding: 10px;
37		float: left;
38		margin: 5px;
39		line-height: 36px;
40	}
41	.menuActive {
42		color: #FF0000 !important;
43	}
44</style>
45
显示:
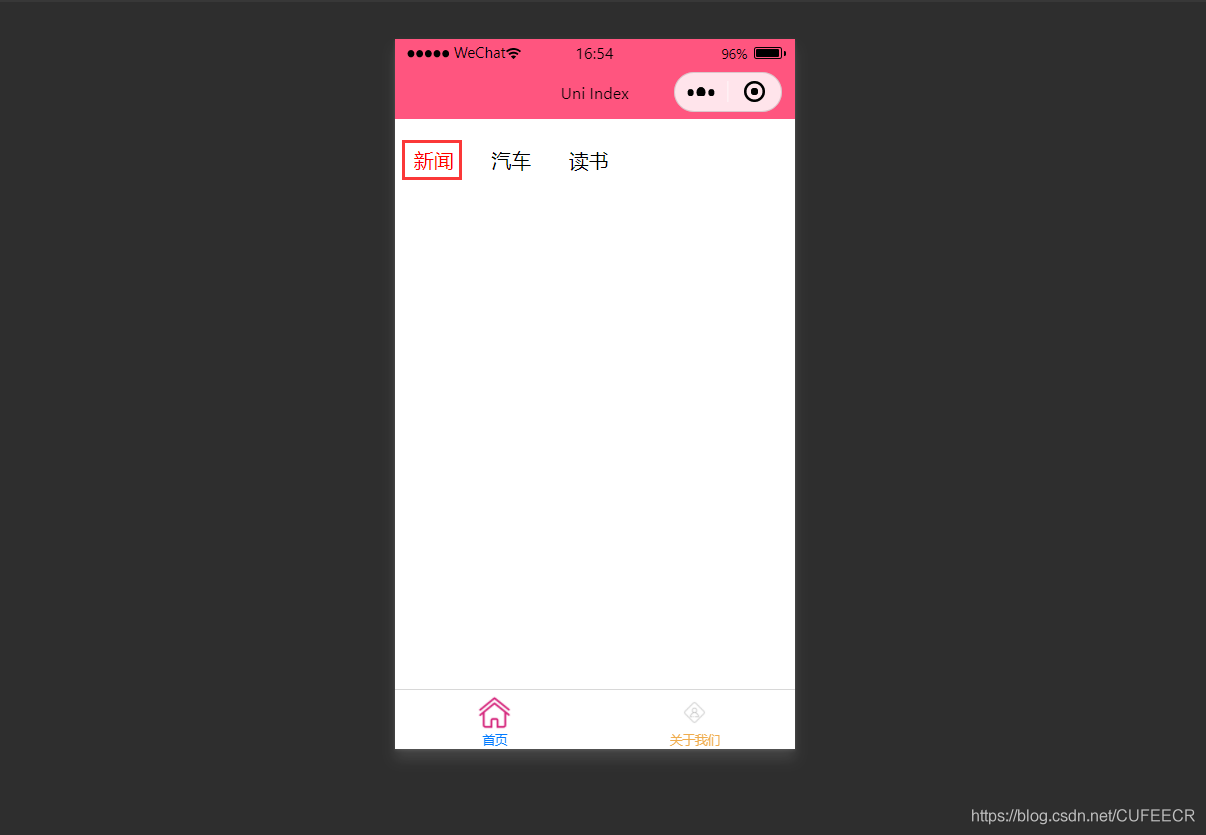
此时,第1个导航栏变为红色。
进一步实现点击时,颜色动态变化,如下:
1<template>
2	<view>
3		<view v-for="(item, index) in menus" class="menu" :class="[activeIndex==index?'menuActive':'']" @click="menuClick" :id="index">
4			{{item}}
5		</view>
6	</view>
7</template>
8<script>
9	var _self;
10	export default {
11		data() {
12			return {
13				menus: [
14					'新闻', '汽车', '读书'
15				],
16				activeIndex: 0
17			}
18		},
19		onLoad() {
20			_self = this
21		},
22		onShow() {
23			console.log('index onshow')
24		},
25		onHide() {
26			console.log('index onhide')
27		},
28		methods: {
29			menuClick: function(e){
30				var aid = e.target.id;
31				console.log(aid);
32				_self.activeIndex = aid;
33			}
34		}
35	}
36</script>
37
38<style>
39	.menu {
40		padding: 10px;
41		float: left;
42		margin: 5px;
43		line-height: 36px;
44	}
45	.menuActive {
46		color: #FF0000 !important;
47	}
48</style>
49
使用了事件来达到动态切换的效果。
显示:

可以看到,点击不同的导航栏实现了颜色同步变化的效果。
三、事件和事件绑定
1.uni-app事件
事件映射表定义了WEB事件和uni-app事件之间的对应关系,具体如下:
| Web事件 | uni-app事件 | 说明 |
|---|---|---|
| click | 'tap' | 被点击 |
| touchstart | 'touchstart' | 手指开始在元素上触摸时 |
| touchmove | 'touchmove' | 移动 |
| touchcancel | 'touchcancel' | 取消 |
| touchend | 'touchend' | 结束 |
| tap | 'tap' | 单机 |
| longtap | 'longtap' | 长按 |
| input | 'input' | 输入 |
| change | 'change' | 改变 |
| submit | 'submit' | 表单提交 |
| blur | 'blur' | 失焦 |
| focus | 'focus' | 聚焦 |
| reset | 'reset' | 表单重置 |
| confirm | 'confirm' | 确认 |
| columnchange | 'columnchange' | 字段变化 |
| linechange | 'linechange' | 行比那花 |
| error | 'error' | 错误 |
| scrolltoupper | 'scrolltoupper' | 滚动到顶部 |
| scrolltolower | 'scrolltolower' | 滚动到底部 |
| scroll | 'scroll' | 滚动 |
说明:
(1)在 input 和 textarea 中 change 事件会被转为 blur 事件;
(2)列表中没有的原生事件也可以使用,例如map组件的regionchange 事件直接在组件上添加@regionchange修饰即可,同时这个事件也非常特殊,它的 event type 有 begin 和 end 两个,导致我们无法在handleProxy 中区分到底是什么事件,所以在监听此类事件的时候同时监听事件名和事件类型,即<map @regionchange="functionName" @end="functionName" @begin="functionName"><map>;
(3)由于平台的差异,bind 和 catch 事件同时绑定时,只会触发 bind,catch 不会被触发,使用时需要注意。
(4)件修饰符:
- 使用stop会阻止冒泡,但是同时绑定了一个非冒泡事件,会导致该元素上的 catchEventName 失效;
- prevent 可以直接结束事件,因为uni-app里没有什么默认事件,比如 submit 并不会跳转页面;
- self 没有可以判断的标识;
- once 也不能做,因为uni-app没有 removeEventListener, 虽然可以直接在 handleProxy 中处理,但是并不优雅;
(5)按键修饰符: uni-app运行在手机端,没有键盘事件,所以不支持按键修饰符。
2.事件绑定
使用@对元素进行事件绑定,当事件被触发时,会导致相应的操作。
index.vue如下:
1<template>
2	<view>
3		<view class="demo" @click="clickTest" @longtap="longtap"></view>
4	</view>
5</template>
6<script>
7	var _self;
8	export default {
9		data() {
10			return {
11			}
12		},
13		onLoad() {
14			_self = this
15		},
16		onShow() {
17			console.log('index onshow')
18		},
19		onHide() {
20			console.log('index onhide')
21		},
22		methods: {
23			clickTest : function(e){
24				console.log("click")
25			},
26			longtap : function(e){
27				console.log("longtap")
28			},
29		}
30	}
31</script>
32
33<style>
34	.demo {
35		width: 600rpx;
36		height: 600rpx;
37		background: #DD524D;
38	}
39</style>
40
显示:
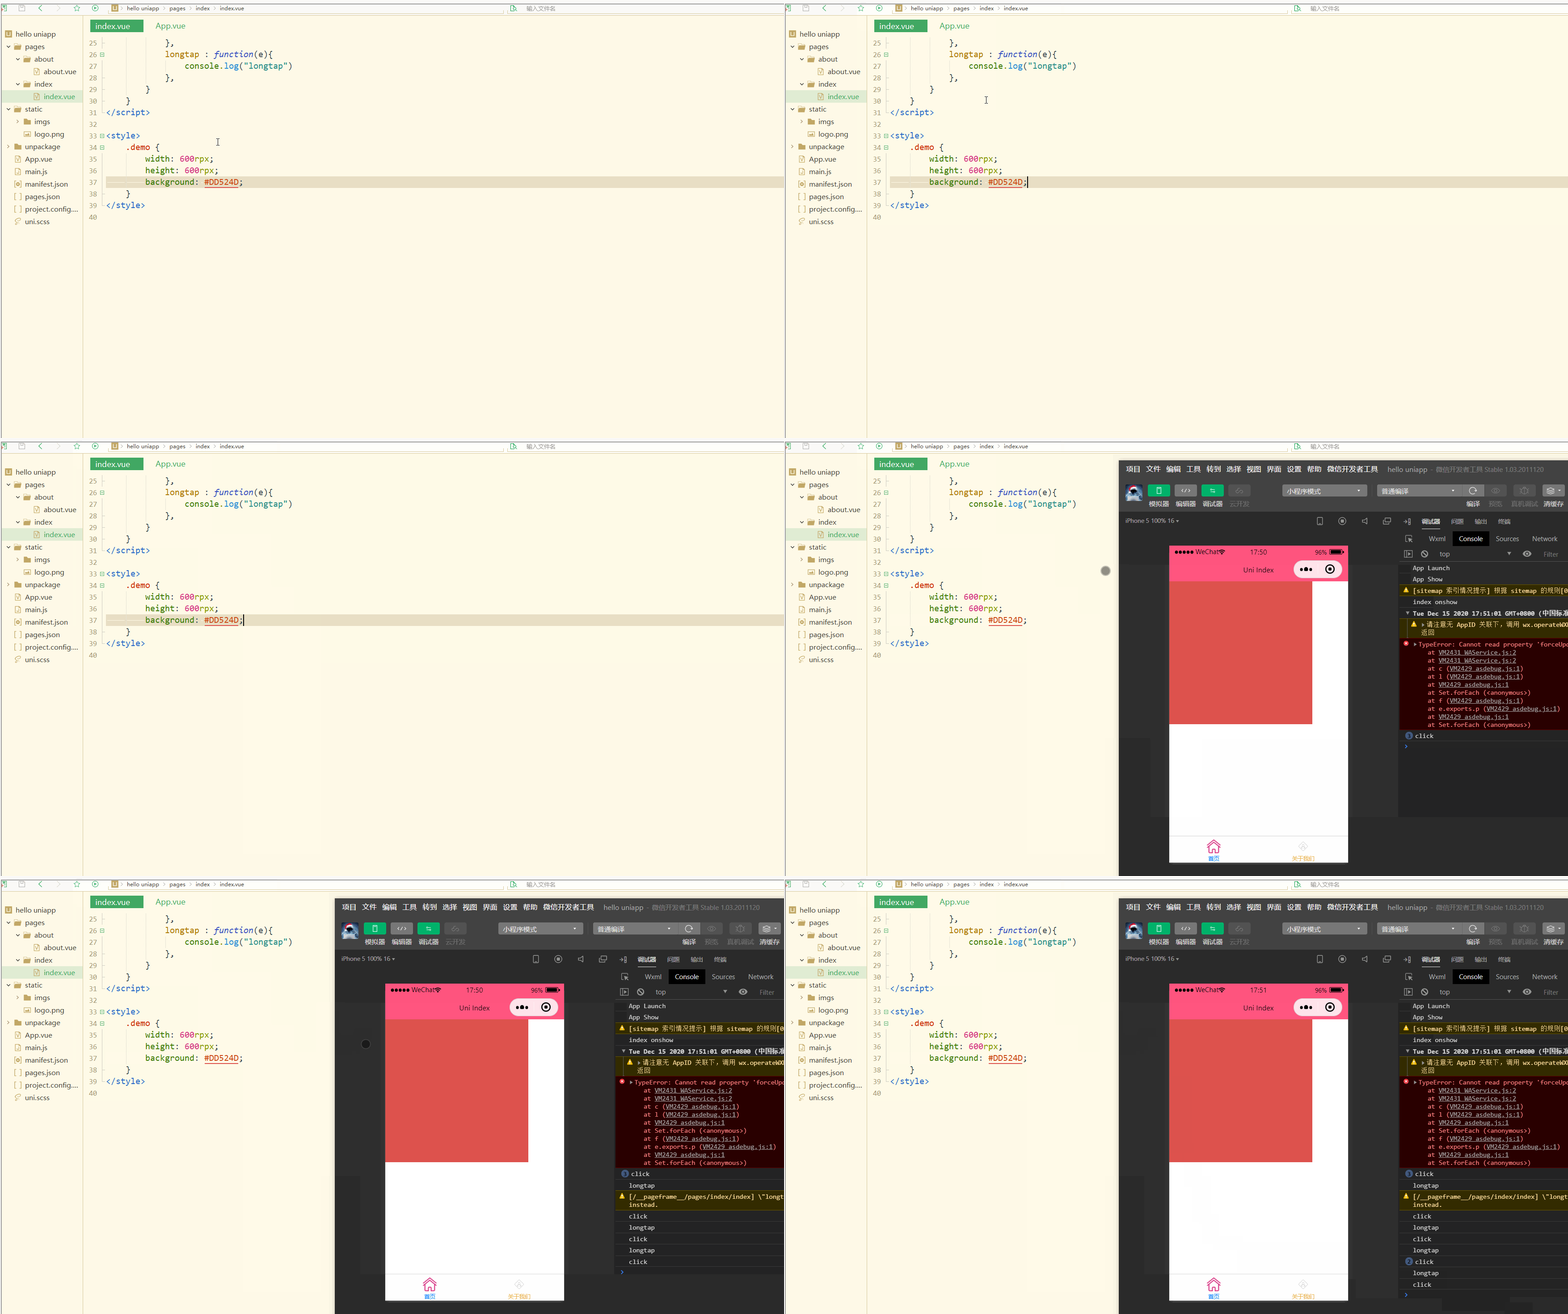
可以看到,在进行点击和长按时,会触发不同的事件、执行不同的操作。
可以在小程序中观察对应事件对象,并利用此对象获取更多信息。
3.事件传参
在触发事件时,还可以传入动态参数。
如下:
1<template>
2	<view>
3		<view v-for="(item, index) in students" class="persons" @click="menuClick" v-bind:id="index">{{index}} - {{item.name}}</view>
4	</view>
5</template>
6<script>
7	var _self;
8	export default {
9		data() {
10			return {
11				students: [{
12						name: "张三",
13						age: 18
14					},
15					{
16						name: "李四",
17						age: 20
18					}
19				]
20			}
21		},
22		onLoad() {
23			_self = this
24		},
25		onShow() {
26			console.log('index onshow')
27		},
28		onHide() {
29			console.log('index onhide')
30		},
31		methods: {
32			menuClick: function(e) {
33				console.log(e);
34				console.log(e.target.id);
35			},
36		}
37	}
38</script>
39
40<style>
41	.demo {
42		width: 600rpx;
43		height: 600rpx;
44		background: #DD524D;
45	}
46</style>
47
显示:
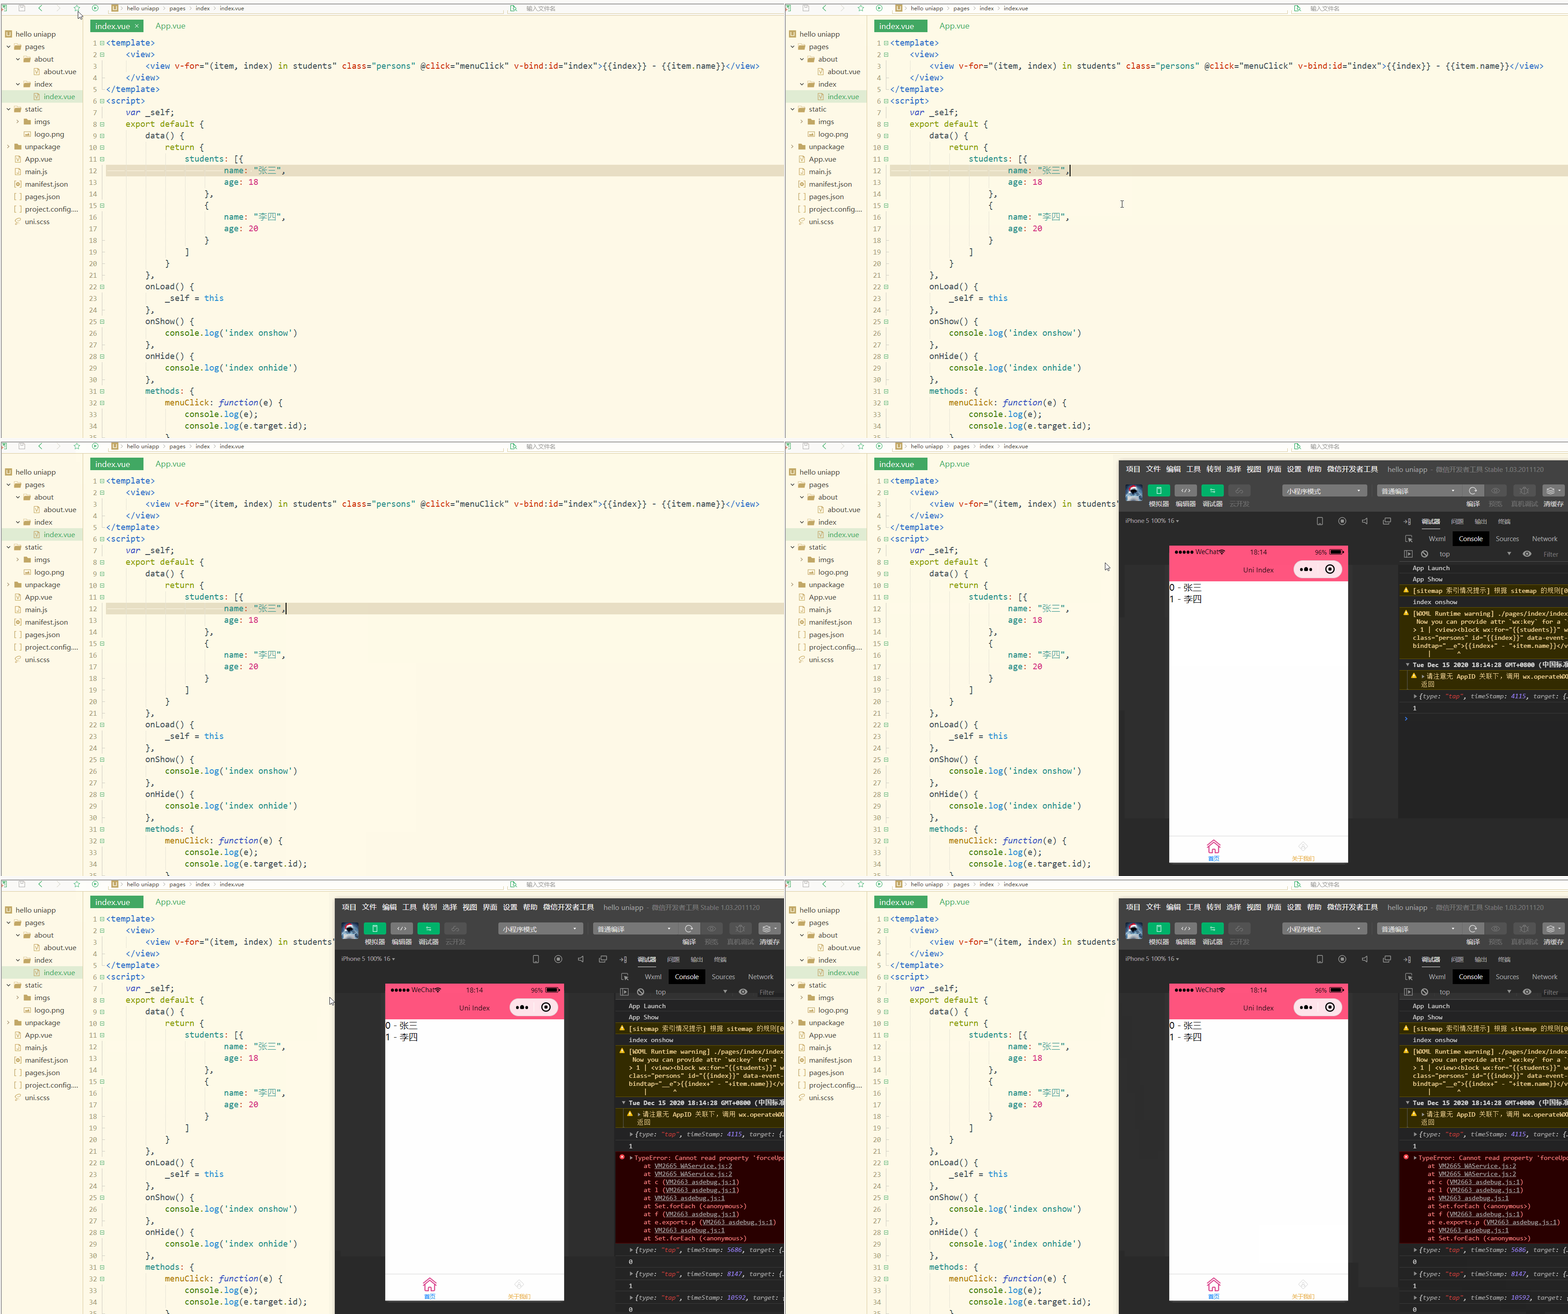
可以看到,在进行点击时,控制台打印出了事件对象和e.target.id的值。
再如:
1<template>
2	<view>
3		<view class="demo" id="outid" @click="clickTest" @longtap="longtap">
4			<view id="inid" style="width: 400rpx;height: 400rpx;background: #007AFF;"></view>
5		</view>
6	</view>
7</template>
8<script>
9	var _self;
10	export default {
11		data() {
12			return {
13			}
14		},
15		onLoad() {
16			_self = this
17		},
18		onShow() {
19			console.log('index onshow')
20		},
21		onHide() {
22			console.log('index onhide')
23		},
24		methods: {
25			clickTest : function(e){
26				console.log(e.currentTarget.id)
27				console.log(e.target.id)
28			},
29			longtap : function(e){
30				console.log("longtap")
31			},
32		}
33	}
34</script>
35
36<style>
37	.demo {
38		width: 600rpx;
39		height: 600rpx;
40		background: #DD524D;
41	}
42</style>
43
显示:

可以看到,在点击外部红色区域时,打印的两个id值相同;
而在点击内部蓝色区域时,e.target变为内部的view元素,所以打印出的也是inid,所以在使用属性传参时尽量使用e.currentTarget。
总结
在uni-app中,不论是对于数据(变量),还是对于以class或style定义的样式,亦或定义的事件,都可以进行动态绑定、同步变化,这些特性有利于更高效地开发出所需功能,大大降低了开发成本。
本文原文首发来自博客专栏移动应用开发,由本人转发至https://www.helloworld.net/p/D0lLu3LcLMCVO,其他平台均属侵权,可点击https://blog.csdn.net/CUFEECR/article/details/111240593查看原文,也可点击https://blog.csdn.net/CUFEECR浏览更多优质原创内容。