
前言
话不多说,这篇文章主要讲述如何从0到1搭建一款适用于Vue.js的自定义配置视频播放器。我们平时在PC端网站上观看视频时,会看到有很多丰富样式的视频播放器,而我们自己写的video标签样式却是那么丑。其实像那些网站都是基于原生video标签进行开发的,只不过还得适当加工一下,才会有我们所看到的漂亮的视频播放器。
开发
在具体开发之前,我们需要明确我们需要做什么?
-
封装一个可配置的视频播放器;
-
适用于Vue.js;
-
应用于PC端网站;
-
视频播放器常用的功能必须要有;
-
发布到Npm;
好,明确了以上几点之后,我们就开始敲代码了。
一、搭建一个基础的UI组件
这里的UI组件你可以理解成我们搭建一个静态页面,就是把视频播放器简单地搭建起来,有一个基础的模型。
1`<template>
2  <div
3    class="video-box"
4  >
5    <video
6      class="video-player"
7    ></video>
8    <div class="bottom-tool">
9      <div class="pv-bar">
10        <div class="pv-played"></div>
11        <div class="pv-dot"></div>
12      </div>
13      <div class="pv-controls">
14        <div class="pc-con-l">
15          <div class="play-btn">
16            <i class="iconfont icon-bofang"></i>
17            <i class="iconfont icon-zanting hide"></i>
18          </div>
19          <div class="pv-time">
20            <span class="pv-currentTime">00:00:00</span>
21            <span>/</span>
22            <span class="pv-duration">00:00:00</span>
23          </div>
24        </div>
25        <div class="pc-con-r">
26          <div class="pv-listen ml">
27            <div class="pv-yl">
28              <p class="pv-ol"></p>
29              <p class="pv-bg"></p>
30            </div>
31            <div class="pv-iconyl">
32              <i class="iconfont icon-yinliang"></i>
33              <i class="iconfont icon-jingyin hide"></i>
34            </div>
35          </div>
36          <div class="pv-speed ml">
37            <p class="pv-spnum">1x</p>
38            <ul class="selectList">
39              <li>0.5x</li>
40              <li>1x</li>
41              <li>1.25x</li>
42              <li>1.5x</li>
43              <li>2x</li>
44            </ul>
45          </div>
46          <div class="pv-screen ml">
47            <i class="iconfont icon-quanping"></i>
48            <i class="iconfont icon-huanyuan hide"></i>
49          </div>
50          <div class="pv-screens ml">
51            <i class="iconfont icon-shipinquanping"></i>
52            <i class="iconfont icon-tuichuquanping hide"></i>
53          </div>
54        </div>
55      </div>
56    </div>
57  </div>
58</template>
59
60<script>
61export default {
62  name: "VamVideo"
63};
64</script>
65
66<style scoped>
67@import "./css/iconfont/iconfont.css";
68@import "./css/index.css";
69</style>
70`
样式文件我这里就不展示了,我会在文末给出源码地址。

二、开发逻辑执行文件
最最关键的部分莫过于逻辑文件了,我这里使用构造函数的方式。
1``// eslint-disable-next-line no-unused-vars
2function VamVideo(vp, attrObj, styleObj) {
3  // 初始化
4  this.timer = null;
5  this.disX = 0;
6  this.disL = 0;
7  this.isPageFullScreen = false;
8  // 处理视频属性
9  for (const key in attrObj) {
10    if (Object.hasOwnProperty.call(attrObj, key) && key !== "controls") {
11      $(".video-player").setAttribute(key, attrObj[key]);
12    }
13  }
14  // 处理视频样式
15  for (const key in styleObj) {
16    if (Object.hasOwnProperty.call(styleObj, key)) {
17      $(".video-box").style[`${key}`] = styleObj[key];
18      key === "width"
19        ? (this.vbw = styleObj.width)
20        : (this.vbw = vp.offsetWidth);
21      key === "height"
22        ? (this.vbh = styleObj.height)
23        : (this.vbh = vp.offsetHeight);
24    }
25  }
26  // 封装获取元素节点
27  function $(el) {
28    return document.querySelector(el);
29  }
30  // 处理当前时间
31  function nowTime() {
32    $(".pv-currentTime").innerHTML = changeTime($(".video-player").currentTime);
33    let scale = $(".video-player").currentTime / $(".video-player").duration;
34    let w = $(".pv-bar").offsetWidth - $(".pv-dot").offsetWidth;
35    $(".pv-dot").style.left = scale * w + "px";
36    $(".pv-played").style.width = scale * w + "px";
37  }
38  // 处理时分秒
39  function changeTime(iNum) {
40    let iN = parseInt(iNum);
41    const iH = toZero(Math.floor(iN / 3600));
42    const iM = toZero(Math.floor((iN % 3600) / 60));
43    const iS = toZero(Math.floor(iN % 60));
44    return iH + ":" + iM + ":" + iS;
45  }
46  // 补0
47  function toZero(num) {
48    if (num <= 9) {
49      return "0" + num;
50    } else {
51      return "" + num;
52    }
53  }
54  // 元素显示
55  this.showEl = function (el) {
56    $(el).style.display = "block";
57  };
58  // 元素隐藏
59  this.hideEl = function (el) {
60    $(el).style.display = "none";
61  };
62  // 动态设置视频宽高
63  this.setVp = function (w, h) {
64    const _w = String(w).indexOf("px") != -1 ? w : w + "px";
65    const _h = String(h).indexOf("px") != -1 ? h : h + "px";
66    $(".video-player").style.width = _w;
67    $(".video-player").style.height = _h;
68    $(".video-box").style.width = _w;
69    $(".video-box").style.height = _h;
70    $(".pv-bar").style.width = _w;
71  };
72  // 底部控制栏(显示/隐藏)
73  this.bottomTup = function () {
74    $(".bottom-tool").style.bottom = "0px";
75  };
76  this.bottomTdow = function () {
77    $(".bottom-tool").style.bottom = "-45px";
78  };
79  // 播放/暂停
80  this.usePlay = function () {
81    if ($(".video-player").paused) {
82      $(".video-player").play();
83      this.hideEl(".icon-bofang");
84      this.showEl(".icon-zanting");
85      nowTime();
86      this.timer = setInterval(nowTime, 1000);
87    } else {
88      $(".video-player").pause();
89      this.showEl(".icon-bofang");
90      this.hideEl(".icon-zanting");
91      clearInterval(this.timer);
92    }
93  };
94  this.isplay = function () {
95    this.usePlay();
96  };
97  // 总时长
98  this.useOnplay = function () {
99    $(".pv-duration").innerHTML = changeTime($(".video-player").duration);
100  };
101  // 播放结束
102  this.useEnd = function () {
103    this.showEl(".icon-bofang");
104    this.hideEl(".icon-zanting");
105  };
106  // 静音
107  this.useVolume = function () {
108    if ($(".video-player").muted) {
109      $(".video-player").volume = 1;
110      this.hideEl(".icon-jingyin");
111      this.showEl(".icon-yinliang");
112      $(".video-player").muted = false;
113    } else {
114      $(".video-player").volume = 0;
115      this.showEl(".icon-jingyin");
116      this.hideEl(".icon-yinliang");
117      $(".video-player").muted = true;
118    }
119  };
120  // 页面全屏
121  this.pageFullScreen = function () {
122    const w = document.documentElement.clientWidth || document.body.clientWidth;
123    const h =
124      document.documentElement.clientHeight || document.body.clientHeight;
125    this.isPageFullScreen = !this.isPageFullScreen;
126    if (this.isPageFullScreen) {
127      this.setVp(w, h);
128      this.hideEl(".icon-quanping");
129      this.showEl(".icon-huanyuan");
130      this.hideEl(".pv-screens");
131    } else {
132      this.setVp(this.vbw, this.vbh);
133      this.showEl(".icon-quanping");
134      this.hideEl(".icon-huanyuan");
135      this.showEl(".pv-screens");
136    }
137  };
138  // 窗口全屏
139  this.fullScreen = function () {
140    const el = $(".video-box");
141    const isFullscreen =
142      document.fullScreen ||
143      document.mozFullScreen ||
144      document.webkitIsFullScreen;
145    if (!isFullscreen) {
146      this.showEl(".icon-tuichuquanping");
147      this.hideEl(".icon-shipinquanping");
148      this.hideEl(".pv-screen");
149      (el.requestFullscreen && el.requestFullscreen()) ||
150        (el.mozRequestFullScreen && el.mozRequestFullScreen()) ||
151        (el.webkitRequestFullscreen && el.webkitRequestFullscreen()) ||
152        (el.msRequestFullscreen && el.msRequestFullscreen());
153    } else {
154      this.showEl(".icon-shipinquanping");
155      this.hideEl(".icon-tuichuquanping");
156      this.showEl(".pv-screen");
157      document.exitFullscreen
158        ? document.exitFullscreen()
159        : document.mozCancelFullScreen
160        ? document.mozCancelFullScreen()
161        : document.webkitExitFullscreen
162        ? document.webkitExitFullscreen()
163        : "";
164    }
165  };
166  // 播放进度条
167  this.useTime = function (ev) {
168    let ev1 = ev || window.event;
169    this.disX = ev1.clientX - $(".pv-dot").offsetLeft;
170    document.onmousemove = (ev) => {
171      let ev2 = ev || window.event;
172      let L = ev2.clientX - this.disX;
173      if (L < 0) {
174        L = 0;
175      } else if (L > $(".pv-bar").offsetWidth - $(".pv-dot").offsetWidth) {
176        L = $(".pv-bar").offsetWidth - $(".pv-dot").offsetWidth;
177      }
178      $(".pv-dot").style.left = L + "px";
179      let scale = L / ($(".pv-bar").offsetWidth - $(".pv-dot").offsetWidth);
180      $(".video-player").currentTime = scale * $(".video-player").duration;
181      nowTime();
182    };
183    document.onmouseup = function () {
184      document.onmousemove = null;
185    };
186    return false;
187  };
188  // 音量控制
189  this.useListen = function (ev) {
190    let ev1 = ev || window.event;
191    this.disL = ev1.clientX - $(".pv-ol").offsetLeft;
192    document.onmousemove = (ev) => {
193      let ev2 = ev || window.event;
194      let L = ev2.clientX - this.disL;
195      if (L < 0) {
196        L = 0;
197      } else if (L > $(".pv-yl").offsetWidth - $(".pv-ol").offsetWidth) {
198        L = $(".pv-yl").offsetWidth - $(".pv-ol").offsetWidth;
199      }
200      $(".pv-ol").style.left = L + "px";
201      let scale = L / ($(".pv-yl").offsetWidth - $(".pv-ol").offsetWidth);
202      $(".pv-bg").style.width = $(".pv-ol").offsetLeft + "px";
203      if ($(".pv-ol").offsetLeft !== 0) {
204        this.showEl(".icon-yinliang");
205        this.hideEl(".icon-jingyin");
206      } else {
207        this.showEl(".icon-jingyin");
208        this.hideEl(".icon-yinliang");
209      }
210      $(".video-player").volume = scale;
211    };
212    document.onmouseup = function () {
213      document.onmousemove = null;
214    };
215    return false;
216  };
217  // 播放速度
218  this.useSpnum = function (e) {
219    let ev = e || window.event;
220    $(".pv-spnum").innerText = ev.target.innerText;
221    const value = ev.target.innerText.replace("x", "");
222    $(".video-player").playbackRate = value;
223  };
224}
225// 导出
226export default VamVideo;
227``
三、整合组件逻辑
开发完UI组件以及逻辑组件了,那我们接下来就是将两者结合起来。
1`<template>
2  <div
3    class="video-box"
4    @mouseenter="vp.bottomTup()"
5    @mouseleave="vp.bottomTdow()"
6  >
7    <video
8      class="video-player"
9      @canplay="vp.useOnplay()"
10      @ended="vp.useEnd()"
11      @click="vp.isplay()"
12    ></video>
13    <div class="bottom-tool">
14      <div class="pv-bar">
15        <div class="pv-played"></div>
16        <div class="pv-dot" @mousedown="vp.useTime()"></div>
17      </div>
18      <div class="pv-controls">
19        <div class="pc-con-l">
20          <div class="play-btn" @click="vp.usePlay()">
21            <i class="iconfont icon-bofang"></i>
22            <i class="iconfont icon-zanting hide"></i>
23          </div>
24          <div class="pv-time">
25            <span class="pv-currentTime">00:00:00</span>
26            <span>/</span>
27            <span class="pv-duration">00:00:00</span>
28          </div>
29        </div>
30        <div class="pc-con-r">
31          <div class="pv-listen ml">
32            <div class="pv-yl">
33              <p class="pv-ol" @mousedown="vp.useListen()"></p>
34              <p class="pv-bg"></p>
35            </div>
36            <div class="pv-iconyl" @click="vp.useVolume()">
37              <i class="iconfont icon-yinliang"></i>
38              <i class="iconfont icon-jingyin hide"></i>
39            </div>
40          </div>
41          <div class="pv-speed ml">
42            <p class="pv-spnum">1x</p>
43            <ul class="selectList" @click="vp.useSpnum()">
44              <li>0.5x</li>
45              <li>1x</li>
46              <li>1.25x</li>
47              <li>1.5x</li>
48              <li>2x</li>
49            </ul>
50          </div>
51          <div class="pv-screen ml" @click="vp.pageFullScreen()">
52            <i class="iconfont icon-quanping"></i>
53            <i class="iconfont icon-huanyuan hide"></i>
54          </div>
55          <div class="pv-screens ml" @click="vp.fullScreen()">
56            <i class="iconfont icon-shipinquanping"></i>
57            <i class="iconfont icon-tuichuquanping hide"></i>
58          </div>
59        </div>
60      </div>
61    </div>
62  </div>
63</template>
64
65<script>
66import VamVideo from "./vp.js";
67export default {
68  name: "VamVideo",
69  data: () => ({
70    vp: null,
71    defaultStyle: {
72      width: "1200px",
73      height: "600px",
74    },
75  }),
76  props: {
77    properties: {
78      type: Object,
79    },
80    videoStyle: {
81      type: Object,
82    },
83  },
84  mounted() {
85    this.vp = new VamVideo(
86      document.querySelector(".video-box"),
87      this.properties,
88      Object.keys(this.videoStyle).length === 0
89        ? this.defaultStyle
90        : this.videoStyle
91    );
92  },
93};
94</script>
95
96<style scoped>
97@import "./css/iconfont/iconfont.css";
98@import "./css/index.css";
99</style>
100`
首先我们引入了之前开发完成的逻辑文件vp.js,然后在mounted方法中对类VamVideo进行实例化,赋给this.vp。传给类的几个参数分别是最外层节点、视频属性、视屏样式。props属性中的properties为视频属性,videoStyle为视频样式。
四、发布组件
完成了以上几个步骤的开发,我们需要将我们完成的组件发布到Npm上。
1. 初始化
创建一个空文件夹,我们可以取名叫v-vamvideo。在此文件夹下键入命令:
1`npm init -y
2`
因为我们还需要修改,所以直接创建package.json文件。
1`{
2  "name": "vue-vam-video",
3  "version": "1.0.0",
4  "description": "Vue.js Custom video components",
5  "main": "index.js",
6  "author": "maomincoding",
7  "keywords": ["video"],
8  "license": "ISC",
9  "private": false
10}
11`
-
name:组件名 -
author:Npm用户名 -
main:入口文件 -
version:版本号,更新组件需要用到这个字段 -
description:描述 -
license的值按照以上即可 -
keywords为:搜索的关键词 -
private设为false, 开源因此需要将这个字段改为false
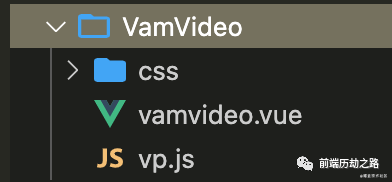
2. 引入组件
将我们之前封装好的组件复制到v-vamvide这个文件夹中,下图就是我们之前封装好的组件文件目录。
3. 创建入口文件
我们要发布到Npm上需要一个入口文件,我们在v-vamvide根目录下创建一个入口文件,我们这里叫做index.js。
1`// 引入组件
2import VamVideo from "./VamVideo/vamvideo.vue";
3// 组件需要添加name属性,代表注册的组件名称
4VamVideo.install = (Vue) => Vue.component(VamVideo.name, VamVideo); //注册组件
5
6export default VamVideo;
7`
4. 创建一个说明文档
发布到Npm上,用户需要知道这个组件干什么的?怎么用?我们在v-vamvide根目录下创建一个说明文档,取名为README.md
1``# vue-vamvideo
2> Vue.js Custom video components
3
4## Using documents
51. Introducing components
62. configuration parameter
7- `properties`: Video properties.
8- `videoStyle`: Video style.
9
10These two parameters need to be set separately.
11***
12<template>
13  <div id="app">
14 <vam-video :properties="videoOption.properties" :videoStyle="videoOption.videoStyle"></vam-video>
15  </div>
16</template>
17
18<script>
19export default {
20  name: "Index",
21  data: () => ({
22 videoOption: {
23 properties: {
24 poster: require("./img/bg.png"),
25 src:
26 "https://mos-vod-drcn.dbankcdn.cn/P_VT/video_injection/A91343E9D/v3/9AB0A7921049102362779584128/MP4Mix_H.264_1920x1080_6000_HEAAC1_PVC_NoCut.mp4",
27 preload: "auto",
28 loop: "loop",
29 // autoplay:"autoplay",
30 // muted:true,
31 // controls:"controls"
32 },
33 videoStyle: {
34 // width: "1200px",
35 // height: "600px",
36 },
37 },
38  })
39};
40</script>
41***
42``
我们离成功很近了,所以谢谢你可以阅读到这。源码地址:https://github.com/maomincoding/vue-vam-video
5. 发布
开始操作以下步骤之前,你需要把命令行切换到项目根目录下(也就是这里的v-vamvide这个文件夹)。
- 查看登录源是否是
http://registry.npmjs.org
1`npm config get registry
2`
如果不是,切换登录源。
1`npm config set registry=http://registry.npmjs.org
2`
- 登录Npm
1`npm login
2`
相继输入用户名、密码、邮箱。回车出现Logged in as maomincoding on http://registry.npmjs.org,那么就登录成功了。
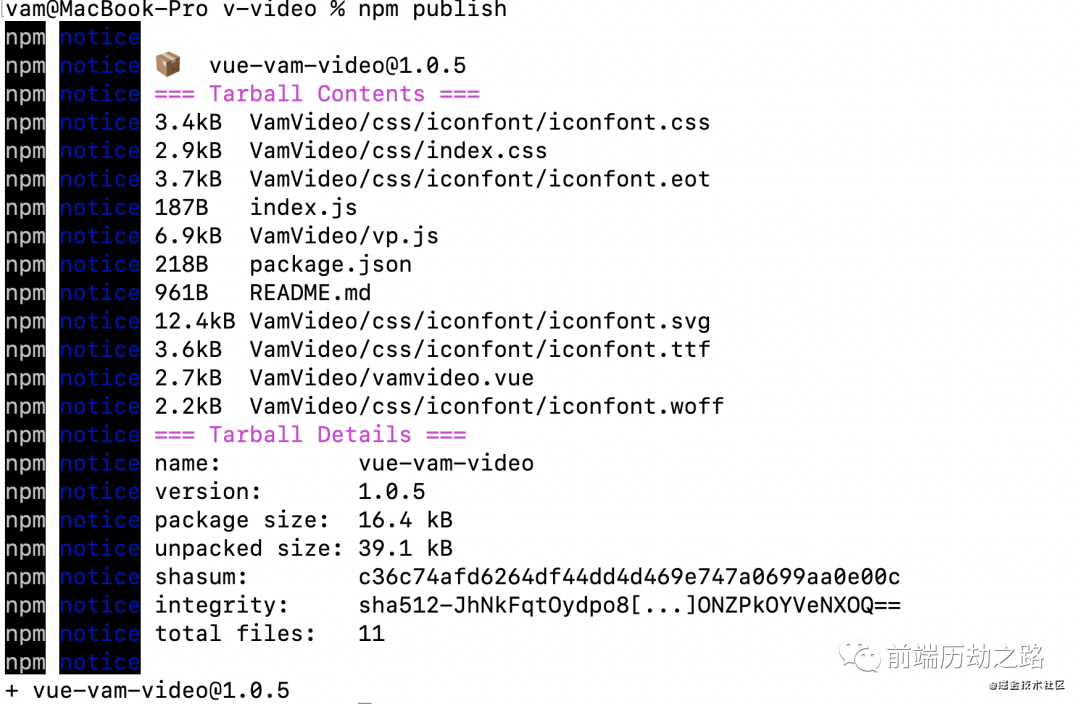
- 上传发布到Npm
1`npm publish
2`
五、安装组件
既然我们已经发布到Npm上,我们可以去Npm网站上看下效果。
1`https://www.npmjs.com/package/vue-vam-video
2`
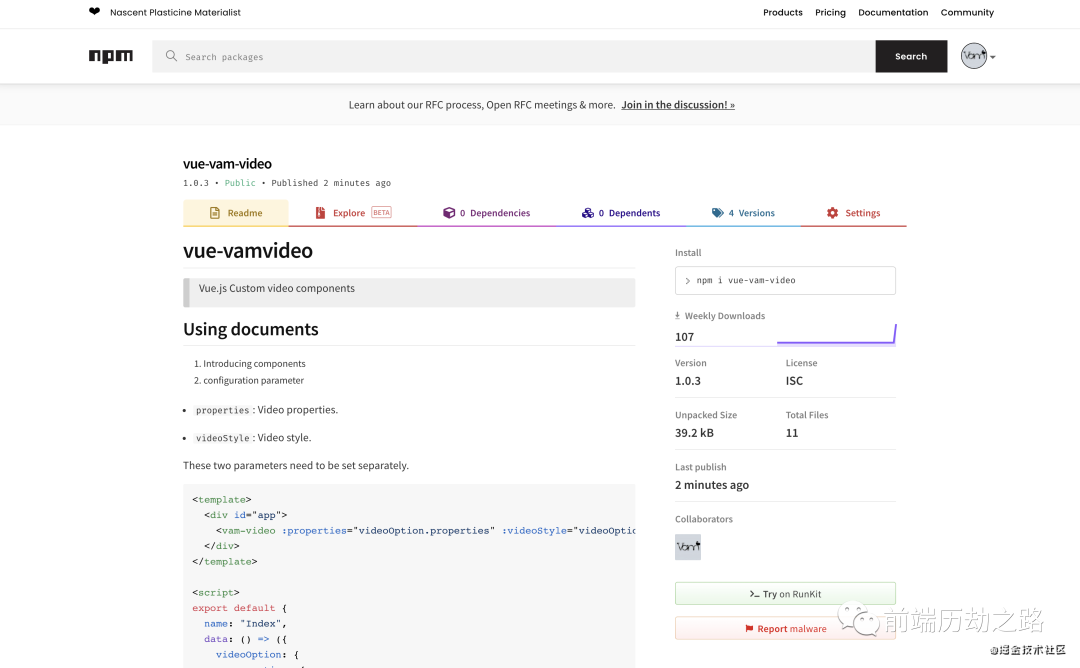
发布组件成功了,那么我们放在Vue工程上测试一下。
- 安装组件
1`npm i vue-vam-video
2`
- 注册组件
全局注册
1`import Vue from 'vue'
2import App from './App.vue'
3// 全局注册
4import VamVideo from "vue-vam-video";
5Vue.use(VamVideo);
6
7Vue.config.productionTip = false
8
9new Vue({
10  render: h => h(App),
11}).$mount('#app')
12
13`
`<template>
<div id="app">
<vam-video :properties="videoOption.properties" :videoStyle="videoOption.videoStyle"></vam-video>
</div>
</template>
`
1
2**局部注册**
3
`<template>
<div id="app">
<vam-video :properties="videoOption.properties" :videoStyle="videoOption.videoStyle"></vam-video>
</div>
</template>
`
1 23. 效果 大功告成! 3 4 5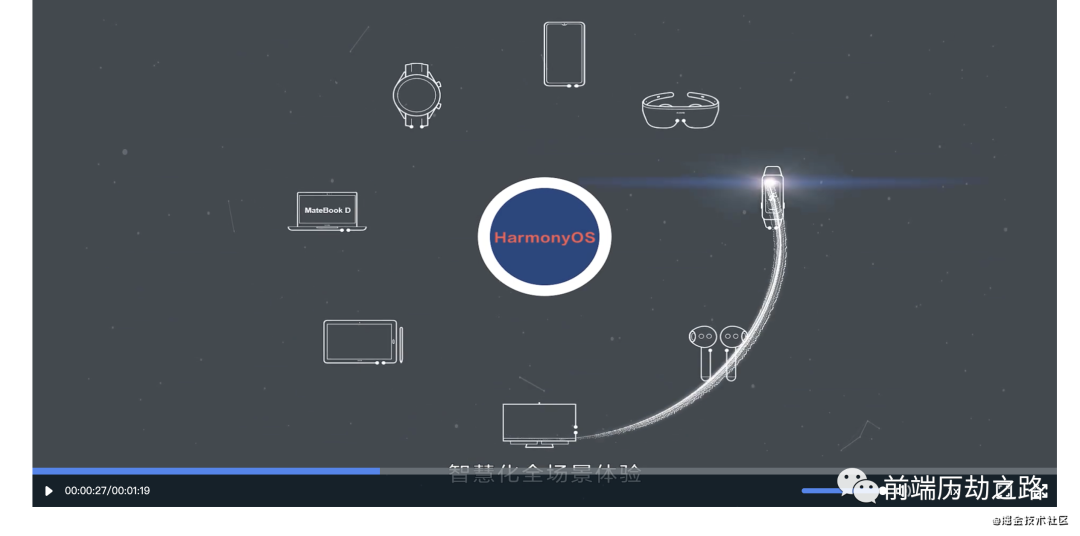 6 7结语 8-- 9 10谢谢阅读,如果觉得有用,不要忘记一键三连哦~ 11 12> * 欢迎关注我的公众号**前端历劫之路** 13> 14> * 回复关键词**电子书**,即可获取12本前端热门电子书。 15> 16> * 回复关键词**红宝书第4版**,即可获取最新《JavaScript高级程序设计》(第四版)电子书。 17> 18> * 关注公众号后,点击下方菜单即可加我微信,我拉拢了很多IT大佬,创建了一个技术交流、文章分享群,期待你的加入。 19> 20> * 作者:**Vam的金豆之路** 21> 22> * 微信公众号:**前端历劫之路** 23> 24> 25>  26 27 28 29\- END - 30 31 32 33本文转转自微信公众号**前端历劫之路**原创[https://mp.weixin.qq.com/s/vrHGiurc0gIJXG7n9oUDGQ](https://mp.weixin.qq.com/s/vrHGiurc0gIJXG7n9oUDGQ),如有侵权,请联系删除。