
前言 🌱
如果你使用过 Deno、Go 或者配置过 Android Studio,那么你一定对配置环境变量不陌生。那么如果我们自己写了一个脚本或者命令行工具,如何分享给朋友们玩呢?最简单的当然是直接把脚本放出去,供别人手动下载和手动配置环境变量。但这既不优雅,也不利于传播,本文就是研读了 Deno 的安装机制后,总结出的一套可用的二进制可执行文件分发教程。
Deno 在 v1.7.0 支持了 交叉编译,本文就以 Deno 实现一个简单的 CLI 工具 并分发给 MacOS、Linux、Windows 用户。
Deno 安装方式分析
从官网中,我们可以看到 Deno 有多种安装方式,主要有:
- With Shell(Linux/MacOS):
curl -fsSL https://deno.land/x/install/install.sh | sh - With PowerShell(Windows):
iwr https://deno.land/x/install/install.ps1 -useb | iex - With Homebrew:
brew install deno
并且还可以安装特定版本:
- With Shell:
curl -fsSL https://deno.land/x/install/install.sh | sh -s v1.0.0 - With PowerShell:
$v="1.0.0"; iwr https://deno.land/x/install/install.ps1 -useb | iex
其中 Homebrew 方式需要将安装脚本合并到 homebrew-core,但是我们的脚本一般比较小众,可以参考 不会吧?不会吧!还有人不会发 Homebrew 包? 发布到自己的 tap 中。对于 Shell 和 PowerShell 是我们本文要研究的。
准备一个项目
我这边已经准备好了一个简单的 Deno 项目 youngjuning/seve。如果你对 Deno 开发感兴趣,可以阅读 Deno 从入门到跑路 | 🏆 技术专题第一期征文 入门。
编译项目
我们可以使用 deno compile --unstable --target=<target> 命令把我们的项目编译成二进制可执行文件,可选的 target 有:
- x86_64-unknown-linux-gnu
- x86_64-pc-windows-msvc
- x86_64-apple-darwin
- aarch64-apple-darwin
我们编写一个 compile.sh 来批量编译出各个平台的产物(记得执行 chmod +x 755 compile.sh 赋予脚本可执行权限)。
1#!/bin/bash
2name="seve"
3deno compile --unstable --lite --target=x86_64-unknown-linux-gnu index.ts
4zip -o -q -m ${name}-x86_64-unknown-linux-gnu.zip ${name}
5
6deno compile --unstable --lite --target=x86_64-pc-windows-msvc -o ./${name}.exe index.ts
7zip -o -q -m ${name}-x86_64-pc-windows-msvc.zip ${name}.exe
8
9deno compile --unstable --lite --target=x86_64-apple-darwin index.ts
10zip -o -q -m ${name}-x86_64-apple-darwin.zip ${name}
11
12deno compile --unstable --lite --target=aarch64-apple-darwin index.ts
13zip -o -q -m ${name}-aarch64-apple-darwin.zip ${name}
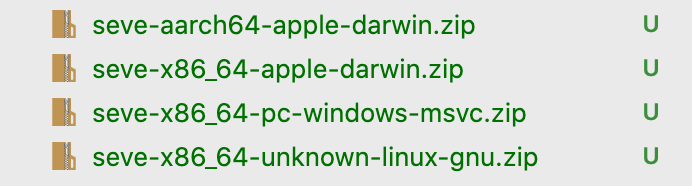
以上脚本会生成以下文件,我们不需要把它们上传到代码库中,所以请在 .gitignore 中忽略它们。
Windows 安装脚本
首先我们来看下 deno_install 中的脚本 install.ps1:
1#!/usr/bin/env pwsh
2# Copyright 2018 the Deno authors. All rights reserved. MIT license.
3# TODO(everyone): Keep this script simple and easily auditable.
4
5$ErrorActionPreference = 'Stop'
6
7if ($v) {
8  $Version = "v${v}"
9}
10if ($args.Length -eq 1) {
11  $Version = $args.Get(0)
12}
13
14$DenoInstall = $env:DENO_INSTALL
15$BinDir = if ($DenoInstall) {
16  "$DenoInstall\bin"
17} else {
18  "$Home\.deno\bin"
19}
20
21$DenoZip = "$BinDir\deno.zip"
22$DenoExe = "$BinDir\deno.exe"
23$Target = 'x86_64-pc-windows-msvc'
24
25# GitHub requires TLS 1.2
26[Net.ServicePointManager]::SecurityProtocol = [Net.SecurityProtocolType]::Tls12
27
28$DenoUri = if (!$Version) {
29  "https://github.com/denoland/deno/releases/latest/download/deno-${Target}.zip"
30} else {
31  "https://github.com/denoland/deno/releases/download/${Version}/deno-${Target}.zip"
32}
33
34if (!(Test-Path $BinDir)) {
35  New-Item $BinDir -ItemType Directory | Out-Null
36}
37
38Invoke-WebRequest $DenoUri -OutFile $DenoZip -UseBasicParsing
39
40if (Get-Command Expand-Archive -ErrorAction SilentlyContinue) {
41  Expand-Archive $DenoZip -Destination $BinDir -Force
42} else {
43  if (Test-Path $DenoExe) {
44    Remove-Item $DenoExe
45  }
46  Add-Type -AssemblyName System.IO.Compression.FileSystem
47  [IO.Compression.ZipFile]::ExtractToDirectory($DenoZip, $BinDir)
48}
49
50Remove-Item $DenoZip
51
52$User = [EnvironmentVariableTarget]::User
53$Path = [Environment]::GetEnvironmentVariable('Path', $User)
54if (!(";$Path;".ToLower() -like "*;$BinDir;*".ToLower())) {
55  [Environment]::SetEnvironmentVariable('Path', "$Path;$BinDir", $User)
56  $Env:Path += ";$BinDir"
57}
58
59Write-Output "Deno was installed successfully to $DenoExe"
60Write-Output "Run 'deno --help' to get started"
这是 powershell 文件,这里不做过多语法解释,我们看其中的核心代码:
1...
2$Target = 'x86_64-pc-windows-msvc'
3...
4$DenoUri = if (!$Version) {
5  "https://github.com/denoland/deno/releases/latest/download/deno-${Target}.zip"
6} else {
7  "https://github.com/denoland/deno/releases/download/${Version}/deno-${Target}.zip"
8}
从这个可以看出,deno 的安装包是以 zip 的形式存在 GitHub Release 的,并且依托 Tag 实现了版本管理。下图便是 Deno 1.7.1 release 的附件:
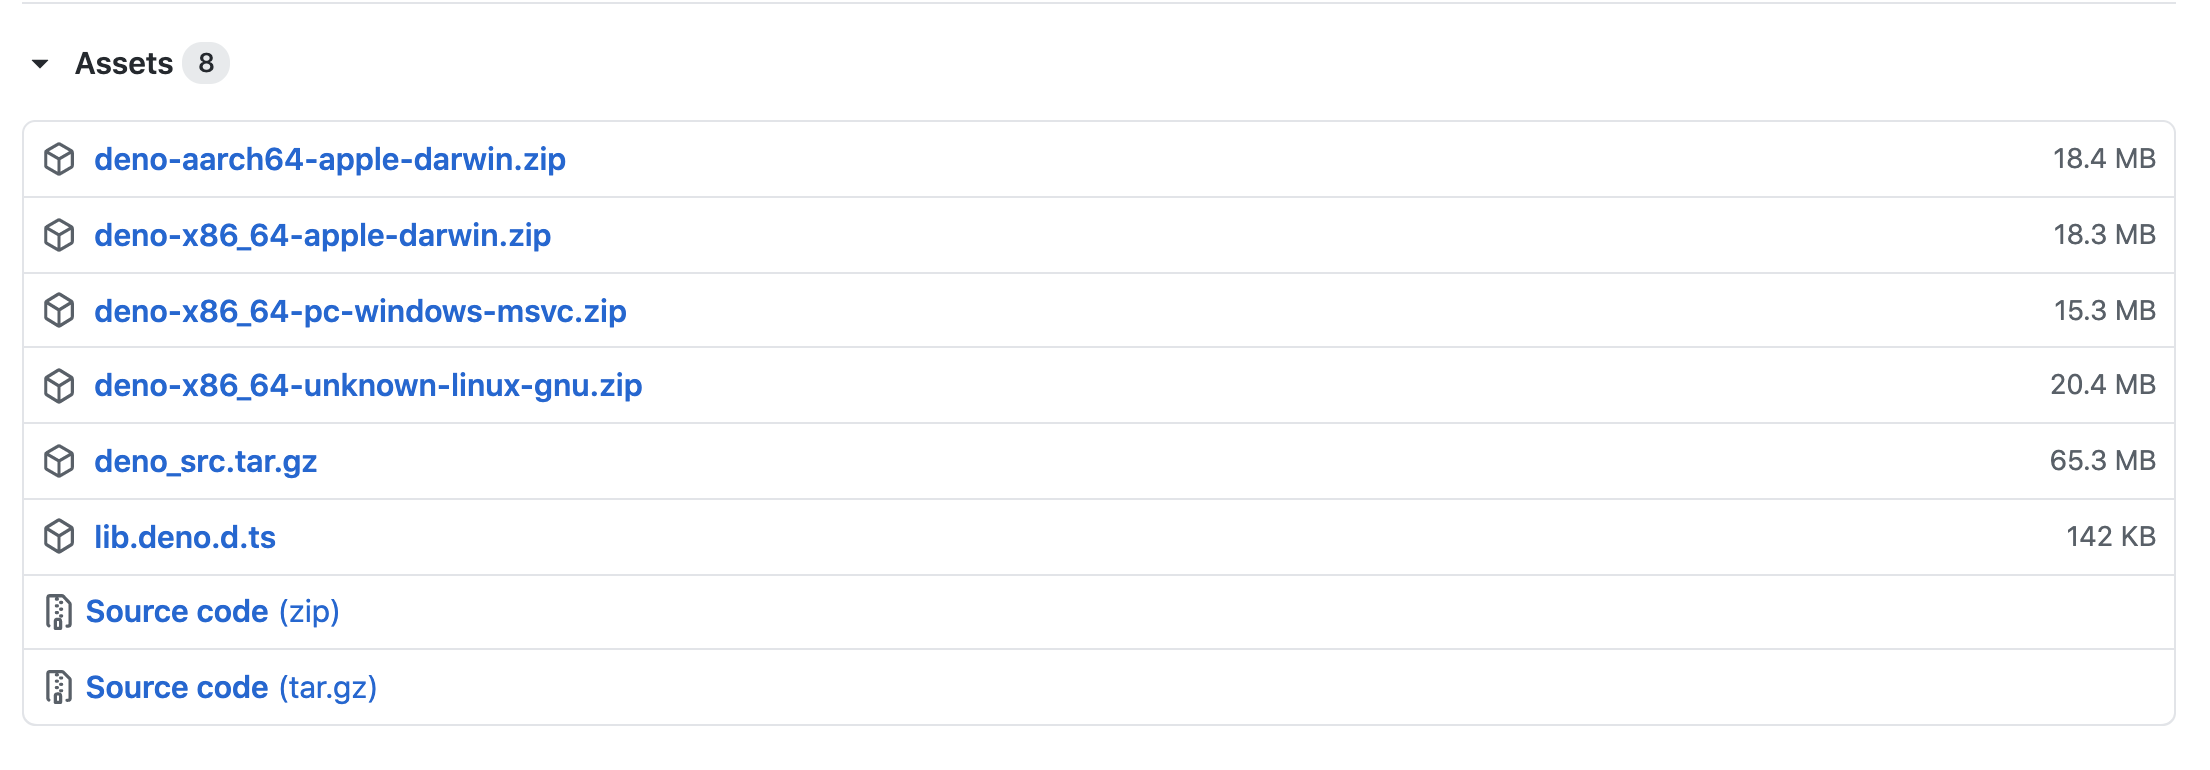
Deno 从构建到发布这些步骤全都是 GitHub Action 自动实现的,感兴趣的我可以再写一篇解析 Deno 的自动化流程。
自定义安装脚本
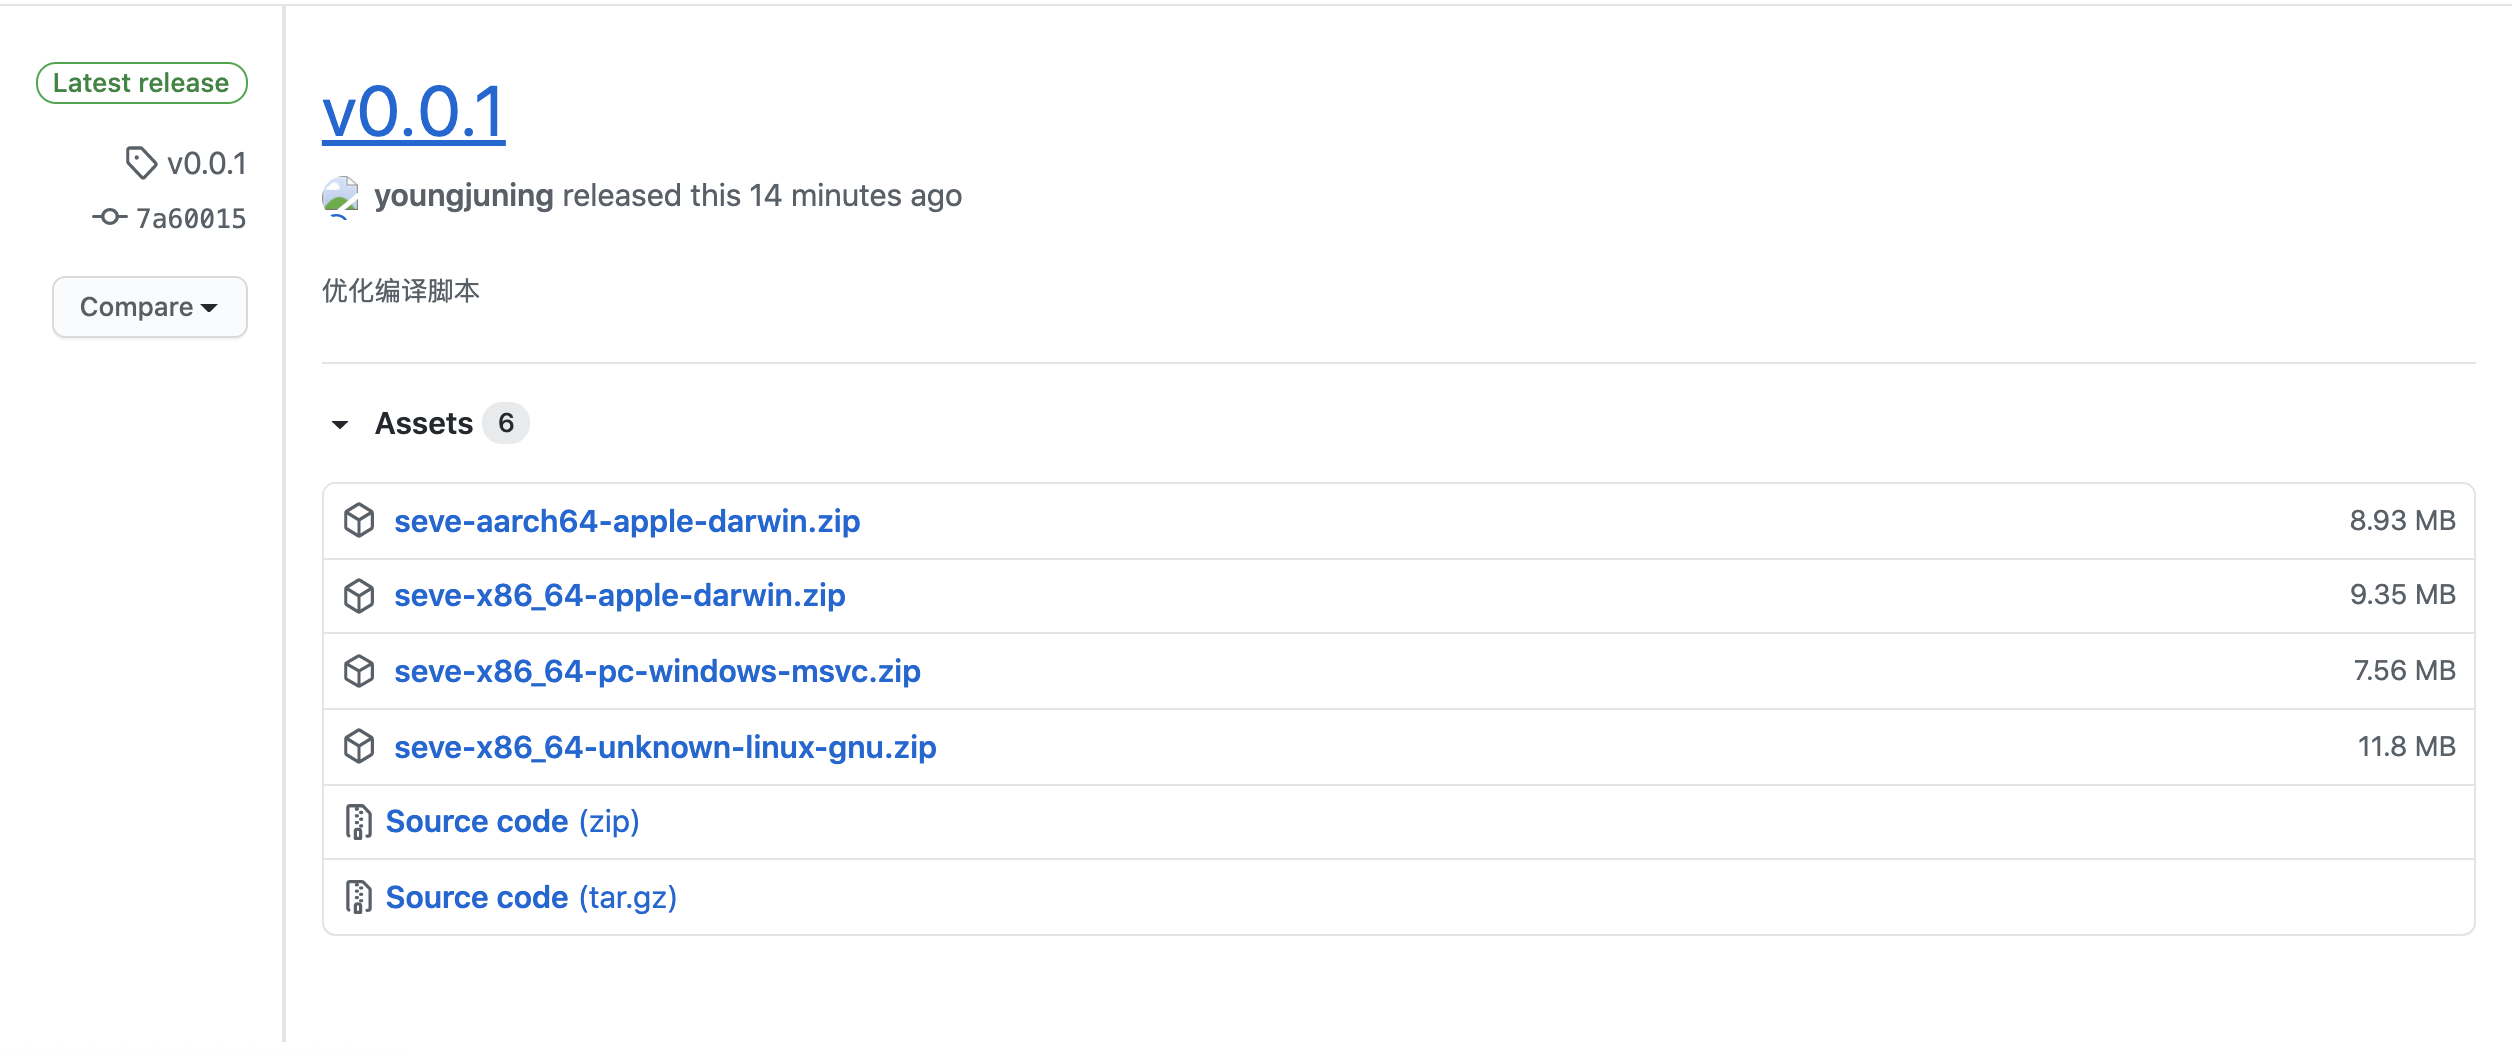
1、手动新建一个 Release 并把上面编译出来的压缩包以附件的形式上传:
2、将上面的脚本中的命名改成我们自己的脚本:
如果你有 cdn 可以把它上传到 cdn 上,我这里就上传到 github 上了。
1#!/usr/bin/env pwsh
2# Copyright 2018 the Seve authors. All rights reserved. MIT license.
3# TODO(everyone): Keep this script simple and easily auditable.
4
5$ErrorActionPreference = 'Stop'
6
7if ($v) {
8  $Version = "v${v}"
9}
10if ($args.Length -eq 1) {
11  $Version = $args.Get(0)
12}
13
14$SeveInstall = $env:SEVE_INSTALL
15$BinDir = if ($SeveInstall) {
16  "$SeveInstall\bin"
17}
18else {
19  "$Home\.seve\bin"
20}
21
22$SeveZip = "$BinDir\seve.zip"
23$SeveExe = "$BinDir\seve.exe"
24$Target = 'x86_64-pc-windows-msvc'
25
26# GitHub requires TLS 1.2
27[Net.ServicePointManager]::SecurityProtocol = [Net.SecurityProtocolType]::Tls12
28
29$DenoUri = if (!$Version) {
30  "https://github.com/youngjuning/seve/releases/latest/download/seve-${Target}.zip"
31}
32else {
33  "https://github.com/youngjuning/seve/releases/download/${Version}/seve-${Target}.zip"
34}
35
36if (!(Test-Path $BinDir)) {
37  New-Item $BinDir -ItemType Directory | Out-Null
38}
39
40Invoke-WebRequest $DenoUri -OutFile $SeveZip -UseBasicParsing
41
42if (Get-Command Expand-Archive -ErrorAction SilentlyContinue) {
43  Expand-Archive $SeveZip -Destination $BinDir -Force
44}
45else {
46  if (Test-Path $SeveExe) {
47    Remove-Item $SeveExe
48  }
49  Add-Type -AssemblyName System.IO.Compression.FileSystem
50  [IO.Compression.ZipFile]::ExtractToDirectory($SeveZip, $BinDir)
51}
52
53Remove-Item $SeveZip
54
55$User = [EnvironmentVariableTarget]::User
56$Path = [Environment]::GetEnvironmentVariable('Path', $User)
57if (!(";$Path;".ToLower() -like "*;$BinDir;*".ToLower())) {
58  [Environment]::SetEnvironmentVariable('Path', "$Path;$BinDir", $User)
59  $Env:Path += ";$BinDir"
60}
61
62Write-Output "Seve was installed successfully to $SeveExe"
63Write-Output "Run 'seve --help' to get started"
3、安装脚本
1# 安装最新版
2iwr https://youngjuning.js.org/seve/install.ps1 -useb | iex
3# 安装指定版本
4$v="1.0.0"; iwr https://deno.land/x/install/install.ps1 -useb | iex
类 Unix 安装脚本
首先我们来看下 deno_install 中的脚本 install.sh:
1#!/bin/sh
2# Copyright 2019 the Deno authors. All rights reserved. MIT license.
3# TODO(everyone): Keep this script simple and easily auditable.
4
5set -e
6
7if ! command -v unzip >/dev/null; then
8	echo "Error: unzip is required to install Deno (see: https://github.com/denoland/deno_install#unzip-is-required)." 1>&2
9	exit 1
10fi
11
12if [ "$OS" = "Windows_NT" ]; then
13	target="x86_64-pc-windows-msvc"
14else
15	case $(uname -sm) in
16	"Darwin x86_64") target="x86_64-apple-darwin" ;;
17	"Darwin arm64") target="aarch64-apple-darwin" ;;
18	*) target="x86_64-unknown-linux-gnu" ;;
19	esac
20fi
21
22if [ $# -eq 0 ]; then
23	deno_uri="https://github.com/denoland/deno/releases/latest/download/deno-${target}.zip"
24else
25	deno_uri="https://github.com/denoland/deno/releases/download/${1}/deno-${target}.zip"
26fi
27
28deno_install="${DENO_INSTALL:-$HOME/.deno}"
29bin_dir="$deno_install/bin"
30exe="$bin_dir/deno"
31
32if [ ! -d "$bin_dir" ]; then
33	mkdir -p "$bin_dir"
34fi
35
36curl --fail --location --progress-bar --output "$exe.zip" "$deno_uri"
37unzip -d "$bin_dir" -o "$exe.zip"
38chmod +x "$exe"
39rm "$exe.zip"
40
41echo "Deno was installed successfully to $exe"
42if command -v deno >/dev/null; then
43	echo "Run 'deno --help' to get started"
44else
45	case $SHELL in
46	/bin/zsh) shell_profile=".zshrc" ;;
47	*) shell_profile=".bash_profile" ;;
48	esac
49	echo "Manually add the directory to your \$HOME/$shell_profile (or similar)"
50	echo "  export DENO_INSTALL=\"$deno_install\""
51	echo "  export PATH=\"\$DENO_INSTALL/bin:\$PATH\""
52	echo "Run '$exe --help' to get started"
53fi
上面的安装脚本就是我们熟悉的 Shell 脚本了,核心代码:
1if [ "$OS" = "Windows_NT" ]; then
2	target="x86_64-pc-windows-msvc"
3else
4	case $(uname -sm) in
5	"Darwin x86_64") target="x86_64-apple-darwin" ;;
6	"Darwin arm64") target="aarch64-apple-darwin" ;;
7	*) target="x86_64-unknown-linux-gnu" ;;
8	esac
9fi
可以看出 $(uname -sm) 表示系统架构,根据它脚本可以动态决定安装哪个平台的脚本。
自定义脚本
发布 Release 和上传附件前面说过你了,这里不多赘述了。
1、将上面的脚本中的命名改成我们自己的脚本并上传到合适的地方:
这里我们加入了自动设置环境变量的功能。PS:Deno 作者为了保持脚本的简洁拒绝了我的 PR。
1#!/bin/sh
2# Copyright 2021 the Seve authors. All rights reserved. MIT license.
3# TODO(everyone): Keep this script simple and easily auditable.
4
5set -e
6
7if ! command -v unzip >/dev/null; then
8	echo "Error: unzip is required to install Seve (see: https://github.com/youngjuning/seve#unzip-is-required)." 1>&2
9	exit 1
10fi
11
12if [ "$OS" = "Windows_NT" ]; then
13	target="x86_64-pc-windows-msvc"
14else
15	case $(uname -sm) in
16	"Darwin x86_64") target="x86_64-apple-darwin" ;;
17	"Darwin arm64") target="aarch64-apple-darwin" ;;
18	*) target="x86_64-unknown-linux-gnu" ;;
19	esac
20fi
21
22if [ $# -eq 0 ]; then
23	seve_uri="https://github.com/youngjuning/seve/releases/latest/download/seve-${target}.zip"
24else
25	seve_uri="https://github.com/youngjuning/seve/releases/download/${1}/seve-${target}.zip"
26fi
27
28seve_install="${SEVE_INSTALL:-$HOME/.seve}"
29bin_dir="$seve_install/bin"
30exe="$bin_dir/seve"
31
32if [ ! -d "$bin_dir" ]; then
33	mkdir -p "$bin_dir"
34fi
35
36curl --fail --location --progress-bar --output "$exe.zip" "$seve_uri"
37unzip -d "$bin_dir" -o "$exe.zip"
38chmod +x "$exe"
39rm "$exe.zip"
40
41echo "Seve was installed successfully to $exe"
42if command -v seve >/dev/null; then
43	echo "Run 'seve --help' to get started"
44else
45	case $SHELL in
46	/bin/zsh) shell_profile=".zshrc" ;;
47	*) shell_profile=".bash_profile" ;;
48	esac
49	echo "# Seve" >> $HOME/$shell_profile
50	echo "export SEVE_INSTALL=\"$seve_install\"" >> $HOME/$shell_profile
51	echo "export PATH=\"\$SEVE_INSTALL/bin:\$PATH\"" >> $HOME/$shell_profile
52	source $HOME/$shell_profile
53	echo "Run 'seve' to get started"
54fi
2、安装脚本
1# 安装最新版
2curl -fsSL https://youngjuning.js.org/seve/install.sh | sh
3# 安装指定版本
4curl -fsSL https://youngjuning.js.org/seve/install.sh | sh -s v0.0.1
至此我们就实现了我们自己的脚本管理,示例代码在 youngjuning/seve,如有帮助,欢迎 Star。
国内加速
这又是另一段故事了,我们可以仿照 justjavac 大佬在 justjavac/deno_releases 中做的那样仿照一份。和原脚本不一样的地方在于是基于 jsdelivr 做了 CDN 加速。
由于 jsdeliver 有 20M 的限制,我在 coding 上开了个仓库,可以使用
https://youngjuning.js.org/deno/install.sh和https://youngjuning.js.org/deno/install.ps1脚本来安装。感谢评论区大佬提醒。使用方式和 deno 一致,替换链接即可。
预告
- Powershell 编程基础
- Deno GitHub Action 自动化流程解析
- Deno CLI 开发入门