
组件将根据屏幕比例及当前浏览器窗口大小,自动进行缩放处理。
建议在组件内使用百分比搭配flex进行布局,以便于在不同的分辨率下得到较为一致的展示效果。
使用前请注意将body的margin设为0,否则会引起计算误差。
fullScreenContainer.vue
`<template>` `<div id="full-screen-container" :ref="ref">` `<template v-if="ready">` `<slot></slot>` `</template>` `</div>``</template>``<script>``import autoResize from './autoResize.js'``export default {` `name: 'DvFullScreenContainer',` `mixins: [autoResize],` `data () {` `return {` `ref: 'full-screen-container',` `allWidth: 0,` `scale: 0,` `datavRoot: '',` `ready: false` `}` `},` `methods: {` `afterAutoResizeMixinInit () {` `const { initConfig, setAppScale } = this` `initConfig()` `setAppScale()` `this.ready = true` `},` `initConfig () {` `const { dom } = this` `const { width, height } = screen` `this.allWidth = width` ``dom.style.width = `${width}px` `` ``dom.style.height = `${height}px` `` `},` `setAppScale () {` `const { allWidth, dom } = this` `const currentWidth = document.body.clientWidth` ``dom.style.transform = `scale(${currentWidth / allWidth})` `` `},` `onResize () {` `const { setAppScale } = this` `setAppScale()` `}` `}``}``</script>``<style lang="scss">``#full-screen-container {` `position: fixed;` `top: 0px;` `left: 0px;` `overflow: hidden;` `transform-origin: left top;` `z-index: 999;``}``</style>`
autoResize.js
`export default {` `data() {` `return {` `dom: '',` `width: 0,` `height: 0,` `debounceInitWHFun: '',` `domObserver: ''` `};` `},` `methods: {` `debounce(delay, callback) {` `let lastTime;` `return function() {` `clearTimeout(lastTime);` `const [that, args] = [this, arguments];` `lastTime = setTimeout(() => {` `callback.apply(that, args);` `}, delay);` `};` `},` `observerDomResize(dom, callback) {` `const MutationObserver =` `window.MutationObserver ||` `window.WebKitMutationObserver ||` `window.MozMutationObserver;` `const observer = new MutationObserver(callback);` `observer.observe(dom, {` `attributes: true,` `attributeFilter: ['style'],` `attributeOldValue: true` `});` `return observer;` `},` `async autoResizeMixinInit() {` `const {` `initWH,` `getDebounceInitWHFun,` `bindDomResizeCallback,` `afterAutoResizeMixinInit` `} = this;` `await initWH(false);` `getDebounceInitWHFun();` `bindDomResizeCallback();` `if (typeof afterAutoResizeMixinInit === 'function')` `afterAutoResizeMixinInit();` `},` `initWH(resize = true) {` `const { $nextTick, $refs, ref, onResize } = this;` `return new Promise(resolve => {` `$nextTick(() => {` `const dom = (this.dom = $refs[ref]);` `this.width = dom ? dom.clientWidth : 0;` `this.height = dom ? dom.clientHeight : 0;` `if (!dom) {` `console.warn(` `'DataV: Failed to get dom node, component rendering may be abnormal!'` `);` `} else if (!this.width || !this.height) {` `console.warn(` `'DataV: Component width or height is 0px, rendering abnormality may occur!'` `);` `}` `if (typeof onResize === 'function' && resize) onResize();` `resolve();` `});` `});` `},` `getDebounceInitWHFun() {` `const { initWH } = this;` `this.debounceInitWHFun = this.debounce(100, initWH);` `},` `bindDomResizeCallback() {` `const { dom, debounceInitWHFun } = this;` `this.domObserver = this.observerDomResize(dom, debounceInitWHFun);` `window.addEventListener('resize', debounceInitWHFun);` `},` `unbindDomResizeCallback() {` `let { domObserver, debounceInitWHFun } = this;` `if (!domObserver) return;` `domObserver.disconnect();` `domObserver.takeRecords();` `domObserver = null;` `window.removeEventListener('resize', debounceInitWHFun);` `}` `},` `mounted() {` `const { autoResizeMixinInit } = this;` `autoResizeMixinInit();` `},` `beforeDestroy() {` `const { unbindDomResizeCallback } = this;` `unbindDomResizeCallback();` `}``};`
这样,一个页面自适应组件就这样搭建完成了,下面,我们将引入组件看一下效果。
`<template>` `<div id="app">` `<fullScreenContainer>` `<img alt="Vue logo" src="./assets/logo.png" />` `<HelloWorld msg="Welcome to Your Vue.js App" />` `</fullScreenContainer>` `</div>``</template>``<script>``import HelloWorld from "./components/HelloWorld.vue";``import fullScreenContainer from "./components/fullScreenContainer/fullScreenContainer.vue";``export default {` `name: "App",` `components: {` `HelloWorld,` `fullScreenContainer,` `},``};``</script>``<style>``#app {` `font-family: Avenir, Helvetica, Arial, sans-serif;` `-webkit-font-smoothing: antialiased;` `-moz-osx-font-smoothing: grayscale;` `text-align: center;` `color: #2c3e50;` `margin-top: 60px;``}``</style>`
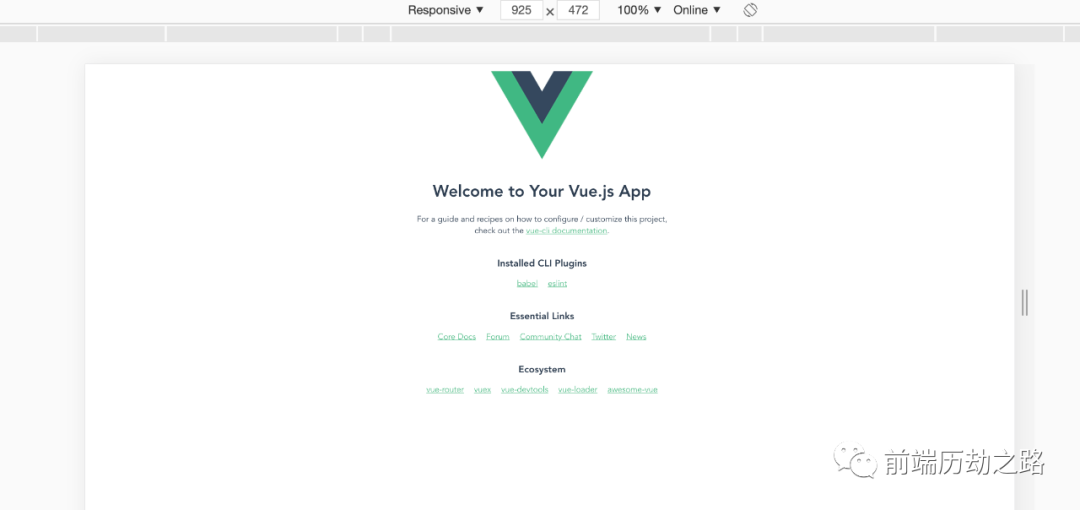
效果很好,这样对于一些开发自适应页面非常容易。
欢迎关注我的公众号
前端历劫之路回复关键词
电子书,即可获取12本前端热门电子书。回复关键词
红宝书第4版,即可获取最新《JavaScript高级程序设计》(第四版)电子书。我创建了一个技术交流、文章分享群,群里有很多大厂的前端大佬,关注公众号后,点击下方菜单了解更多即可加我微信,期待你的加入。
本文转转自微信公众号前端历劫之路原创https://mp.weixin.qq.com/s/ePhPYWHeiwawdRwul-QJqw,如有侵权,请联系删除。