
1. 简介
之前一直使用Freemarker,对Thymeleaf了解但是不熟悉,最近因为其他项目组他们要快速搭建后台,使用了一个三方的框架用到了Thymeleaf,所以进一步了解了一些。
发现Thymeleaf更加像前端的模板语言,所以对静态页面有更好的兼容性,就是,如果是Freemarker模板文件,浏览器是解析不了的,会直接出错。而使用Thymeleaf模板文件,如果没有解析,浏览器也能解析,基本样式基本没有问题,只是不能解析数据。
因为Thymeleaf使用属性,少了很多像Freemarker的tag,这样语法上看起来也更加简介一些。
这篇文章主要记录一下Thymeleaf中一些常用的功能,以便于看到这些东西知道是什么意思。
2. 开始
在SpringBoot中使用Thymeleaf非常简单,只需要添加下面的依赖就可以了:
1<dependency>
2    <groupId>org.springframework.boot</groupId>
3    <artifactId>spring-boot-starter-thymeleaf</artifactId>
4</dependency>
然后,基本就和使用JSP一样,除了语法不同。
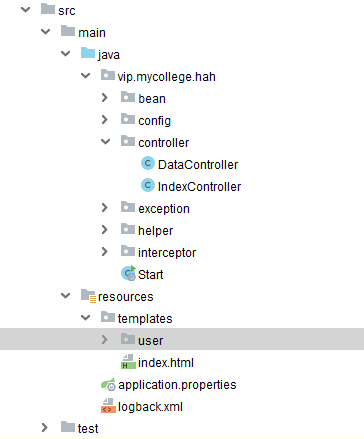
SpringBoot Thymeleaf默认配置会去classpath的templates去找模板文件,和Freemarker默认的后缀ftl不同,Thymeleaf直接使用的html后缀,就是为了就算不能解析,浏览器也能识别。
接下来添加一个Controller:
1import org.springframework.stereotype.Controller;
2import org.springframework.ui.Model;
3import org.springframework.web.bind.annotation.RequestMapping;
4
5@Controller
6@RequestMapping("/data")
7public class DataController {
8
9    @RequestMapping("/index")
10    public String show(Model model){
11        model.addAttribute("id","10001");
12        model.addAttribute("name","Tim");
13        model.addAttribute("userhome","<a style='color:red' href='/user/10001'>Tim</a>");
14        return "index";
15    }
16}
然后添加一个index.html文件:
1<!DOCTYPE HTML>
2<html xmlns:th="http://www.thymeleaf.org">
3<head>
4    <title>Index</title>
5    <meta http-equiv="Content-Type" content="text/html;charset=UTF-8"/>
6</head>
7<body>
8<div th:text="'用户ID:' + ${id}"/>
9<div th:text="'用户名称:' + ${name}"/>
10<div th:utext="'用户主页:' + ${userhome}"/>
11</body>
12</html>
如果你对模板文件熟悉,不管是前端模板,还是后端模板,基本一看就能大致猜出上面的模板是什么意思。
Thymeleaf通过th:text来绑定标签的文本属性,就是给标签设置text内容。其中th是Thymeleaf的缩写,text表示文本属性。
除了使用th:text,还可以使用th:utext,th:utext最重要的一点是可以设置带html标签的text
3. list遍历
1@RequestMapping("/list")
2public String list(Model model) {
3    List<Integer> ids = new ArrayList<>();
4    for (int i = 0; i < 10; i++) {
5        ids.add(i) ;
6    }
7    model.addAttribute("ids", ids);
8    return "collection/list";
9}
10
11
12<!DOCTYPE HTML>
13<html xmlns:th="http://www.thymeleaf.org">
14<head>
15    <title>List</title>
16    <meta http-equiv="Content-Type" content="text/html;charset=UTF-8"/>
17</head>
18<body>
19<div>
20    <table>
21        <tr><td>编号</td><td>ID</td><td>是否是第偶数个元素</td><td>是否是第奇数个元素</td></tr>
22        <tr th:each="id,memberStat:${ids}">
23            <td th:text="${memberStat.index + 1}"/>
24            <td th:text="${id}"/>
25            <td th:text="${memberStat.even}"/>
26            <td th:text="${memberStat.odd}"/>
27        </tr>
28    </table>
29</div>
30</body>
31</html>
4. map遍历
1@RequestMapping("/map")
2public String map(Model model) {
3    Map<Integer,String> map = new HashMap<>();
4    for (int i = 0; i < 10; i++) {
5        map.put(i,"VL" + i);
6    }
7    model.addAttribute("map", map);
8    return "collection/map";
9}
10
11
12<!DOCTYPE HTML>
13<html xmlns:th="http://www.thymeleaf.org">
14<head>
15    <title>Map</title>
16    <meta http-equiv="Content-Type" content="text/html;charset=UTF-8"/>
17</head>
18<body>
19<div>
20    <table>
21        <tr><td>编号</td><td>key</td><td>value</td><td>是否是第偶数个元素</td><td>是否是第奇数个元素</td></tr>
22        <tr th:each="entry,memberStat:${map}">
23            <td th:text="${memberStat.index + 1}"/>
24            <td th:text="${entry.key}"/>
25            <td th:text="${entry.value}"/>
26            <td th:text="${memberStat.even}"/>
27            <td th:text="${memberStat.odd}"/>
28        </tr>
29    </table>
30</div>
31</body>
32</html>
5. if unless switch
1@RequestMapping("/ifel")
2public String ifel(Model model) {
3    model.addAttribute("score", 89);
4    return "tool/ifel";
5}
6
7
8<body>
9<div>
10    <div th:if="${score ge 90}">
11        A
12    </div>
13    <div th:if="${score lt 90 && score ge 80}">
14        B
15    </div>
16    <div th:unless="${score ge 80}">
17        C
18    </div>
19</div>
20
21<div>
22    <div th:switch="${score}">
23        <div th:case="100">100</div>
24        <div th:case="99">90</div>
25        <div th:case="*">都不匹配</div>
26    </div>
27</div>
28</body>
29</html>
if是条件满足执行,unless不是else的意思,而是条件不满足执行。
Thymeleaf支持switch,这样就避免了写多个if语句了。
6. @
用过JSP的朋友都知道,JSP的路径真是一点都不方便,要自己去拼接,虽然也可以直接添加拦截器、工具类去处理。
Thymeleaf提供了@,然我们不用去拼接网站前缀,主要是处理上下文部分。
1<script type="text/javascript" th:src="@{/js/jquery.js}"></script>
2<a th:href="@{/user/info}">访问controller方法</a>
7. th:object
th:object提供了一种省略对象前缀的访问方式,看实例就清楚。
1@RequestMapping("/info")
2public String userInfo(Model model) {
3    User user = new User();
4    user.setId(10001);
5    user.setName("轩辕雪");
6    user.setAge(25);
7    model.addAttribute("user", user);
8    return "user/info";
9}
10
11
12<!DOCTYPE HTML>
13<html xmlns:th="http://www.thymeleaf.org">
14<head>
15    <title>用户信息</title>
16    <meta http-equiv="Content-Type" content="text/html;charset=UTF-8"/>
17</head>
18<body>
19<div>
20    <div th:text="'用户ID:' + ${user.id}"/>
21    <div th:text="'用户姓名:' + ${user.name}"/>
22    <div th:text="'用户年龄:' + ${user.age}"/>
23</div>
24
25<div th:object="${user}">
26    <div th:text="'用户ID:' + *{id}"/>
27    <div th:text="'用户姓名:' + *{name}"/>
28    <div th:text="'用户年龄:' + *{age}"/>
29</div>
30</body>
31</html>
上面的两种绑定方式是完全等价的。
8. 工具方法
1@RequestMapping("/tool")
2public String tool(Model model) {
3    Set<String> set = new HashSet<>() ;
4    set.add("A");
5
6    Map<String,Integer> map = new HashMap<>();
7    map.put("a",1);
8
9    List<Integer> list = new ArrayList<>() ;
10    for (int i = 0 ; i < 10 ; i ++) {
11        list.add(i) ;
12    }
13
14    Integer[] array = new Integer[list.size()];
15    list.toArray(array);
16
17    model.addAttribute("list", list) ;
18    model.addAttribute("set", set) ;
19    model.addAttribute("map", map) ;
20    model.addAttribute("array", array) ;
21    model.addAttribute("now", new Date()) ;
22    return "tool/tool" ;
23}
24
25
26<!DOCTYPE HTML>
27<html xmlns:th="http://www.thymeleaf.org">
28<head>
29    <title>Index</title>
30    <meta http-equiv="Content-Type" content="text/html;charset=UTF-8"/>
31</head>
32<body>
33<div>日期:</div>
34<div>
35    <div th:text="${#dates.millisecond(now)}"/>
36    <div th:text="${#dates.format(now,'yyyy-MM-dd')}"/>
37    <div th:text="${#dates.format(now,'yyyy-MM-dd HH:mm:ss')}"/>
38</div>
39
40<div>字符串:</div>
41<div>
42    <div th:text="${#strings.isEmpty('')}"/>
43    <div th:text="${#strings.replace('$199','$','¥')}"/>
44    <div th:text="${#strings.toUpperCase('love')}"/>
45    <div th:text="${#strings.trim('   I Love You        ')}"/>
46</div>
47
48<div>其他:</div>
49<div>
50    <div th:text="${#sets.contains(set,'a')}"/>
51    <div th:text="${#lists.size(list)}"/>
52    <div th:text="${#maps.containsKey(map, 'a')}"/>
53    <div th:text="${#arrays.length(array)}"/>
54    <div th:text="${#aggregates.sum(array)}"/>
55    <div th:text="${#numbers.formatInteger(3.1415926,3,'POINT')}"/>
56    <div th:text="${#numbers.formatDecimal(3.1415926,3,'POINT',2,'COMMA')}"/>
57    <div th:text="${#numbers.formatPercent(3.1415926, 3, 2)}"/>
58</div>
59</body>
60</html>
注意dates的millisecond只是获取毫秒,而不是时间戳。
这样的工具类方法还有一大堆,具体可以参考官方的:Thymeleaf工具类
9. include replace insert
在处理页面的时候,经常需要引入一些公共页面,Thymeleaf中我们可以使用include实现。
和JSP、Freemarker不同,Thymeleaf可以不导入整个页面,而是只导入这个页面中的某些片段(fragment)
在页面中,我们可以通过下面的方式来定义片段:
<div th:fragment="page"></div>
通过下面的方式引入片段:
<div th:include="pagefile::page"></div>
include的有一些简写方式:
1<!--  "::"前面是模板文件名,后面是fragement的名称 -->
2<div th:include="template/pagefile::page"></div>
3
4<!-- 省略模板文件名,只有fragment名称,则加载本页面对应的fragment -->
5<div th:include="::page"></div>
6
7<!-- 只写模板文件名,省略fragment名称,则加载整个页面 -->
8<div th:include="template/nav"></div>
来一个示例看一看,加强理解:
1@RequestMapping("/myinclude")
2public String myinclude(Model model) {
3    return "user/myinclude";
4}
定义一个公共的包含文件include.html:
1<head th:fragment=header(title)>
2    <meta charset="utf-8">
3    <meta name="viewport" content="width=device-width, initial-scale=1.0">
4    <meta http-equiv="X-UA-Compatible" content="IE=edge">
5    <meta name="keywords" content="">
6    <meta name="description" content="">
7    <title th:text="${title}"></title>
8    <link rel="shortcut icon" href="favicon.ico">
9</head>
10
11<div th:fragment="footer">
12    <script th:src="@{/js/jquery.min.js}"></script>
13    <script th:src="@{/js/bootstrap.min.js}"></script>
14</div>
15
16<div clss="fragment-content-class" th:fragment="content(first,second)">
17    <div th:text="'第一个参数:' + ${first} + '  第二个参数:' + ${second}"></div>
18</div>
导入页面:
1<!DOCTYPE HTML>
2<html xmlns:th="http://www.thymeleaf.org">
3<head>
4    <th:block th:include="common/include :: header('myinclude-title')" />
5</head>
6<body>
7
8<div class="page-content-class" th:insert="common/include :: content('Hello','insert')"></div>
9<div class="page-content-class" th:include="common/include :: content('Hello','include')"></div>
10<div class="page-content-class" th:replace="common/include :: content('Hello','replace')"></div>
11
12<th:block th:insert="common/include :: footer" />
13</body>
14</html>
Thymeleaf渲染之后的页面:
1<!DOCTYPE HTML>
2<html>
3<head>
4
5    <meta charset="utf-8">
6    <meta name="viewport" content="width=device-width, initial-scale=1.0">
7    <meta http-equiv="X-UA-Compatible" content="IE=edge">
8    <meta name="keywords" content="">
9    <meta name="description" content="">
10    <title>myinclude-title</title>
11    <link rel="shortcut icon" href="favicon.ico">
12
13</head>
14<body>
15
16<div class="page-content-class"><div clss="fragment-content-class">
17    <div>第一个参数:Hello  第二个参数:insert</div>
18</div></div>
19<div class="page-content-class">
20    <div>第一个参数:Hello  第二个参数:include</div>
21</div>
22<div clss="fragment-content-class">
23    <div>第一个参数:Hello  第二个参数:replace</div>
24</div>
25
26<div>
27    <script src="https://my.oschina.net/js/jquery.min.js"></script>
28    <script src="https://my.oschina.net/js/bootstrap.min.js"></script>
29</div>
30</body>
31</html>
我们可以简单的小结一下:
- th:insert:保留自己和th:fragment的主标签
- th:replace:只保留th:fragment的主标签
- th:include:只保留自己的主标签
10. 处理本地文件
除了在Web中使用,我们也当做一个本地工具使用:
1import org.thymeleaf.TemplateEngine;
2import org.thymeleaf.context.Context;
3import org.thymeleaf.templateresolver.FileTemplateResolver;
4
5import java.util.HashMap;
6import java.util.Map;
7
8public class ThymeleafHelper {
9
10    private static TemplateEngine templateEngine;
11
12    static {
13        templateEngine = new TemplateEngine();
14        FileTemplateResolver resolver = new FileTemplateResolver();
15        resolver.setPrefix("G:\\tmp\\thymeleaf\\");
16        resolver.setCharacterEncoding("UTF-8");
17        resolver.setSuffix(".html");
18        templateEngine.setTemplateResolver(resolver);
19    }
20
21    public static String redering(String templateFileName, Map<String,Object> data) {
22        Context context = new Context();
23        context.setVariables(data);
24        return templateEngine.process(templateFileName, context);
25    }
26
27    public static void main(String[] args) {
28        HashMap<String, Object> data = new HashMap<>();
29        data.put("id","10001");
30        data.put("name","Tim");
31        data.put("userhome","<a style='color:red' href='/user/10001'>Tim</a>");
32        System.out.println(redering("index",data));
33    }
34}
可能需要单独引入ognl包:
1<dependency>
2    <groupId>ognl</groupId>
3    <artifactId>ognl</artifactId>
4    <version>3.2.18</version>
5</dependency>