
Distributed Configuration Management Platform(分布式配置管理平台)
专注于各种 分布式系统配置管理 的通用组件/通用平台, 提供统一的配置管理服务。
主要目标:
-
部署极其简单:同一个上线包,无须改动配置,即可在 多个环境中(RD/QA/PRODUCTION) 上线
-
部署动态化:更改配置,无需重新打包或重启,即可 实时生效
-
统一管理:提供web平台,统一管理 多个环境(RD/QA/PRODUCTION)、多个产品 的所有配置
-
支持微服务架构
安装依赖软件
-
安装Mysql(Ver 14.12 Distrib 5.0.45, for unknown-linux-gnu (x86_64) using EditLine wrapper)
-
安装Tomcat(apache-tomcat-7.0.50)
-
安装Nginx(nginx/1.5.3)
-
安装 zookeeeper (zookeeper-3.3.0)
-
安装 Redis (2.4.5)
服务端部署
-
下载源码,点此跳转
-
导入IDE,以Intellij为例
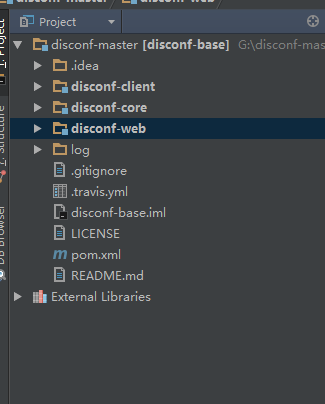
一共分为三个模块:
-
disconf-client是客户端代码
-
disconf-core是核心模块
-
disconf-web是disconf的页面管理控制台
先部署disconf-web页面
-
执行数据库脚本:/disconf-web/sql下的脚本,顺序如下:
-
1 - 0-init_table.sql create db,tables 2 - 1-init_data.sql create data 3 - 201512/20151225.sql patch -
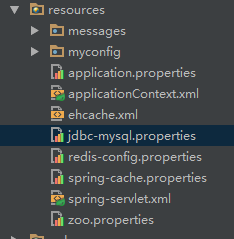
复制/disconf-web/profile/rd下的文件到/disconf/src/main/resources下
-
-
修改配置文件:jdbc-mysql.properties,redis-config.properties,zoo.properties,按照实际部署环境修改
-
启动运行程序
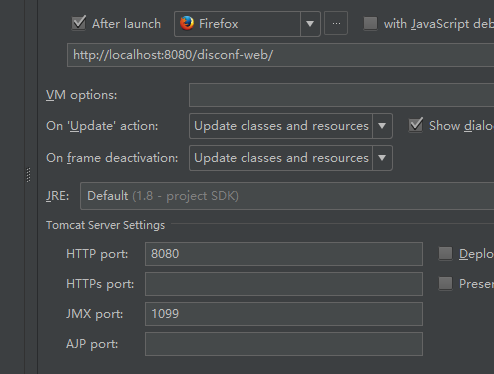
浏览器输入地址:http://localhost:8080/disconf-web/api/account/session,提示如下即部署成功

静态文件部署
修改/disconf-web/html/assets/js/jquery-1.11.0.js文件,查找ajax8949行,修改如下
1ajax: function( url, options ) {
2
3		url.url ="/disconf-web"+url.url;
4
5		// If url is an object, simulate pre-1.5 signature
6		if ( typeof url === "object" ) {
7			options = url;
8			url = undefined;
9		}
其中的disconf-web是本人的 服务器访问前缀
Nginx部署
1#user  nobody;
2worker_processes  1;
3
4#error_log  logs/error.log;
5#error_log  logs/error.log  notice;
6#error_log  logs/error.log  info;
7
8#pid        logs/nginx.pid;
9
10
11events {
12    worker_connections  1024;
13}
14
15
16http {
17    include       mime.types;
18    default_type  application/octet-stream;
19
20    #log_format  main  '$remote_addr - $remote_user [$time_local] "$request" '
21    #                  '$status $body_bytes_sent "$http_referer" '
22    #                  '"$http_user_agent" "$http_x_forwarded_for"';
23
24    #access_log  logs/access.log  main;
25
26    sendfile        on;
27    #tcp_nopush     on;
28
29    #keepalive_timeout  0;
30    keepalive_timeout  65;
31
32    #gzip  on;
33    server {
34        listen       80;
35        server_name  _;
36
37		#root D:\Downloads\disconf-master\disconf-master\disconf-web\html;
38		#index index.html;
39
40        #charset koi8-r;
41
42        #access_log  logs/host.access.log  main;
43
44      location / {
45		##下载的源码中的html静态文件位置
46        root D:\Downloads\disconf-master\disconf-master\disconf-web\html;
47		index index.html;
48    }
49	##此处的disconf-web是本人的服务端前缀
50    location ~ ^/disconf-web/(api|export) {
51       proxy_pass_header Server;
52        proxy_set_header Host $http_host;
53        proxy_redirect off;
54        proxy_set_header X-Real-IP $remote_addr;
55        proxy_set_header X-Scheme $scheme;
56        proxy_pass http://127.0.0.1:8080;
57    }
58
59
60        #error_page  404              /404.html;
61
62        # redirect server error pages to the static page /50x.html
63        #
64        #error_page   500 502 503 504  /50x.html;
65        #location = /50x.html {
66        #    root   html;
67        #}
68
69        # proxy the PHP scripts to Apache listening on 127.0.0.1:80
70        #
71        #location ~ \.php$ {
72        #    proxy_pass   http://127.0.0.1;
73        #}
74
75        # pass the PHP scripts to FastCGI server listening on 127.0.0.1:9000
76        #
77        #location ~ \.php$ {
78        #    root           html;
79        #    fastcgi_pass   127.0.0.1:9000;
80        #    fastcgi_index  index.php;
81        #    fastcgi_param  SCRIPT_FILENAME  /scripts$fastcgi_script_name;
82        #    include        fastcgi_params;
83        #}
84
85        # deny access to .htaccess files, if Apache's document root
86        # concurs with nginx's one
87        #
88        #location ~ /\.ht {
89        #    deny  all;
90        #}
91    }
92
93
94    # another virtual host using mix of IP-, name-, and port-based configuration
95    #
96    #server {
97    #    listen       8000;
98    #    listen       somename:8080;
99    #    server_name  somename  alias  another.alias;
100
101    #    location / {
102    #        root   html;
103    #        index  index.html index.htm;
104    #    }
105    #}
106
107
108    # HTTPS server
109    #
110    #server {
111    #    listen       443 ssl;
112    #    server_name  localhost;
113
114    #    ssl_certificate      cert.pem;
115    #    ssl_certificate_key  cert.key;
116
117    #    ssl_session_cache    shared:SSL:1m;
118    #    ssl_session_timeout  5m;
119
120    #    ssl_ciphers  HIGH:!aNULL:!MD5;
121    #    ssl_prefer_server_ciphers  on;
122
123    #    location / {
124    #        root   html;
125    #        index  index.html index.htm;
126    #    }
127    #}
128
129}
启动Nginx,访问http://localhost/disconf/显示如下: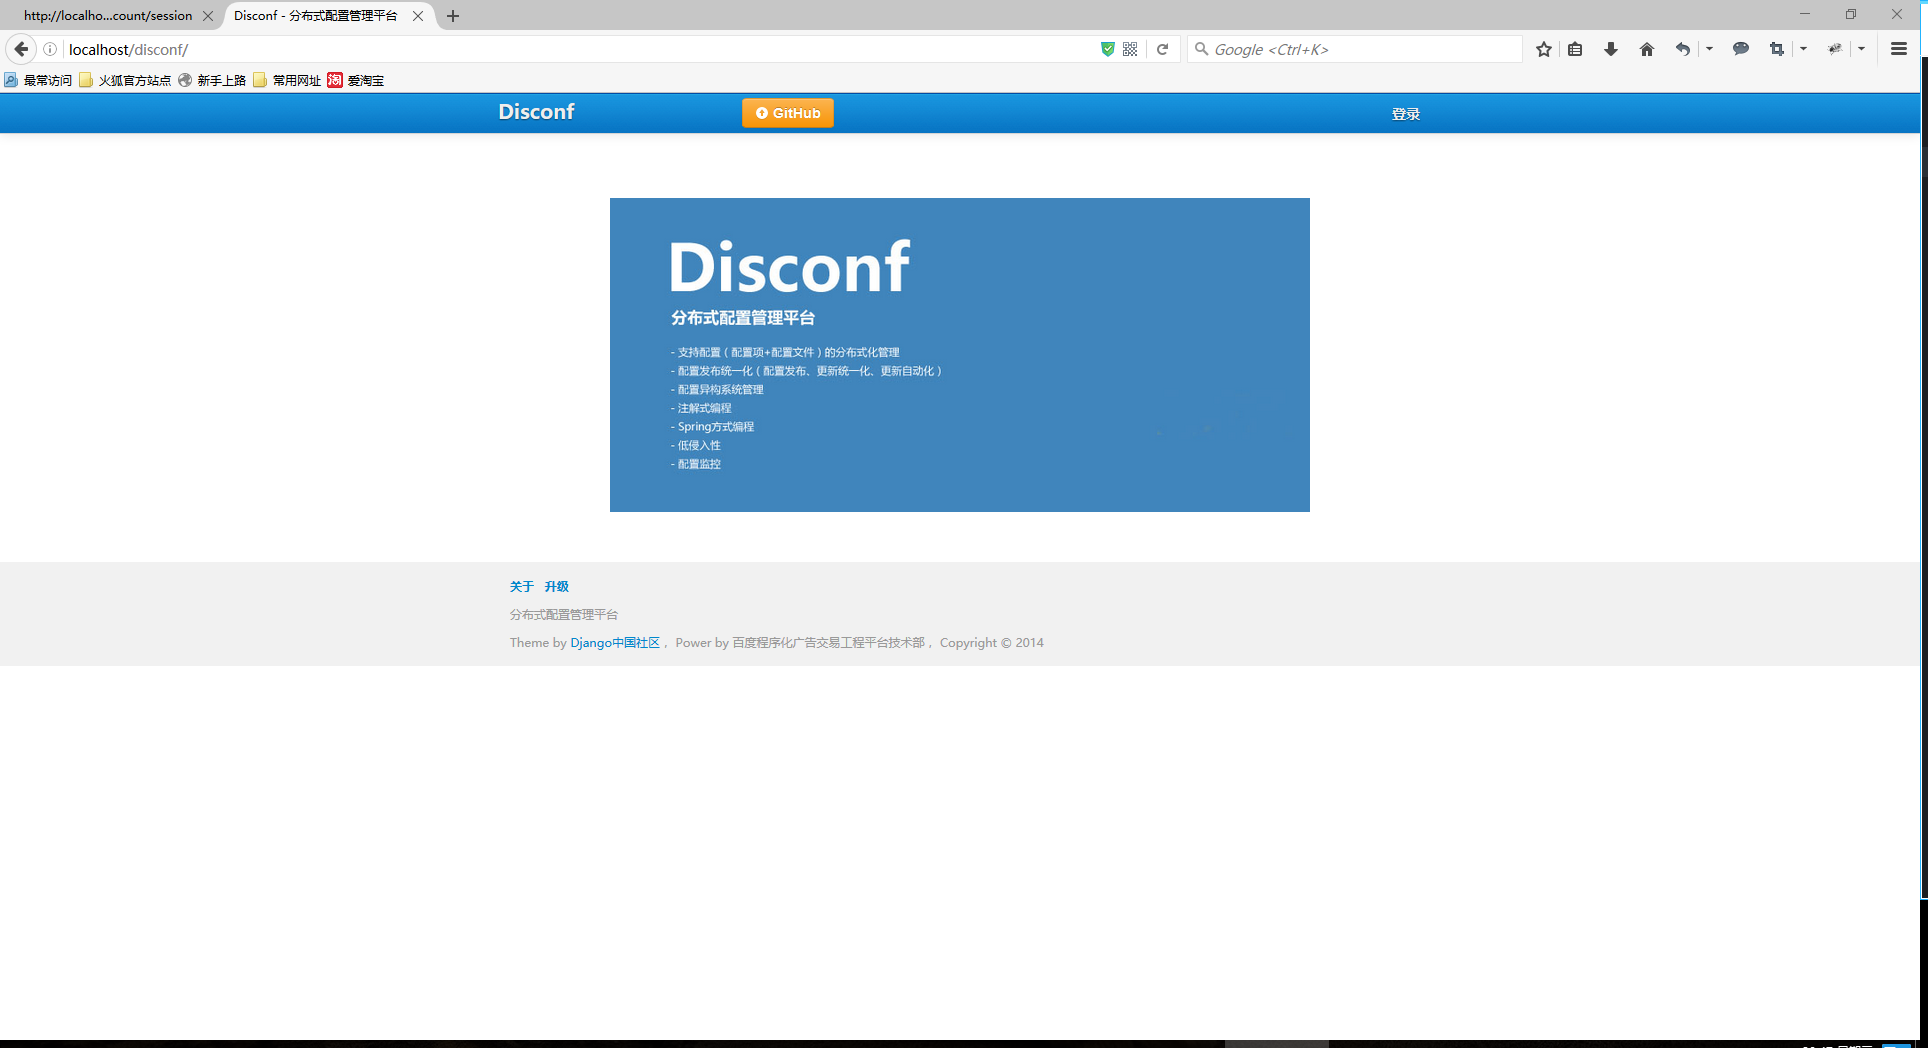
点击右上角登录,输入admin/admin

选择app:disconf_demo,rd环境即可看到默认的部署配置
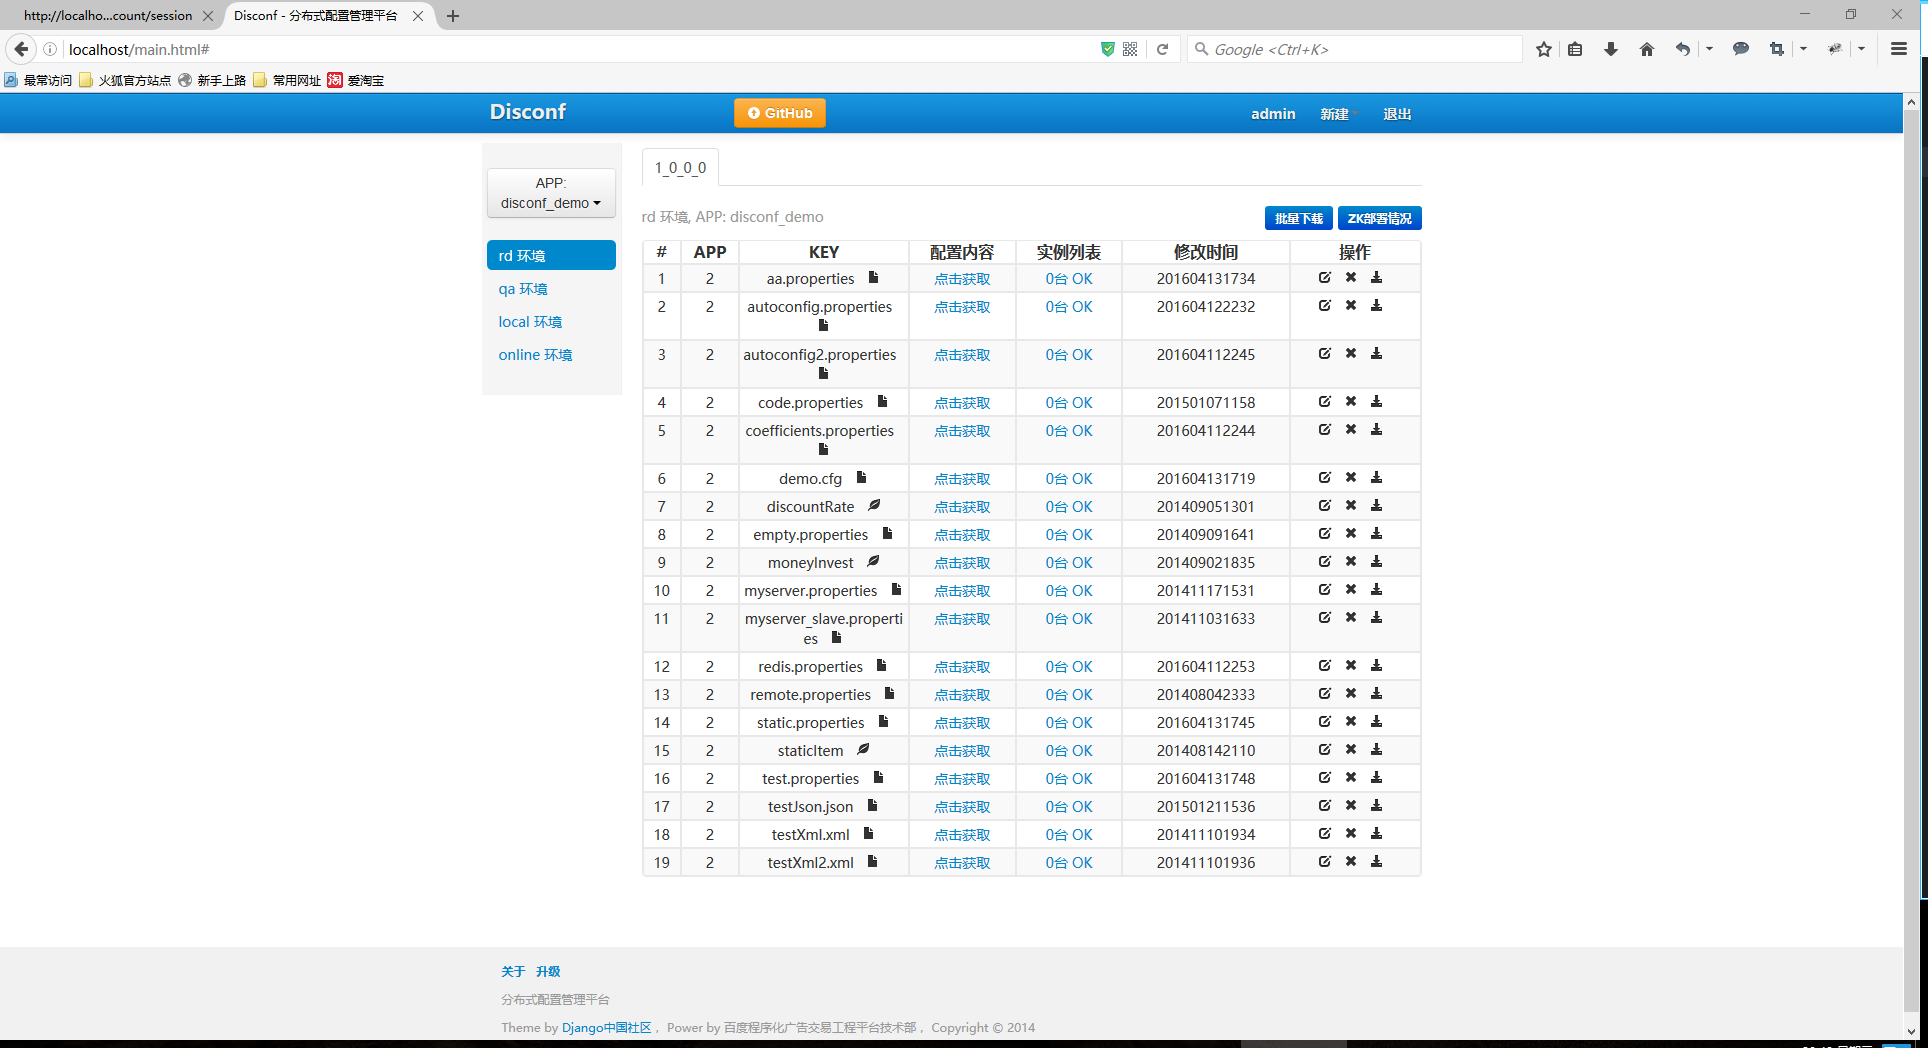
到此为止,服务端以及页面显示完成。
客户端使用可以点此下载示例
注意事项:配置文件一定要properties结尾,在我们开发中有时候以cfg结尾,在这里是无法读取的