
###1/ 概述 利用Spring Boot作为基础框架,Spring Security作为安全框架,WebSocket作为通信框架,实现点对点聊天和群聊天。
###2/ 所需依赖 Spring Boot 版本 1.5.3,使用MongoDB存储数据(非必须),Maven依赖如下:
1<properties>
2    <java.version>1.8</java.version>
3    <thymeleaf.version>3.0.0.RELEASE</thymeleaf.version>
4    <thymeleaf-layout-dialect.version>2.0.0</thymeleaf-layout-dialect.version>
5  </properties>
6
7  <dependencies>
8
9    <!-- WebSocket依赖,移除Tomcat容器 -->
10    <dependency>
11      <groupId>org.springframework.boot</groupId>
12      <artifactId>spring-boot-starter-websocket</artifactId>
13      <exclusions>
14        <exclusion>
15          <groupId>org.springframework.boot</groupId>
16          <artifactId>spring-boot-starter-tomcat</artifactId>
17        </exclusion>
18      </exclusions>
19    </dependency>
20
21    <!-- 使用Undertow容器 -->
22    <dependency>
23      <groupId>org.springframework.boot</groupId>
24      <artifactId>spring-boot-starter-undertow</artifactId>
25    </dependency>
26
27    <!--  Spring Security 框架 -->
28    <dependency>
29      <groupId>org.springframework.boot</groupId>
30      <artifactId>spring-boot-starter-security</artifactId>
31    </dependency>
32
33    <!-- MongoDB数据库 -->
34    <dependency>
35      <groupId>org.springframework.boot</groupId>
36      <artifactId>spring-boot-starter-data-mongodb</artifactId>
37    </dependency>
38
39    <!-- Thymeleaf 模版引擎 -->
40    <dependency>
41      <groupId>org.springframework.boot</groupId>
42      <artifactId>spring-boot-starter-thymeleaf</artifactId>
43    </dependency>
44
45    <dependency>
46      <groupId>org.projectlombok</groupId>
47      <artifactId>lombok</artifactId>
48      <version>1.16.16</version>
49    </dependency>
50
51    <dependency>
52      <groupId>com.alibaba</groupId>
53      <artifactId>fastjson</artifactId>
54      <version>1.2.30</version>
55    </dependency>
56
57    <!-- 静态资源 -->
58    <dependency>
59      <groupId>org.webjars</groupId>
60      <artifactId>webjars-locator</artifactId>
61    </dependency>
62    <dependency>
63      <groupId>org.webjars</groupId>
64      <artifactId>sockjs-client</artifactId>
65      <version>1.0.2</version>
66    </dependency>
67    <dependency>
68      <groupId>org.webjars</groupId>
69      <artifactId>stomp-websocket</artifactId>
70      <version>2.3.3</version>
71    </dependency>
72    <dependency>
73      <groupId>org.webjars</groupId>
74      <artifactId>bootstrap</artifactId>
75      <version>3.3.7</version>
76    </dependency>
77    <dependency>
78      <groupId>org.webjars</groupId>
79      <artifactId>jquery</artifactId>
80      <version>3.1.0</version>
81    </dependency>
82
83  </dependencies>
配置文件内容:
1server:
2  port: 80
3
4# 若使用MongoDB则配置如下参数
5spring:
6  data:
7    mongodb:
8      uri: mongodb://username:password@172.25.11.228:27017
9      authentication-database: admin
10      database: chat
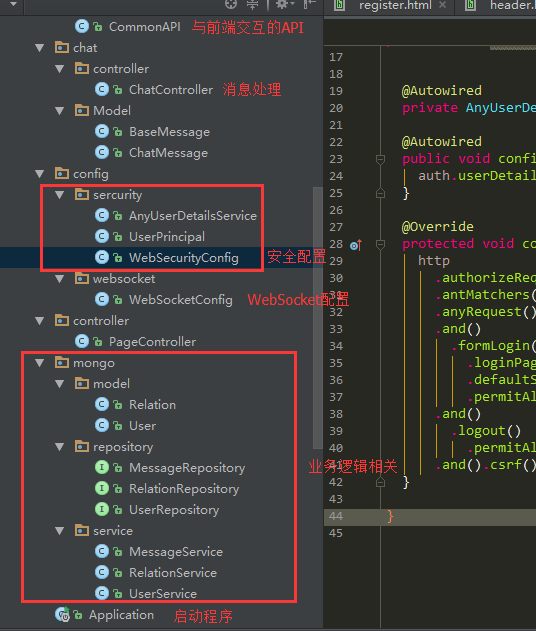
大致程序结构,仅供参考:
###3/ 创建程序启动类,启用WebSocket 使用@EnableWebSocket注解
1@SpringBootApplication
2@EnableWebSocket
3public class Application {
4
5  public static void main(String[] args) {
6    SpringApplication.run(Application.class, args);
7  }
8
9}
###4/ 配置Spring Security 此章节省略。(配置好Spring Security,用户能正常登录即可) 可以参考:Spring Boot 全栈开发:用户安全
###5/ 配置Web Socket(结合第7节的JS看)
1@Configuration
2@EnableWebSocketMessageBroker
3@Log4j
4public class WebSocketConfig extends AbstractWebSocketMessageBrokerConfigurer {
5
6  // 此处可注入自己写的Service
7
8  @Override
9  public void registerStompEndpoints(StompEndpointRegistry stompEndpointRegistry) {
10    // 客户端与服务器端建立连接的点
11    stompEndpointRegistry.addEndpoint("/any-socket").withSockJS();
12  }
13
14  @Override
15  public void configureMessageBroker(MessageBrokerRegistry messageBrokerRegistry) {
16    // 配置客户端发送信息的路径的前缀
17    messageBrokerRegistry.setApplicationDestinationPrefixes("/app");
18    messageBrokerRegistry.enableSimpleBroker("/topic");
19  }
20
21  @Override
22  public void configureWebSocketTransport(final WebSocketTransportRegistration registration) {
23    registration.addDecoratorFactory(new WebSocketHandlerDecoratorFactory() {
24      @Override
25      public WebSocketHandler decorate(final WebSocketHandler handler) {
26        return new WebSocketHandlerDecorator(handler) {
27          @Override
28          public void afterConnectionEstablished(final WebSocketSession session) throws Exception {
29            // 客户端与服务器端建立连接后,此处记录谁上线了
30            String username = session.getPrincipal().getName();
31            log.info("online: " + username);
32            super.afterConnectionEstablished(session);
33          }
34
35          @Override
36          public void afterConnectionClosed(WebSocketSession session, CloseStatus closeStatus) throws Exception {
37            // 客户端与服务器端断开连接后,此处记录谁下线了
38            String username = session.getPrincipal().getName();
39            log.info("offline: " + username);
40            super.afterConnectionClosed(session, closeStatus);
41          }
42        };
43      }
44    });
45    super.configureWebSocketTransport(registration);
46  }
47}
###6/ 点对点消息,群消息
1@Controller
2@Log4j
3public class ChatController {
4
5  @Autowired
6  private SimpMessagingTemplate template;
7
8  // 注入其它Service
9
10  // 群聊天
11  @MessageMapping("/notice")
12  public void notice(Principal principal, String message) {
13    // 参数说明 principal 当前登录的用户, message 客户端发送过来的内容
14    // principal.getName() 可获得当前用户的username
15
16    // 发送消息给订阅 "/topic/notice" 且在线的用户
17    template.convertAndSend("/topic/notice", message);
18  }
19
20  // 点对点聊天
21  @MessageMapping("/chat")
22  public void chat(Principal principal, String message){
23    // 参数说明 principal 当前登录的用户, message 客户端发送过来的内容(应该至少包含发送对象toUser和消息内容content)
24    // principal.getName() 可获得当前用户的username
25
26    // 发送消息给订阅 "/user/topic/chat" 且用户名为toUser的用户
27    template.convertAndSendToUser(toUser, "/topic/chat", content);
28  }
29
30}
###7/ 客户端与服务器端交互
1    var stompClient = null;
2
3    function connect() {
4        var socket = new SockJS('/any-socket');
5        stompClient = Stomp.over(socket);
6        stompClient.connect({}, function (frame) {
7            // 订阅 /topic/notice 实现群聊
8            stompClient.subscribe('/topic/notice', function (message) {
9                showMessage(JSON.parse(message.body));
10            });
11            // 订阅 /user/topic/chat 实现点对点聊
12            stompClient.subscribe('/user/topic/chat', function (message) {
13                showMessage(JSON.parse(message.body));
14            });
15        });
16    }
17
18    function showMessage(message) {
19        // 处理消息在页面的显示
20    }
21
22    $(function () {
23        // 建立websocket连接
24        connect();
25        // 发送消息按钮事件
26        $("#send").click(function () {
27            if (target == "TO_ALL"){
28                // 群发消息
29                // 匹配后端ChatController中的 @MessageMapping("/notice")
30                stompClient.send("/app/notice", {}, '消息内容');
31            }else{
32                // 点对点消息,消息中必须包含对方的username
33                // 匹配后端ChatController中的 @MessageMapping("/chat")
34                var content = "{'content':'消息内容','receiver':'anoy'}";
35                stompClient.send("/app/chat", {}, content);
36            }
37        });
38    });
###8/ 效果测试 登录三个用户:Anoyi、Jock、超级管理员。 群消息测试,超级管理员群发消息:
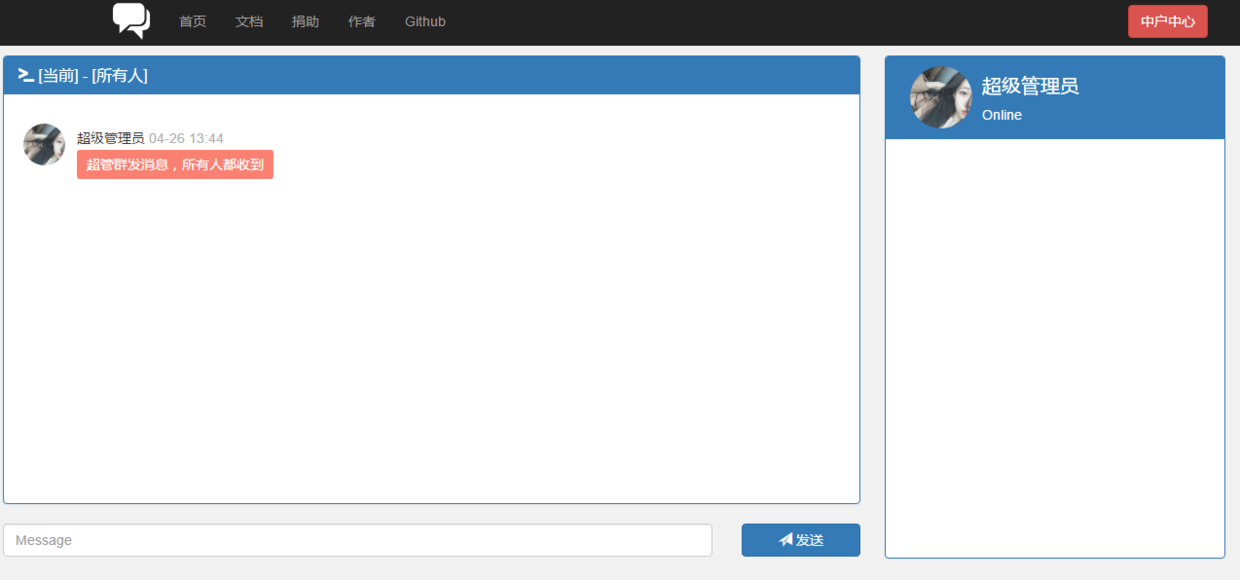
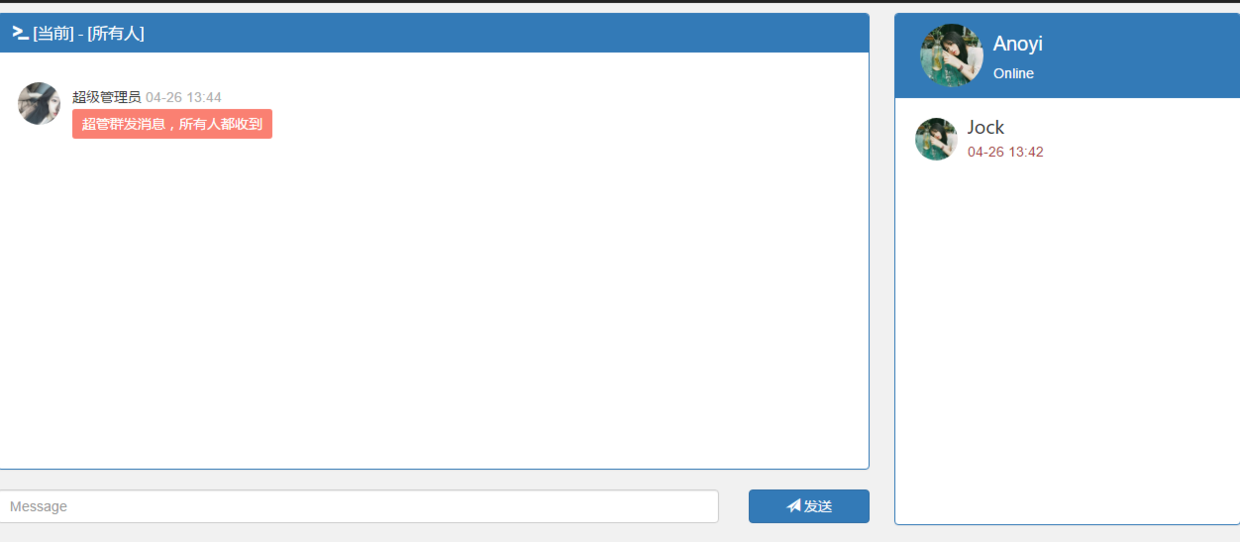
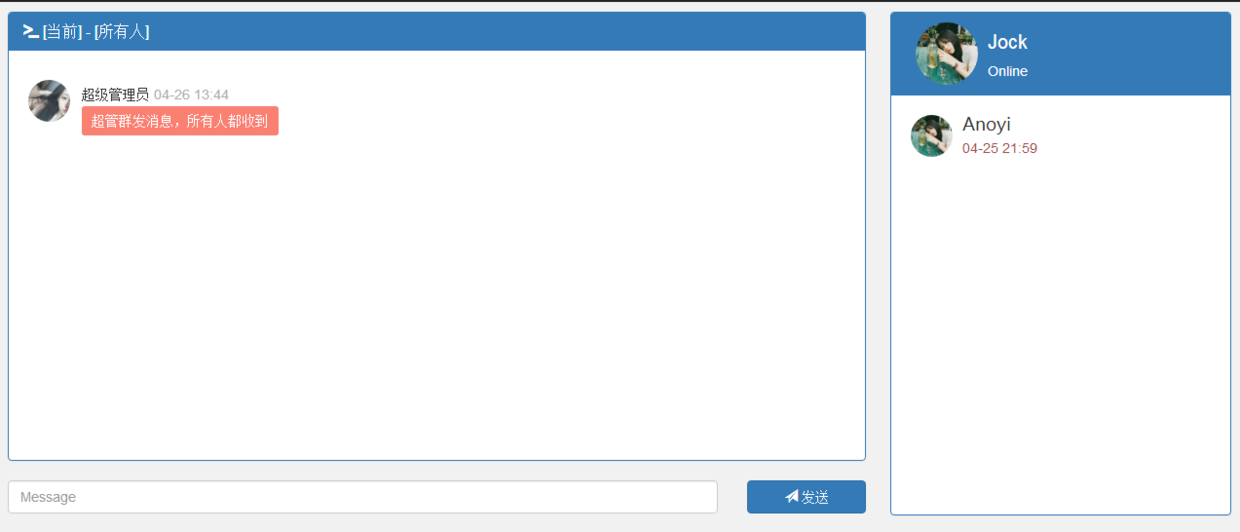
点对点消息测试,Anoyi给Jock发送消息,只有Jock收到消息,Anoyi和超级管理员收不到消息:
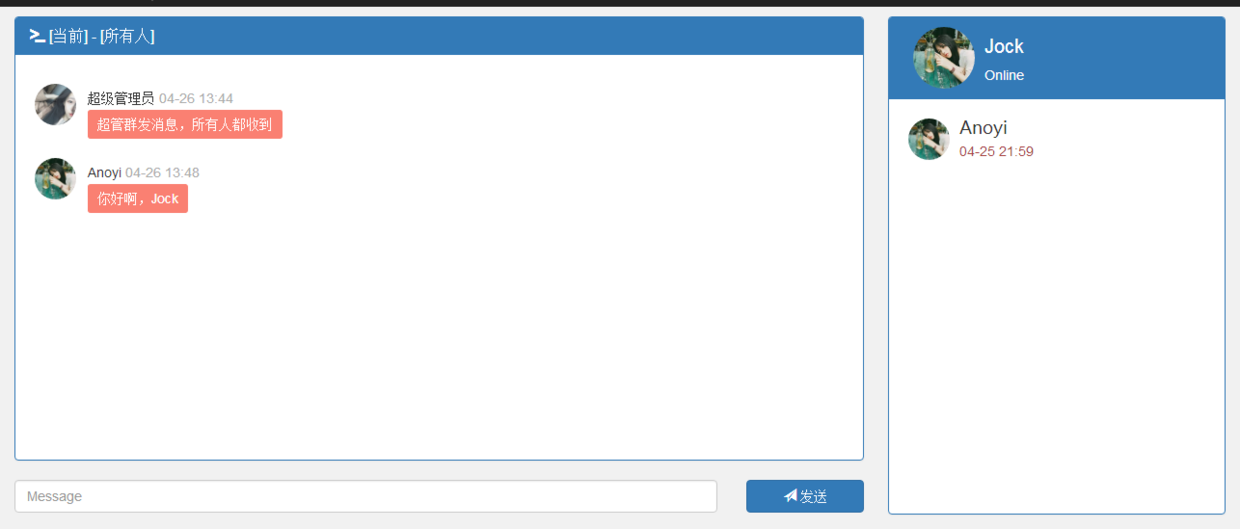
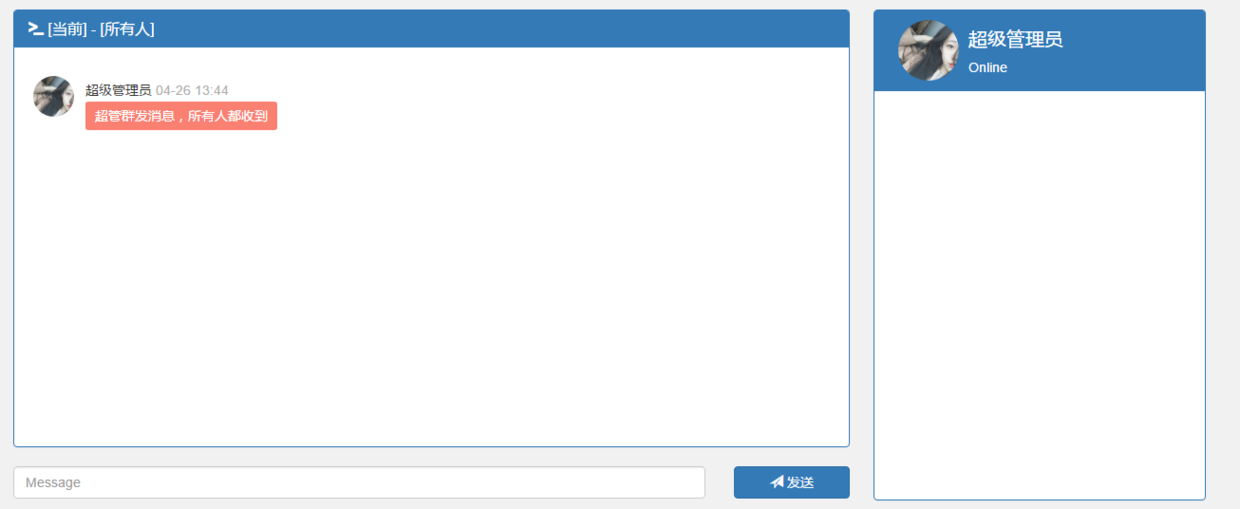
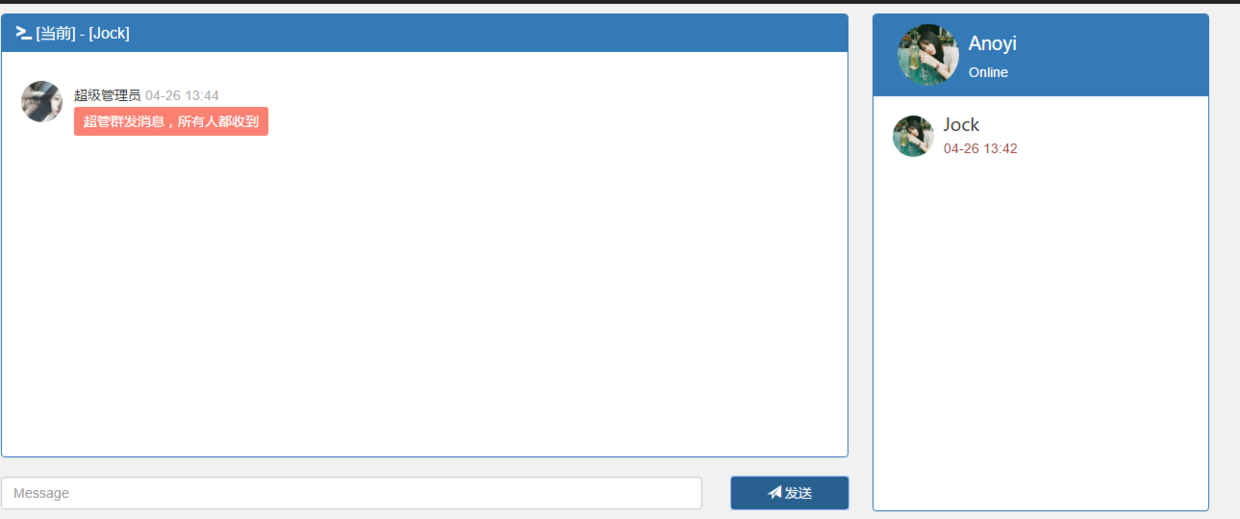
###9/ 轻量级DEMO(完整可运行代码) Spring Boot 开发私有即时通信系统(WebSocket)(续) ###10/ 参考文献
文末福利
Java 资料大全 链接:https://pan.baidu.com/s/1pUCCPstPnlGDCljtBVUsXQ 密码:b2xc 更多资料: 2020 年 精选阿里 Java、架构、微服务精选资料等,加 v ❤ :qwerdd111
本文由博客一文多发平台 OpenWrite 发布!