
在Spring Security中,实现访问控制或权限控制是非常容易实现的,请看下面的代码片段:
1
2
3
<http auto-config="true">
<intercept-url pattern="/admin*" access="ROLE_ADMIN" />
</http>
它的意思是,只有“ROLE_ADMIN”权限的用户可以允许访问“ /admin*”路径,如果没有权限的用户访问则会提示“http 403 access denied page”错误。
本次教程中,我们像你展示只有“ROLE_ADMIN”权限的用户可以访问“/admin*”
1.项目依赖
访问控制需要Spring Security的核心包,请参考Spring+Spring Security+Maven 实现的一个Hello World例子 列出的jar
2.Spring MVC
Spring MVC做控制器并返回一个“hello”视图,这个你应该可以理解的。
WelcomeController.java
1
2
3
4
5
6
7
8
9
10
11
12
13
14
15
16
17
18
19
package com.mkyong.common.controller;
import org.springframework.stereotype.Controller;
import org.springframework.ui.ModelMap;
import org.springframework.web.bind.annotation.RequestMapping;
import org.springframework.web.bind.annotation.RequestMethod;
@Controller
public class WelcomeController {
@RequestMapping(value = "/admin", method = RequestMethod.GET)
public String welcomeAdmin(ModelMap model) {
model.addAttribute("message", "Spring Security - ROLE_ADMIN");
return "hello";
}
}
hello.jsp
1
2
3
4
5
6
7
8
<%@ taglib prefix="c" uri=" http://java.sun.com/jsp/jstl/core"%>
<html> <body><h3>Message : ${message}</h3>
<a href="<c:url value="j_spring_security_logout" />" > Logout</a>
</body> </html>3.Spring Security
一下是Sprign Security全部的配置文件,只允许“eclipse”用户可以访问“/hello”页面
1
2
3
4
5
6
7
8
9
10
11
12
13
14
15
16
17
18
19
20
21
22
23
<beans:beans xmlns=" http://www.springframework.org/schema/security"
xmlns:beans=" http://www.springframework.org/schema/beans"
xmlns:xsi=" http://www.w3.org/2001/XMLSchema-instance"
xsi:schemaLocation=" http://www.springframework.org/schema/beans
http://www.springframework.org/schema/beans/spring-beans-3.0.xsd
http://www.springframework.org/schema/security
http://www.springframework.org/schema/security/spring-security-3.0.3.xsd">
<http auto-config="true">
<intercept-url pattern="/admin*" access="ROLE_ADMIN" />
<logout logout-success-url="/admin" />
</http>
<authentication-manager>
<authentication-provider>
<user-service>
<user name="it161" password="password" authorities="ROLE_USER" />
<user name="eclipse" password="password" authorities="ROLE_ADMIN" />
</user-service>
</authentication-provider>
</authentication-manager>
</beans:beans>
4.示例
http://localhost:8080/SpringMVC/admin
1.默认的登陆页面如下所示:
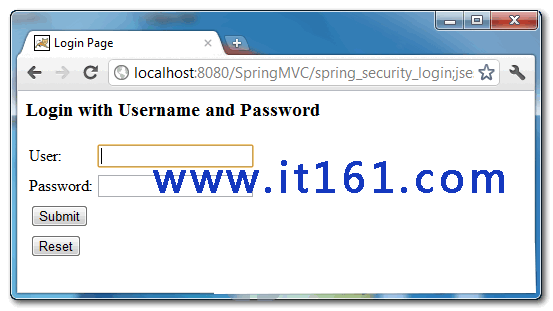
2.如果用“it161”登陆时,就会提示“http 403 is access denied page”,因为it161是“ROLE_USER”权限

3.如果用“eclipse”登陆的话,“hello.jsp”就会展示,因为“eclipse”是“ROLE_ADMIN“权限。

默认的403页面非常丑陋,请可以阅读本人自定义你的403页面:Spring Security教程-Spring Security实现访问控制
原创文章,转载请注明出处:http://www.it161.com/article/javaDetail?articleid=140113230945
更多原创内容,请访问:http://www.it161.com/