
2021.2.24 更新
1 概述
本文主要讲述了如何使用Hibernate Validator以及@Valid/@Validate注解。
2 校验
对于一个普通的Spring Boot应用,经常可以在业务层看到以下类似的操作:
1if(id == null)
2{...}
3if(username == null)
4{...}
5if(password == null)
6{...}
这是很正常的,但是会显得代码很繁琐,一个更好的做法就是使用Hibernate Validator。
3 Hibernate Validator
JSR是Java Specification Requests的缩写,意思是Java规范提案,JSR-303是Java EE 6的一项子规范,叫作Bean Validation,Hibernate Validator是Bean Validator的参考实现。其中JSR-303内置constraint如下:
@Null:被注解元素必须为null@NotNull:必须不为null@AssertTrue/@AssertFalse:必须为true/false@Min(value)/@Max(value):指定最小值/最大值(可以相等)@DecimalMin(value)/DecimalMax(value):指定最小值/最大值(不能相等)@Size(min,max):大小在给定范围@Digits(integer,fraction):将字符串转为浮点数,并且规定整数位数最大integer位,小数位数最大fraction位@Past:必须是一个过去日期@Future:必须是将来日期@Pattern:必须符合正则表达式
其中Hibernate Validator添加的constraint如下:
@Email:必须符合邮箱格式@Length(min,max):字符串长度范围@Range:数字在指定范围
而在Spring中,对Hibernate Validator进行了二次封装,添加了自动校验并且可以把校验信息封装进特定的BindingResult中。
4 基本使用
注解直接在实体类的对应字段加上即可:
1@Setter
2@Getter
3public class User {
4    @NotBlack(message = "邮箱不能为空")
5    @Email(message = "邮箱非法")
6    private String email;
7    @NotBlack(message = "电话不能为空")
8    private String phone;
9}
控制层:
1@CrossOrigin(value = "http://localhost:3000")
2@RestController
3public class TestController {
4    @PostMapping("/test")
5    public boolean test(@RequestBody @Valid User user)
6    {
7        return true;
8    }
9}
测试:
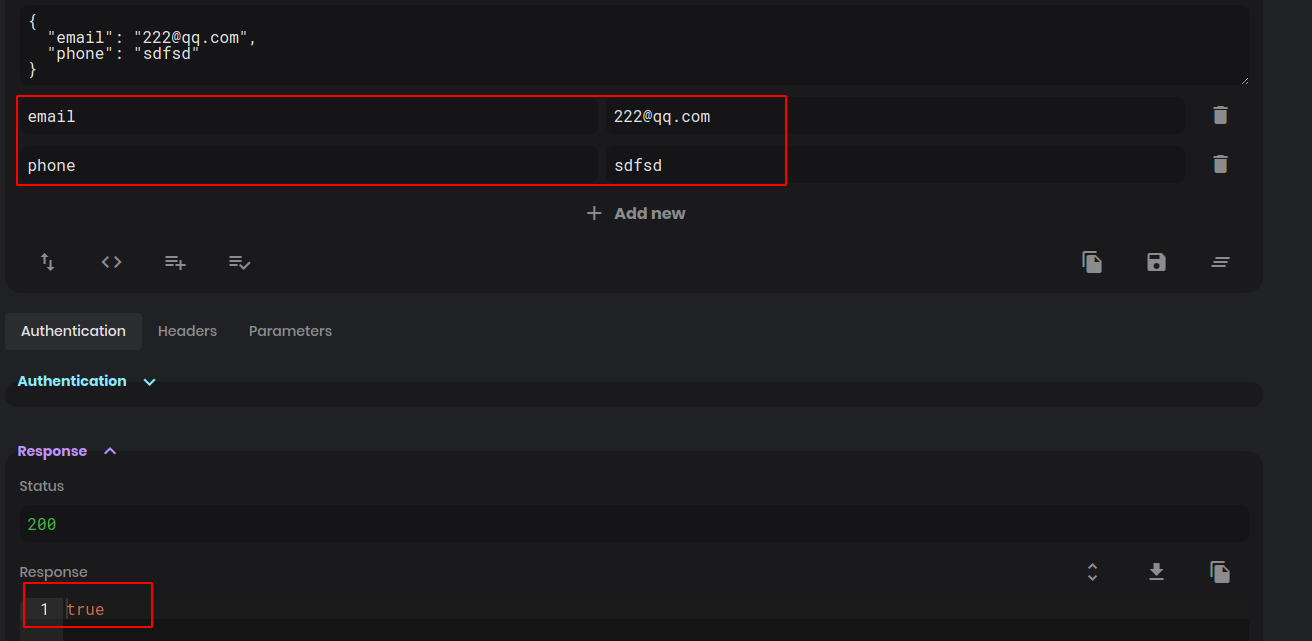
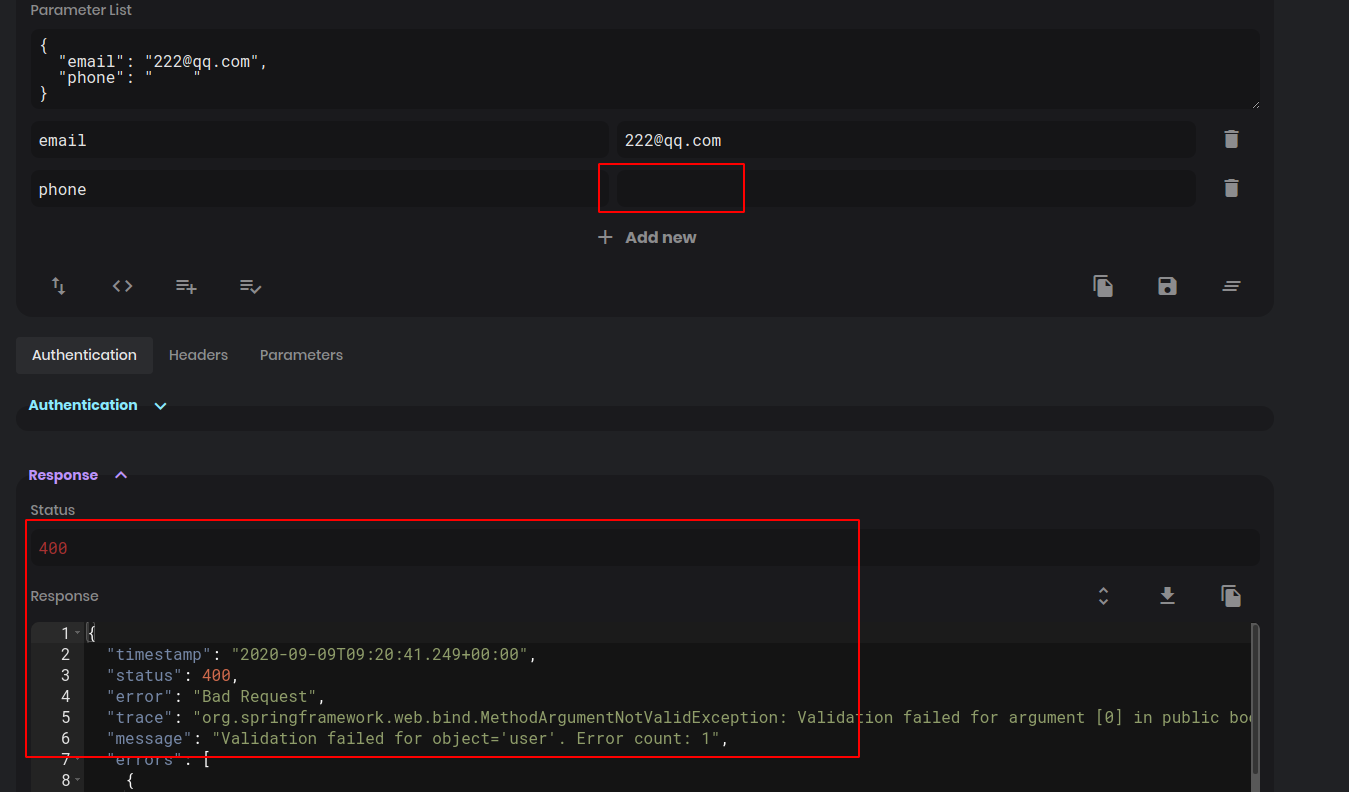
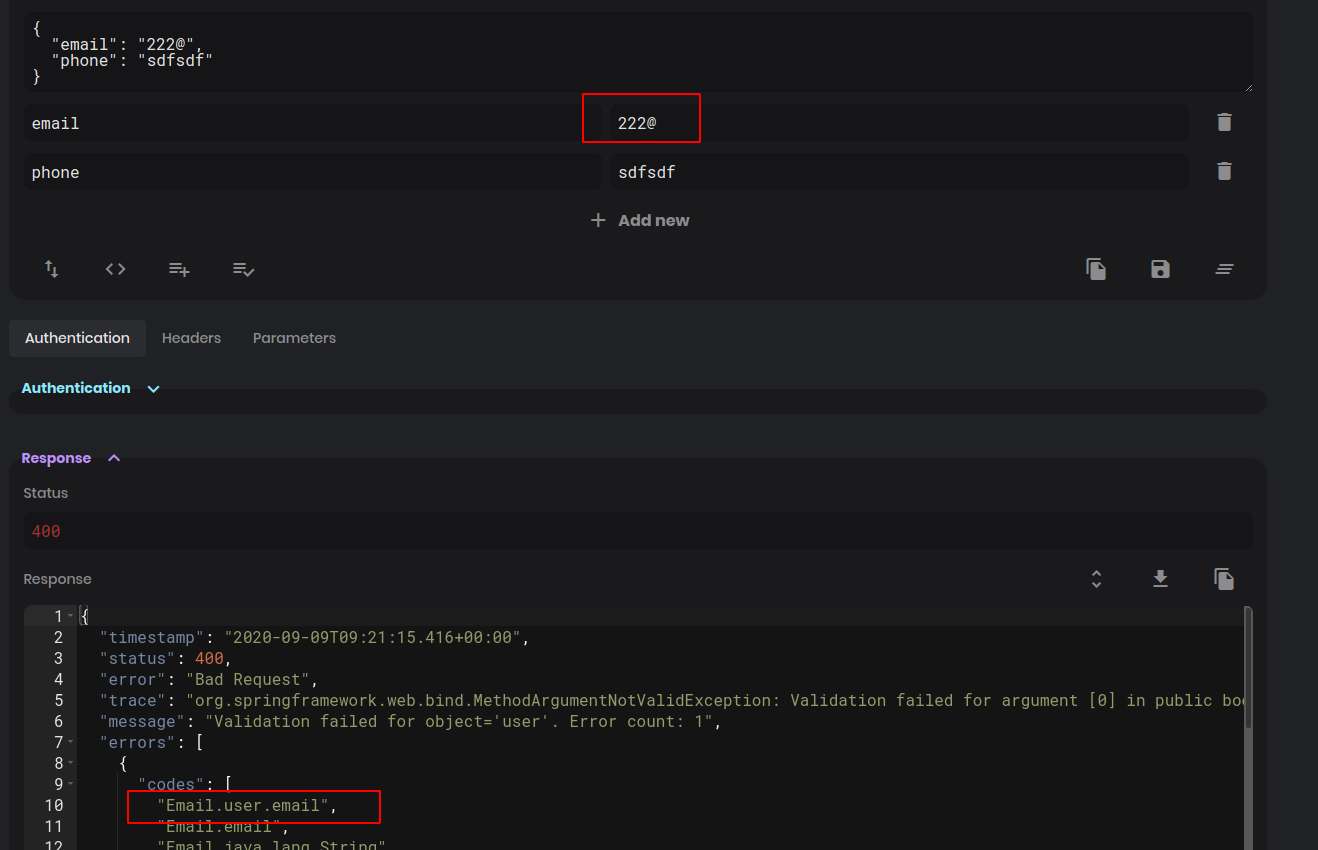
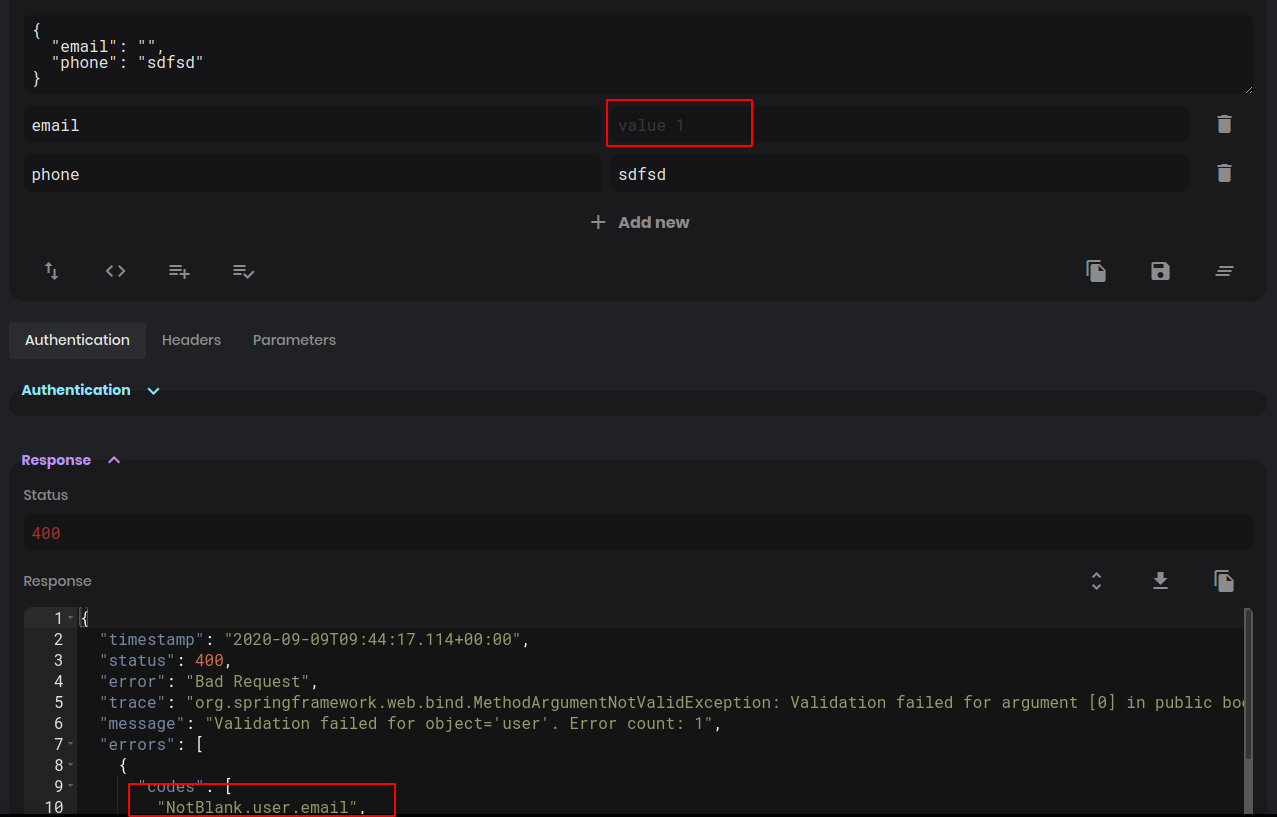
可以看到把phone字段留空或者使用非法邮箱格式时直接抛出异常。
5 异常处理
前面说过校验出错会把异常放进BindingResult中,具体的处理方法就是加上对应参数即可,控制层修改如下:
1@PostMapping("/test")
2public boolean test(@RequestBody @Valid User user, BindingResult result)
3{
4    if(result.hasErrors())
5        result.getAllErrors().forEach(System.out::println);
6    return true;
7}
可以通过getAllErrors获取所有的错误,这样就可以对具体错误进行处理了。
6 快速失败模式
Hibernate Validator有两种校验模式:
- 普通模式:默认,检验所有属性,然后返回所有验证失败信息
- 快速失败模式:只要有一个验证失败便返回
使用快速失败模式需要通过HiberateValidateConfiguration以及ValidateFactory创建Validator,并且使用Validator.validate手动校验,首先可以添加一个生成Validator的类:
1import org.hibernate.validator.HibernateValidator;
2import org.springframework.context.annotation.Configuration;
3
4import java.util.Set;
5import javax.validation.ConstraintViolation;
6import javax.validation.Validation;
7import javax.validation.Validator;
8
9@Configuration
10public class FailFastValidator {
11    private final Validator validator;
12    public FailFastValidator()
13    {
14        validator = Validation
15        .byProvider(HibernateValidator.class)
16        .configure()
17        .failFast(true)
18        .buildValidatorFactory()
19        .getValidator();
20    }
21
22    public Set<ConstraintViolation<User>> validate(User user)
23    {
24        return validator.validate(user);
25    }
26}
接着修改控制层,去掉User上的@Valid,同时注入validator进行手动校验:
1import com.example.demo.entity.User;
2import com.example.demo.failfast.FailFastValidator;
3import lombok.RequiredArgsConstructor;
4import org.springframework.beans.factory.annotation.Autowired;
5import org.springframework.web.bind.annotation.CrossOrigin;
6import org.springframework.web.bind.annotation.PostMapping;
7import org.springframework.web.bind.annotation.RequestBody;
8import org.springframework.web.bind.annotation.RestController;
9
10import javax.validation.ConstraintViolation;
11import java.util.Set;
12
13@CrossOrigin(value = "http://localhost:3000")
14@RestController
15@RequiredArgsConstructor(onConstructor = @__(@Autowired))
16public class TestController {
17    private final FailFastValidator validator;
18    @PostMapping("/test")
19    public boolean test(@RequestBody User user)
20    {
21        Set<ConstraintViolation<User>> message = validator.validate(user);
22        message.forEach(System.out::println);
23        return true;
24    }
25}
这样一旦校验失败便会返回,而不是校验完所有的字段记录所有错误信息再返回。
7 @Valid与@Validated
@Valid位于javax.validation下,而@Validated位于org.springframework.validation.annotation下,是@Valid的一次封装,在@Valid的基础上,增加了分组以及组序列的功能,下面分别进行介绍。
7.1 分组
当不同的情况下需要不同的校验方式时,可以使用分组功能,比如在某种情况下需要注册时不需要校验邮箱,而修改信息的时候需要校验邮箱,则实体类可以如下设计:
1@Setter
2@Getter
3public class User {
4    @NotBlank(message = "邮箱不能为空",groups = GroupB.class)
5    @Email(message = "邮箱非法",groups = GroupB.class)
6    private String email;
7    @NotBlank(message = "电话不能为空",groups = {GroupA.class,GroupB.class})
8    private String phone;
9
10    public interface GroupA{}
11    public interface GroupB{}
12}
接着修改控制层,并使用@Validate代替原来的@Valid:
1public class TestController {
2    @PostMapping("/test")
3    public boolean test(@RequestBody @Validated(User.GroupA.class) User user)
4    {
5        return true;
6    }
7}
在GroupA的情况下,只校验电话,测试如下:
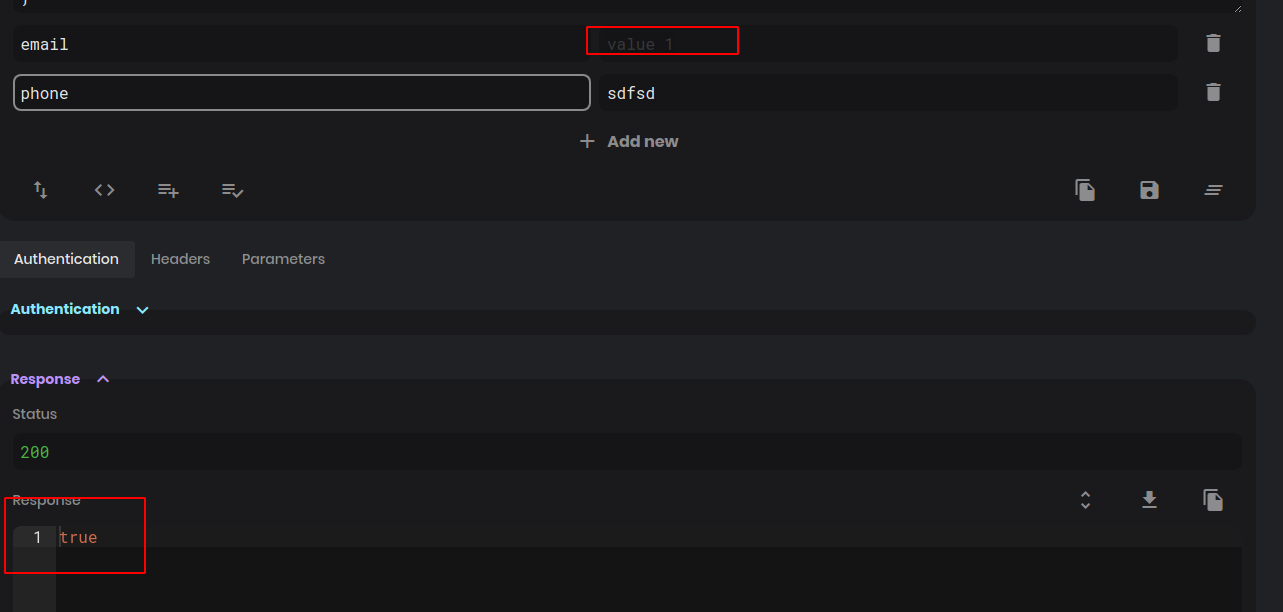
而如果修改为GroupB:
public boolean test(@RequestBody @Validated(User.GroupB.class) User user)
这样就邮箱与电话都校验:
7.2 组序列
默认情况下,校验是无序的,也就是说,对于下面的实体类:
1public class User {
2    @NotBlank(message = "邮箱不能为空")
3    @Email(message = "邮箱非法")
4    private String email;
5    @NotBlank(message = "电话不能为空")
6    private String phone;
7}
先校验哪一个并没有固定顺序,修改控制层如下,返回错误信息:
1@PostMapping("/test")
2public String test(@RequestBody @Validated User user, BindingResult result)
3{
4    for (ObjectError allError : result.getAllErrors()) {
5        return allError.getDefaultMessage();
6    }
7    return "true";
8}
可以看到两次测试的结果不同:
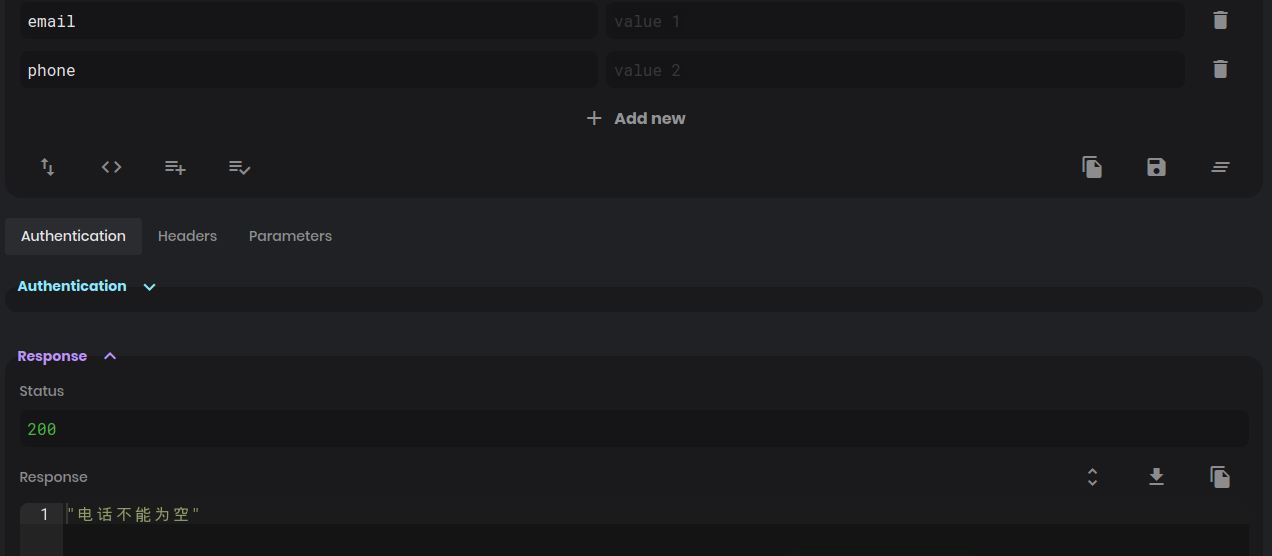
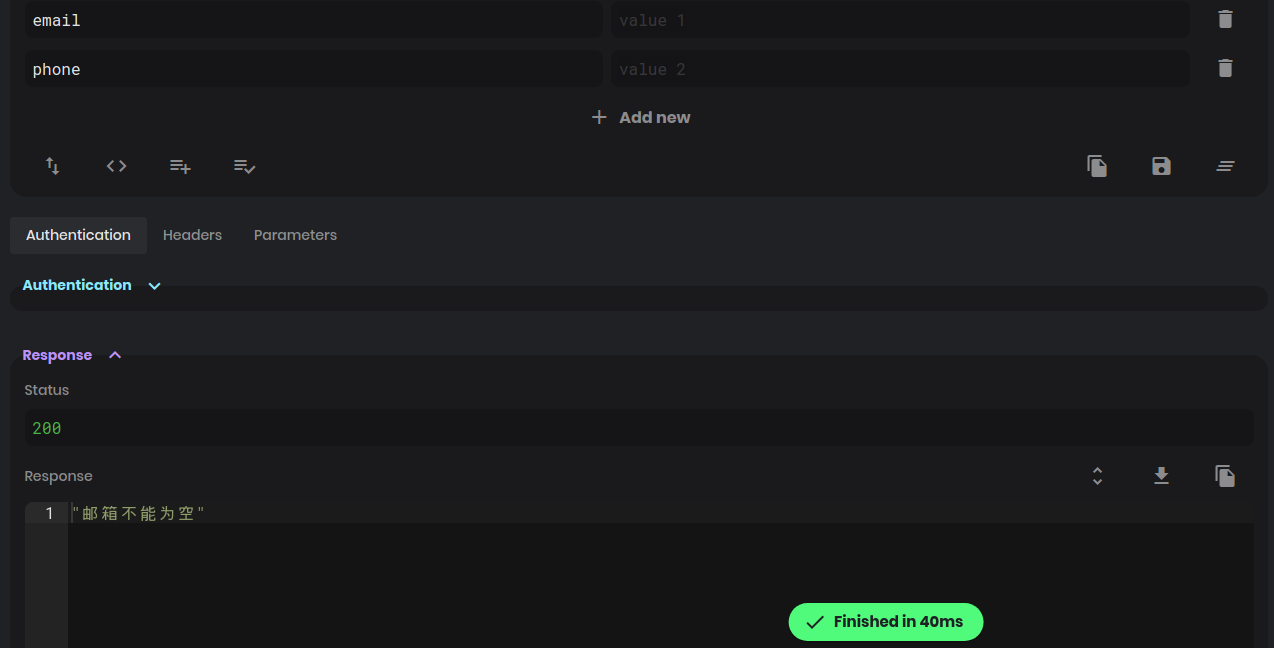
因为顺序不固定,而如果指定了顺序:
1public class User {
2    @NotBlank(message = "邮箱不能为空",groups = First.class)
3    @Email(message = "邮箱非法",groups = First.class)
4    private String email;
5    @NotBlank(message = "电话不能为空",groups = Third.class)
6    private String phone;
7
8    public interface First{}
9    public interface Second{}
10    public interface Third{}
11    @GroupSequence({First.class,Second.class,Third.class})
12    public interface Group{}
13}
同时控制层指定顺序:
public String test(@RequestBody @Validated(User.Group.class) User user, BindingResult result)
这样就一定会先校验First,也就是先校验邮箱是否为空。
8 自定义注解
尽管使用上面的各种注解已经能解决很多情况了,但是对于一些特定的情况,需要一些特别的校验,而自带的注解不能满足,这时就需要自定义注解了,比如上面的电话字段,国内的是11位的,而且需要符合某些条件(比如默认区号+86等),下面就自定义一个专门用于手机号码的注解:
1@Documented
2@Constraint(validatedBy = PhoneValidator.class)
3@Target({ElementType.FIELD,ElementType.METHOD})
4@Retention(RetentionPolicy.RUNTIME)
5public @interface Phone {
6    String message() default "请使用合法的手机号码";
7    Class<?> [] groups() default {};
8    Class<? extends Payload> [] payload() default {};
9}
同时定义一个验证类:
1public class PhoneValidator implements ConstraintValidator<Phone,String> {
2    @Override
3    public boolean isValid(String s, ConstraintValidatorContext constraintValidatorContext) {
4        if(s.length() != 11)
5            return false;
6        return Pattern.matches("^((17[0-9])|(14[0-9])|(13[0-9])|(15[^4,\\D])|(18[0,5-9]))\\d{8}$",s);
7    }
8}
接着修改实体类,加上注解即可:
1@Phone
2@NotBlank(message = "电话不能为空")
3private String phone;
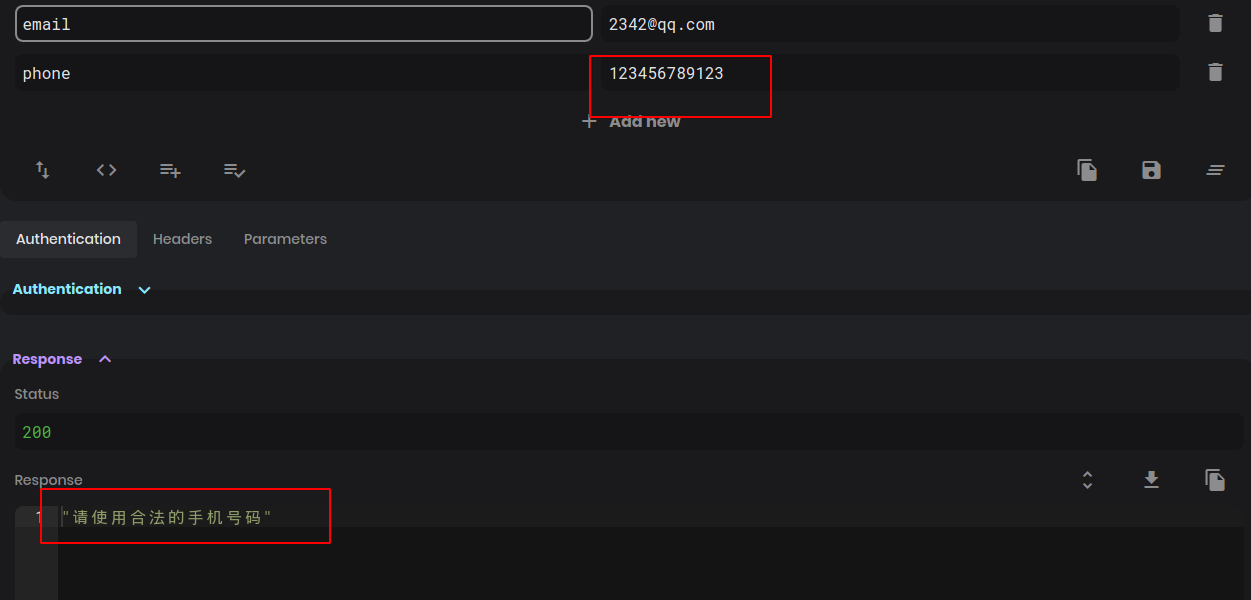
测试如下,可以看到虽然是11位了,但是格式非法,因此返回相应信息:
9 来点AOP
默认情况下Hibernate Validator不是快速失败模式的,但是如果配成快速失败模式就不能用@Validate了,需要手动实例化一个Validator,这是一种很麻烦的操作,虽然说可以利用组序列“伪装”成一个快速失败模式,但是有没有更好的解决办法呢?
有!
就是。。。
自己动手使用AOP实现校验。
9.1 依赖
AOP这种高级的东西当然是用别人的轮子啊:
1<dependency>
2    <groupId>org.springframework.boot</groupId>
3    <artifactId>spring-boot-starter-aop</artifactId>
4</dependency>
9.2 验证注解
首先自定义一个验证注解,这个注解的作用类似@Validate:
public @interface UserValidate {}
9.3 字段验证
自定义一些类似@NotEmpty等的注解:
1@Documented
2@Retention(RetentionPolicy.RUNTIME)
3@Target(ElementType.FIELD)
4public @interface MyEmail {
5    String message() default "邮箱不能为空,且需要一个合法的邮箱";
6    int order();
7}
8
9@Documented
10@Target(ElementType.FIELD)
11@Retention(RetentionPolicy.RUNTIME)
12public @interface MyPhone {
13    String message() default "电话不能为空,且需要一个合法的电话";
14    int order();
15}
9.4 定义验证器
1@Aspect
2@Component
3public class UserValidator {
4    @Pointcut("@annotation(com.example.demo.aop.UserValidate)")
5    public void userValidate(){}
6
7    @Before("userValidate()")
8    public void validate(JoinPoint point) throws EmailException, PhoneException, IllegalAccessException {
9        User user = (User)point.getArgs()[0];
10        TreeMap<Integer,Annotation> treeMap = new TreeMap<>();
11        HashMap<Integer,Object> allFields = new HashMap<>();
12        for (Field field : user.getClass().getDeclaredFields()) {
13            field.setAccessible(true);
14            for (Annotation annotation : field.getAnnotations()) {
15                if(annotation.annotationType() == MyEmail.class)
16                {
17                    treeMap.put(((MyEmail)annotation).order(),annotation);
18                    allFields.put(((MyEmail)annotation).order(),field.get(user));
19                }
20                else if(annotation.annotationType() == MyPhone.class)
21                {
22                    treeMap.put(((MyPhone)annotation).order(),annotation);
23                    allFields.put(((MyPhone)annotation).order(),field.get(user));
24                }
25            }
26        }
27        for (Map.Entry<Integer, Annotation> entry : treeMap.entrySet()) {
28            Class<? extends Annotation> type = entry.getValue().annotationType();
29            if(type == MyEmail.class)
30            {
31                validateEmail((String)allFields.get(entry.getKey()));
32            }
33            else if(type == MyPhone.class)
34            {
35                validatePhone((String)allFields.get(entry.getKey()));
36            }
37        }
38    }
39
40    private static void validateEmail(String s) throws EmailException
41    {
42        throw new EmailException();
43    }
44
45    private static void validatePhone(String s) throws PhoneException
46    {
47        throw new PhoneException();
48    }
49}
这个是实现校验的核心,首先定义一个切点:
1@Pointcut("@annotation(com.example.demo.aop.UserValidate)")
2public void userValidate(){}
该切点应用在注解@UserValidate上,接着定义验证方法validate,首先通过切点获取其中的参数以及参数中的注解,并且模拟了组序列,先使用TreeMap进行排序,最后针对遍历该TreeMap,对不同的注解分别调用不同的方法校验。
实体类简单定义顺序即可:
1public class User {
2    @MyEmail(order = 2)
3    private String email;
4    @MyPhone(order = 1)
5    private String phone;
6}
控制类中的注解定义在方法上:
1@PostMapping("/test")
2@UserValidate
3public String test(@RequestBody User user)
4{
5    return "true";
6}
这样就自定义实现了一个简单的JSR-303了。
当然该方法还有很多的不足,比如需要配合全局异常处理,不然的话会直接抛出异常:
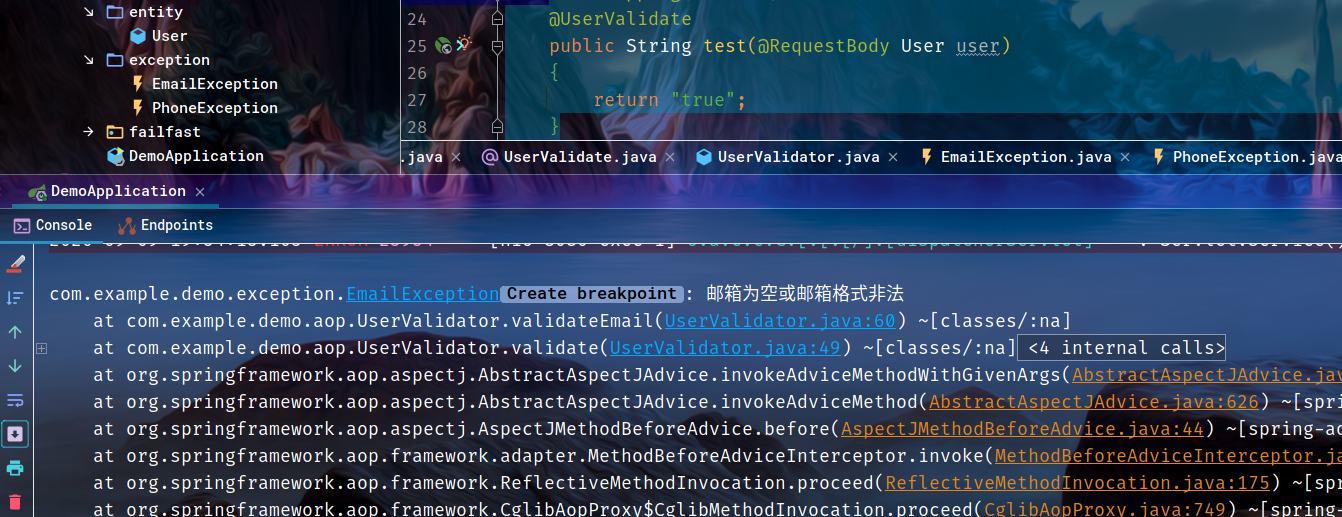
前端也是直接返回异常:
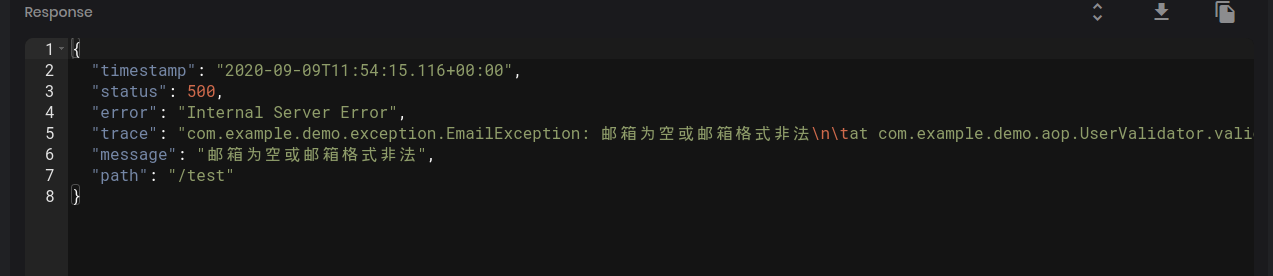
一般情况下还是推荐使用Hibernate Validator,应对常规情况足够了。
10 参考源码
Java版:
Kotlin版: