hexo-theme-next 主题配置大全,图文并茂,持续更新中。
1 安装 NexT 主题
1.1 下载 NexT 主题
建议你使用 克隆最新版本 的方式,之后的更新可以通过 git pull 来快速更新, 而不用再次下载压缩包替换。
1cd blog
2git clone https://github.com/iissnan/hexo-theme-next themes/next
1.2 启用 NexT 主题
与所有 Hexo 主题启用的模式一样。 当 克隆/下载 完成后,打开 站点配置文件, 找到 theme 字段,并将其值更改为 next。
1# Extensions
2## Plugins: https://hexo.io/plugins/
3## Themes: https://hexo.io/themes/
4theme: next
到此,NexT 主题安装完成。下一步我们将验证主题是否正确启用。在切换主题之后、验证之前, 我们最好使用 hexo clean 来清除 Hexo 的缓存。
2 配置 NexT 主题
设置站点信息
效果图:
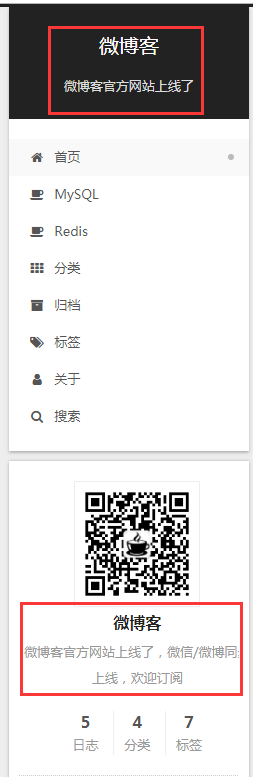
编辑 站点配置文件,具体配置参考 Hexo 搭建个人博客网站 。
设置页面文章的篇数
编辑 站点配置文件,具体配置参考 Hexo 搭建个人博客网站 。
主题配置文件
编辑 主题配置文件,具体配置参考 themes/next/_config.yml。
# ......
选择 Scheme
Scheme 是 NexT 提供的一种特性,借助于 Scheme,NexT 为你提供多种不同的外观。同时,几乎所有的配置都可以 在 Scheme 之间共用。目前 NexT 支持三种 Scheme,他们是:
- Muse - 默认 Scheme,这是 NexT 最初的版本,黑白主调,大量留白
- Mist - Muse 的紧凑版本,整洁有序的单栏外观
- Pisces - 双栏 Scheme,小家碧玉似的清新
- Gemini
Scheme 的切换通过更改 主题配置文件,搜索 scheme 关键字,将你需用启用的 scheme 前面注释 # 去除即可。
1# Schemes
2#scheme: Muse
3#scheme: Mist
4#scheme: Pisces
5scheme: Gemini
设置菜单
效果图:
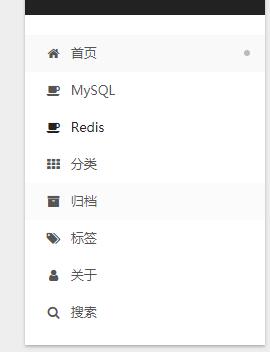
菜单配置包括三个部分,第一是菜单项(名称和链接),第二是菜单项的显示文本,第三是菜单项对应的图标。 NexT 使用的是 Font Awesome 提供的图标, Font Awesome 提供了 600+ 的图标,可以满足绝大的多数的场景,同时无须担心在 Retina 屏幕下 图标模糊的问题。
编辑 主题配置文件,修改以下内容:
-
设定菜单内容,对应的字段是
menu。 菜单内容的设置格式是:item name: link。其中item name是一个名称,这个名称并不直接显示在页面上,它将用于匹配图标以及翻译。When running the site in a subdirectory (e.g. domain.tld/blog), remove the leading slash from link value (/archives -> archives).
Usage:
Key: /link/ || iconKey is the name of menu item. If translate for this menu will find in languages - this translate will be loaded; if not - Key name will be used. Key is case-senstive.
Value before
||delimeter is the target link.Value after
||delimeter is the name of FontAwesome icon. If icon (with or without delimeter) is not specified, question icon will be loaded.menu: home: / || home 咖啡豆: /cherry/ || coffee 咖啡粉: /powder/ || coffee categories: /categories/ || th archives: /archives/ || archive tags: /tags/ || tags #schedule: /schedule/ || calendar #sitemap: /sitemap.xml || sitemap #commonweal: /404/ || heartbeat about: /about/ || user
若你的站点运行在子目录中,请将链接前缀的 / 去掉。
NexT 默认的菜单项有(标注 ! 的项表示需要手动创建这个页面):
键值
设定值
显示文本(简体中文)
home
home: /
主页
archives
archives: /archives
归档页
categories
categories: /categories
分类页 !
tags
tags: /tags
标签页 !
about
about: /about
关于页面 !
commonweal
commonweal: /404.html
公益 404 !
- 设置菜单项的显示文本。在第一步中设置的菜单的名称并不直接用于界面上的展示。Hexo 在生成的时候将使用 这个名称查找对应的语言翻译,并提取显示文本。这些翻译文本放置在 NexT 主题目录下的
languages/{language}.yml({language}为你所使用的语言)。
以简体中文为例,若你需要添加一个菜单项,比如 something。那么就需要修改简体中文对应的翻译文件 languages/zh-Hans.yml,在 menu 字段下添加一项:
1menu:
2  home: 首页
3  archives: 归档
4  categories: 分类
5  tags: 标签
6  about: 关于
7  search: 搜索
8  commonweal: 公益404
9  something: 有料
3. 设定菜单项的图标。enable 可用于控制是否显示图标,你可以设置成 false 来去掉图标。
1# Enable/Disable menu icons.
2menu_icons:
3  enable: true
在菜单图标开启的情况下,如果菜单项与菜单未匹配(没有设置或者无效的 Font Awesome 图标名字) 的情况下,NexT 将会使用 ? 作为图标。
请注意键值(如 home)的大小写要严格匹配。
设置侧栏
效果图:
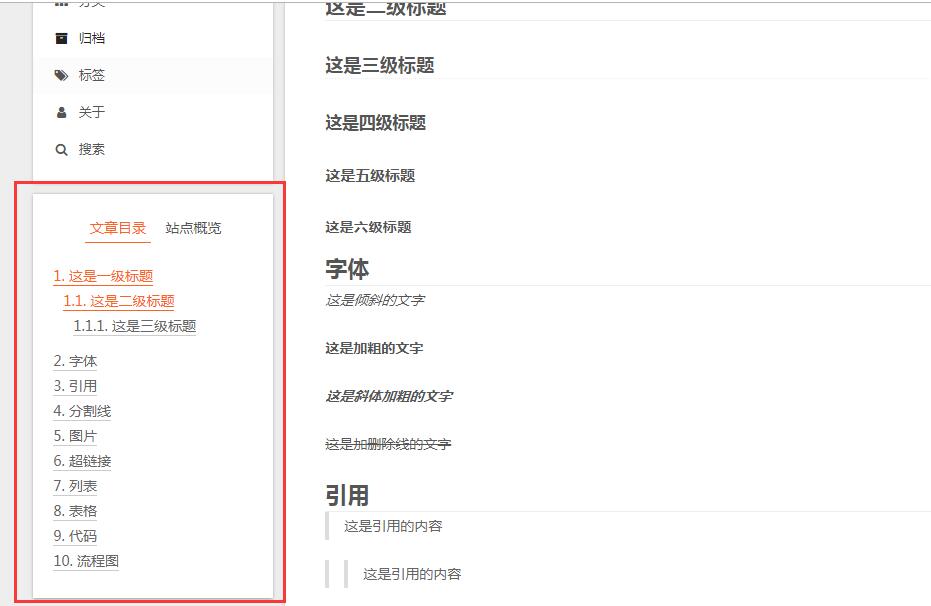
默认情况下,侧栏仅在文章页面(拥有目录列表)时才显示,并放置于右侧位置。 可以通过修改 主题配置文件 中的 sidebar 字段来控制侧栏的行为。侧栏的设置包括两个部分,其一是侧栏的位置, 其二是侧栏显示的时机。
- 设置侧栏的位置,修改
sidebar.position的值,支持的选项有:
-
left - 靠左放置
-
right - 靠右放置
sidebar: position: left
目前仅 Pisces Scheme 支持
position配置。影响版本5.0.0及更低版本。
- 设置侧栏显示的时机,修改
sidebar.display的值,支持的选项有:
-
post- 默认行为,在文章页面(拥有目录列表)时显示 -
always- 在所有页面中都显示 -
hide- 在所有页面中都隐藏(可以手动展开) -
remove- 完全移除sidebar: display: post
已知侧栏在
use motion: false的情况下不会展示。 影响版本5.0.0及更低版本。
设置头像
效果图:
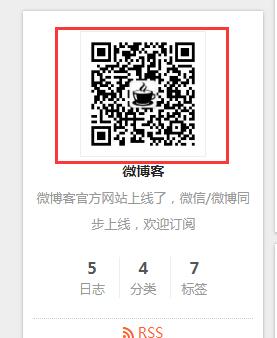
编辑 主题配置文件, 修改字段 avatar, 值设置成头像的链接地址。其中,头像的链接地址可以是:
-
完整的互联网 URI,如:http://example.com/avatar.png
-
站点内的地址,主题或站点的source目录下。
Sidebar Avatar
in theme directory(source/images): /images/avatar.gif
in site directory(source/uploads): /uploads/avatar.gif
avatar: /images/custom/avatar.jpg

设置 RSS
效果图:
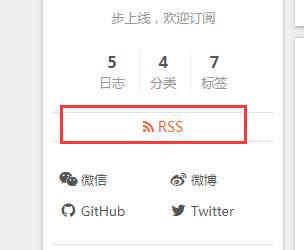
安装RSS插件: npm install --save hexo-generator-feed
编辑 站点配置文件,新增如下配置:
1####################### add #######################
2# rss
3plugins: hexo-generate-feed
编辑 主题配置文件,配置如下:
1# Set rss to false to disable feed link.
2# Leave rss as empty to use site's feed link.
3# Set rss to specific value if you have burned your feed already.
4rss: /atom.xml
侧边栏社交链接
效果图:
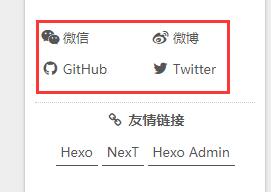
侧栏社交链接的修改包含两个部分,第一是链接,第二是链接图标。 两者配置均在 主题配置文件 中。
-
链接放置在 social 字段下,一行一个链接。其键值格式是 显示文本: 链接地址。
Social Links.
Usage:
Key: permalink || iconKey is the link label showing to end users.
Value before
||delimeter is the target permalink.Value after
||delimeter is the name of FontAwesome icon. If icon (with or without delimeter) is not specified, globe icon will be loaded.social: 微信: https://wx.qq.com/ || weixin 微博: https://weibo.com/ || weibo GitHub: https://github.com/ || github #E-Mail: mailto:yourname@gmail.com || envelope #Google: https://plus.google.com/yourname || google Twitter: https://twitter.com/ || twitter #FB Page: https://www.facebook.com/yourname || facebook #VK Group: https://vk.com/yourname || vk #StackOverflow: https://stackoverflow.com/yourname || stack-overflow #YouTube: https://youtube.com/yourname || youtube #Instagram: https://instagram.com/yourname || instagram #Skype: skype:yourname?call|chat || skype
-
设定链接的图标,对应的字段是 social_icons。其键值格式是 匹配键: Font Awesome 图标名称, 匹配键 与上一步所配置的链接的 显示文本 相同(大小写严格匹配),图标名称 是 Font Awesome 图标的名字(不必带 fa- 前缀)。 enable 选项用于控制是否显示图标,你可以设置成 false 来去掉图标。
social_icons: enable: true icons_only: false transition: false
开启打赏功能
效果图:
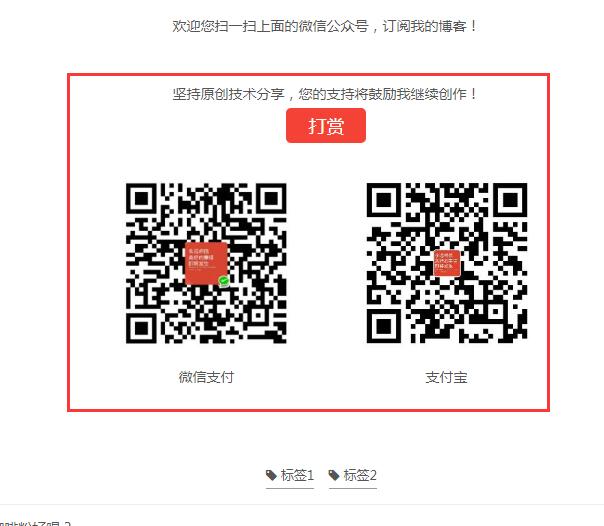
越来越多的平台(微信公众平台,新浪微博,简书,百度打赏等)支持打赏功能,付费阅读时代越来越近,特此增加了打赏功能,支持微信打赏和支付宝打赏。 只需要 主题配置文件 中填入 微信 和 支付宝 收款二维码图片地址 即可开启该功能。
1# Reward
2reward_comment: 坚持原创技术分享,您的支持将鼓励我继续创作!
3wechatpay: /images/custom/wechatpay.jpg
4alipay: /images/custom/alipay.jpg
5#bitcoin: /images/bitcoin.png
设置友情链接
效果图:
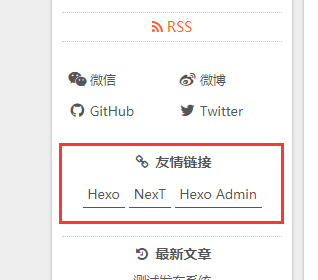
编辑 主题配置文件 ,配置如下:
1links_icon: link
2links_title: 友情链接
3#links_layout: block
4links_layout: inline
5links:
6  Hexo: https://hexo.io/zh-cn/
7  NexT: https://theme-next.iissnan.com/
8  Hexo Admin: https://github.com/jaredly/hexo-admin
腾讯公益404页面
腾讯公益404页面,寻找丢失儿童,让大家一起关注此项公益事业!效果如下 http://www.ixirong.com/404.html
使用方法,新建 404.html 页面,放到主题的 source 目录下,内容如下:
1<!DOCTYPE HTML>
2<html>
3<head>
4  <meta http-equiv="content-type" content="text/html;charset=utf-8;"/>
5  <meta http-equiv="X-UA-Compatible" content="IE=edge,chrome=1" />
6  <meta name="robots" content="all" />
7  <meta name="robots" content="index,follow"/>
8  <link rel="stylesheet" type="text/css" href="https://qzone.qq.com/gy/404/style/404style.css">
9</head>
10<body>
11  <script type="text/plain" src="http://www.qq.com/404/search_children.js"
12          charset="utf-8" homePageUrl="/"
13          homePageName="回到我的主页">
14  </script>
15  <script src="https://qzone.qq.com/gy/404/data.js" charset="utf-8"></script>
16  <script src="https://qzone.qq.com/gy/404/page.js" charset="utf-8"></script>
17</body>
18</html>
站点建立时间
这个时间将在站点的底部显示,例如 © 2015 - 2019。 编辑 主题配置文件,配置如下:
1footer:
2  # Specify the date when the site was setup.
3  # If not defined, current year will be used.
4  #since: 2015
订阅微信公众号
效果图:
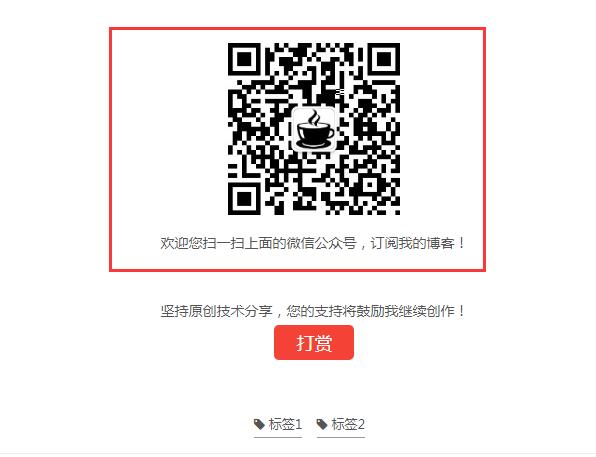
注意: 此特性在版本 5.0.1 中引入,要使用此功能请确保所使用的 NexT 版本在此之后
在每篇文章的末尾显示微信公众号二维码,扫一扫,轻松订阅博客。
在微信公众号平台下载您的二维码,并将它存放于主题 source/images/custom/ 目录下。
然后编辑 主题配置文件,配置如下:
1# Wechat Subscriber
2wechat_subscriber:
3  enabled: true
4  qcode: /images/custom/wechat-qcode.jpg
5  description: 欢迎您扫一扫上面的微信公众号,订阅我的博客!
设置动画效果
NexT 默认开启动画效果,效果使用 JavaScript 编写,因此需要等待 JavaScript 脚本完全加载完毕后才会显示内容。 如果您比较在乎速度,可以将设置此字段的值为 false 来关闭动画。
编辑 主题配置文件, 搜索 use_motion,根据您的需求设置值为 true 或者 false 即可:
1# Use velocity to animate everything.
2motion:
3  enable: true
4  async: true
5  transition:
6    # Transition variants:
7    # fadeIn | fadeOut | flipXIn | flipXOut | flipYIn | flipYOut | flipBounceXIn | flipBounceXOut | flipBounceYIn | flipBounceYOut
8    # swoopIn | swoopOut | whirlIn | whirlOut | shrinkIn | shrinkOut | expandIn | expandOut
9    # bounceIn | bounceOut | bounceUpIn | bounceUpOut | bounceDownIn | bounceDownOut | bounceLeftIn | bounceLeftOut | bounceRightIn | bounceRightOut
10    # slideUpIn | slideUpOut | slideDownIn | slideDownOut | slideLeftIn | slideLeftOut | slideRightIn | slideRightOut
11    # slideUpBigIn | slideUpBigOut | slideDownBigIn | slideDownBigOut | slideLeftBigIn | slideLeftBigOut | slideRightBigIn | slideRightBigOut
12    # perspectiveUpIn | perspectiveUpOut | perspectiveDownIn | perspectiveDownOut | perspectiveLeftIn | perspectiveLeftOut | perspectiveRightIn | perspectiveRightOut
13    post_block: fadeIn
14    post_header: slideDownIn
15    post_body: slideDownIn
16    coll_header: slideLeftIn
17    # Only for Pisces | Gemini.
18    sidebar: slideUpIn
设置背景动画
注意: three_waves 在版本 5.1.1 中引入。只能同时开启一种背景动画效果。
编辑 主题配置文件,配置如下:
1# Canvas-nest
2canvas_nest: false
3
4# three_waves
5three_waves: false
6
7# canvas_lines
8canvas_lines: false
9
10# canvas_sphere
11canvas_sphere: false
12
13# Only fit scheme Pisces
14# Canvas-ribbon
15# size: The width of the ribbon.
16# alpha: The transparency of the ribbon.
17# zIndex: The display level of the ribbon.
18canvas_ribbon:
19  enable: false
20  size: 300
21  alpha: 0.6
22  zIndex: -1
设置阅读全文
效果图:
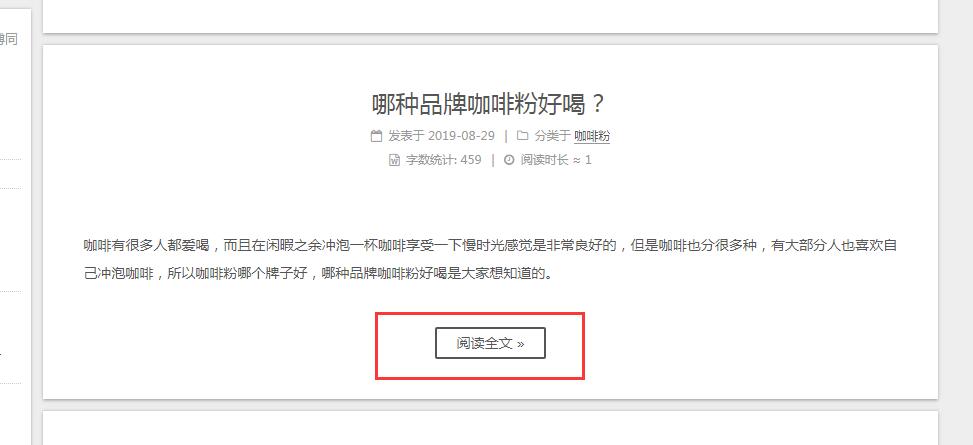
在首页显示一篇文章的部分内容,并提供一个链接跳转到全文页面是一个常见的需求。 NexT 提供三种方式来控制文章在首页的显示方式。 也就是说,在首页显示文章的摘录并显示 阅读全文 按钮,可以通过以下方法:
-
在文章中使用
<!-- more -->手动进行截断,Hexo 提供的方式 推荐。 -
在文章的 front-matter 中添加 description,并提供文章摘录
-
自动形成摘要,在
主题配置文件中添加:1# Automatically Excerpt. Not recommend. 2# Please use <!-- more --> in the post to control excerpt accurately. 3auto_excerpt: 4 enable: true 5 length: 150
建议使用
<!-- more -->(即第一种方式),除了可以精确控制需要显示的摘录内容以外, 这种方式也可以让 Hexo 中的插件更好的识别。
设置字数统计/阅读时长
效果图:
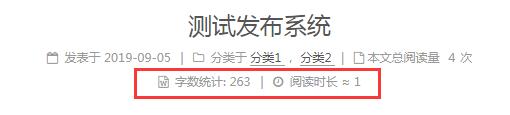
安装字数统计插件: npm i --save hexo-wordcount
编辑 主题配置文件,配置如下:
1# Post wordcount display settings
2# Dependencies: https://github.com/willin/hexo-wordcount
3post_wordcount:
4  item_text: true
5  wordcount: true
6  min2read: true
7  totalcount: false
8  separated_meta: true
设置顶部加载条
效果图:

编辑 主题配置文件,配置如下:
1# Progress bar in the top during page loading.
2pace: true
3# Themes list:
4#pace-theme-big-counter
5#pace-theme-bounce
6#pace-theme-barber-shop
7#pace-theme-center-atom
8#pace-theme-center-circle
9#pace-theme-center-radar
10#pace-theme-center-simple
11#pace-theme-corner-indicator
12#pace-theme-fill-left
13#pace-theme-flash
14#pace-theme-loading-bar
15#pace-theme-mac-osx
16#pace-theme-minimal
17# For example
18# pace_theme: pace-theme-center-simple
19pace_theme: pace-theme-minimal
设置底部内容
效果图:
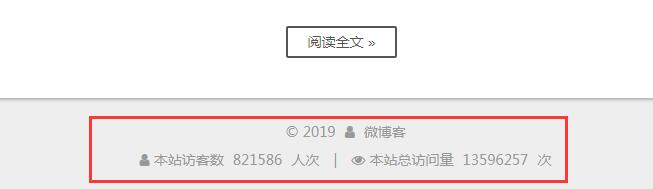
编辑 主题配置文件,配置如下:
1footer:
2  # Specify the date when the site was setup.
3  # If not defined, current year will be used.
4  #since: 2015
5
6  # Icon between year and copyright info.
7  icon: user
8
9  # If not defined, will be used `author` from Hexo main config.
10  copyright:
11  # -------------------------------------------------------------
12  # Hexo link (Powered by Hexo).
13  powered: false
14
15  theme:
16    # Theme & scheme info link (Theme - NexT.scheme).
17    enable: false
18    # Version info of NexT after scheme info (vX.X.X).
19    version: false
20  # -------------------------------------------------------------
21  # Any custom text can be defined here.
22  #custom_text: Hosted by <a target="_blank" href="https://pages.github.com">GitHub Pages</a>
TODO-评论系统
数据统计与分析
不蒜子统计
效果图:
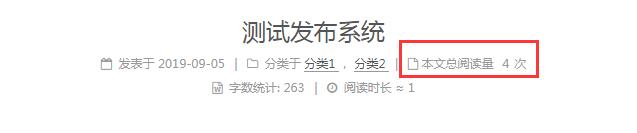

注意: 此特性在版本 5.0.1 中引入,要使用此功能请确保所使用的 NexT 版本在此之后
编辑 主题配置文件,配置如下:
1# Show PV/UV of the website/page with busuanzi.
2# Get more information on http://ibruce.info/2015/04/04/busuanzi/
3busuanzi_count:
4  # count values only if the other configs are false
5  enable: true
6  # custom uv span for the whole site
7  site_uv: true
8  site_uv_header: <i class="fa fa-user"></i> 本站访客数
9  site_uv_footer: 人次
10  # custom pv span for the whole site
11  site_pv: true
12  site_pv_header: <i class="fa fa-eye"></i> 本站总访问量
13  site_pv_footer: 次
14  # custom pv span for one page only
15  page_pv: true
16  page_pv_header: <i class="fa fa-file-o"></i> 本文总阅读量
17  page_pv_footer: 次
内容分享服务
百度分享
效果图:
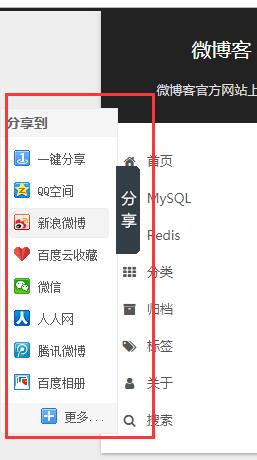
编辑 主题配置文件,配置如下:
1# Baidu Share
2# Available value:
3#    button | slide
4# Warning: Baidu Share does not support https.
5baidushare:
6  type: slide
type(=slide测试成功,=button测试未成功)
搜索服务
Local Search
效果图:

安装Local Search搜索插件: npm install --save hexo-generator-searchdb
编辑 站点配置文件,新增如下配置:
1####################### add #######################
2# hexo-generator-searchdb
3search:
4  path: search.xml
5  field: post
6  format: html
7  limit: 10000
编辑 主题配置文件,配置如下:
1# Local search
2# Dependencies: https://github.com/flashlab/hexo-generator-search
3local_search:
4  enable: true
5  # if auto, trigger search by changing input
6  # if manual, trigger search by pressing enter key or search button
7  trigger: auto
8  # show top n results per article, show all results by setting to -1
9  top_n_per_article: 1
增加最新文章模块
效果图:
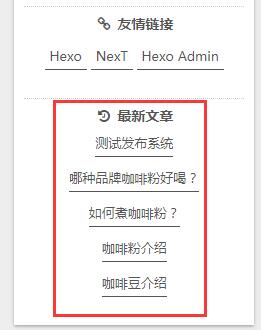
编辑主题目录下的 layout/_custom/sidebar.swig 文件,新增如下内容:
1{# recent_posts #}
2{% if theme.recent_posts %}
3  <div class="links-of-blogroll motion-element {{ "links-of-blogroll-" + theme.recent_posts_layout | default('block') }}">
4    <div class="links-of-blogroll-title">
5      <i class="fa  fa-fw fa-{{ theme.recent_posts_icon | default('globe') | lower }}"></i>
6      {{ theme.recent_posts_title }}
7    </div>
8    <ul class="links-of-blogroll-list">
9      {% set posts = site.posts.sort('-date') %}
10      {% for post in posts.slice('0', '5') %}
11	<li class="links-of-blogroll-item">
12	  <a href="{{ url_for(post.path) }}" title="{{ post.title }}" target="_blank">{{ post.title }}</a>
13	</li>
14      {% endfor %}
15    </ul>
16  </div>
17{% endif %}
编辑 主题配置文件,新增如下配置:
1####################### add #######################
2recent_posts: true
3recent_posts_icon: history
4recent_posts_title: 最新文章
5recent_posts_layout: block
6#recent_posts_layout: inline
增加博客后台管理功能
Hexo Admin 插件 GitHub 首页:https://github.com/jaredly/hexo-admin
演示 Demo:https://jaredforsyth.com/hexo-admin/
-
安装 Hexo Admin 插件
npm install --save hexo-admin
-
配置用户名密码
启动服务 hexo server -d 之后,访问 http://127.0.0.1:4000/admin ,按下列步骤完成配置:
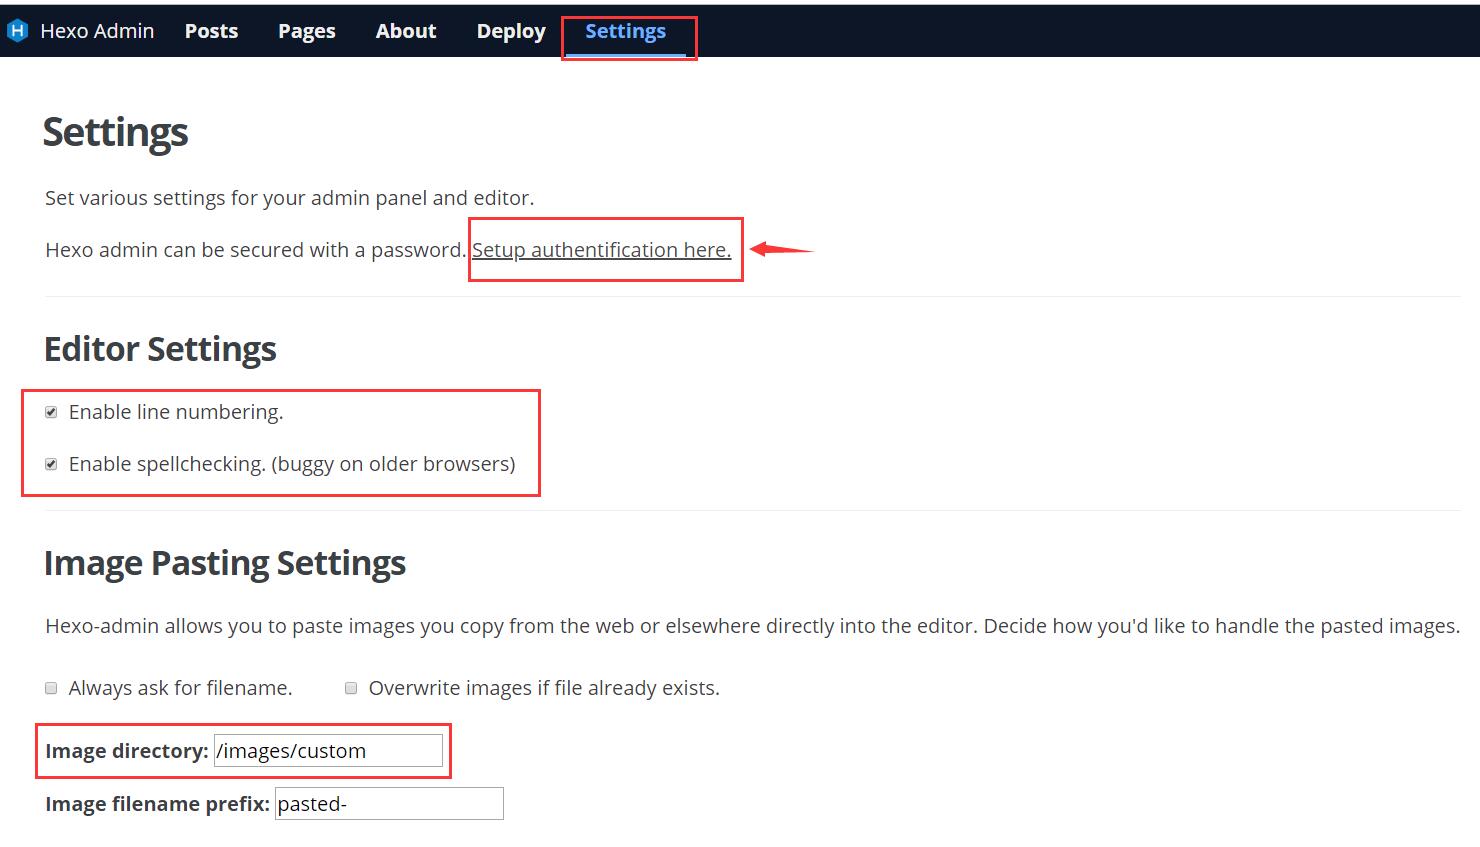
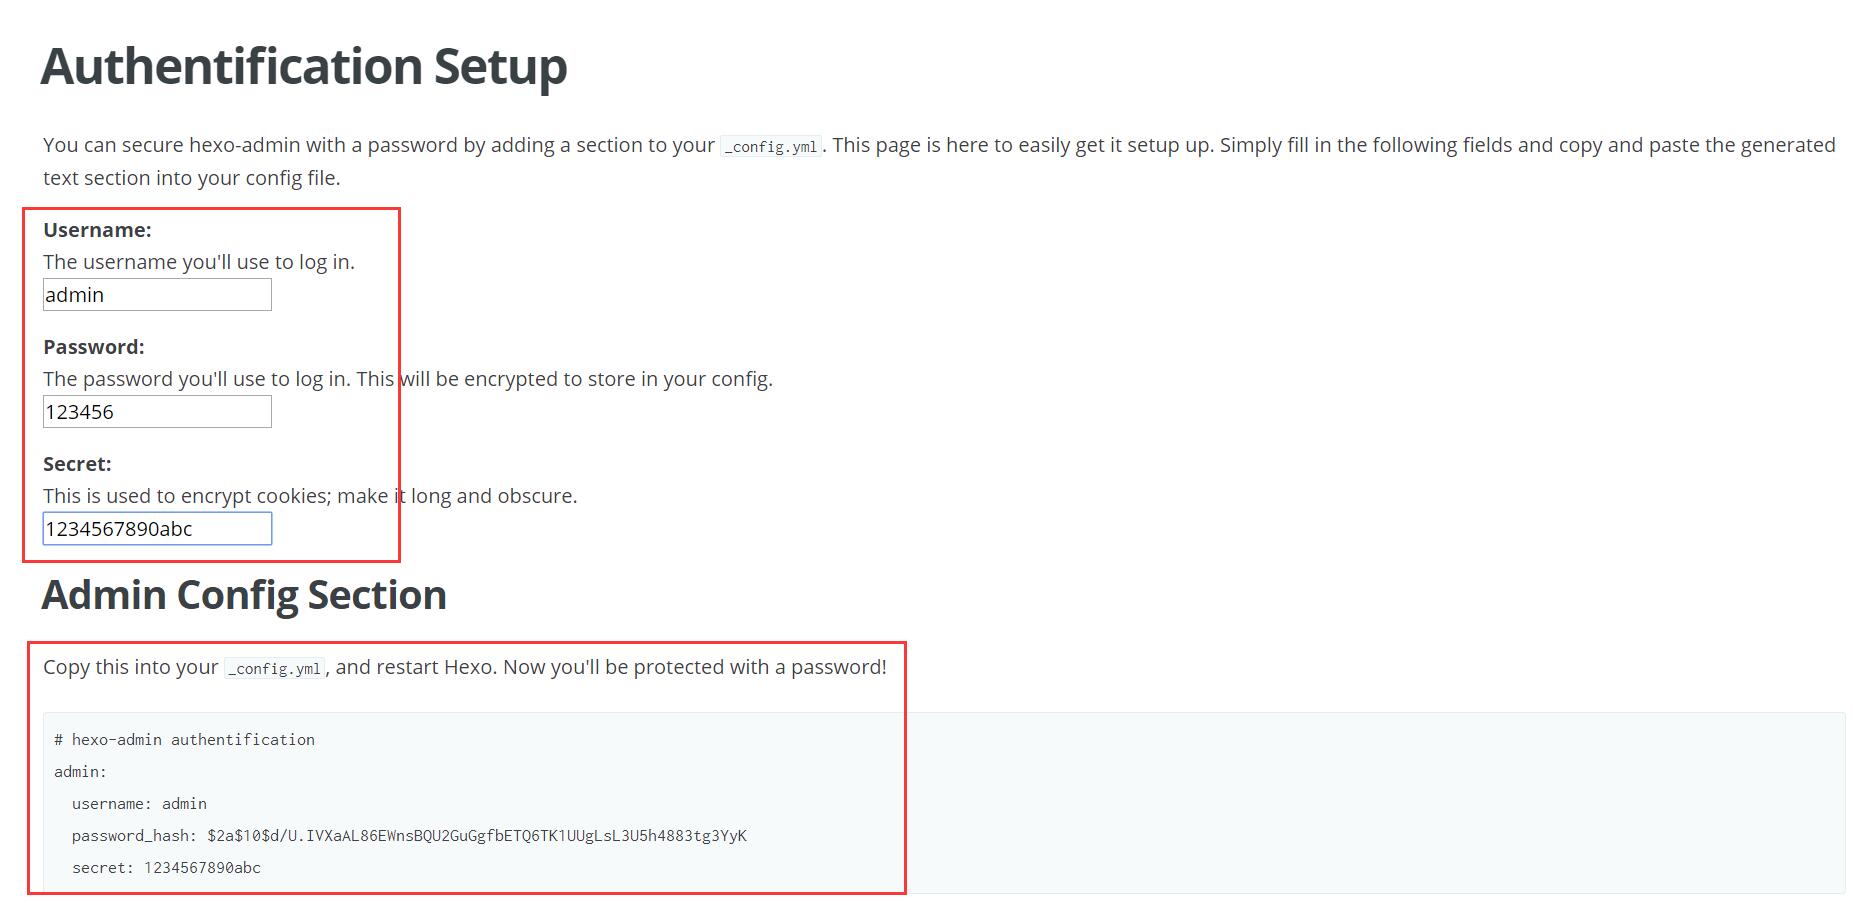
注意:我们只能在本地进行后台管理,无法在自己的域名下进行后台管理。
-
编辑
站点配置文件,新增如下配置(从2中拷贝):####################### add #######################
hexo-admin authentification
admin: username: admin password_hash: $2a$10$d/U.IVXaAL86EWnsBQU2GuGgfbETQ6TK1UUgLsL3U5h4883tg3YyK secret: 1234567890abc
-
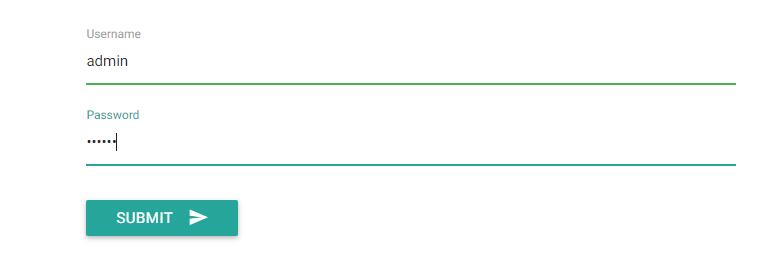
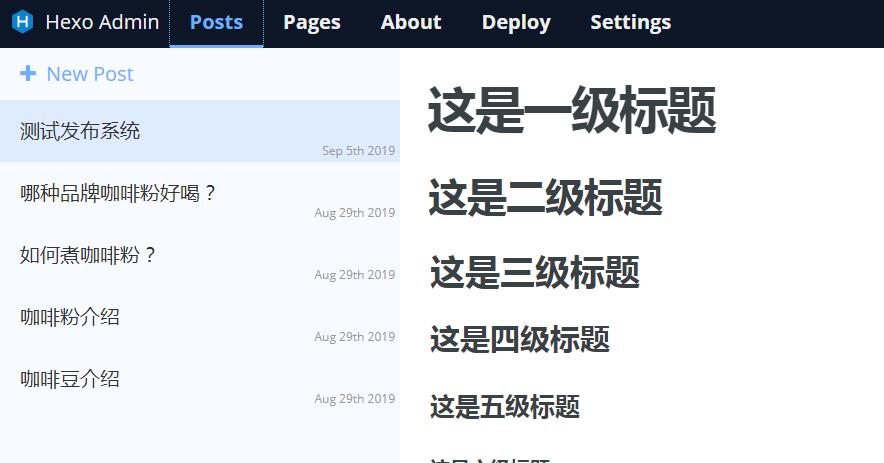
验证
hexo clean hexo generate hexo server -d
访问 http://127.0.0.1:4000/admin 登录。
- Hexo 教程合集(微信左下方阅读全文可直达)。
扫码关注微信公众号 程序员35 ,获取最新技术干货,畅聊 #程序员的35,35的程序员# 。独立站点:https://cxy35.com