
Nginx安装
处理静态文件能力更强。
Nginx官网 nginx.org,最新版1.13,最新稳定版1.12
Nginx应用场景:web服务、反向代理、负载均衡
Nginx著名分支,淘宝基于Nginx开发的Tengine,使用上和Nginx一致,服务名,配置文件名都一样,和Nginx的最大区别在于Tenging增加了一些定制化模块,在安全限速方面表现突出,另外它支持对js,css合并
Nginx核心+lua相关的组件和模块组成了一个支持lua的高性能web容器openresty,参考 http://jinnianshilongnian.iteye.com/blog/2280928
下载并解压安装包
1cd /usr/local/src
2wget http://nginx.org/download/nginx-1.12.1.tar.gz
3tar zxf nginx-1.12.1.tar.g
编译安装
1#自定义安装,无任何参数安装
2[root@localhost nginx-1.12.1]# ./configure --prefix=/usr/local/nginx
3[root@localhost nginx-1.12.1]# make && make install
4
5./configure: error: the HTTP rewrite module requires the PCRE library.
6
7安装pcre-devel与openssl-devel解决问题
8
9yum -y install pcre-devel openssl openssl-devel
编辑启动脚本,更改权限
1#编辑启动脚本
2[root@localhost nginx-1.12.1]# vi /etc/init.d/nginx
3#!/bin/bash
4# chkconfig: - 30 21
5# description: http service.
6# Source Function Library
7. /etc/init.d/functions
8# Nginx Settings
9NGINX_SBIN="/usr/local/nginx/sbin/nginx"
10NGINX_CONF="/usr/local/nginx/conf/nginx.conf"
11NGINX_PID="/usr/local/nginx/logs/nginx.pid"
12RETVAL=0
13prog="Nginx"
14start()
15{
16    echo -n $"Starting $prog: "
17    mkdir -p /dev/shm/nginx_temp
18    daemon $NGINX_SBIN -c $NGINX_CONF
19    RETVAL=$?
20    echo
21    return $RETVAL
22}
23stop()
24{
25    echo -n $"Stopping $prog: "
26    killproc -p $NGINX_PID $NGINX_SBIN -TERM
27    rm -rf /dev/shm/nginx_temp
28    RETVAL=$?
29    echo
30    return $RETVAL
31}
32reload()
33{
34    echo -n $"Reloading $prog: "
35    killproc -p $NGINX_PID $NGINX_SBIN -HUP
36    RETVAL=$?
37    echo
38    return $RETVAL
39}
40restart()
41{
42    stop
43    start
44}
45configtest()
46{
47    $NGINX_SBIN -c $NGINX_CONF -t
48    return 0
49}
50case "$1" in
51  start)
52        start
53        ;;
54  stop)
55        stop
56        ;;
57  reload)
58        reload
59        ;;
60  restart)
61        restart
62        ;;
63  configtest)
64        configtest
65        ;;
66  *)
67        echo $"Usage: $0 {start|stop|reload|restart|configtest}"
68        RETVAL=1
69esac
70exit $RETVAL
71
72#更改权限
73[root@localhost nginx-1.12.1]# chmod 755 /etc/init.d/nginx
开机自启
1[root@localhost nginx-1.12.1]# chkconfig --add nginx
2[root@localhost nginx-1.12.1]# chkconfig nginx on
修改配置文件
1cd /usr/local/nginx/conf/
2mv nginx.conf nginx.conf.bak
3
4vim nginx.conf
5user nobody nobody;
6worker_processes 2;
7error_log /usr/local/nginx/logs/nginx_error.log crit;
8pid /usr/local/nginx/logs/nginx.pid;
9worker_rlimit_nofile 51200;
10events
11{
12    use epoll;
13    worker_connections 6000;
14}
15http
16{
17    include mime.types;
18    default_type application/octet-stream;
19    server_names_hash_bucket_size 3526;
20    server_names_hash_max_size 4096;
21    log_format combined_realip '$remote_addr $http_x_forwarded_for [$time_local]'
22    ' $host "$request_uri" $status'
23    ' "$http_referer" "$http_user_agent"';
24    sendfile on;
25    tcp_nopush on;
26    keepalive_timeout 30;
27    client_header_timeout 3m;
28    client_body_timeout 3m;
29    send_timeout 3m;
30    connection_pool_size 256;
31    client_header_buffer_size 1k;
32    large_client_header_buffers 8 4k;
33    request_pool_size 4k;
34    output_buffers 4 32k;
35    postpone_output 1460;
36    client_max_body_size 10m;
37    client_body_buffer_size 256k;
38    client_body_temp_path /usr/local/nginx/client_body_temp;
39    proxy_temp_path /usr/local/nginx/proxy_temp;
40    fastcgi_temp_path /usr/local/nginx/fastcgi_temp;
41    fastcgi_intercept_errors on;
42    tcp_nodelay on;
43    gzip on;
44    gzip_min_length 1k;
45    gzip_buffers 4 8k;
46    gzip_comp_level 5;
47    gzip_http_version 1.1;
48    gzip_types text/plain application/x-javascript text/css text/htm
49    application/xml;
50    server
51    {
52        listen 80;
53        server_name localhost;
54        index index.html index.htm index.php;
55        root /usr/local/nginx/html;
56        location ~ \.php$
57        {
58            include fastcgi_params;
59            fastcgi_pass unix:/tmp/php-fcgi.sock;
60            fastcgi_index index.php;
61            fastcgi_param SCRIPT_FILENAME /usr/local/nginx/html$fastcgi_script_name;
62        }
63    }
64}
启动服务
1#查看配置文件是否有错误
2/usr/local/nginx/sbin/nginx -t
3
4#启动服务
5 /etc/init.d/nginx  start
6 netstat -lntp |grep 80
php解析是因为在nginx配置文件中service部分配置了location ~ \.php$ 语句,可以自行测试是否解析php。
1[root@localhost ~]# vi /usr/local/nginx/html/1.php
2<?php
3    echo "test php scripts.";
4?>
5[root@localhost ~]# curl localhost/1.php
6test php scripts.
安装nginx
yum安装
yum安装。使用nginx扩展源安装nginx,epel里面的nginx版本太老,先禁用了epel。
1[root@localhost ~]# cat /etc/yum.repos.d/nginx.repo
2[nginx]
3name=nginx repo
4baseurl=http://nginx.org/packages/centos/$releasever/$basearch/
5gpgcheck=0
6enabled=1
看下所有nginx的安装包
1[root@localhost ~]# yum list |grep nginx
2https://mirrors.ustc.edu.cn/epel/7/x86_64/repodata/d51f5143ca1af84a289a105797cbd21b79d354d68842e80454dcbbdc9783db7e-updateinfo.xml.bz2: [Errno 14] HTTPS Error 404 - Not Found
3正在尝试其它镜像。
4https://ftp.yz.yamagata-u.ac.jp/pub/linux/fedora-projects/epel/7/x86_64/repodata/a645c8172833961741e3cee02d5c531b796bdc433557a331bafa53b04cb94c0e-primary.xml.gz: [Errno 14] curl#35 - "Peer reports incompatible or unsupported protocol version."
5正在尝试其它镜像。
6collectd-nginx.x86_64                    5.8.0-4.el7                   epel
7munin-nginx.noarch                       2.0.33-1.el7                  epel
8nextcloud-nginx.noarch                   10.0.4-2.el7                  epel
9nginx.x86_64                             1:1.14.0-1.el7_4.ngx          nginx
10nginx-all-modules.noarch                 1:1.12.2-2.el7                epel
11nginx-debug.x86_64                       1:1.8.0-1.el7.ngx             nginx
12nginx-debuginfo.x86_64                   1:1.14.0-1.el7_4.ngx          nginx
13nginx-filesystem.noarch                  1:1.12.2-2.el7                epel
14nginx-mod-http-geoip.x86_64              1:1.12.2-2.el7                epel
15nginx-mod-http-image-filter.x86_64       1:1.12.2-2.el7                epel
16nginx-mod-http-perl.x86_64               1:1.12.2-2.el7                epel
17nginx-mod-http-xslt-filter.x86_64        1:1.12.2-2.el7                epel
18nginx-mod-mail.x86_64                    1:1.12.2-2.el7                epel
19nginx-mod-stream.x86_64                  1:1.12.2-2.el7                epel
20nginx-module-geoip.x86_64                1:1.14.0-1.el7_4.ngx          nginx
21nginx-module-geoip-debuginfo.x86_64      1:1.14.0-1.el7_4.ngx          nginx
22nginx-module-image-filter.x86_64         1:1.14.0-1.el7_4.ngx          nginx
23nginx-module-image-filter-debuginfo.x86_64
24                                         1:1.14.0-1.el7_4.ngx          nginx
25nginx-module-njs.x86_64                  1:1.14.0.0.2.2-1.el7_4.ngx    nginx
26nginx-module-njs-debuginfo.x86_64        1:1.14.0.0.2.2-1.el7_4.ngx    nginx
27nginx-module-perl.x86_64                 1:1.14.0-1.el7_4.ngx          nginx
28nginx-module-perl-debuginfo.x86_64       1:1.14.0-1.el7_4.ngx          nginx
29nginx-module-xslt.x86_64                 1:1.14.0-1.el7_4.ngx          nginx
30nginx-module-xslt-debuginfo.x86_64       1:1.14.0-1.el7_4.ngx          nginx
31nginx-nr-agent.noarch                    2.0.0-12.el7.ngx              nginx
32owncloud-nginx.noarch                    9.1.5-1.el7                   epel
33pcp-pmda-nginx.x86_64                    3.12.2-5.el7                  base
34python2-certbot-nginx.noarch             0.25.1-1.el7                  epel
其中epel源的都比较老,先禁用了。
1[root@localhost ~]# mv /etc/yum.repos.d/epel.repo  /etc/yum.repos.d/epel.repo.bak
2[root@localhost ~]# yum list |grep nginx                                        nginx.x86_64                               1:1.14.0-1.el7_4.ngx        nginx
3nginx-debug.x86_64                         1:1.8.0-1.el7.ngx           nginx
4nginx-debuginfo.x86_64                     1:1.14.0-1.el7_4.ngx        nginx
5nginx-module-geoip.x86_64                  1:1.14.0-1.el7_4.ngx        nginx
6nginx-module-geoip-debuginfo.x86_64        1:1.14.0-1.el7_4.ngx        nginx
7nginx-module-image-filter.x86_64           1:1.14.0-1.el7_4.ngx        nginx
8nginx-module-image-filter-debuginfo.x86_64 1:1.14.0-1.el7_4.ngx        nginx
9nginx-module-njs.x86_64                    1:1.14.0.0.2.2-1.el7_4.ngx  nginx
10nginx-module-njs-debuginfo.x86_64          1:1.14.0.0.2.2-1.el7_4.ngx  nginx
11nginx-module-perl.x86_64                   1:1.14.0-1.el7_4.ngx        nginx
12nginx-module-perl-debuginfo.x86_64         1:1.14.0-1.el7_4.ngx        nginx
13nginx-module-xslt.x86_64                   1:1.14.0-1.el7_4.ngx        nginx
14nginx-module-xslt-debuginfo.x86_64         1:1.14.0-1.el7_4.ngx        nginx
15nginx-nr-agent.noarch                      2.0.0-12.el7.ngx            nginx
16pcp-pmda-nginx.x86_64                      3.12.2-5.el7                base
直接yum安装,再启动(安装最稳定最新的nginx)
1[root@localhost ~]# yum install -y nginx
2[root@localhost ~]# systemctl start nginx
3[root@localhost ~]# netstat -lnpt
4Active Internet connections (only servers)
5Proto Recv-Q Send-Q Local Address           Foreign Address         State       PID/Program name
6tcp        0      0 127.0.0.1:25            0.0.0.0:*               LISTEN      1928/master
7tcp        0      0 0.0.0.0:80              0.0.0.0:*               LISTEN      3070/nginx: master
8tcp        0      0 0.0.0.0:22              0.0.0.0:*               LISTEN      1091/sshd
9tcp6       0      0 ::1:25                  :::*                    LISTEN      1928/master
10tcp6       0      0 :::22                   :::*                    LISTEN      1091/sshd
11[root@localhost ~]# ps aux|grep nginx
12root      3070  0.0  0.0  48976   976 ?        Ss   21:28   0:00 nginx: master process /usr/sbin/nginx -c /etc/nginx/nginx.conf
13nginx     3071  0.0  0.1  49380  1932 ?        S    21:28   0:00 nginx: worker process
14root      3075  0.0  0.0 112656   992 pts/1    R+   21:28   0:00 grep --color=auto nginx
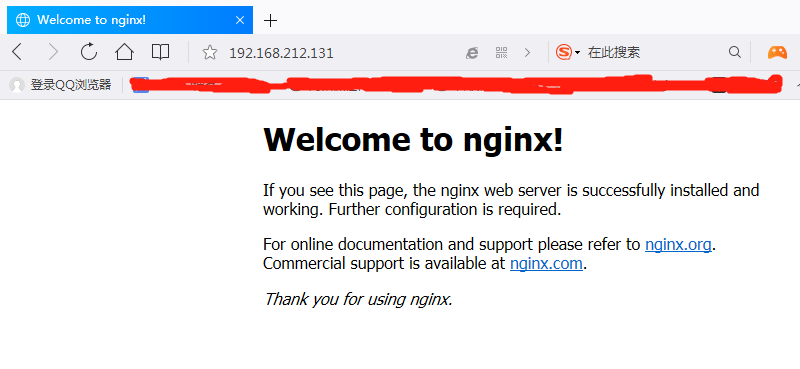
测试:浏览器访问或者curl,用浏览器前需要禁用Iptables,或者把iput80端口全部放行
1[root@localhost ~]# iptables -F
2[root@localhost ~]# systemctl stop firewalld
3[root@localhost ~]# curl http://192.168.212.131/
4<!DOCTYPE html>
5<html>
6<head>
7<title>Welcome to nginx!</title>
8<style>
9    body {
10        width: 35em;
11        margin: 0 auto;
12        font-family: Tahoma, Verdana, Arial, sans-serif;
13    }
14</style>
15</head>
16<body>
17<h1>Welcome to nginx!</h1>
18<p>If you see this page, the nginx web server is successfully installed and
19working. Further configuration is required.</p>
20
21<p>For online documentation and support please refer to
22<a href="http://nginx.org/">nginx.org</a>.<br/>
23Commercial support is available at
24<a href="http://nginx.com/">nginx.com</a>.</p>
25
26<p><em>Thank you for using nginx.</em></p>
27</body>
28</html>
查看nginx安装目录,编译参数等
1[root@localhost ~]# nginx -V
2nginx version: nginx/1.14.0
3built by gcc 4.8.5 20150623 (Red Hat 4.8.5-16) (GCC)
4built with OpenSSL 1.0.2k-fips  26 Jan 2017
5TLS SNI support enabled
6configure arguments: --prefix=/etc/nginx --sbin-path=/usr/sbin/nginx --modules-path=/usr/lib64/nginx/modules --conf-path=/etc/nginx/nginx.conf --error-log-path=/var/log/nginx/error.log --http-log-path=/var/log/nginx/access.log --pid-path=/var/run/nginx.pid --lock-path=/var/run/nginx.lock --http-client-body-temp-path=/var/cache/nginx/client_temp --http-proxy-temp-path=/var/cache/nginx/proxy_temp --http-fastcgi-temp-path=/var/cache/nginx/fastcgi_temp --http-uwsgi-temp-path=/var/cache/nginx/uwsgi_temp --http-scgi-temp-path=/var/cache/nginx/scgi_temp --user=nginx --group=nginx --with-compat --with-file-aio --with-threads --with-http_addition_module --with-http_auth_request_module --with-http_dav_module --with-http_flv_module --with-http_gunzip_module --with-http_gzip_static_module --with-http_mp4_module --with-http_random_index_module --with-http_realip_module --with-http_secure_link_module --with-http_slice_module --with-http_ssl_module --with-http_stub_status_module --with-http_sub_module --with-http_v2_module --with-mail --with-mail_ssl_module --with-stream --with-stream_realip_module --with-stream_ssl_module --with-stream_ssl_preread_module --with-cc-opt='-O2 -g -pipe -Wall -Wp,-D_FORTIFY_SOURCE=2 -fexceptions -fstack-protector-strong --param=ssp-buffer-size=4 -grecord-gcc-switches -m64 -mtune=generic -fPIC' --with-ld-opt='-Wl,-z,relro -Wl,-z,now -pie'
源码安装
需要特殊需求或者不能使用Yum的系统。
1[root@localhost src]# wget http://nginx.org/download/nginx-1.14.0.tar.gz
2[root@localhost src]# tar zxf nginx-1.14.0.tar.gz
3[root@localhost src]# cd nginx-1.14.0
4[root@localhost nginx-1.14.0]# ls
5auto  CHANGES  CHANGES.ru  conf  configure  contrib  html  LICENSE  man  README  src
6
7//查看编译参数
8
9[root@localhost nginx-1.14.0]# ./configure --help
10
11  --help                             print this message
12
13  --prefix=PATH                      set installation prefix
14  --sbin-path=PATH                   set nginx binary pathname
15  --modules-path=PATH                set modules path
16  --conf-path=PATH                   set nginx.conf pathname
17  --error-log-path=PATH              set error log pathname
18  --pid-path=PATH                    set nginx.pid pathname
19  --lock-path=PATH                   set nginx.lock pathname
20... ...
21
22[root@localhost nginx-1.12.1]# make && make install
23  编辑启动脚本,更改权限
24
25#编辑启动脚本
26[root@localhost nginx-1.12.1]# vi /etc/init.d/nginx
27#!/bin/bash
28# chkconfig: - 30 21
29# description: http service.
30# Source Function Library
31. /etc/init.d/functions
32# Nginx Settings
33NGINX_SBIN="/usr/local/nginx/sbin/nginx"
34NGINX_CONF="/usr/local/nginx/conf/nginx.conf"
35NGINX_PID="/usr/local/nginx/logs/nginx.pid"
36RETVAL=0
37prog="Nginx"
38start()
39{
40    echo -n $"Starting $prog: "
41    mkdir -p /dev/shm/nginx_temp
42    daemon $NGINX_SBIN -c $NGINX_CONF
43    RETVAL=$?
44    echo
45    return $RETVAL
46}
47stop()
48{
49    echo -n $"Stopping $prog: "
50    killproc -p $NGINX_PID $NGINX_SBIN -TERM
51    rm -rf /dev/shm/nginx_temp
52    RETVAL=$?
53    echo
54    return $RETVAL
55}
56reload()
57{
58    echo -n $"Reloading $prog: "
59    killproc -p $NGINX_PID $NGINX_SBIN -HUP
60    RETVAL=$?
61    echo
62    return $RETVAL
63}
64restart()
65{
66    stop
67    start
68}
69configtest()
70{
71    $NGINX_SBIN -c $NGINX_CONF -t
72    return 0
73}
74case "$1" in
75  start)
76        start
77        ;;
78  stop)
79        stop
80        ;;
81  reload)
82        reload
83        ;;
84  restart)
85        restart
86        ;;
87  configtest)
88        configtest
89        ;;
90  *)
91        echo $"Usage: $0 {start|stop|reload|restart|configtest}"
92        RETVAL=1
93esac
94exit $RETVAL
95
96#更改权限
97[root@localhost nginx-1.12.1]# chmod 755 /etc/init.d/nginx
98  开机自启
99
100[root@localhost nginx-1.12.1]# chkconfig --add nginx
101[root@localhost nginx-1.12.1]# chkconfig nginx on
Nginx配置文件
安装MySQL
若之前服务器有mysql,再次安装需要把之前mysql删除干净。MySQL数据文件夹可删可不删
1#删除分三步
2#先删除MySQL文件包
3rm -rf /usr/local/mysql
4
5#再删除启动文件
6rm -rf /etc/init.d/mysqld
7
8#删除配置文件
9rm -rf  /etc/my.cnf
之后为安装MySQL,首先下载mysql二进制免编译包
[root@localhost src]# wget http://mirrors.sohu.com/mysql/MySQL-5.6/mysql-5.6.35-linux-glibc2.5-x86_64.tar.gz
再解压该二进制免编译包。
[root@localhost src]# tar -zxvf mysql-5.6.35-linux-glibc2.5-x86_64.tar.gz
移动解压后的文件,移动前确认目标地无MySQL文件夹
1[root@localhost src]# ls /usr/local/mysql
2ls: 无法访问/usr/local/mysql: 没有那个文件或目录
3[root@localhost src]# mv mysql-5.6.35-linux-glibc2.5-x86_64 /usr/local/mysql
创建MySQL数据文件夹,并创建mysql用户
1useradd mysql
2 mkdir /data/
编译安装mysql,出现两个OK则成功
./scripts/mysql_install_db --user=mysql --datadir=/data/mysql
安装会出现一些错误
1#error 1
2[root@localhost mysql]# ./scripts/mysql_install_db --user=mysql --datadir=/data/mysql
3Installing MySQL system tables..../bin/mysqld: error while loading shared libraries: libaio.so.1: cannot open shared object file: No such file or directory
4
5#解决办法
6[root@localhost mysql]# yum install -y libaio
7
8
9#error 2
10[root@localhost mysql]# ./scripts/mysql_install_db --user=mysql --datadir=/data/mysql
11-bash: ./scripts/mysql_install_db: /usr/bin/perl: 坏的解释器: 没有那个文件或目录
12
13#解决办法
14[root@localhost mysql]# yum -y install autoconf
15
16再次编译安装,验证输出
17[root@localhost mysql]# echo $?
180
拷贝配置文件和启动脚本
1#配置文件
2[root@localhost mysql]# cp ./support-files/my-default.cnf  /etc/my.cnf
3
4
5#启动脚本
6[root@localhost mysql]# cp ./support-files/mysql.server /etc/init.d/mysqld
修改配置文件和启动脚本,主要修改这两项
1basedir
2datadir
修改启动脚本权限为755,开机自启
1[root@localhost mysql]# chmod 755 /etc/init.d/mysqld
2[root@localhost mysql]# chkconfig --add mysqld
启动MySQL
1[root@localhost mysql]# /etc/init.d/mysqld start
2Starting MySQL.Logging to '/data/mysql/localhost.localdomain.err'.
3. SUCCESS!
命令行方式启动
/usr/local/mysql/bin/mysqld_safe --default-file=/etc/my.cnf --user=mysql --data=/data/mysql
杀进程可以用killall mysqld,系统会继续等待mysql传输数据,直到全部完成才会自动关闭。
在mysqld写数据的时候,如果杀死mysqld进程,发现杀不死,不要强制-9杀,有可能会直接导致正在传输的数据丢失,表损坏。
安装PHP
和LAMP安装PHP方法有差别,需要开启php-fpm服务
下载php源码包
[root@localhost src]# wget http://cn2.php.net/distributions/php-5.6.30.tar.gz
解压
[root@localhost src]# tar zxf php-5.6.30.tar.gz
创建用户
useradd -s /sbin/nologin php-fpm
编译安装
./configure --prefix=/usr/local/php-fpm --with-config-file-path=/usr/local/php-fpm/etc --enable-fpm --with-fpm-user=php-fpm --with-fpm-group=php-fpm --with-mysql=/usr/local/mysql --with-mysqli=/usr/local/mysql/bin/mysql_config --with-pdo-mysql=/usr/local/mysql --with-mysql-sock=/tmp/mysql.sock --with-libxml-dir --with-gd --with-jpeg-dir --with-png-dir --with-freetype-dir --with-iconv-dir --with-zlib-dir --with-mcrypt --enable-soap --enable-gd-native-ttf --enable-ftp --enable-mbstring --enable-exif --with-pear --with-curl --with-openssl
安装错误见LAMP文件,其中未包含的错误有以下
1configure: error: Please reinstall the libcurl distribution -
2    easy.h should be in <curl-dir>/include/curl/
3
4#解决方法
5
6yum install -y curl curl-devel
最后make && make install 可能需要10分钟左右。
安装成功后
查看php文件发现,LAMP和LNMP的php文件是有区别的
1#LNMP
2[root@localhost php-5.6.30]# ls /usr/local/php-fpm/
3bin  etc  include  lib  php  sbin  var
4#多一个sbin和var文件
5#sbin文件是存放php服务启动文件
6[root@localhost php-5.6.30]# ls /usr/local/php-fpm/sbin/
7php-fpm
8#var里面放的是日志文件和存放pid
9[root@localhost php-5.6.30]# ls /usr/local/php-fpm/var/
10log  run
11
12#LAMP
13[root@chy002 ~]# ls /usr/local/php/
14bin  etc  include  lib  php
-m 查看模块,-i 查看phpinfo,-t查看配置文件是否正确
1#两个都可以
2
3[root@localhost php-5.6.30]# /usr/local/php-fpm/bin/php  -m
4
5[root@localhost php-5.6.30]# /usr/local/php-fpm/sbin/php-fpm  -m
拷贝修改配置文件,php.ini用来控制php某些功能
1#拷贝生产环境下配置文件
2[root@localhost etc]# cp php.ini-production /usr/local/php-fpm/etc/php.ini
3
4#修改配置文件
5[root@localhost etc]# mv php-fpm.conf.default php-fpm.conf
6
7[root@localhost etc]#vi /usr/local/php/etc/php-fpm.conf
8[global]
9pid = /usr/local/php-fpm/var/run/php-fpm.pid
10error_log = /usr/local/php-fpm/var/log/php-fpm.log
11[www]
12listen = /tmp/php-fcgi.sock
13listen.mode = 666
14user = php-fpm
15group = php-fpm
16pm = dynamic
17pm.max_children = 50
18pm.start_servers = 20
19pm.min_spare_servers = 5
20pm.max_spare_servers = 35
21pm.max_requests = 500
22rlimit_files = 1024
拷贝启动脚本
1[root@localhost etc]# cp /usr/local/src/php-5.6.30/sapi/fpm/init.d.php-fpm /etc/init.d/php-fpm
2[root@localhost etc]# chmod 755 /etc/init.d/php-fpm
3[root@localhost etc]# chkconfig --add php-fpm
4[root@localhost etc]# chkconfig php-fpm on
5[root@localhost etc]# service php-fpm start
6Starting php-fpm  done
检测一下
1[root@localhost etc]# ps aux|grep php
2root     21666  0.0  0.4 124228  4944 ?        Ss   05:31   0:00 php-fpm: master process (/usr/local/php-fpm/etc/php-fpm.conf)
3php-fpm  21667  0.0  0.4 124228  4704 ?        S    05:31   0:00 php-fpm: pool www
4php-fpm  21668  0.0  0.4 124228  4704 ?        S    05:31   0:00 php-fpm: pool www
5php-fpm  21669  0.0  0.4 124228  4704 ?        S    05:31   0:00 php-fpm: pool www
6php-fpm  21670  0.0  0.4 124228  4704 ?        S    05:31   0:00 php-fpm: pool www
7php-fpm  21671  0.0  0.4 124228  4708 ?        S    05:31   0:00 php-fpm: pool www
8php-fpm  21672  0.0  0.4 124228  4708 ?        S    05:31   0:00 php-fpm: pool www
9php-fpm  21673  0.0  0.4 124228  4708 ?        S    05:31   0:00 php-fpm: pool www
10php-fpm  21674  0.0  0.4 124228  4712 ?        S    05:31   0:00 php-fpm: pool www
11php-fpm  21675  0.0  0.4 124228  4712 ?        S    05:31   0:00 php-fpm: pool www
12php-fpm  21676  0.0  0.4 124228  4712 ?        S    05:31   0:00 php-fpm: pool www
13php-fpm  21677  0.0  0.4 124228  4712 ?        S    05:31   0:00 php-fpm: pool www
14php-fpm  21678  0.0  0.4 124228  4712 ?        S    05:31   0:00 php-fpm: pool www
15php-fpm  21679  0.0  0.4 124228  4712 ?        S    05:31   0:00 php-fpm: pool www
16php-fpm  21680  0.0  0.4 124228  4712 ?        S    05:31   0:00 php-fpm: pool www
17php-fpm  21681  0.0  0.4 124228  4712 ?        S    05:31   0:00 php-fpm: pool www
18php-fpm  21682  0.0  0.4 124228  4712 ?        S    05:31   0:00 php-fpm: pool www
19php-fpm  21683  0.0  0.4 124228  4712 ?        S    05:31   0:00 php-fpm: pool www
20php-fpm  21684  0.0  0.4 124228  4712 ?        S    05:31   0:00 php-fpm: pool www
21php-fpm  21685  0.0  0.4 124228  4712 ?        S    05:31   0:00 php-fpm: pool www
22php-fpm  21686  0.0  0.4 124228  4712 ?        S    05:31   0:00 php-fpm: pool www
23root     21688  0.0  0.0 112724   980 pts/0    S+   05:33   0:00 grep --color=auto php
24[root@localhost etc]# ls -l /tmp/php-fcgi.sock
25srw-rw-rw-. 1 root root 0 5月  15 05:31 /tmp/php-fcgi.sock