
文章目录
Spring Boot Admin的使用
前面的文章我们讲了Spring Boot的Actuator。但是Spring Boot Actuator只是提供了一个个的接口,需要我们自行集成到监控程序中。今天我们将会讲解一个优秀的监控工具Spring Boot Admin。 它采用图形化的界面,让我们的Spring Boot管理更加简单。
先上图给大家看一下Spring Boot Admin的界面:
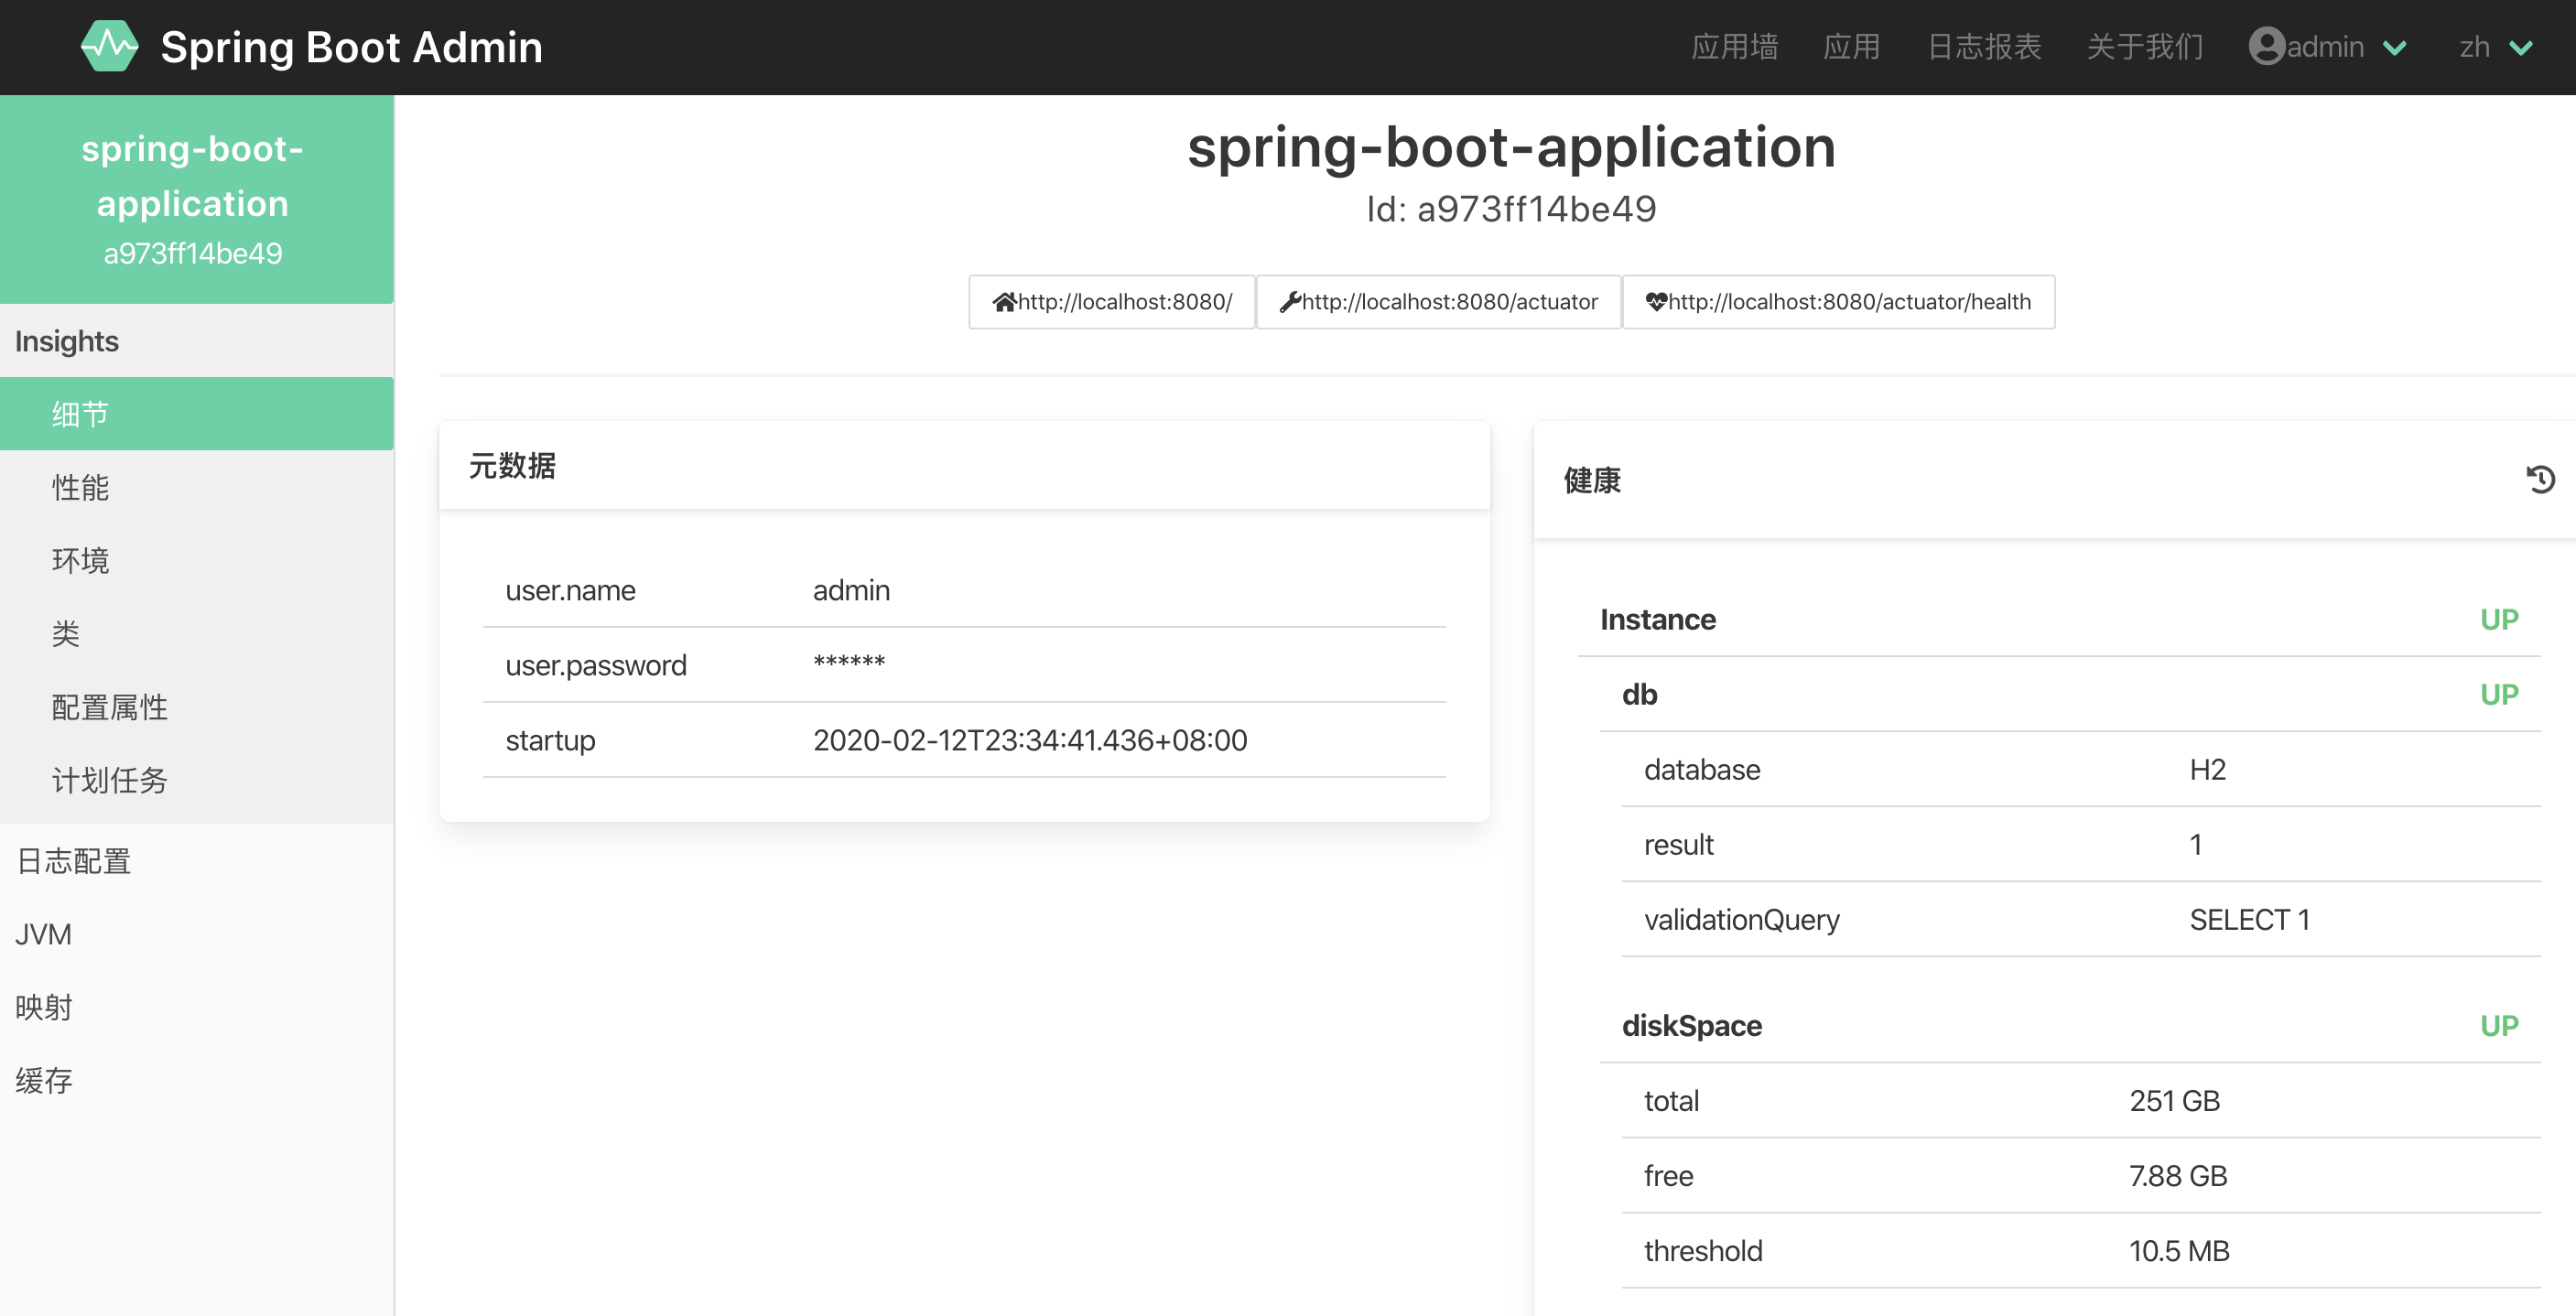
从界面上面我们可以看到Spring Boot Admin提供了众多强大的监控功能。那么开始我们的学习吧。
配置Admin Server
既然是管理程序,肯定有一个server,配置server很简单,我们添加这个依赖即可:
1<dependency>
2    <groupId>de.codecentric</groupId>
3    <artifactId>spring-boot-admin-starter-server</artifactId>
4    <version>2.2.2</version>
5</dependency>
同时我们需要在main程序中添加@EnableAdminServer来启动admin server。
1@EnableAdminServer
2@SpringBootApplication
3public class SpringBootAdminServerApplication {
4
5    public static void main(String[] args) {
6        SpringApplication.run(SpringBootAdminServerApplication.class, args);
7    }
8}
配置admin client
有了server,我们接下来配置需要监控的client应用程序,在本文中,我们自己监控自己,添加client依赖如下:
1<dependency>
2    <groupId>de.codecentric</groupId>
3    <artifactId>spring-boot-admin-starter-client</artifactId>
4    <version>2.2.2</version>
5</dependency>
我们需要为client指定要注册到的admin server:
spring.boot.admin.client.url=http://localhost:8080
因为Spring Boot Admin依赖于 Spring Boot Actuator, 从Spring Boot2 之后,我们需要主动开启暴露的主键,如下:
1management.endpoints.web.exposure.include=*
2management.endpoint.health.show-details=always
配置安全主键
通常来说,我们需要一个登陆界面,以防止未经授权的人访问。spring boot admin提供了一个UI供我们使用,同时我们添加Spring Security依赖:
1<dependency>
2    <groupId>de.codecentric</groupId>
3    <artifactId>spring-boot-admin-server-ui-login</artifactId>
4    <version>1.5.7</version>
5</dependency>
6<dependency>
7    <groupId>org.springframework.boot</groupId>
8    <artifactId>spring-boot-starter-security</artifactId>
9</dependency>
添加了Spring Security,我们需要自定义一些配置:
1@Configuration
2public class WebSecurityConfig extends WebSecurityConfigurerAdapter {
3    private final AdminServerProperties adminServer;
4
5    public WebSecurityConfig(AdminServerProperties adminServer) {
6        this.adminServer = adminServer;
7    }
8
9    @Override
10    protected void configure(HttpSecurity http) throws Exception {
11        SavedRequestAwareAuthenticationSuccessHandler successHandler =
12          new SavedRequestAwareAuthenticationSuccessHandler();
13        successHandler.setTargetUrlParameter("redirectTo");
14        successHandler.setDefaultTargetUrl(this.adminServer.getContextPath() + "/");
15
16        http
17            .authorizeRequests()
18                .antMatchers(this.adminServer.getContextPath() + "/assets/**").permitAll()
19                .antMatchers(this.adminServer.getContextPath() + "/login").permitAll()
20                .anyRequest().authenticated()
21                .and()
22            .formLogin()
23                .loginPage(this.adminServer.getContextPath() + "/login")
24                .successHandler(successHandler)
25                .and()
26            .logout()
27                .logoutUrl(this.adminServer.getContextPath() + "/logout")
28                .and()
29            .httpBasic()
30                .and()
31            .csrf()
32                .csrfTokenRepository(CookieCsrfTokenRepository.withHttpOnlyFalse())
33                .ignoringRequestMatchers(
34                  new AntPathRequestMatcher(this.adminServer.getContextPath() +
35                    "/instances", HttpMethod.POST.toString()),
36                  new AntPathRequestMatcher(this.adminServer.getContextPath() +
37                    "/instances/*", HttpMethod.DELETE.toString()),
38                  new AntPathRequestMatcher(this.adminServer.getContextPath() + "/actuator/**"))
39                .and()
40            .rememberMe()
41                .key(UUID.randomUUID().toString())
42                .tokenValiditySeconds(1209600);
43    }
44}
接下来,我们在配置文件中指定服务器的用户名和密码:
1spring.boot.admin.client.username=admin
2spring.boot.admin.client.password=admin
作为一个客户端,连接服务器的时候,我们也需要提供相应的认证信息如下:
1spring.boot.admin.client.instance.metadata.user.name=admin
2spring.boot.admin.client.instance.metadata.user.password=admin
3
4spring.boot.admin.client.username=admin
5spring.boot.admin.client.password=admin
好了,登录页面和权限认证也完成了。
Hazelcast集群
Spring Boot Admin 支持Hazelcast的集群,我们先添加依赖如下:
1<dependency>
2    <groupId>com.hazelcast</groupId>
3    <artifactId>hazelcast</artifactId>
4    <version>3.12.2</version>
5</dependency>
然后添加Hazelcast的配置:
1@Configuration
2public class HazelcastConfig {
3
4    @Bean
5    public Config hazelcast() {
6        MapConfig eventStoreMap = new MapConfig("spring-boot-admin-event-store")
7          .setInMemoryFormat(InMemoryFormat.OBJECT)
8          .setBackupCount(1)
9          .setEvictionPolicy(EvictionPolicy.NONE)
10          .setMergePolicyConfig(new MergePolicyConfig(PutIfAbsentMapMergePolicy.class.getName(), 100));
11
12        MapConfig sentNotificationsMap = new MapConfig("spring-boot-admin-application-store")
13          .setInMemoryFormat(InMemoryFormat.OBJECT)
14          .setBackupCount(1)
15          .setEvictionPolicy(EvictionPolicy.LRU)
16          .setMergePolicyConfig(new MergePolicyConfig(PutIfAbsentMapMergePolicy.class.getName(), 100));
17
18        Config config = new Config();
19        config.addMapConfig(eventStoreMap);
20        config.addMapConfig(sentNotificationsMap);
21        config.setProperty("hazelcast.jmx", "true");
22
23        config.getNetworkConfig()
24          .getJoin()
25          .getMulticastConfig()
26          .setEnabled(false);
27        TcpIpConfig tcpIpConfig = config.getNetworkConfig()
28          .getJoin()
29          .getTcpIpConfig();
30        tcpIpConfig.setEnabled(true);
31        tcpIpConfig.setMembers(Collections.singletonList("127.0.0.1"));
32        return config;
33    }
34}
本文的例子可以参考https://github.com/ddean2009/learn-springboot2/tree/master/springboot-admin
更多教程请参考 flydean的博客