
首先了解的技术点是:
后台:springboot,mybatis,mybatis逆向工程,mysql,日志
前端: nodejs,npm ,cnpm,vue,vue-cli,webpack,element ui,router,axios
开发工具:idea,webstorm
该项目前端使用的是vue ,目的是实现前后端分离
后台:
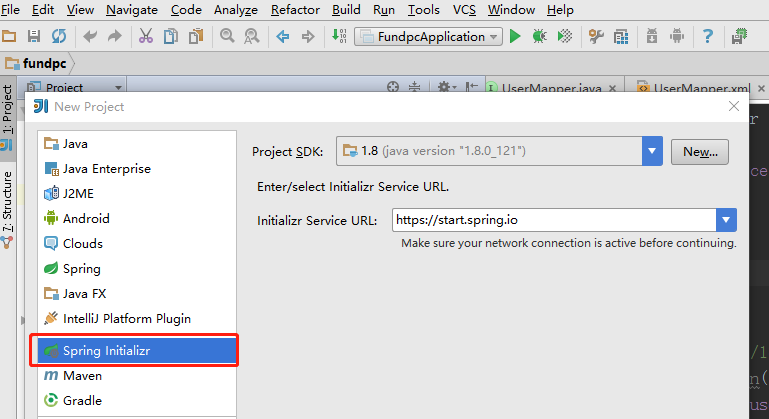
1.选择springboot 插件
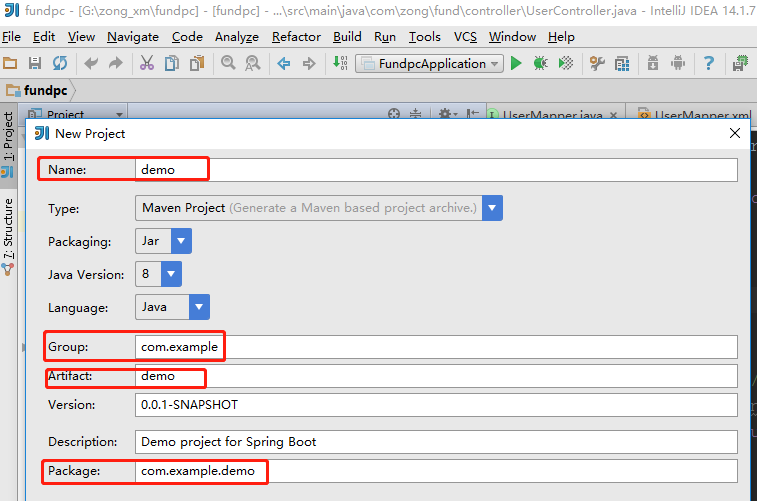
2.创建项目,修改相关的设置
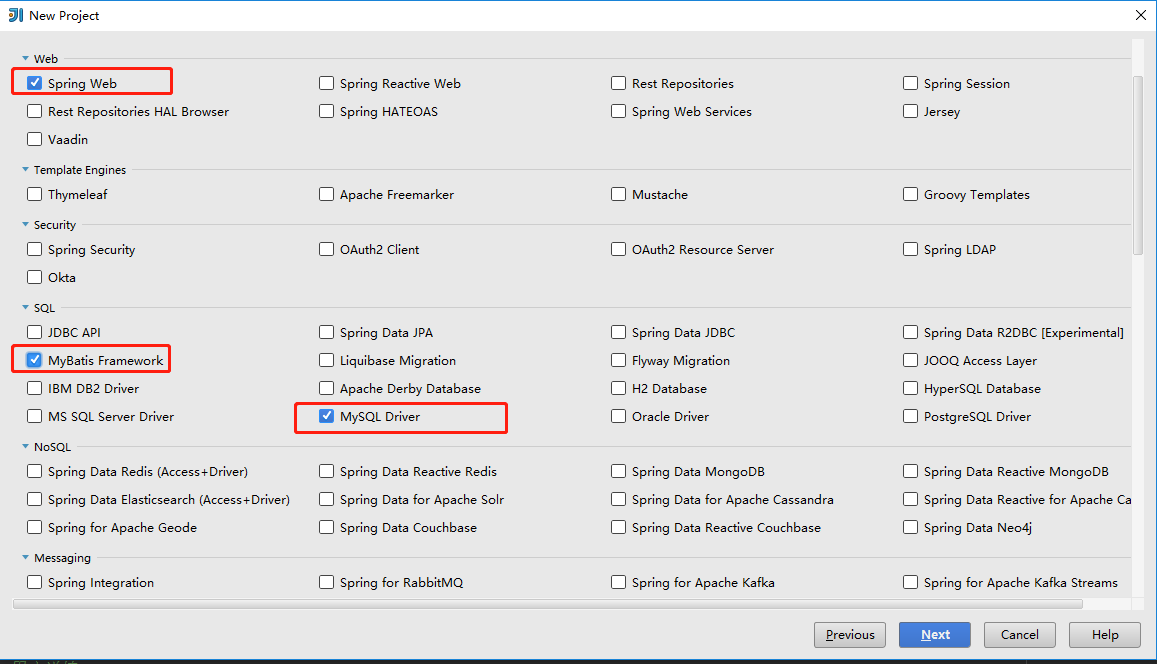
3.添加依赖包:spring web,mybatis,mysql
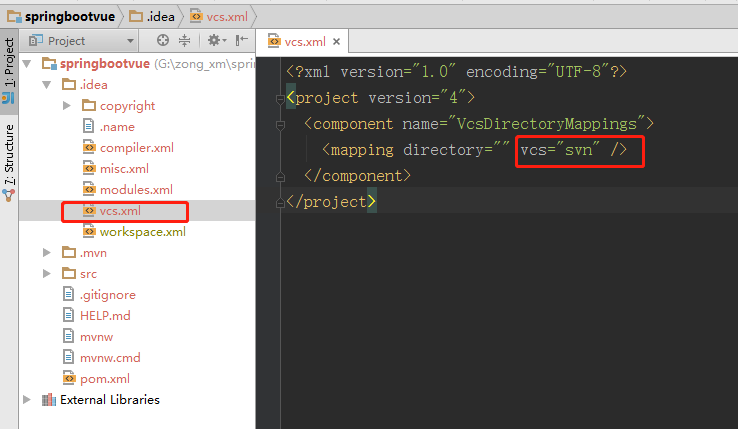
4.项目变红,将“svn” 去除,进行保存
5.点击项目右侧,点击刷新,将项目添加为maven 项目
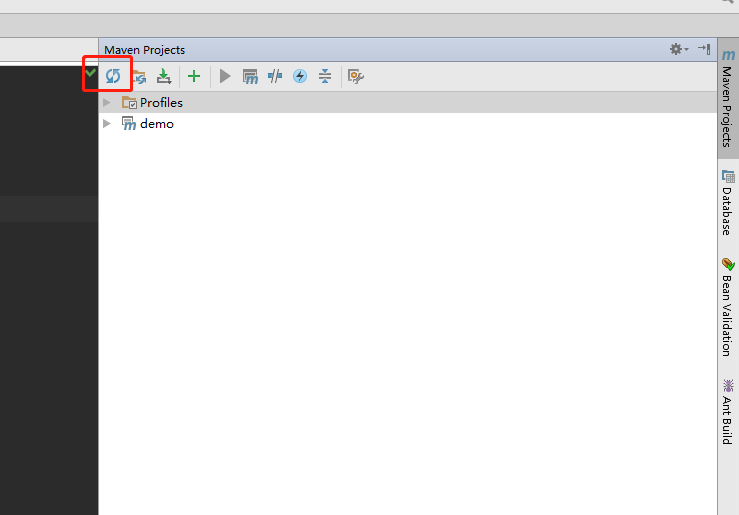
6.查看pom.xml
1<?xml version="1.0" encoding="UTF-8"?>
2<project xmlns="http://maven.apache.org/POM/4.0.0" xmlns:xsi="http://www.w3.org/2001/XMLSchema-instance"
3    xsi:schemaLocation="http://maven.apache.org/POM/4.0.0 https://maven.apache.org/xsd/maven-4.0.0.xsd">
4    <modelVersion>4.0.0</modelVersion>
5    <parent>
6        <groupId>org.springframework.boot</groupId>
7        <artifactId>spring-boot-starter-parent</artifactId>
8        <version>2.2.1.RELEASE</version>
9        <relativePath/> <!-- lookup parent from repository -->
10    </parent>
11    <groupId>com.example</groupId>
12    <artifactId>demo</artifactId>
13    <version>0.0.1-SNAPSHOT</version>
14    <name>demo</name>
15    <description>Demo project for Spring Boot</description>
16
17    <properties>
18        <java.version>1.8</java.version>
19    </properties>
20
21    <dependencies>
22        <!-- web-->
23        <dependency>
24            <groupId>org.springframework.boot</groupId>
25            <artifactId>spring-boot-starter-web</artifactId>
26        </dependency>
27        <!-- mybatis-->
28        <dependency>
29            <groupId>org.mybatis.spring.boot</groupId>
30            <artifactId>mybatis-spring-boot-starter</artifactId>
31            <version>2.1.1</version>
32        </dependency>
33        <!-- mysql-->
34        <dependency>
35            <groupId>mysql</groupId>
36            <artifactId>mysql-connector-java</artifactId>
37            <scope>runtime</scope>
38        </dependency>
39        <dependency>
40            <groupId>org.springframework.boot</groupId>
41            <artifactId>spring-boot-starter-test</artifactId>
42            <scope>test</scope>
43            <exclusions>
44                <exclusion>
45                    <groupId>org.junit.vintage</groupId>
46                    <artifactId>junit-vintage-engine</artifactId>
47                </exclusion>
48            </exclusions>
49        </dependency>
50    </dependencies>
51
52    <build>
53        <plugins>
54            <plugin>
55                <groupId>org.springframework.boot</groupId>
56                <artifactId>spring-boot-maven-plugin</artifactId>
57            </plugin>
58        </plugins>
59    </build>
60
61</project>