
之前写过一篇使用sharding-jdbc进行分库分表的文章,https://blog.csdn.net/tianyaleixiaowu/article/details/70242971,当时的版本还比较早,现在已经不能用了。这一篇是基于最新版来写的。新版已经变成了shardingsphere了,https://shardingsphere.apache.org/。
有点不同的是,这一篇,我们是采用多数据源,仅对一个数据源进行分表。也就是说在网上那些jpa多数据源的配置,用sharding jdbc一样能完成。
也就是说我们有两个库,一个库是正常使用,另一个库其中的一个表进行分表。
老套路,我们还是使用Springboot进行集成,在pom里确保有如下引用。
1<sharding-sphere.version>4.0.0-RC1</sharding-sphere.version>
2
3<!-- 分库分表-->
4        <dependency>
5            <groupId>org.apache.shardingsphere</groupId>
6            <artifactId>sharding-jdbc-spring-boot-starter</artifactId>
7            <version>${sharding-sphere.version}</version>
8        </dependency>
9        <dependency>
10            <groupId>org.apache.shardingsphere</groupId>
11            <artifactId>sharding-core-common</artifactId>
12            <version>${sharding-sphere.version}</version>
13        </dependency>
14        <!-- 分库分表 end-->
15        <dependency>
16            <groupId>org.springframework.boot</groupId>
17            <artifactId>spring-boot-starter-data-jpa</artifactId>
18        </dependency>
19
20spring:
21  application:
22    name: t3cc
23  profiles:
24    active: sharding-databases-tables
25#  datasource:
26#    primary:
27#        jdbc-url: jdbc:mysql://${MYSQL_HOST:localhost}:${MYSQL_PORT:3306}/${DB_NAME:dmp_t3cc}?useUnicode=true&characterEncoding=UTF8&serverTimezone=Hongkong
28#        username: ${MYSQL_USER:root}
29#        password: ${MYSQL_PASS:root}
30#    secondary:
31#        jdbc-url: jdbc:mysql://xxxxxxxxxxxxx/xxxxxx?useUnicode=true&characterEncoding=UTF8&serverTimezone=Hongkong
32#        username: xxxxx
33#        password: xxxxxxx
34  jpa:
35    database: mysql
36    database-platform: org.hibernate.dialect.MySQL5InnoDBDialect  #不加这句则默认为myisam引擎
37    hibernate:
38      ddl-auto: none
39      naming:
40        physical-strategy: org.springframework.boot.orm.jpa.hibernate.SpringPhysicalNamingStrategy
41    open-in-view: true
42    properties:
43        enable_lazy_load_no_trans: true
44    show-sql: true
yml里还是老套路,大家注意,我把之前的多数据源的配置给注释掉了,改成使用sharding来完成多数据源。
里面我profiles.active了另一个sharding-databases-tables.yml
1db:
2  one: primary
3  two: secondary
4spring:
5  shardingsphere:
6    datasource:
7      names: ${db.one},${db.two}
8      primary:
9        type: com.zaxxer.hikari.HikariDataSource
10        jdbc-url: jdbc:mysql://${MYSQL_HOST:localhost}:${MYSQL_PORT:3306}/${DB_NAME:dmp_t3cc}?useUnicode=true&characterEncoding=UTF8&serverTimezone=Hongkong
11        username: ${MYSQL_USER:root}
12        password: ${MYSQL_USER:root}
13        max-active: 16
14      secondary:
15        type: com.zaxxer.hikari.HikariDataSource
16        jdbc-url: jdbc:mysql://xxxxxxx:3306/t3cc?useUnicode=true&characterEncoding=UTF8&serverTimezone=Hongkong
17        username: xxx
18        password: xxxxxx
19        max-active: 16
20    sharding:
21      tables:
22        pt_call_info:
23           actual-data-nodes: ${db.one}.pt_call_info_$->{1..14}
24           table-strategy:
25              inline:
26                sharding-column: today
27                algorithm-expression: pt_call_info_$->{today}
28           key-generator:
29              column: id
30              type: SNOWFLAKE
31        pre_cc_project:
32           actual-data-nodes: ${db.two}.pre_cc_project
33        pre_cc_biztrack:
34           actual-data-nodes: ${db.two}.pre_cc_biztrack
可以看到datasource里,定义了2个数据源,names=primary,secondary,这个名字随便起。之后分别对每个数据源配置了type、url等基本信息。
在sharding里,我针对要被分表的pt_call_info表做了配置,分为14个表pt_call_info_1到pt_call_info_14,分表的原则是根据today这个字段,today为1就分到pt_call_info_1这个表。这也是我这个数据源,唯一要做配置的表。
另外,secondary这个数据源里,也有两个表,但我不想分表,只是当成普通的数据源进行操作。所以,我只是单独列出来他们的表名,并指定actual-data-nodes为第二个数据源的表名。这里是必须要列出来所有表的,无论是否需要分表,不然对表操作时,会报错找不到表。所以需要手工指定。
配完这个yml就ok了,别的什么都不用配了。也不需要像之前的多数据源时,像如下的配置都不用了。不需要指定model和repository的包位置什么的。
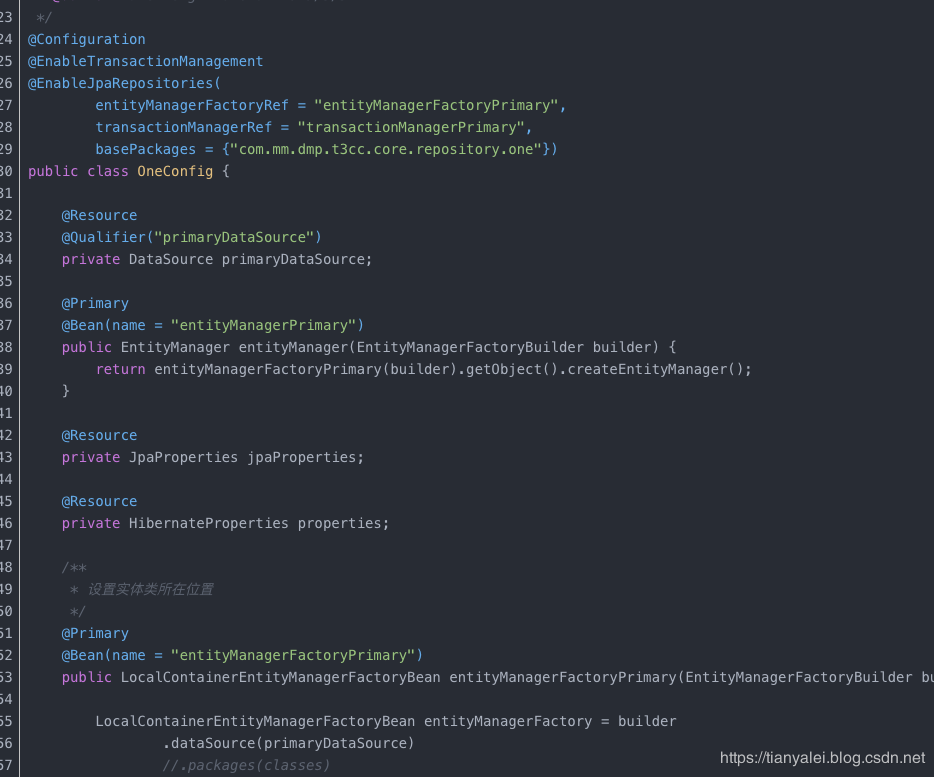
当yml配置好后,就可以把两个数据源的model和Repository放在任意的包下,不影响。
无论是对哪个表进行分表,都还是正常定义这个entity就行了。譬如下面就是我用来分表的model,就是个普通的entity。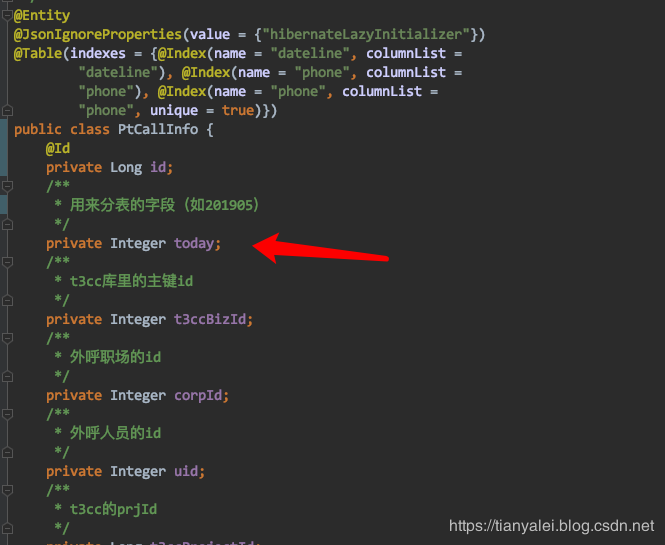
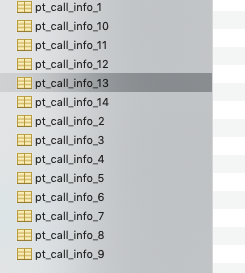
之后手工把表都建好。然后就可以像平时一样操作这个model类了。
1@RunWith(SpringRunner.class)
2@SpringBootTest
3public class T3ccApplicationTests {
4    @Resource
5    private ProjectManager projectManager;
6    @Resource
7    private PtCallInfoManager ptCallInfoManager;
8
9    @Test
10    public void contextLoads() {
11        List<PreCcProject> preCcProjectList = projectManager.findAll();
12        System.out.println(preCcProjectList.size());
13        for (int i = 1; i <= 14; i++) {
14            PtCallInfo ptCallInfo = new PtCallInfo();
15            ptCallInfo.setId((Long) new SnowflakeShardingKeyGenerator().generateKey());
16            ptCallInfo.setToday(i);
17            ptCallInfoManager.add(ptCallInfo);
18        }
19
20    }
21
22}
写个测试代码,分别从第二个数据源取值,从第一个数据源插入值,查看分表情况。注意,id是使用特定的算法生成的,避免分表后的主键冲突。
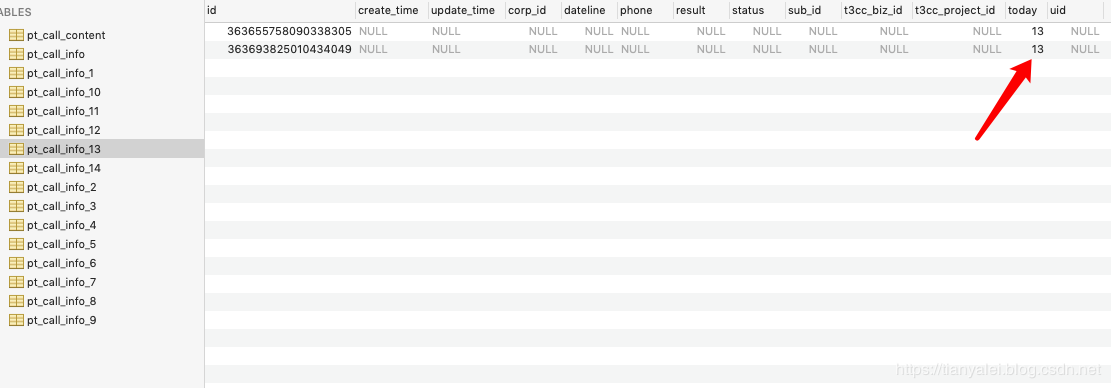
运行后,可以看到分表成功。
需要注意一个坑:不要使用jpa的saveAll功能,在sharding-jdbc中,用单条去添加,如果你用了saveAll,则会失败,插入错误的数据。