一、应用场景
为了理解OAuth的适用场合,让我举一个假设的例子。
有一个"云冲印"的网站,可以将用户储存在Google的照片,冲印出来。用户为了使用该服务,必须让"云冲印"读取自己储存在Google上的照片。
问题是只有得到用户的授权,Google才会同意"云冲印"读取这些照片。那么,"云冲印"怎样获得用户的授权呢?
传统方法是,用户将自己的Google用户名和密码,告诉"云冲印",后者就可以读取用户的照片了。这样的做法有以下几个严重的缺点。
- "云冲印"为了后续的服务,会保存用户的密码,这样很不安全。
- Google不得不部署密码登录,而我们知道,单纯的密码登录并不安全。
- "云冲印"拥有了获取用户储存在Google所有资料的权力,用户没法限制"云冲印"获得授权的范围和有效期。
- 用户只有修改密码,才能收回赋予"云冲印"的权力。但是这样做,会使得其他所有获得用户授权的第三方应用程序全部失效。
- 只要有一个第三方应用程序被破解,就会导致用户密码泄漏,以及所有被密码保护的数据泄漏。
OAuth就是为了解决上面这些问题而诞生的。
二、名词定义
在详细讲解OAuth 2.0之前,需要了解几个专用名词。它们对读懂后面的讲解,尤其是几张图,至关重要。
- Third-party application:第三方应用程序,本文中又称"客户端"(client),即上一节例子中的"云冲印"。
- HTTP service:HTTP服务提供商,本文中简称"服务提供商",即上一节例子中的Google。
- Resource Owner:资源所有者,本文中又称"用户"(user)。
- User Agent:用户代理,本文中就是指浏览器。
- Authorization server:认证服务器,即服务提供商专门用来处理认证的服务器。
- Resource server:资源服务器,即服务提供商存放用户生成的资源的服务器。它与认证服务器,可以是同一台服务器,也可以是不同的服务器。
知道了上面这些名词,就不难理解,OAuth的作用就是让"客户端"安全可控地获取"用户"的授权,与"服务商提供商"进行互动。
三、OAuth的思路
OAuth在"客户端"与"服务提供商"之间,设置了一个授权层(authorization layer)。"客户端"不能直接登录"服务提供商",只能登录授权层,以此将用户与客户端区分开来。"客户端"登录授权层所用的令牌(token),与用户的密码不同。用户可以在登录的时候,指定授权层令牌的权限范围和有效期。
"客户端"登录授权层以后,"服务提供商"根据令牌的权限范围和有效期,向"客户端"开放用户储存的资料。
四、客户端的授权模式
客户端必须得到用户的授权(authorization grant),才能获得令牌(access token)。OAuth 2.0定义了四种授权方式。
- 授权码模式(authorization code)
- 简化模式(implicit)
- 密码模式(resource owner password credentials)
- 客户端模式(client credentials)
五、授权码模式
授权码模式(authorization code)是功能最完整、流程最严密的授权模式。它的特点就是通过客户端的后台服务器,与"服务提供商"的认证服务器进行互动。
它的步骤如下:
(A)用户访问客户端,后者将前者导向认证服务器。
(B)用户选择是否给予客户端授权。
(C)假设用户给予授权,认证服务器将用户导向客户端事先指定的"重定向URI"(redirection URI),同时附上一个授权码。
(D)客户端收到授权码,附上早先的"重定向URI",向认证服务器申请令牌。这一步是在客户端的后台的服务器上完成的,对用户不可见。
(E)认证服务器核对了授权码和重定向URI,确认无误后,向客户端发送访问令牌(access token)和更新令牌(refresh token)。
六、简化模式
简化模式(implicit grant type)不通过第三方应用程序的服务器,直接在浏览器中向认证服务器申请令牌,跳过了"授权码"这个步骤,因此得名。所有步骤在浏览器中完成,令牌对访问者是可见的,且客户端不需要认证。
它的步骤如下:
(A)客户端将用户导向认证服务器。
(B)用户决定是否给于客户端授权。
(C)假设用户给予授权,认证服务器将用户导向客户端指定的"重定向URI",并在URI的Hash部分包含了访问令牌。
(D)浏览器向资源服务器发出请求,其中不包括上一步收到的Hash值。
(E)资源服务器返回一个网页,其中包含的代码可以获取Hash值中的令牌。
(F)浏览器执行上一步获得的脚本,提取出令牌。
(G)浏览器将令牌发给客户端。
七、密码模式
密码模式(Resource Owner Password Credentials Grant)中,用户向客户端提供自己的用户名和密码。客户端使用这些信息,向"服务商提供商"索要授权。
在这种模式中,用户必须把自己的密码给客户端,但是客户端不得储存密码。这通常用在用户对客户端高度信任的情况下,比如客户端是操作系统的一部分,或者由一个著名公司出品。而认证服务器只有在其他授权模式无法执行的情况下,才能考虑使用这种模式。
它的步骤如下:
(A)用户向客户端提供用户名和密码。
(B)客户端将用户名和密码发给认证服务器,向后者请求令牌。
(C)认证服务器确认无误后,向客户端提供访问令牌。
八、客户端模式
客户端模式(Client Credentials Grant)指客户端以自己的名义,而不是以用户的名义,向"服务提供商"进行认证。严格地说,客户端模式并不属于OAuth框架所要解决的问题。在这种模式中,用户直接向客户端注册,客户端以自己的名义要求"服务提供商"提供服务,其实不存在授权问题。
它的步骤如下:
(A)客户端向认证服务器进行身份认证,并要求一个访问令牌。
(B)认证服务器确认无误后,向客户端提供访问令牌。
九、更新令牌
如果用户访问的时候,客户端的"访问令牌"已经过期,则需要使用"更新令牌"申请一个新的访问令牌。
客户端发出更新令牌的HTTP请求,包含以下参数:
- granttype:表示使用的授权模式,此处的值固定为"refreshtoken",必选项。
- refresh_token:表示早前收到的更新令牌,必选项。
- scope:表示申请的授权范围,不可以超出上一次申请的范围,如果省略该参数,则表示与上一次一致。
十、client_credentials代码示范
首先引入主要jar包:
1 <dependency>
2     <groupId>org.springframework.boot</groupId>
3     <artifactId>spring-boot-starter-security</artifactId>
4</dependency>
5<dependency>
6     <groupId>org.springframework.security.oauth</groupId>
7     <artifactId>spring-security-oauth2</artifactId>
8     <version>2.3.3.RELEASE</version>
9</dependency>
10<dependency>
11     <groupId>org.springframework.boot</groupId>
12     <artifactId>spring-boot-starter-actuator</artifactId>
13</dependency>
14<dependency>
15     <groupId>org.springframework.data</groupId>
16     <artifactId>spring-data-redis</artifactId>
17</dependency>
18<dependency>
19     <groupId>redis.clients</groupId>
20     <artifactId>jedis</artifactId>
21     <version>2.9.0</version>
22</dependency>
下面配置获取token的配置文件:
1package cn.chinotan.config.oauth;
2
3import org.springframework.beans.factory.annotation.Autowired;
4import org.springframework.beans.factory.annotation.Qualifier;
5import org.springframework.context.annotation.Bean;
6import org.springframework.context.annotation.Configuration;
7import org.springframework.data.redis.connection.RedisConnectionFactory;
8import org.springframework.data.redis.connection.jedis.JedisConnectionFactory;
9import org.springframework.security.authentication.AuthenticationManager;
10import org.springframework.security.oauth2.config.annotation.configurers.ClientDetailsServiceConfigurer;
11import org.springframework.security.oauth2.config.annotation.web.configuration.AuthorizationServerConfigurerAdapter;
12import org.springframework.security.oauth2.config.annotation.web.configuration.EnableAuthorizationServer;
13import org.springframework.security.oauth2.config.annotation.web.configurers.AuthorizationServerEndpointsConfigurer;
14import org.springframework.security.oauth2.config.annotation.web.configurers.AuthorizationServerSecurityConfigurer;
15import org.springframework.security.oauth2.provider.token.store.redis.RedisTokenStore;
16
17/**
18 * @program: test
19 * @description: OAuth2服务配置
20 * @author: xingcheng
21 * @create: 2018-12-01 16:27
22 **/
23@Configuration
24@EnableAuthorizationServer
25public class AuthorizationServerConfig extends AuthorizationServerConfigurerAdapter {
26
27    @Autowired
28    @Qualifier("authenticationManagerBean")
29    private AuthenticationManager authenticationManager ;
30
31    @Autowired
32    private RedisConnectionFactory connectionFactory;
33
34    @Bean
35    public RedisTokenStore tokenStore() {
36        // redis 存储token,方便集群部署
37        return new RedisTokenStore(connectionFactory);
38    }
39
40    @Override
41    public void configure(AuthorizationServerEndpointsConfigurer endpoints) throws Exception {
42        endpoints
43                .authenticationManager(authenticationManager) // 配置认证管理器
44                .tokenStore(tokenStore()); // 使用redis进行token存储
45    }
46
47    @Override
48    public void configure(AuthorizationServerSecurityConfigurer security) throws Exception {
49        security
50                .tokenKeyAccess("permitAll()")
51                .checkTokenAccess("isAuthenticated()")
52                .allowFormAuthenticationForClients(); // 允许表单认证
53    }
54
55    @Override
56    public void configure(ClientDetailsServiceConfigurer clients) throws Exception {
57        clients.inMemory()
58                .withClient("start_test_two") // 获取token的客户端id
59                .secret("start_test_two") // 获取token密钥
60                .scopes("start_test_two") // 资源范围
61                .authorizedGrantTypes("client_credentials", "password", "refresh_token") // 授权类型
62                .resourceIds("oauth2-resource") // 资源id
63                .accessTokenValiditySeconds(120); // token 有效时间
64    }
65}
其中,RedisTokenStore这个是基于Redis的实现,令牌(Access Token)会保存到Redis中,需要配置Redis的连接服务
1# Redis数据库索引(默认为0)
2spring.redis.database: 0
3# Redis服务器地址
4spring.redis.host: 127.0.0.1
5# Redis服务器连接端口
6spring.redis.port: 6379
7# Redis服务器连接密码(默认为空)
8spring.redis.password:
9# 连接池最大连接数(使用负值表示没有限制)
10spring.redis.pool.max-active: 8
11# 连接池最大阻塞等待时间(使用负值表示没有限制)
12spring.redis.pool.max-wait: -1
13# 连接池中的最大空闲连接
14spring.redis.pool.max-idle: 8
15# 连接池中的最小空闲连接
16spring.redis.pool.min-idle: 0
17# 连接超时时间(毫秒)
18spring.redis.timeout: 100
19
20package cn.chinotan.config.redis;
21
22import com.fasterxml.jackson.annotation.JsonAutoDetect;
23import com.fasterxml.jackson.annotation.PropertyAccessor;
24import com.fasterxml.jackson.databind.ObjectMapper;
25import org.slf4j.Logger;
26import org.slf4j.LoggerFactory;
27import org.springframework.beans.factory.annotation.Autowired;
28import org.springframework.beans.factory.annotation.Value;
29import org.springframework.cache.Cache;
30import org.springframework.cache.CacheManager;
31import org.springframework.cache.annotation.CachingConfigurerSupport;
32import org.springframework.cache.annotation.EnableCaching;
33import org.springframework.cache.interceptor.CacheErrorHandler;
34import org.springframework.cache.interceptor.KeyGenerator;
35import org.springframework.context.annotation.Bean;
36import org.springframework.context.annotation.Configuration;
37import org.springframework.data.redis.cache.RedisCacheManager;
38import org.springframework.data.redis.connection.RedisConnectionFactory;
39import org.springframework.data.redis.connection.jedis.JedisConnectionFactory;
40import org.springframework.data.redis.core.RedisTemplate;
41import org.springframework.data.redis.core.StringRedisTemplate;
42import org.springframework.data.redis.serializer.Jackson2JsonRedisSerializer;
43import org.springframework.data.redis.serializer.RedisSerializer;
44import org.springframework.data.redis.serializer.StringRedisSerializer;
45
46/**
47 * @program: test
48 * @description: redis
49 * @author: xingcheng
50 * @create: 2018-12-01 17:09
51 **/
52@Configuration
53@EnableCaching
54public class RedisConfig extends CachingConfigurerSupport {
55
56    @Value("${spring.redis.host}")
57    private String host;
58    @Value("${spring.redis.port}")
59    private int port;
60    @Value("${spring.redis.timeout}")
61    private int timeout;
62
63    @Autowired
64    private JedisConnectionFactory jedisConnectionFactory;
65
66    /**
67     * Logger
68     */
69    private static final Logger lg = LoggerFactory.getLogger(RedisConfig.class);
70
71    @Bean
72    @Override
73    public KeyGenerator keyGenerator() {
74        //  设置自动key的生成规则,配置spring boot的注解,进行方法级别的缓存
75        // 使用:进行分割,可以很多显示出层级关系
76        // 这里其实就是new了一个KeyGenerator对象
77        return (target, method, params) -> {
78            StringBuilder sb = new StringBuilder();
79            sb.append(target.getClass().getName());
80            sb.append(":");
81            sb.append(method.getName());
82            for (Object obj : params) {
83                sb.append(":" + String.valueOf(obj));
84            }
85            String rsToUse = String.valueOf(sb);
86            return rsToUse;
87        };
88    }
89
90    //缓存管理器
91    @Bean
92    public CacheManager cacheManager(RedisTemplate redisTemplate) {
93        // 初始化缓存管理器,在这里我们可以缓存的整体过期时间什么的,我这里默认没有配置
94        RedisCacheManager.RedisCacheManagerBuilder builder = RedisCacheManager
95                .RedisCacheManagerBuilder
96                .fromConnectionFactory(jedisConnectionFactory);
97        return builder.build();
98    }
99    @Bean
100    public RedisTemplate<Object, Object> redisTemplate(RedisConnectionFactory factory){
101        //设置序列化
102        Jackson2JsonRedisSerializer jackson2JsonRedisSerializer = new Jackson2JsonRedisSerializer(Object.class);
103        ObjectMapper om = new ObjectMapper();
104        om.setVisibility(PropertyAccessor.ALL, JsonAutoDetect.Visibility.ANY);
105        om.enableDefaultTyping(ObjectMapper.DefaultTyping.NON_FINAL);
106        jackson2JsonRedisSerializer.setObjectMapper(om);
107        // 配置redisTemplate
108        RedisTemplate<Object, Object> redisTemplate = new RedisTemplate<Object, Object>();
109        redisTemplate.setConnectionFactory(jedisConnectionFactory);
110        RedisSerializer stringSerializer = new StringRedisSerializer();
111        redisTemplate.setKeySerializer(stringSerializer); // key序列化
112        redisTemplate.setValueSerializer(jackson2JsonRedisSerializer); // value序列化
113        redisTemplate.setHashKeySerializer(stringSerializer); // Hash key序列化
114        redisTemplate.setHashValueSerializer(jackson2JsonRedisSerializer); // Hash value序列化
115        redisTemplate.afterPropertiesSet();
116        return redisTemplate;
117    }
118
119    @Override
120    @Bean
121    public CacheErrorHandler errorHandler() {
122        // 异常处理,当Redis发生异常时,打印日志,但是程序正常走
123        CacheErrorHandler cacheErrorHandler = new CacheErrorHandler() {
124            @Override
125            public void handleCacheGetError(RuntimeException e, Cache cache, Object key) {
126                lg.error("Redis occur handleCacheGetError:key -> [{}]", key, e);
127            }
128
129            @Override
130            public void handleCachePutError(RuntimeException e, Cache cache, Object key, Object value) {
131                lg.error("Redis occur handleCachePutError:key -> [{}];value -> [{}]", key, value, e);
132            }
133
134            @Override
135            public void handleCacheEvictError(RuntimeException e, Cache cache, Object key)    {
136                lg.error("Redis occur handleCacheEvictError:key -> [{}]", key, e);
137            }
138
139            @Override
140            public void handleCacheClearError(RuntimeException e, Cache cache) {
141                lg.error("Redis occur handleCacheClearError:", e);
142            }
143        };
144        return cacheErrorHandler;
145    }
146}
之后配置资源服务器:
1package cn.chinotan.config.oauth;
2
3import org.springframework.context.annotation.Configuration;
4import org.springframework.security.config.annotation.web.builders.HttpSecurity;
5import org.springframework.security.oauth2.config.annotation.web.configuration.EnableResourceServer;
6import org.springframework.security.oauth2.config.annotation.web.configuration.ResourceServerConfigurerAdapter;
7
8import javax.servlet.http.HttpServletResponse;
9
10/**
11 * @program: test
12 * @description: Resource服务配置
13 * @author: xingcheng
14 * @create: 2018-12-01 16:30
15 **/
16@Configuration
17@EnableResourceServer
18public class ResourceServerConfig extends ResourceServerConfigurerAdapter {
19
20
21}
以及Web安全配置:
1package cn.chinotan.config;
2
3import org.springframework.beans.factory.annotation.Autowired;
4import org.springframework.context.annotation.Bean;
5import org.springframework.context.annotation.Configuration;
6import org.springframework.core.Ordered;
7import org.springframework.core.annotation.Order;
8import org.springframework.security.access.expression.method.MethodSecurityExpressionHandler;
9import org.springframework.security.authentication.AuthenticationManager;
10import org.springframework.security.config.annotation.authentication.builders.AuthenticationManagerBuilder;
11import org.springframework.security.config.annotation.method.configuration.EnableGlobalMethodSecurity;
12import org.springframework.security.config.annotation.method.configuration.GlobalMethodSecurityConfiguration;
13import org.springframework.security.config.annotation.web.builders.HttpSecurity;
14import org.springframework.security.config.annotation.web.configuration.EnableWebSecurity;
15import org.springframework.security.config.annotation.web.configuration.WebSecurityConfigurerAdapter;
16import org.springframework.security.crypto.bcrypt.BCryptPasswordEncoder;
17import org.springframework.security.oauth2.provider.expression.OAuth2MethodSecurityExpressionHandler;
18
19import javax.servlet.http.HttpServletResponse;
20
21/**
22 * @program: test
23 * @description: WebSecurityConfig
24 * @author: xingcheng
25 * @create: 2018-12-01 17:29
26 **/
27@Configuration
28@EnableWebSecurity
29@Order(Ordered.HIGHEST_PRECEDENCE)
30public class WebSecurityConfig extends WebSecurityConfigurerAdapter {
31
32    @Bean
33    @Override
34    public AuthenticationManager authenticationManagerBean() throws Exception {
35        return super.authenticationManagerBean();
36    }
37
38    @Override
39    public void configure(HttpSecurity http) throws Exception {
40        http.csrf().disable()
41                .exceptionHandling() // 统一异常处理
42                .authenticationEntryPoint((request, response, authException) -> response.sendError(HttpServletResponse.SC_UNAUTHORIZED)) // 自定义异常返回
43                .and()
44                .authorizeRequests()
45                .antMatchers("/api/**")
46                .authenticated() // 拦截所有/api开头下的资源路径,包括其/api本身
47                .anyRequest()
48                .permitAll()// 其他请求无需认证
49                .and()
50                .httpBasic(); // 启用httpBasic认证
51    }
52
53    @Override
54    protected void configure(AuthenticationManagerBuilder auth) throws Exception {
55        auth.inMemoryAuthentication().passwordEncoder(new BCryptPasswordEncoder()).withUser("start_test_two").password(new BCryptPasswordEncoder().encode("start_test_two")).roles("USER"); // 内存中配置httpBasic认证名和密码,使用BCryptPasswordEncoder加密
56    }
57}
其中注意WebSecurityConfigurerAdapter和ResourceServerConfigurerAdapter都有对于HttpSecurity的配置:
而在ResourceServerConfigurer中,默认所有接口都需要认证:
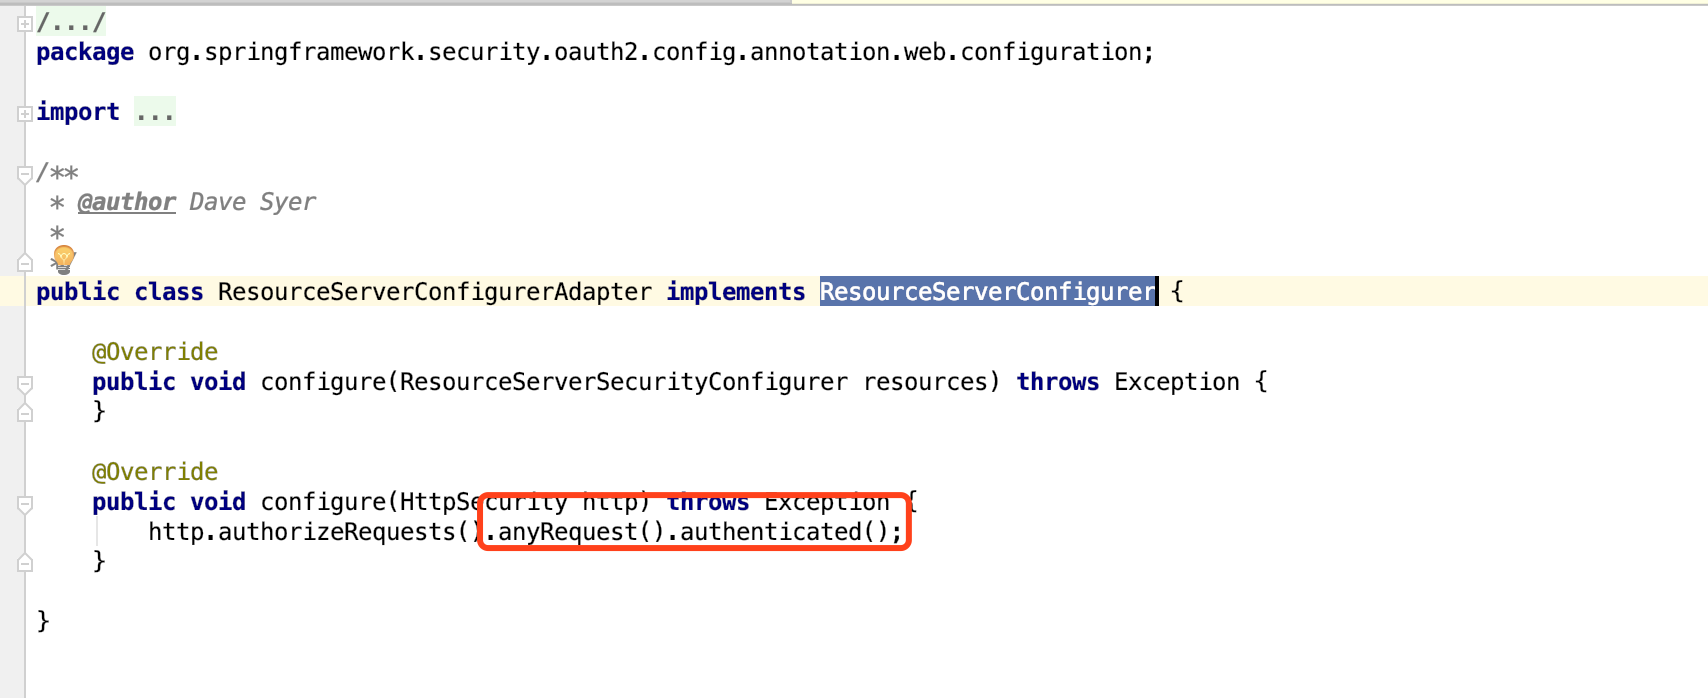
且一旦匹配上一个filter后就不会走其他的filter了,因此需要将WebSecurityConfigurerAdapter的调用顺序调到最高级:
@Order(Ordered.HIGHEST_PRECEDENCE)
配置完成后启动:

可以看到暴露了/oauth/token接口
Spring-Security-Oauth2的提供的jar包中内置了与token相关的基础端点。本文认证与授权token与/oauth/token有关,其处理的接口类为TokenEndpoint。下面我们来看一下对于认证与授权token流程的具体处理过程。
1 1 @FrameworkEndpoint
2 2 public class TokenEndpoint extends AbstractEndpoint {
3 3     ...
4 4     @RequestMapping(value = "/oauth/token", method=RequestMethod.POST)
5 5     public ResponseEntity<OAuth2AccessToken> postAccessToken(Principal principal, @RequestParam
6 6     Map<String, String> parameters) throws HttpRequestMethodNotSupportedException {
7 7     //首先对client信息进行校验
8 8         if (!(principal instanceof Authentication)) {
9 9             throw new InsufficientAuthenticationException(
1010                     "There is no client authentication. Try adding an appropriate authentication filter.");
1111         }
1212         String clientId = getClientId(principal);
1313         //根据请求中的clientId,加载client的具体信息
1414         ClientDetails authenticatedClient = getClientDetailsService().loadClientByClientId(clientId);
1515         TokenRequest tokenRequest = getOAuth2RequestFactory().createTokenRequest(parameters, authenticatedClient);
1616         ...
1717
1818         //验证scope域范围
1919         if (authenticatedClient != null) {
2020             oAuth2RequestValidator.validateScope(tokenRequest, authenticatedClient);
2121         }
2222         //授权方式不能为空
2323         if (!StringUtils.hasText(tokenRequest.getGrantType())) {
2424             throw new InvalidRequestException("Missing grant type");
2525         }
2626         //token endpoint不支持Implicit模式
2727         if (tokenRequest.getGrantType().equals("implicit")) {
2828             throw new InvalidGrantException("Implicit grant type not supported from token endpoint");
2929         }
3030         ...
3131
3232         //进入CompositeTokenGranter,匹配授权模式,然后进行password模式的身份验证和token的发放
3333         OAuth2AccessToken token = getTokenGranter().grant(tokenRequest.getGrantType(), tokenRequest);
3434         if (token == null) {
3535             throw new UnsupportedGrantTypeException("Unsupported grant type: " + tokenRequest.getGrantType());
3636         }
3737         return getResponse(token);
3838     }
3939     ...
口处理的主要流程就是对authentication信息进行检查是否合法,不合法直接抛出异常,然后对请求的GrantType进行处理,根据GrantType,进行password模式的身份验证和token的发放。下面我们来看下TokenGranter的类图。

可以看出TokenGranter的实现类CompositeTokenGranter中有一个List<TokenGranter>,对应五种GrantType的实际授权实现。这边涉及到的getTokenGranter(),代码也列下:
1 1 public class CompositeTokenGranter implements TokenGranter {
2 2     //GrantType的集合,有五种,之前有讲
3 3     private final List<TokenGranter> tokenGranters;
4 4     public CompositeTokenGranter(List<TokenGranter> tokenGranters) {
5 5         this.tokenGranters = new ArrayList<TokenGranter>(tokenGranters);
6 6     }
7 7
8 8     //遍历list,匹配到相应的grantType就进行处理
9 9     public OAuth2AccessToken grant(String grantType, TokenRequest tokenRequest) {
1010         for (TokenGranter granter : tokenGranters) {
1111             OAuth2AccessToken grant = granter.grant(grantType, tokenRequest);
1212             if (grant!=null) {
1313                 return grant;
1414             }
1515         }
1616         return null;
1717     }
1818     ...
1919 }
启动后,访问下面的接口:
1package cn.chinotan.controller;
2
3import org.springframework.web.bind.annotation.RequestMapping;
4import org.springframework.web.bind.annotation.RestController;
5
6/**
7 * @program: test
8 * @description: oauth2测试类
9 * @author: xingcheng
10 * @create: 2018-12-01 17:43
11 **/
12@RestController
13public class WordController {
14
15    @RequestMapping("/")
16    public String index(){
17
18        return "index" ;
19    }
20
21    @RequestMapping("/api")
22    public String api(){
23        return "api" ;
24    }
25
26    @RequestMapping("/login")
27    public String login() {
28        return "login";
29    }
30
31
32}
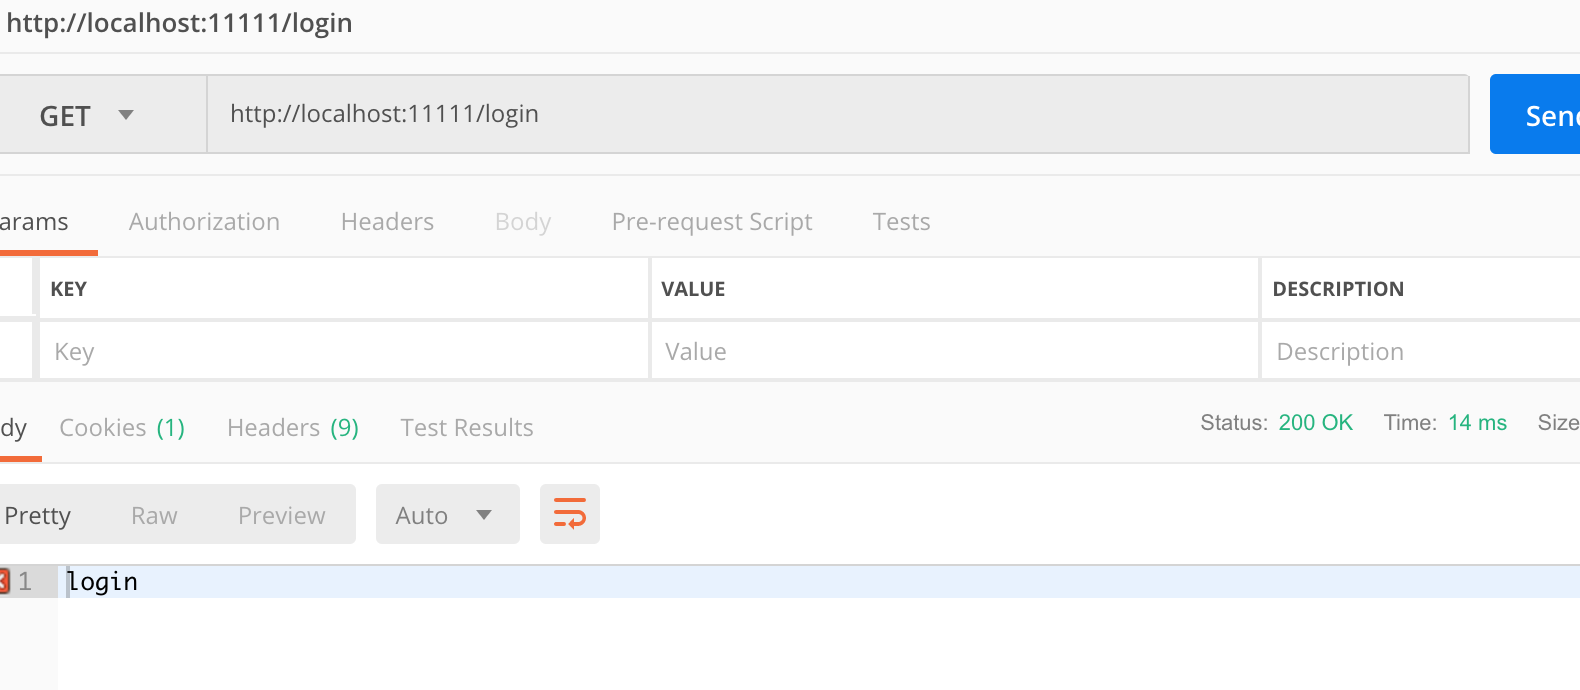
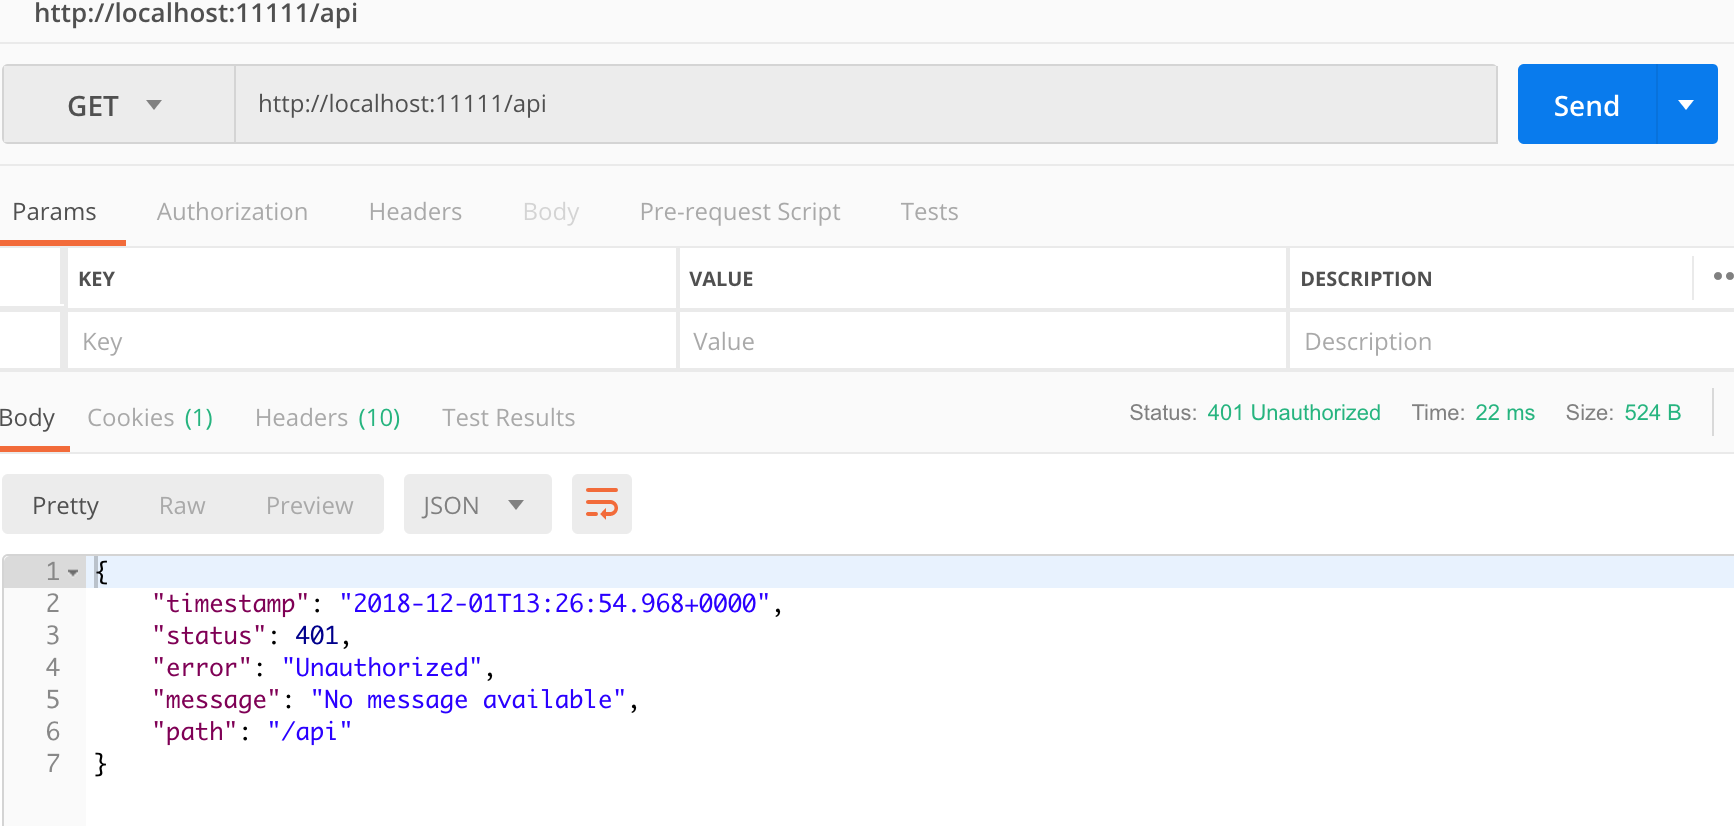
可以看到访问/api接口的时候被拦截了,但是其他接口可以访问
那么如何才能访问/api接口呢,首先得获取到access_token才行
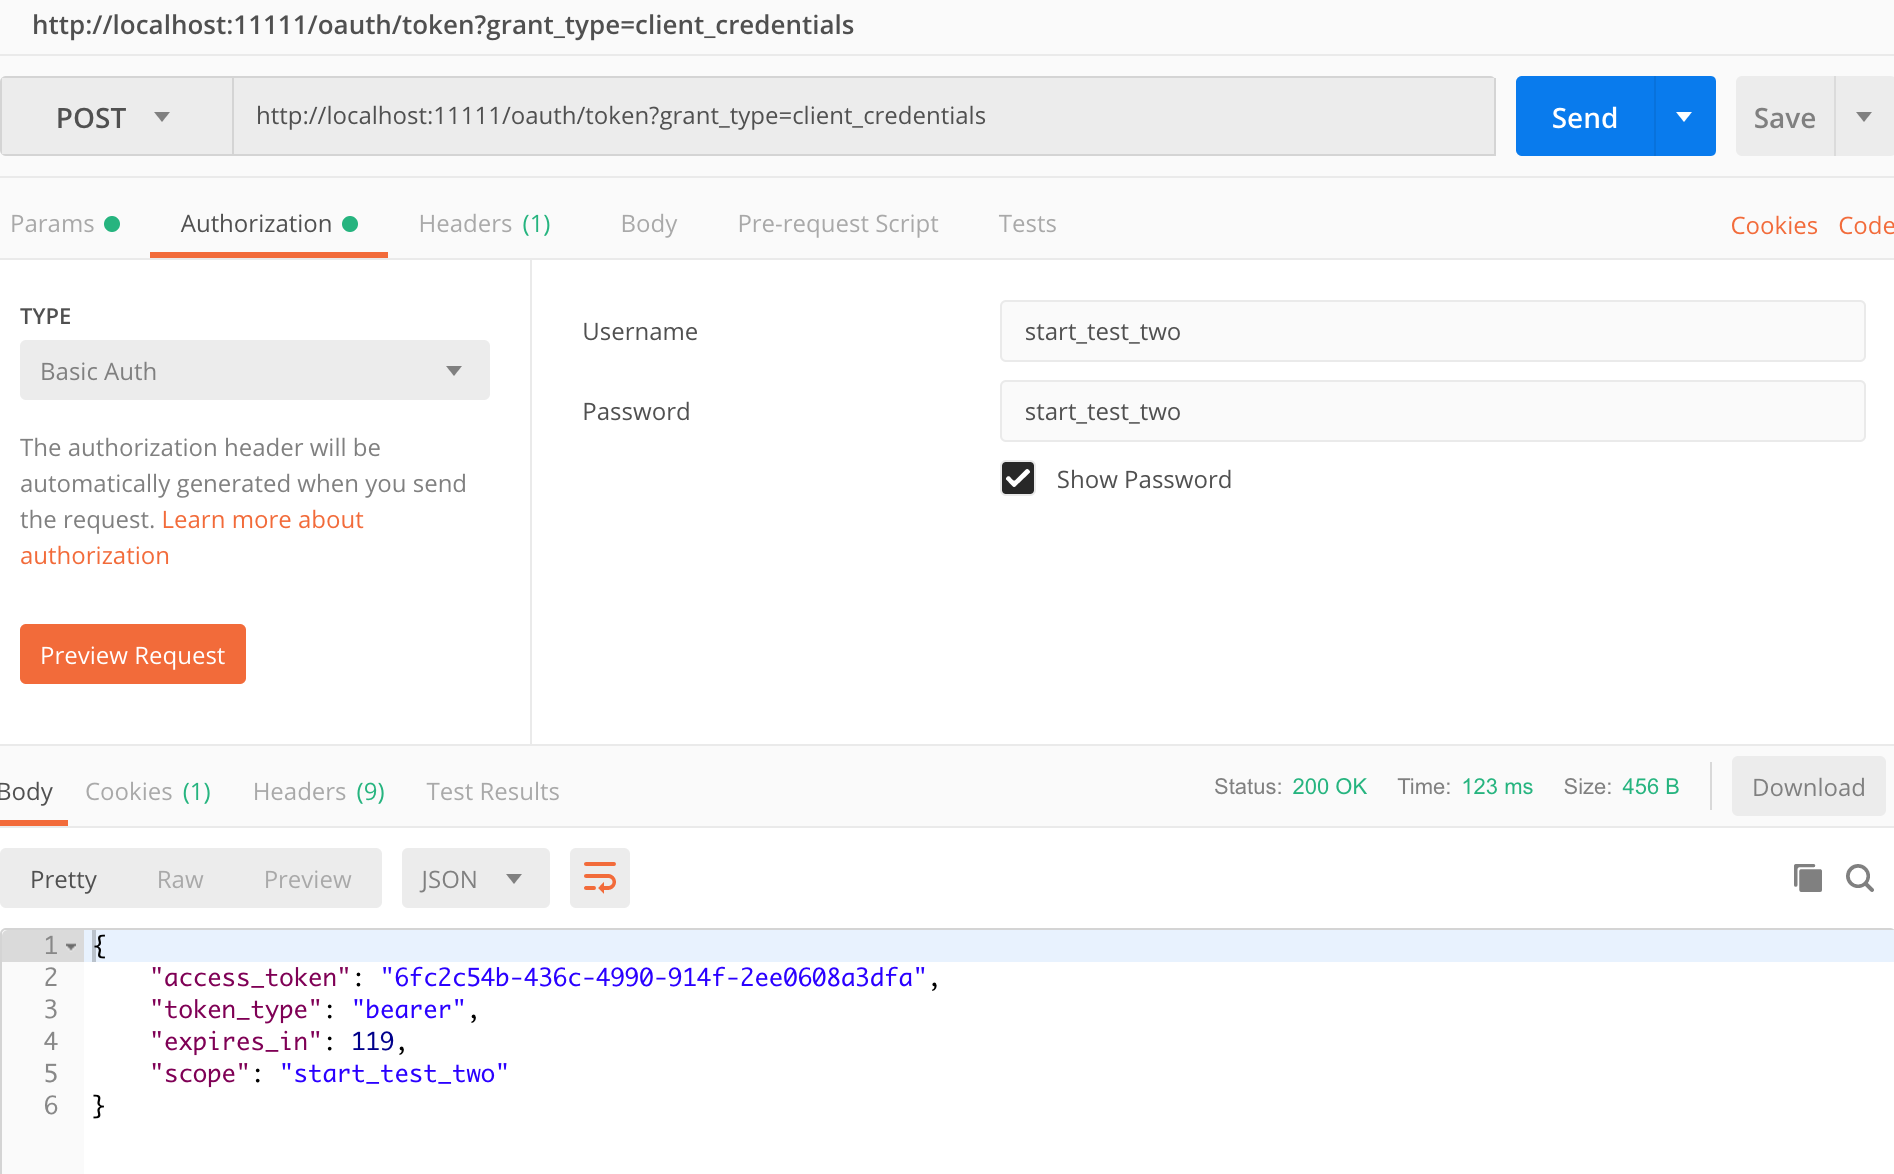
通过暴露出的/oauth/token?grant_type=client_credentials接口就可以获取到access_token,其中expires_in为有效时间,看下我们的token是存储在哪里:
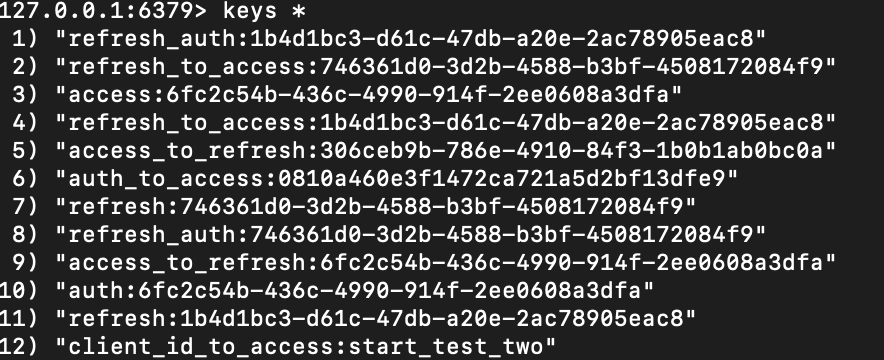
没错,被存在了redis中,相比存在本地内存和数据库中,redis这样的数据结构有着天然的时间特性,可以方便的来做失效处理
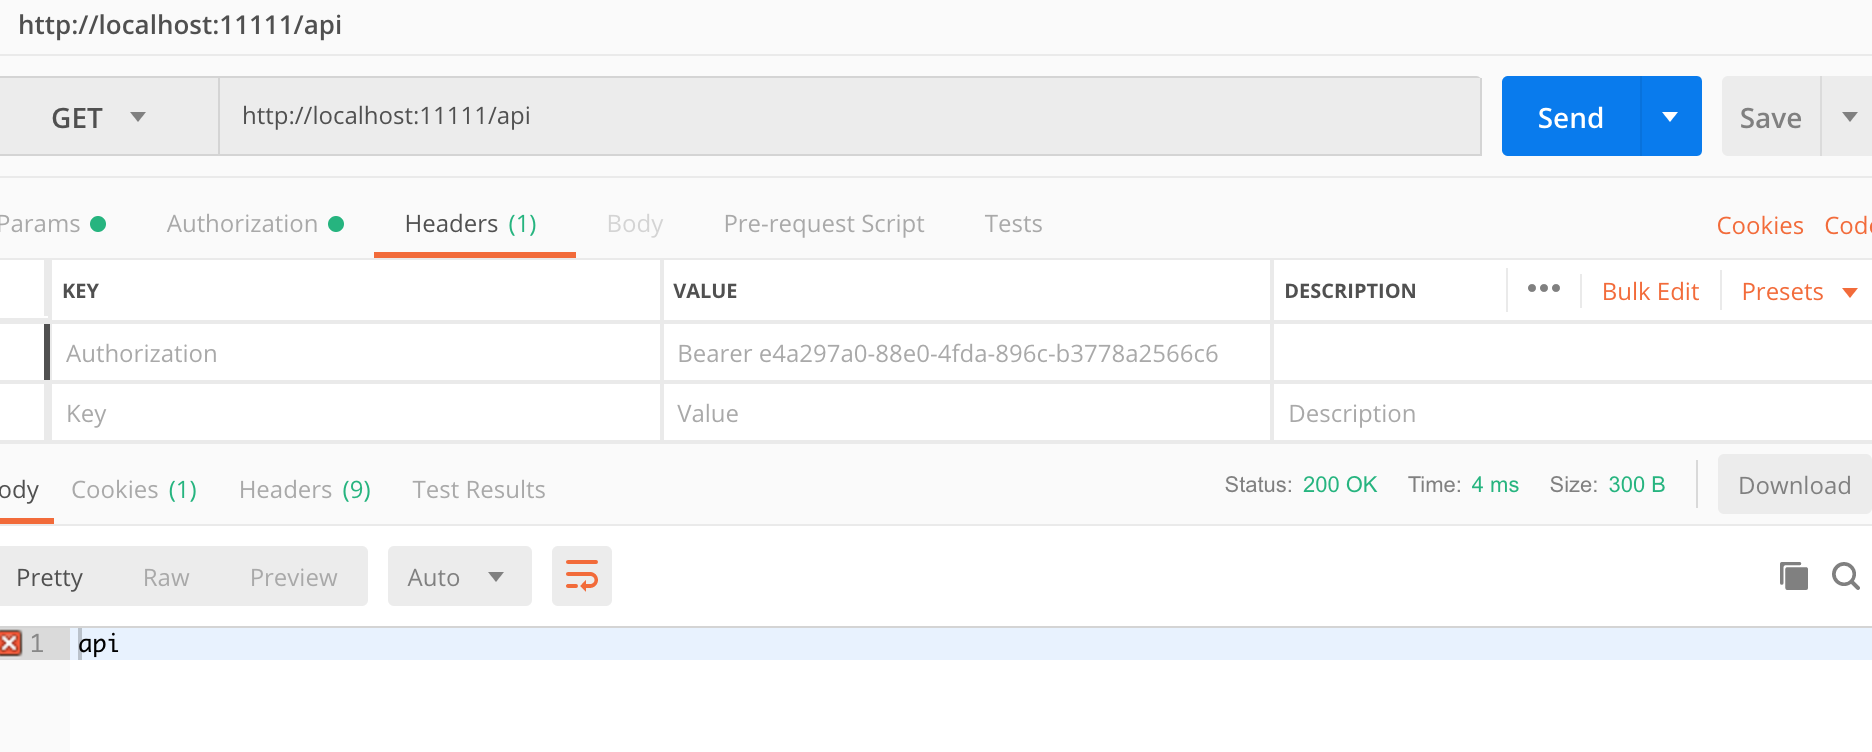
之后便可以通过access_token方便的访问/api接口了
坑
NoSuchMethodError.RedisConnection.set([B[B)V #16错误
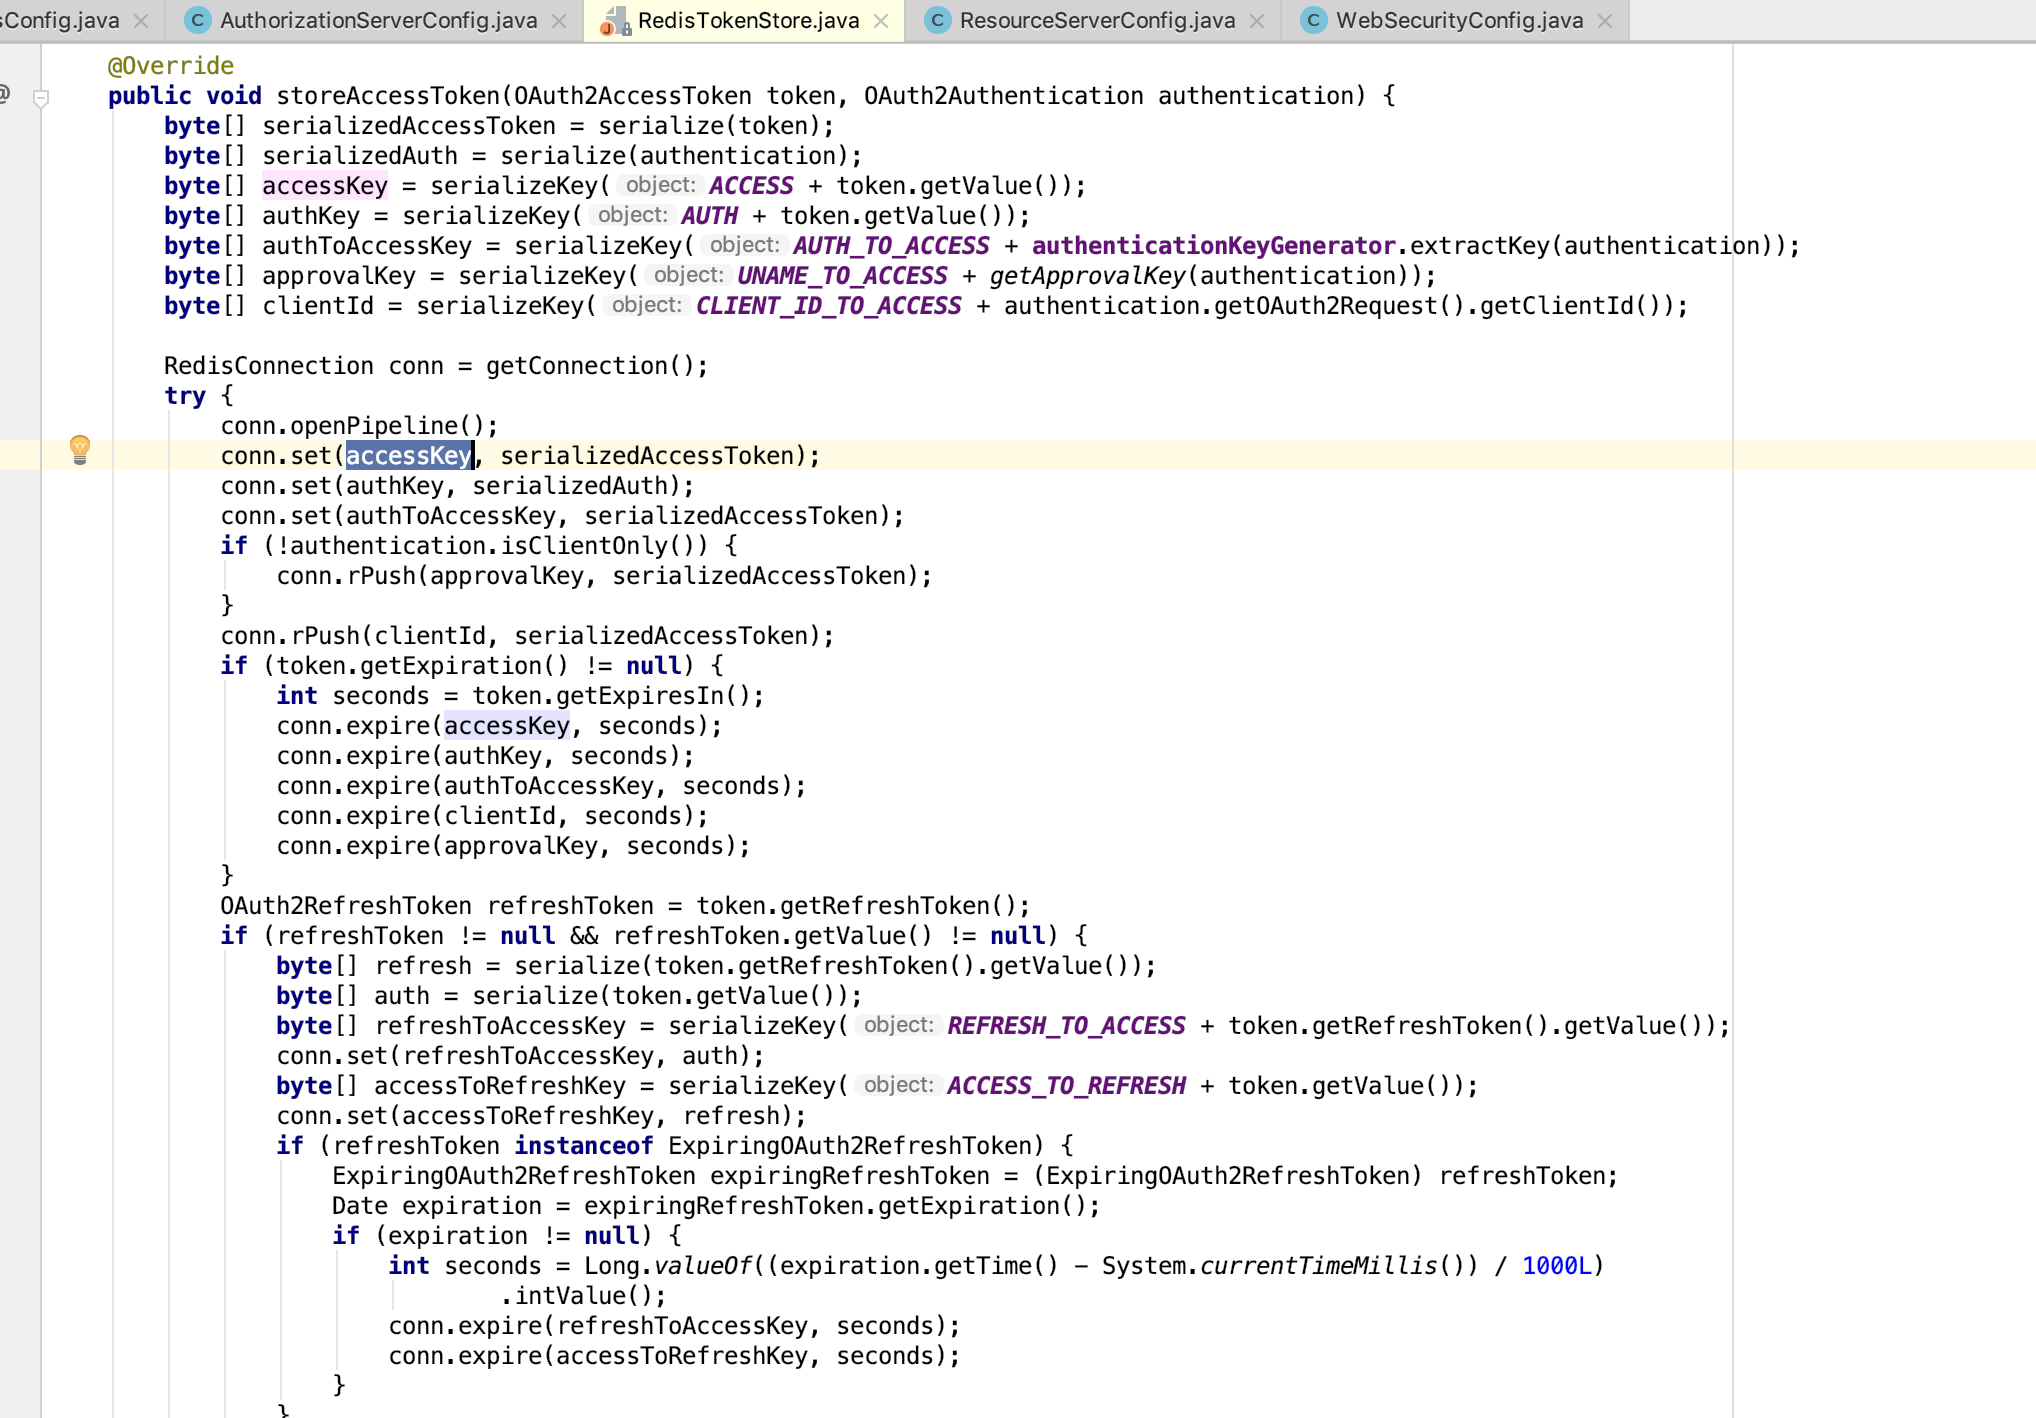
版本问题,spring-data-redis 2.0版本中set(String,String)被弃用了。然后我按照网页中的决解方法“spring-date-redis”改为2.3.3.RELEASE版本,下面是源码中的存储token过程: