
1.环境要求:centos 7 ,jdk ,安装elasticsearch之前必须要安装好jdk
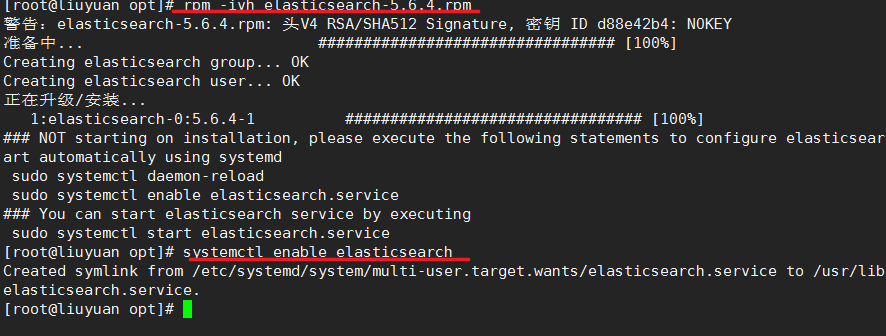
2.安装完成后,通过rpm方式安装elasticsearch-5.6.4.rpm
3.rpm -ivh elasticsearch-5.6.4.rpm安装完成后,查看是否为自启动systemctl list-unit-files|grep elasticsearch
查看为disabled 为非自启动
那么如何来设置自启动呢?systemctl enable elasticsearch
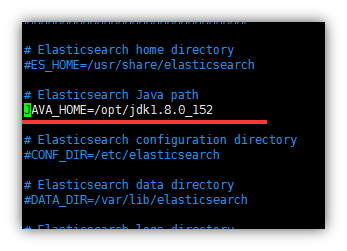
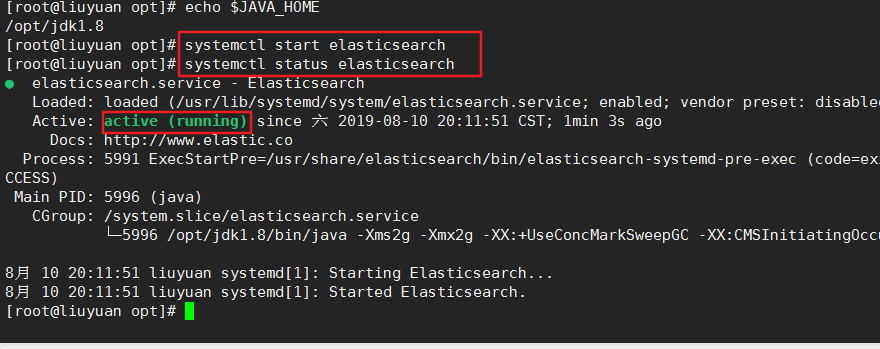
启动之前为elasticsearch配置jdk
vim /etc/sysconfig/elasticsearch 中修改JAVA_HOME路径的路径
还没有完,接下来配置核心配置文件和数据存储位置以及日志
核心文件
/etc/elasticsearch/elasticsearch.yml
数据文件路径
/var/lib/elasticsearch/
日志文件路径e
/var/log/elasticsearch/elasticsearch.log
修改配置文件
vim /etc/elasticsearch/elasticsearch.yml
修改yml配置的注意事项:
每行必须顶格,不能有空格
“:”后面必须有一个空格
集群名称,同一集群名称必须相同

单个节点名称

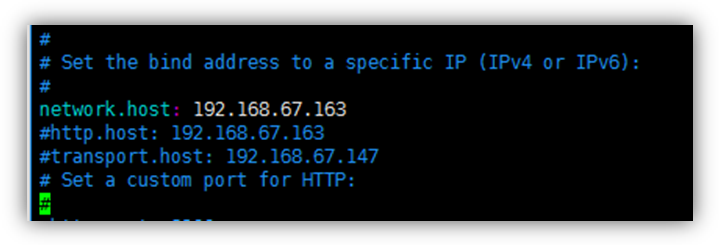
网络部分 改为当前的ip地址 ,端口号保持默认9200就行
把bootstrap自检程序关掉
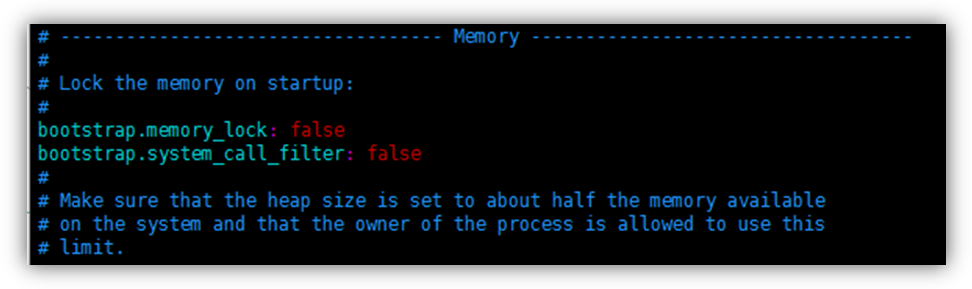
bootstrap.system_call_filter: false
自发现配置:新节点向集群报到的主机名
1# ======================== Elasticsearch Configuration =========================
2#
3# NOTE: Elasticsearch comes with reasonable defaults for most settings.
4#       Before you set out to tweak and tune the configuration, make sure you
5#       understand what are you trying to accomplish and the consequences.
6#
7# The primary way of configuring a node is via this file. This template lists
8# the most important settings you may want to configure for a production cluster.
9#
10# Please consult the documentation for further information on configuration options:
11# https://www.elastic.co/guide/en/elasticsearch/reference/index.html
12#
13# ---------------------------------- Cluster -----------------------------------
14#
15# Use a descriptive name for your cluster:
16#
17cluster.name: my-es
18#
19# ------------------------------------ Node ------------------------------------
20#
21# Use a descriptive name for the node:
22#
23node.name: node-1
24#
25# Add custom attributes to the node:
26#
27#node.attr.rack: r1
28#
29# ----------------------------------- Paths ------------------------------------
30#
31# Path to directory where to store the data (separate multiple locations by comma):
32#
33  #path.data: /path/to/data
34#
35# Path to log files:
36#
37#path.logs: /path/to/logs
38#
39# ----------------------------------- Memory -----------------------------------
40#
41# Lock the memory on startup:
42#
43bootstrap.memory_lock: false
44bootstrap.system_call_filter: false
45#
46# Make sure that the heap size is set to about half the memory available
47# on the system and that the owner of the process is allowed to use this
48# limit.
49#
50# Elasticsearch performs poorly when the system is swapping the memory.
51#
52# ---------------------------------- Network -----------------------------------
53#
54# Set the bind address to a specific IP (IPv4 or IPv6):
55#
56network.host: 192.168.19.129
57#
58# Set a custom port for HTTP:
59#
60#http.port: 9200
61#
62# For more information, consult the network module documentation.
63#
64# --------------------------------- Discovery ----------------------------------
65#
66# Pass an initial list of hosts to perform discovery when new node is started:
67# The default list of hosts is ["127.0.0.1", "[::1]"]
68#
69discovery.zen.ping.unicast.hosts: ["liuyuan"]
70#
71# Prevent the "split brain" by configuring the majority of nodes (total number of master-eligible nodes / 2 + 1):
72#
73#discovery.zen.minimum_master_nodes: 3
74#
75# For more information, consult the zen discovery module documentation.
76#
77# ---------------------------------- Gateway -----------------------------------
78#
79# Block initial recovery after a full cluster restart until N nodes are started:
80#
81#gateway.recover_after_nodes: 3
82#
83# For more information, consult the gateway module documentation.
84#
85# ---------------------------------- Various -----------------------------------
86#
87# Require explicit names when deleting indices:
88#
89#action.destructive_requires_name: true
90
91
- 修改linux配置
为什么要修改linux配置?
默认elasticsearch是单机访问模式,就是只能自己访问自己。
但是我们之后一定会设置成允许应用服务器通过网络方式访问。这时,elasticsearch就会因为嫌弃单机版的低端默认配置而报错,甚至无法启动。
所以我们在这里就要把服务器的一些限制打开,能支持更多并发。
**问题1:**max file descriptors [4096] for elasticsearch process likely too low, increase to at least [65536] elasticsearch
原因:系统允许 Elasticsearch 打开的最大文件数需要修改成65536
解决:vi /etc/security/limits.conf
添加内容:
* soft nofile 65536
* hard nofile 131072
* soft nproc 2048
* hard nproc 65536
注意:“*” 不要省略掉
**问题2:**max number of threads [1024] for user [judy2] likely too low, increase to at least [2048] (CentOS7.x 不用改)
原因:允许最大进程数修该成2048
解决:vi /etc/security/limits.d/90-nproc.conf
修改如下内容:
* soft nproc 1024
#修改为
* soft nproc 2048
**问题3:**max virtual memory areas vm.max_map_count [65530] likely too low, increase to at least [262144] (CentOS7.x 不用改)
原因:一个进程可以拥有的虚拟内存区域的数量。
解决:可零时提高vm.max_map_count的大小
命令:sysctl -w vm.max_map_count=262144
重启:reboot
curl http://192.168.19.129:9200访问
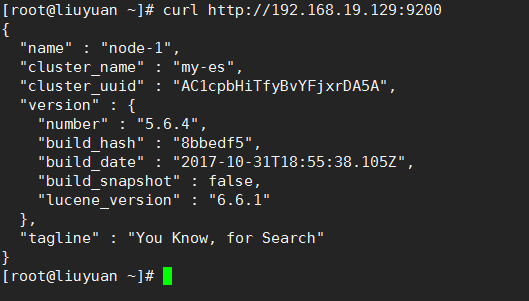
成功
安装kibana解压即可用
拷贝kibana-5.6.4-linux-x86_64.tar 到/opt下
解压缩
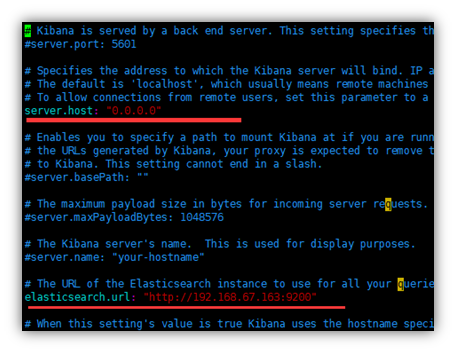
进入kibana主目录的config目录下
vim kibana.yml
server.host: “你本机ip”
启动
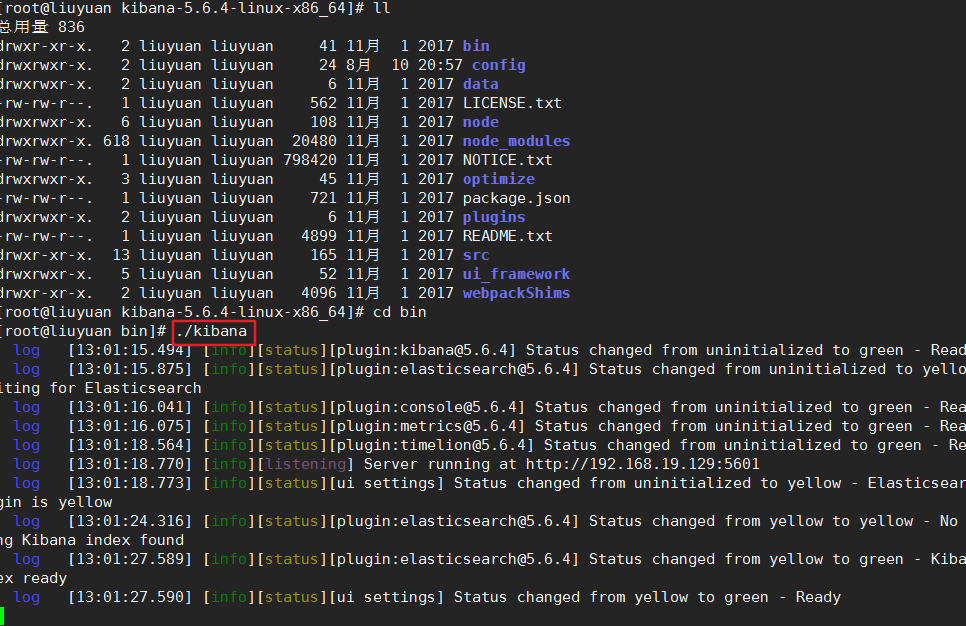
这属于前台启动,不好,关闭后,kibana即退出。用nohup ./kibana & 来替代。
ctrl + c 后
看进程:s -ef ,kibana进程名字不叫kibana,没法查,可以这个命令查最后的

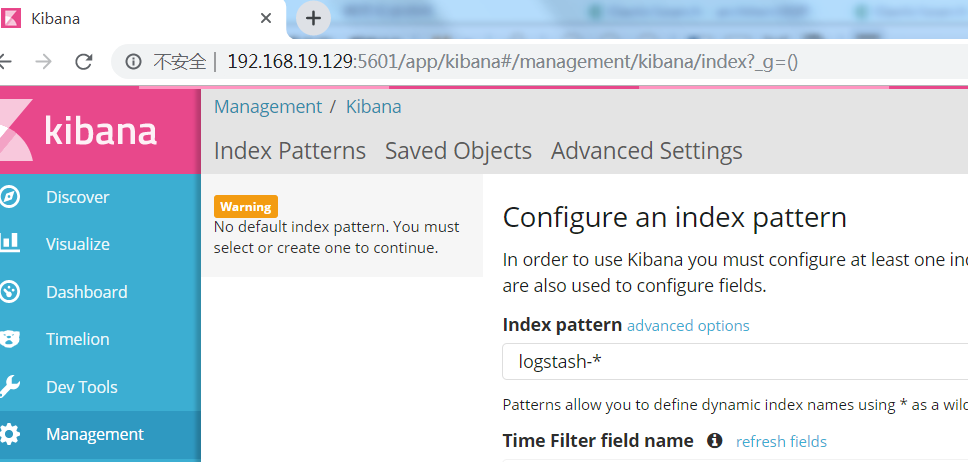
浏览器访问:我的ip为192.168.19.129:5601访问kibana
kibana不能自启动,已亲测,重启后并不能访问,进入到姐以后的根目录的bin下执行nohup ./kibana & 就可以了
期间linux很卡cd /etc/elasticsearch
vim jvm.options
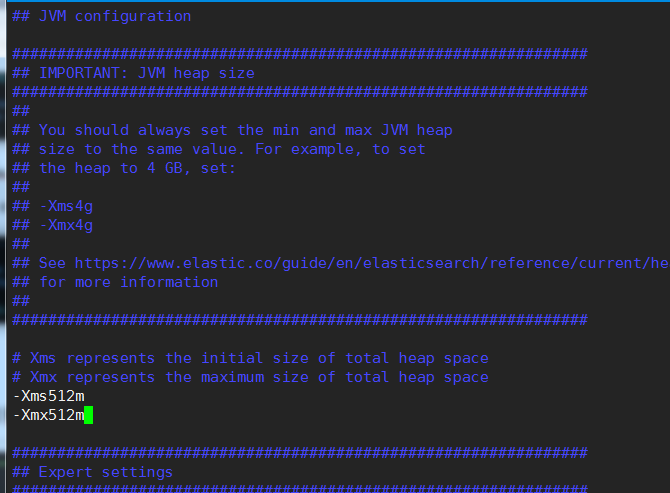
虚拟机配置了2G内存,沾满了,不过还可以用,是因为swap,交换分区当内存用。