
推荐Android开发者将现有项目迁移到Android Studio环境,并在Android Studio下更快地实现SDK的集成工作。
本文档介绍Android Studio和Eclipse开发环境下导入SDK资源进行集成的步骤,需要仔细阅读文档和Demo工程。
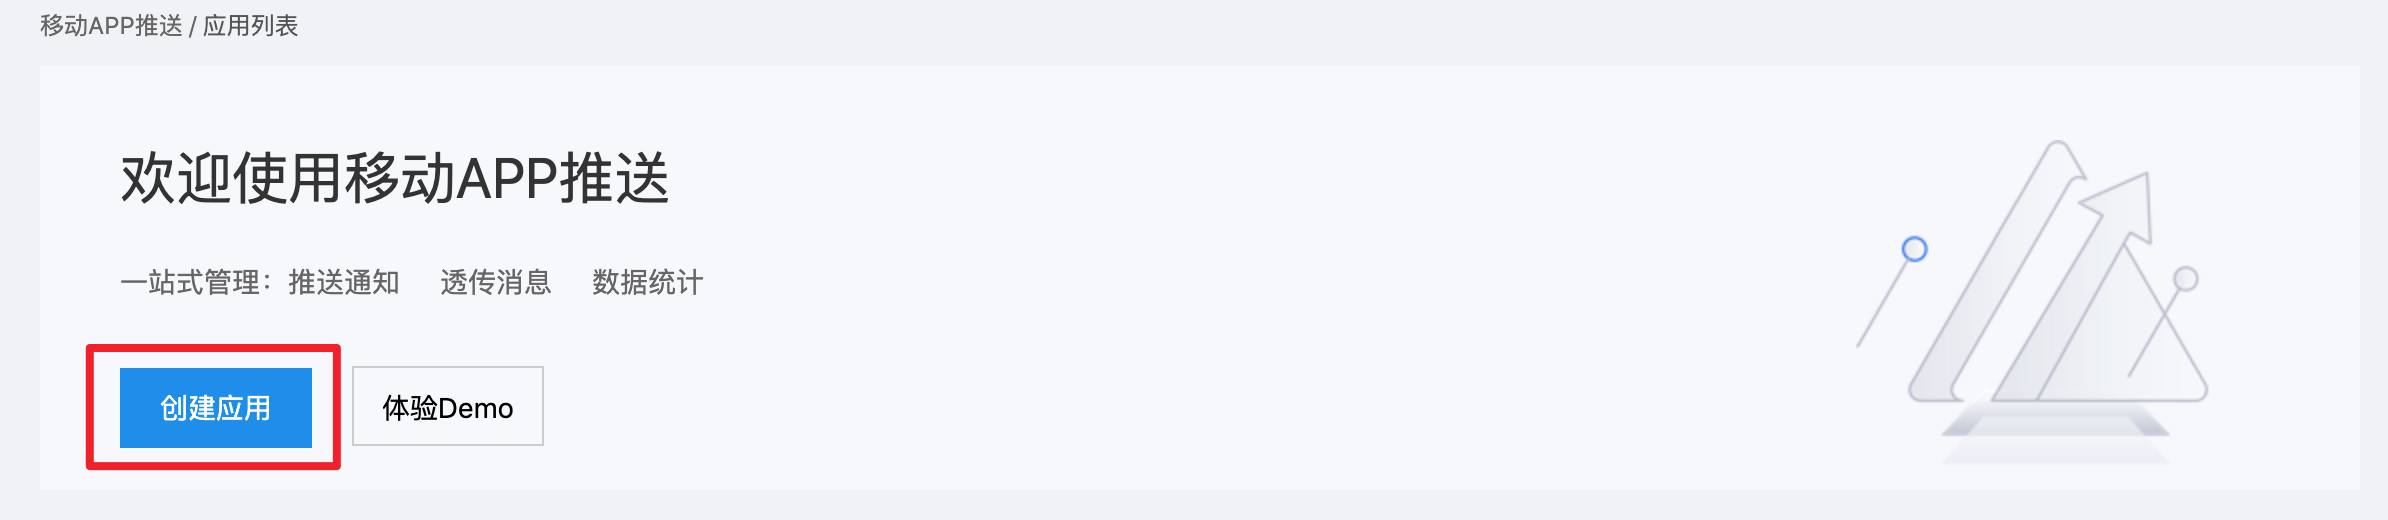
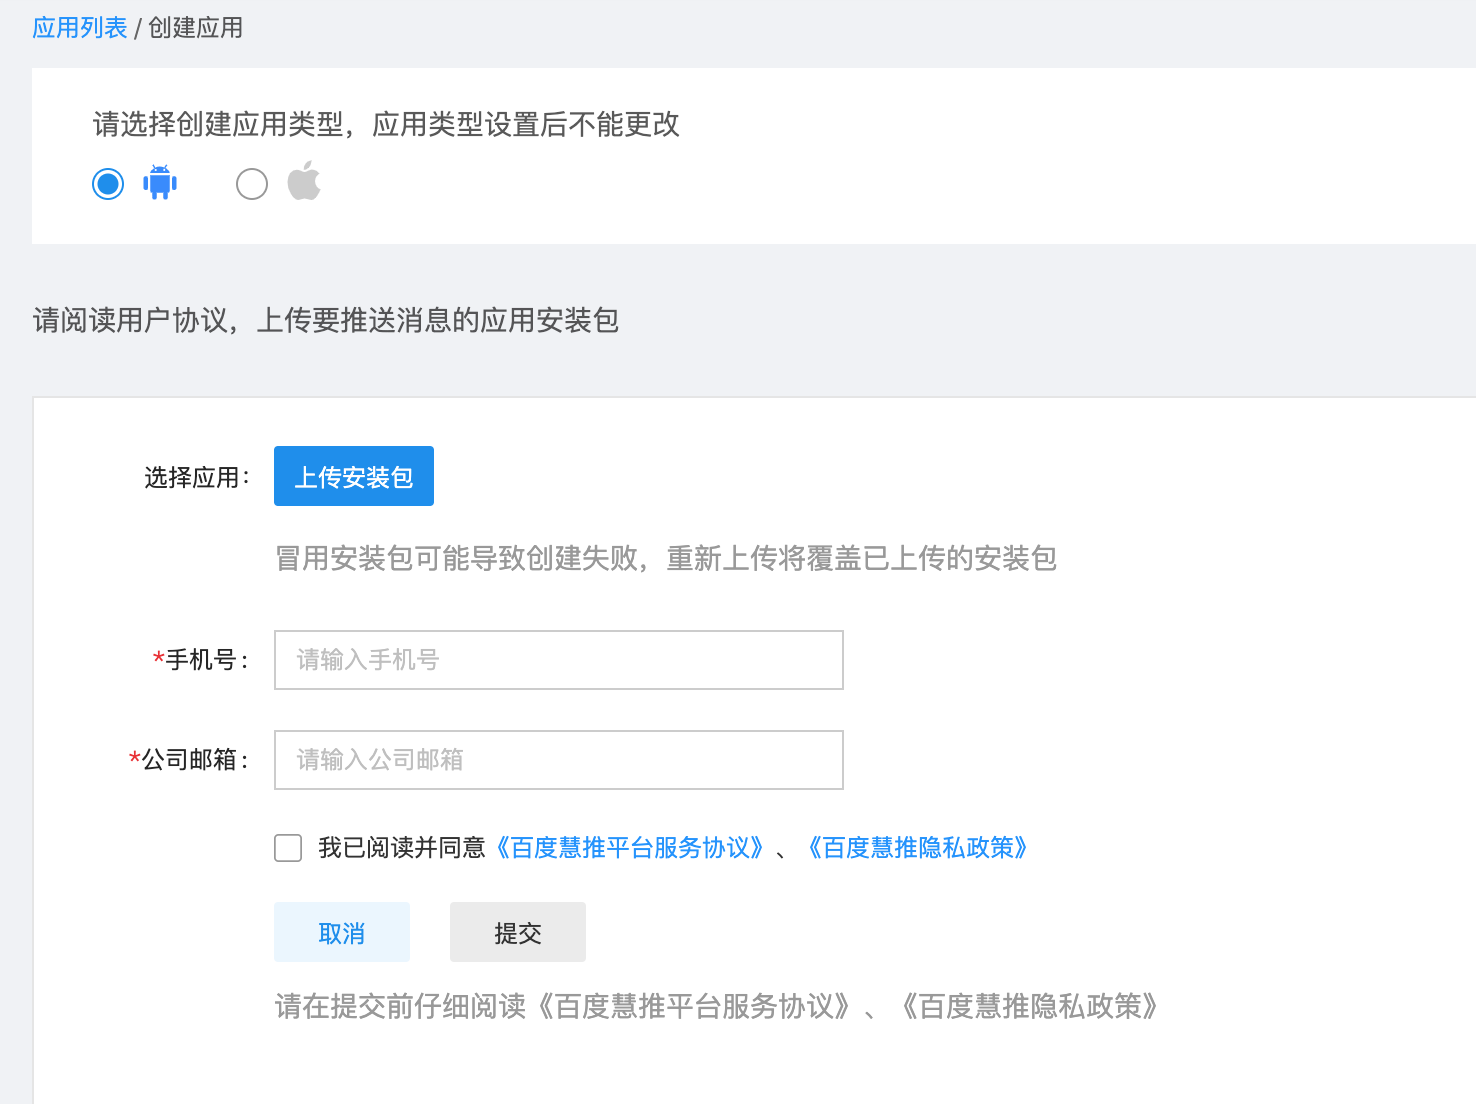
1、 登录百度慧推,点击创建应用使用带有签名的apk包上传创建应用;
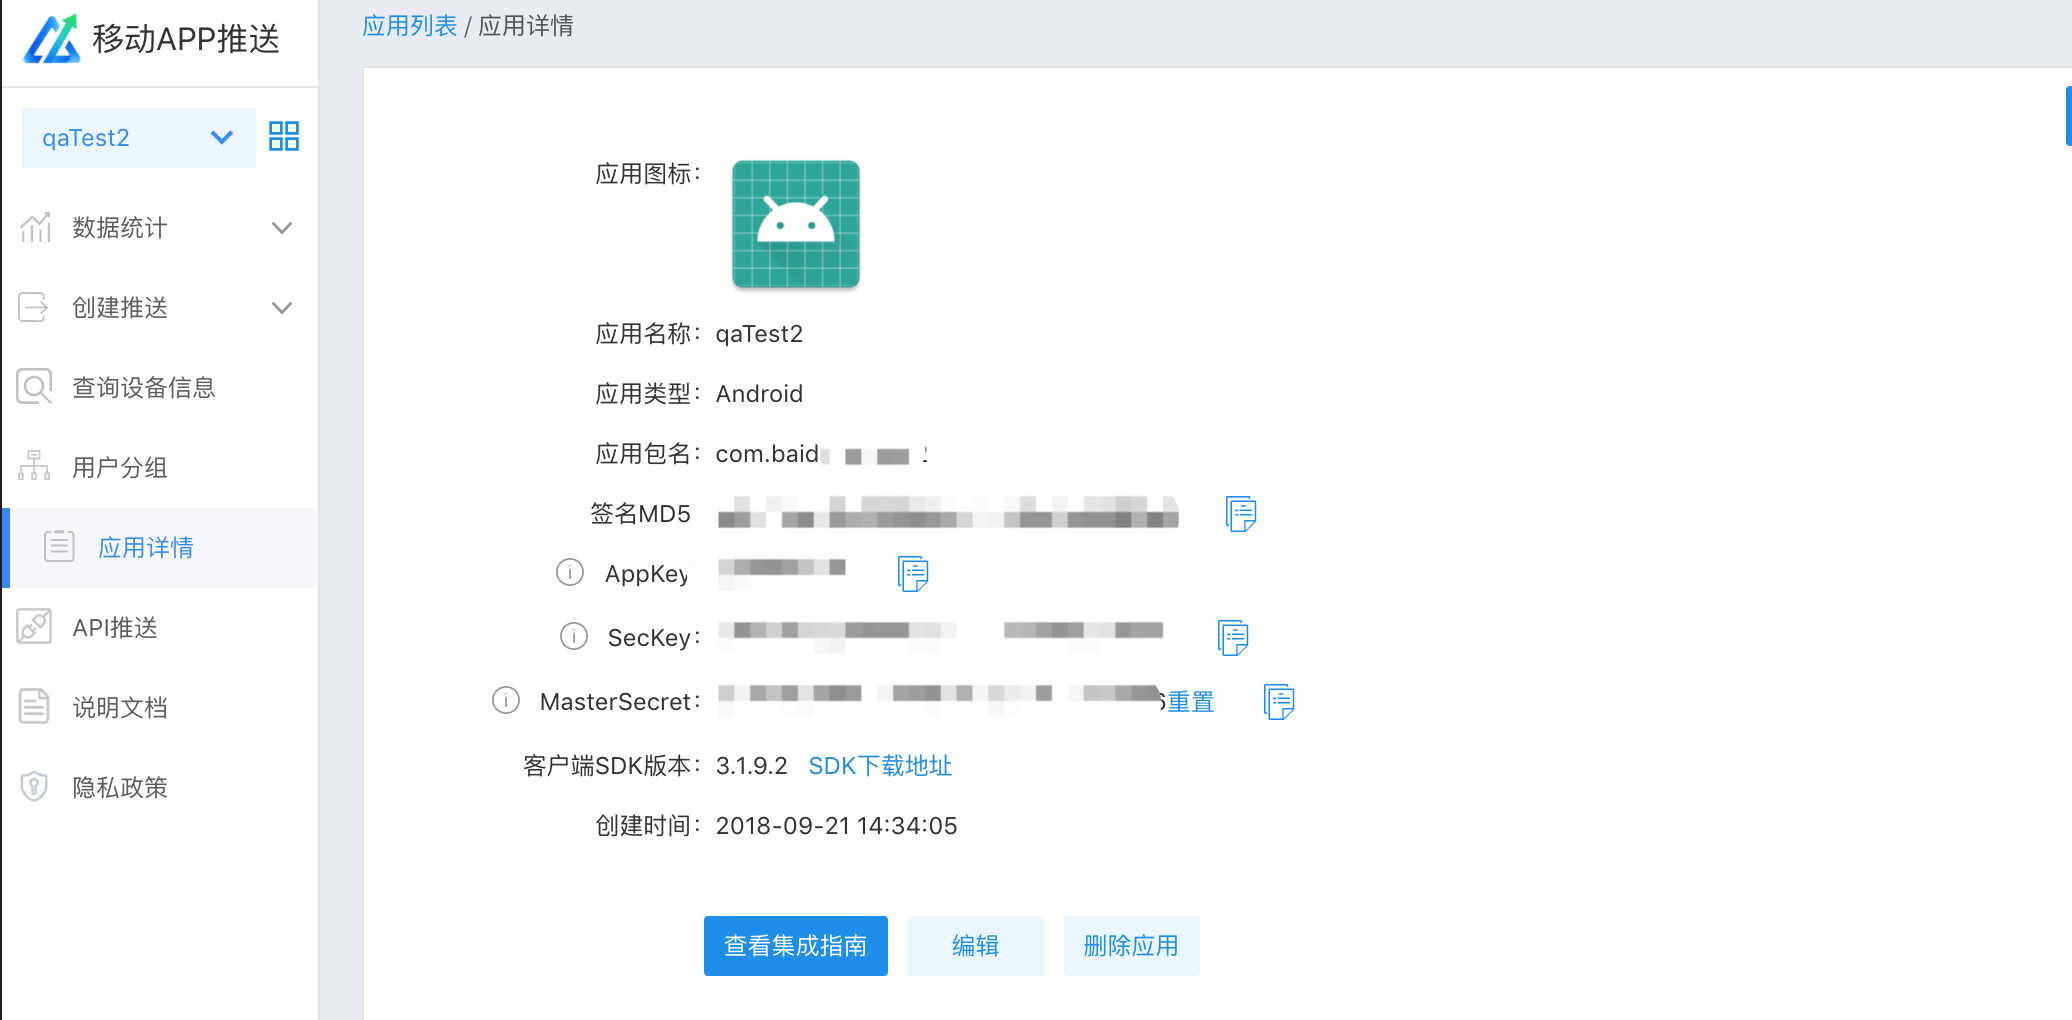
2、 创建成功后,将返回应用列表,可在应用详情页查看和获取AppKey、SecKey,集成sdk的时候会用到这些信息
获取sdk并解压
SDK下载地址:https://cloud.baidu.com/doc/SPP/s/qjwvxj91t
拿到SDK后进行解压。
导入SDK
创建一个新的Module,导入SDK中取出的AAR文件,这里以techain*.aar为例,module取名:techain(名称任意,这里只是举例),如下图所示: 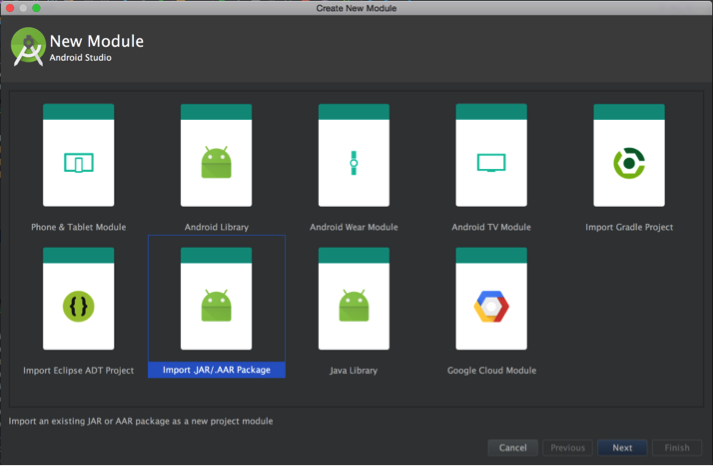
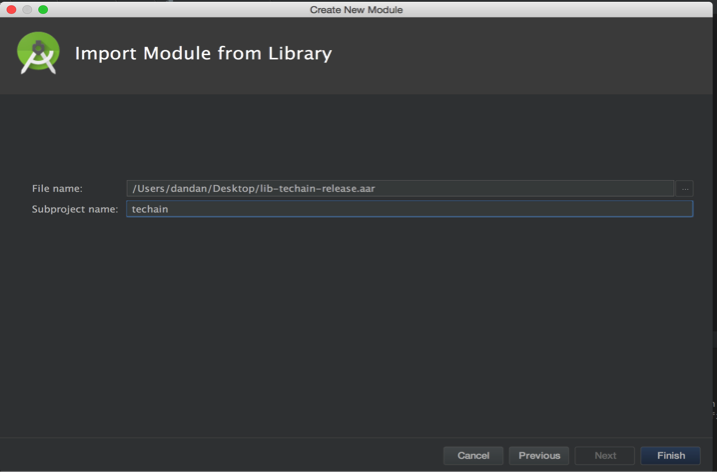
在自己项目的build.gradle中添加依赖,引入techain依赖,然后sync。
1dependencies {
2	...
3	compile project(':techain')
4	...
5}
so包相关:aar包中包含了armeabi,armeabi-v7a,arm64-v8a,x86的so包,如果集成的App自身兼容的abi种类少于本aar,应当在build.gradle文件中,加入ndk的abiFilter配置,选定本app支持的abi,以防止引入全部4种abi的so导致在指定abi上缺失其他so文件。
1defaultConfig {
2	...
3	ndk { abiFilter "armeabi" }
4	...
5}
防止混淆配置
集成方工程如存在资源混淆情况,请根据自身配置对协同SDK内资源进行keep,具体如下:
1.需要keep的资源文件:
1file n_b_s0.xml
2file n_b_s1.xml
3file n_b_s2.xml
4file n_b_s3.xml
5file a_a.xml
6file b_b.png
2.需要keep的a_a.xml内的ID值
1id BD_TranslucentTheme
2id b_b
3id a_a
4id n_b_s0
5id n_b_s1
6id n_b_s2
7id n_b_s3
8id push_custom_notification_layout
9id style_0
10id notification_pic_0
11id notification_timer_0
12id notification_title_0
13id notification_text_0
14id style_1
15id notification_pic_1
16id notification_timer_1
17id notification_title_1
18id notification_text_1
19id style_2
20id notification_pic_2
21id style_3
22id notification_pic_3
23id notification_btn_3
24id notification_title_3
25id notification_text_3
26id style_4
27id notification_pic_4
28id notification_timer_4
29id notification_title_4
30id notification_text_4
31id notification_lbtn_4
32id notification_rbtn_4
33id style_5
34id notification_pic_5
35id notification_title_5
36id notification_progress_5