
鸿蒙入门指南,小白速来!0基础学习路线分享,高效学习方法,重点答疑解惑--->【课程入口】
目录:
1. SwipeLayout组件功能介绍
2. SwipeLayout使用方法
3. SwipeLayout开发实现
4.《HarmonyOS三方件开发指南》系列文章合集
1. SwipeLayout组件功能介绍
1.1.功能介绍:
SwipeLayout组件是一个侧滑删除组件。
1.2. 模拟器上运行效果:
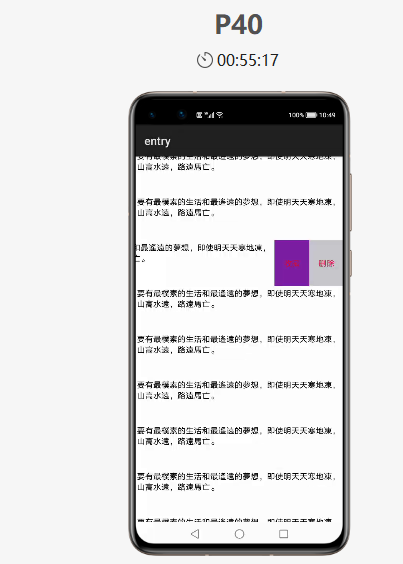
2. SwipeLayout使用方法
2.1. 新建工程,增加组件Har包依赖
在应用模块中添加HAR,只需要将SwipeLayout.har复制到entry\libs目录下即可(由于build.gradle中已经依赖的libs目录下的*.har,因此不需要再做修改)。
2.2. 修改主页面的布局文件
修改主页面的布局文件ability_main.xml,将自定义的SwipeLayout添加到xml中,将初始状态下展示的视图添加到SwipeLayout作为index为0的子视图:
1<?xml version="1.0" encoding="utf-8"?>
2<DirectionalLayout
3    xmlns:ohos="http://schemas.huawei.com/res/ohos"
4    ohos:id="$+id:total1"
5    ohos:height="match_parent"
6    ohos:width="match_parent"
7    ohos:background_element="gray"
8    ohos:orientation="vertical">
9    <com.isoftstone.swipelayout.SwipeLayout
10        ohos:id="$+id:sample2"
11        ohos:height="80vp"
12        ohos:width="match_parent"
13        ohos:orientation="horizontal">
14        <Text
15            ohos:id="$+id:bottom_layout1"
16            ohos:height="match_parent"
17            ohos:width="match_parent"
18            ohos:background_element="white"
19            ohos:multiple_lines="true"
20            ohos:padding="10"
21            ohos:text="要有最樸素的生活和最遙遠的夢想,即使明天天寒地凍,山高水遠,路遠馬亡。"
22            ohos:text_alignment="left"
23            ohos:text_size="14fp"
24            ohos:visibility="visible">
25        </Text>
26        <DirectionalLayout
27            ohos:id="$+id:bottom_wrapper1"
28            ohos:height="match_parent"
29            ohos:width="360px"
30            ohos:background_element="#ddff00"
31            ohos:orientation="horizontal"
32            ohos:visibility="visible">
33            <Text
34                ohos:id="$+id:Texts1"
35                ohos:height="match_parent"
36                ohos:width="180px"
37                ohos:background_element="#7B1FA2"
38                ohos:left_padding="25"
39                ohos:right_padding="25"
40                ohos:text="收藏"
41                ohos:text_alignment="center"
42                ohos:text_color="#DC143C"
43                ohos:text_size="14fp"
44                ohos:visibility="visible"
45                />
46            <Text
47                ohos:id="$+id:texts2"
48                ohos:height="match_parent"
49                ohos:width="180px"
50                ohos:background_element="#C7C7CC"
51                ohos:left_padding="25"
52                ohos:right_padding="25"
53                ohos:text="删除"
54                ohos:text_alignment="center"
55                ohos:text_color="#DC143C"
56                ohos:text_size="14fp"
57                ohos:visibility="visible"
58                />
59        </DirectionalLayout>
60        <Image
61            ohos:id="$+id:images3"
62            ohos:height="match_parent"
63            ohos:width="match_parent"
64            ohos:background_element="gray"
65            ohos:image_src="$media:star"
66            />
67        <DirectionalLayout
68            ohos:id="$+id:bottom_fronts"
69            ohos:height="match_parent"
70            ohos:width="match_content"
71            ohos:background_element="#ddff00"
72            ohos:orientation="horizontal"
73            ohos:visibility="visible">
74            <Image
75                ohos:id="$+id:images1"
76                ohos:height="match_parent"
77                ohos:width="180px"
78                ohos:background_element="green"
79                ohos:image_src="$media:star"/>
80            <Image
81                ohos:id="$+id:images2"
82                ohos:height="match_parent"
83                ohos:width="180px"
84                ohos:background_element="red"
85                ohos:image_src="$media:trash"/>
86        </DirectionalLayout>
87    </com.isoftstone.swipelayout.SwipeLayout>
88    <Image
89        ohos:id="$+id:images"
90        ohos:height="match_content"
91        ohos:width="match_content"
92        ohos:background_element="green"
93        ohos:image_src="$media:star"
94        ohos:layout_alignment="horizontal_center"
95        ohos:top_margin="100vp"/>
96</DirectionalLayout>
2.3. 初始化SwipeLayout
在MainAbilitySlince类的onStart函数中,增加如下代码。
1SwipeLayout swipeLayout = (SwipeLayout) findComponentById(ResourceTable.Id_sample1);
2DirectionalLayout right = (DirectionalLayout) findComponentById(ResourceTable.Id_bottom_wrapper);
3//初始化
4swipeLayout.initializeSwipe();
5DirectionalLayout left = (DirectionalLayout) findComponentById(ResourceTable.Id_bottom_front);
6Image image3 = (Image) findComponentById(ResourceTable.Id_image3);
7//将各个方向拖拽时对应展示的视图添加到swipeLayout
8swipeLayout.addDrag(SwipeLayout.DragEdge.Left, right);
9swipeLayout.addDrag(SwipeLayout.DragEdge.Right, left);
10swipeLayout.addDrag(SwipeLayout.DragEdge.Bottom, image3);
3. SwipeLayout开发实现
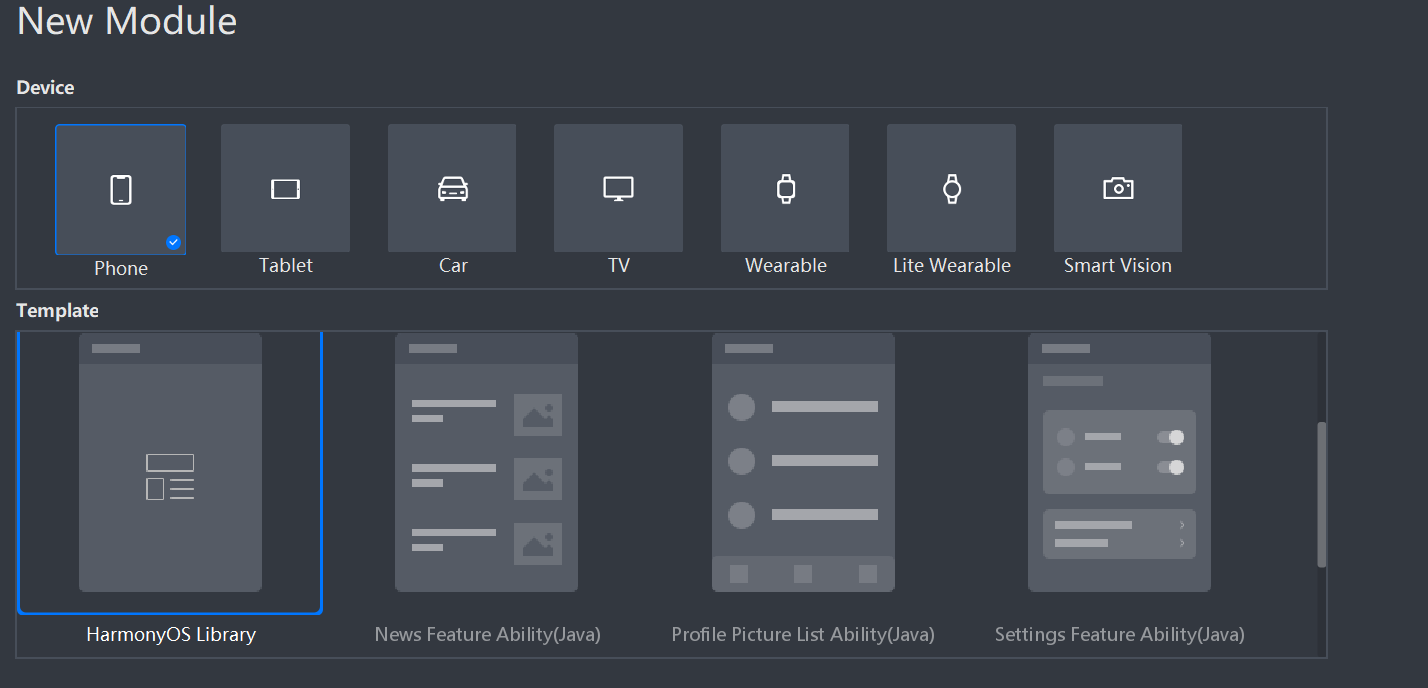
3.1. 新建一个Module
新建一个Module,类型选择HarmonyOS Library,模块名为SwipeLayout,如图
3.2. 新建一个SwipeLayout类
新建一个SwipeLayout类,继承自PositionLayout类
SwipeLayout的主要流程:
1. 首先通过xml的构造方法,为SwipeLayout添加拖拽监听;
2. 将LinkedHashMap<DragEdge, Component> mDragEdges初始化为空,并确定主界面的显示位置;
3. 通过public void addDrag(DragEdge dragEdge, Component child) 方法将可拖拽的方向和对应展示的视图添加到mDragEdges,并设置其初始的ContentPosition;
1public void addDrag(DragEdge dragEdge, Component child) {
2    mDragEdges.put(dragEdge, child);
3    switch (dragEdge) {
4        case Left:
5            child.setContentPosition(getWidth(), 0);
6            break;
7        case Right:
8            HiLog.info(label, "Log_addDrag" + child.getHeight());
9            child.setContentPosition(-child.getWidth(), 0);
10            break;
11        case Top:
12            child.setContentPosition(0, getHeight());
13            break;
14        case Bottom:
15            child.setContentPosition(0, -child.getHeight());
16            break;
17    }
18    child.setVisibility(INVISIBLE);
19    addComponent(child, 0);
20}
4.在拖拽动作的监听回调方法中完成对视图的更新
A.在update回调中设置打开和关闭的边界以及边界内的位置刷新
1if (getSurfaceView().getContentPositionY() + dragInfo.yOffset <= 0) {
2    close();
3} else if (getSurfaceView().getContentPositionY() + dragInfo.yOffset >= getHeight()) {
4    open();
5} else {
6    getSurfaceView().setContentPositionY(getSurfaceView().getContentPositionY() + (float) dragInfo.yOffset);
7    getCurrentBottomView().setContentPositionY(getCurrentBottomView().getContentPositionY() + (float) dragInfo.yOffset);
8}
B.在end中判断滑动的距离,如果大于设定的滑动距离则直接将控件展开或者关闭
1if (isCloseBeforeDrag && mDragDistanceY < 0) {
2    if (Math.abs(mDragDistanceY) >= mWillOpenPercentAfterClose * getBottomViewHeight()) {
3        open();
4    } else {
5        close();
6    }
7}
8if (!isCloseBeforeDrag && mDragDistanceY > 0) {
9    if (Math.abs(mDragDistanceY) >= mWillOpenPercentAfterClose * getBottomViewHeight()) {
10        close();
11    } else {
12        open();
13    }
14}
3.3. 编译HAR包
利用Gradle可以将HarmonyOS Library库模块构建为HAR包,构建HAR包的方法如下:
在Gradle构建任务中,双击PackageDebugHar或PackageReleaseHar任务,构建Debug类型或Release类型的HAR。
待构建任务完成后,可以loadingview> bulid > outputs > har目录中,获取生成的HAR包。
项目源代码地址:https://github.com/isoftstone-dev/SwipeBackLayout
作者:软通田可辉
想了解更多内容,请访问: 51CTO和华为官方战略合作共建的鸿蒙技术社区https://harmonyos.51cto.com