
集成阿里云推送的方式有两种:一:通过maven库达到快速集成的目的,二:通过手动修改配置配置文件的方法,由于手动修改配置文件过程繁琐且极易出现问题,所以强烈建议使用maven库达到快速集成的目的。下面是详细步骤:
1.在Project根目录下build.gradle文件中配置maven库URL:
1maven {
2url 'http://maven.aliyun.com/nexus/content/repositories/releases/'
3}
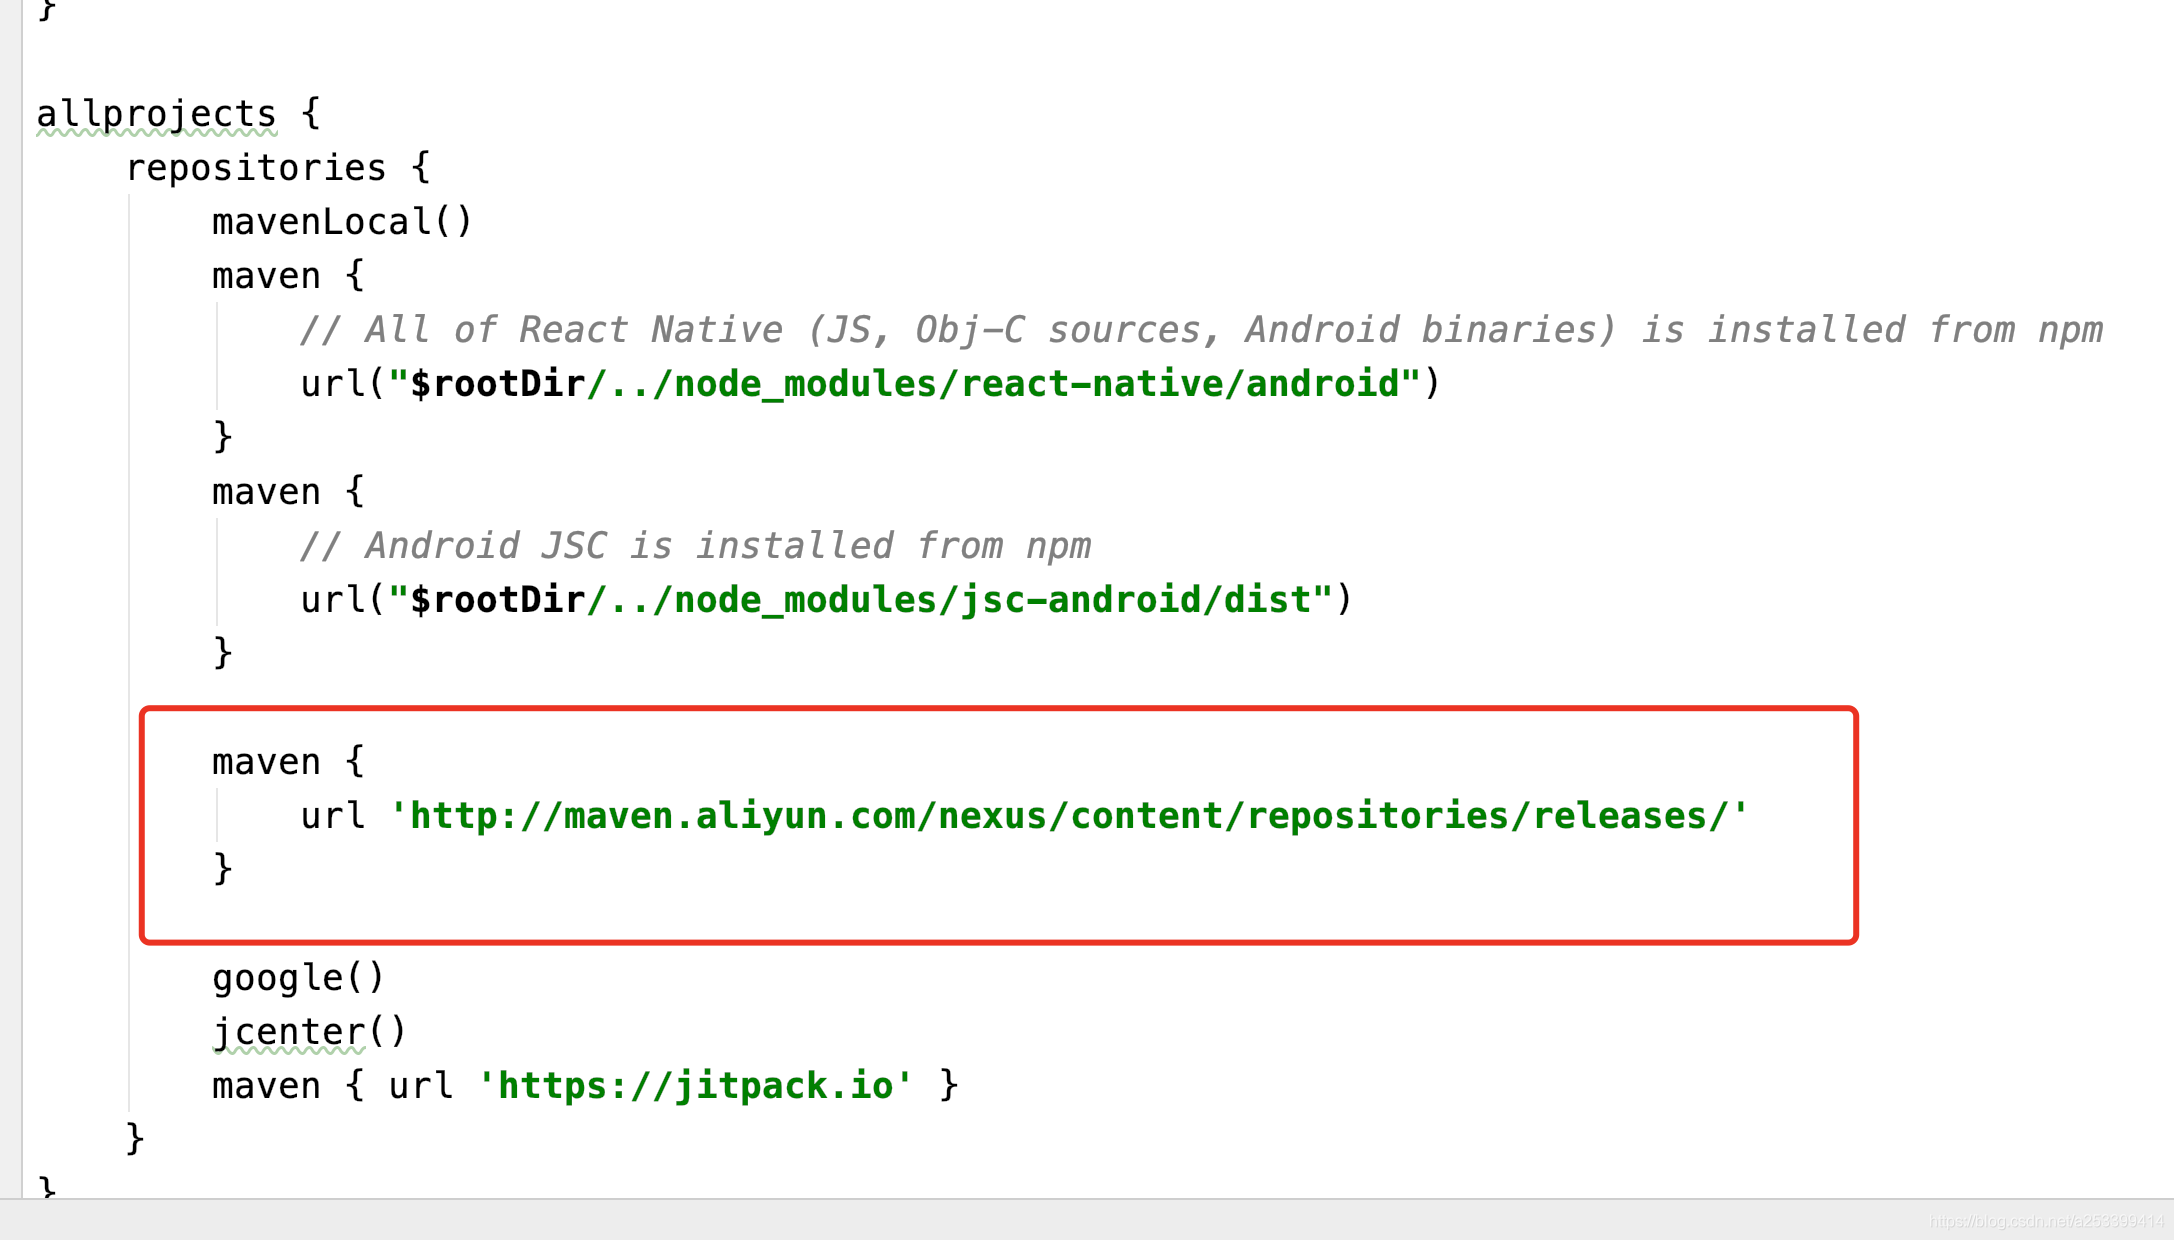
2.在android/app/build.gradle文件中添加以下依赖:
1android {
2
3...
4
5defaultConfig {
6
7applicationId "com.****_rn"
8
9minSdkVersion rootProject.ext.minSdkVersion
10
11targetSdkVersion rootProject.ext.targetSdkVersion
12
13versionCode 1
14
15versionName "1.0"
16
17//以下是新注入的依赖
18
19ndk {
20
21//选择要添加的对应cpu类型的.so库。
22
23abiFilters "armeabi-v7a","x86"
24
25}
26
27
28
29}
30
31dependencies {
32
33......
34
35//注入阿里云推送SDK
36
37compile 'com.aliyun.ams:alicloud-android-push:3.1.9.1'
38
39......
40
41}
42
3.appKey, appSecret配置
在AndroidManifest文件中设置appKey,appSecret,文件路径如图所示:
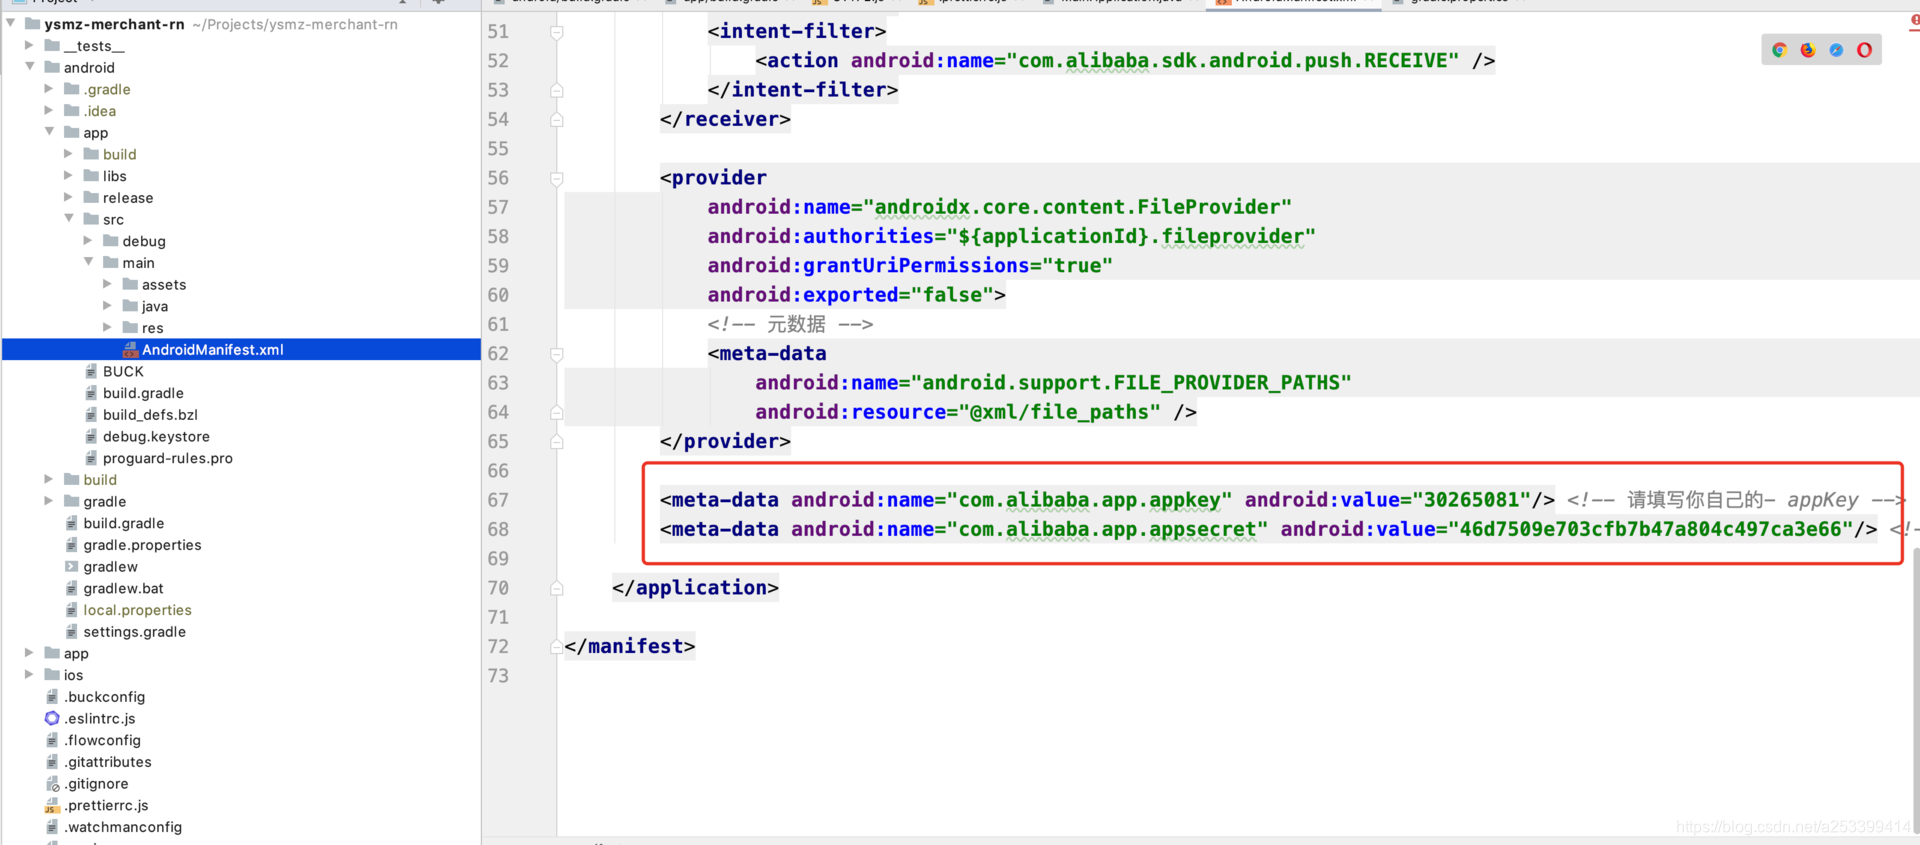
1<meta-data android:name="com.alibaba.app.appkey" android:value="30265081"/> <!-- 请填写你自己的- appKey -->
2<meta-data android:name="com.alibaba.app.appsecret" android:value="46d7509e703cfb7b47a804c497ca3e66"/> <!-- 请填写你自己的appSecret -->
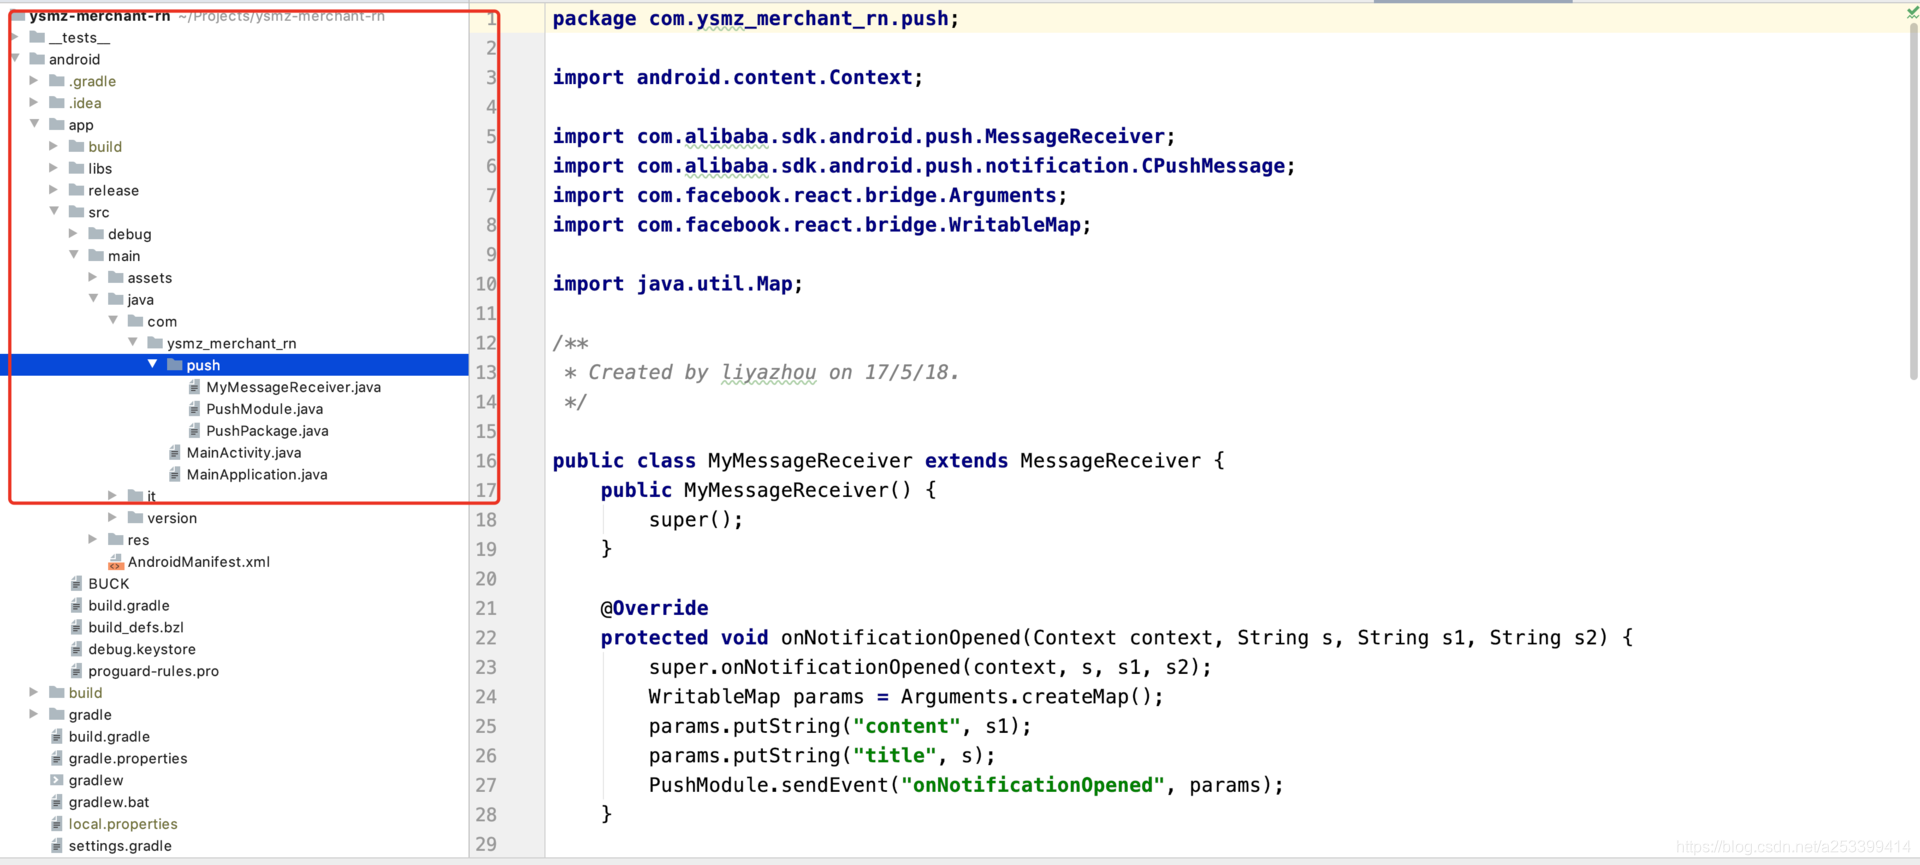
4.消息接收Receiver配置
将以下push文件复制入图中所示位置,记得修改包名:
链接: https://pan.baidu.com/s/14n84zDtjzWoBe5-Syr9Aqw 密码: svt7
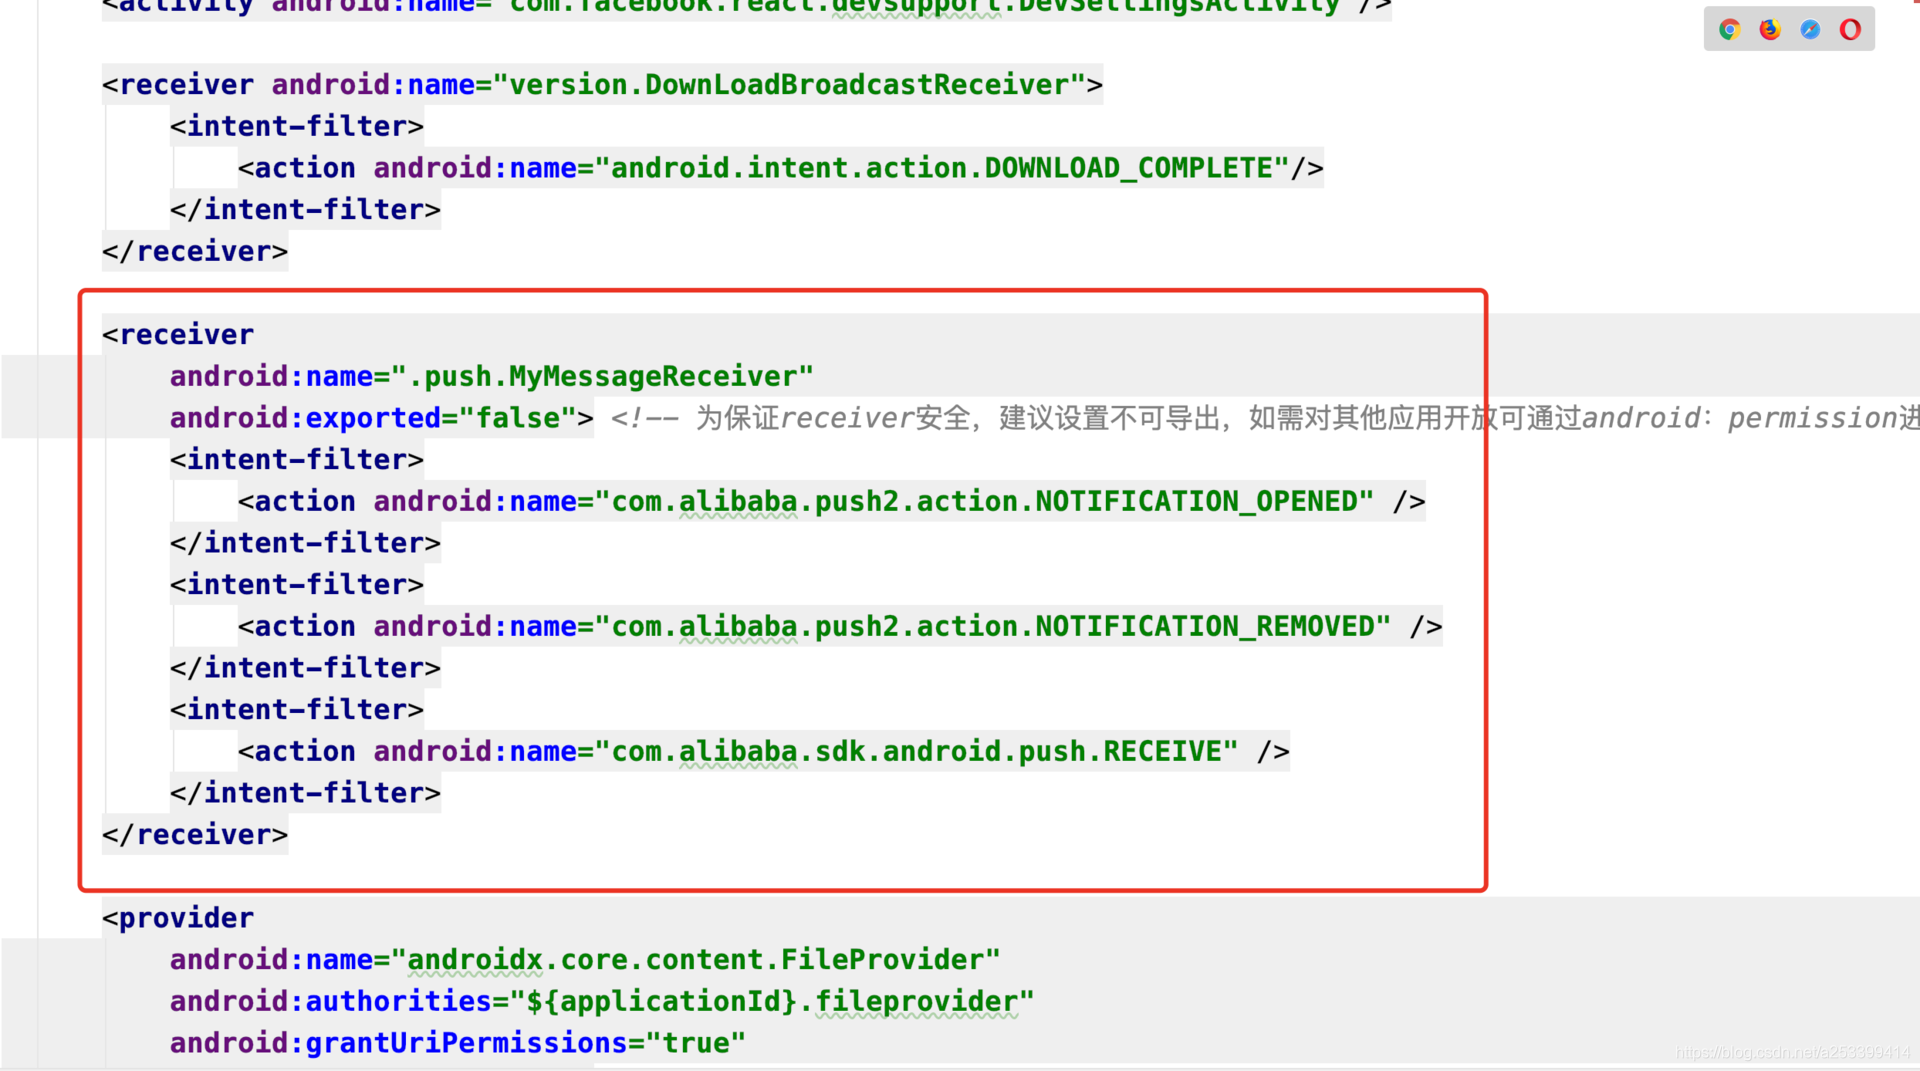
5.将receiver监听器加入到android/app/src/main/AndroidManifest.xml中
1<receiver
2
3android:name=".push.MyMessageReceiver"
4
5android:exported="false"> <!-- 为保证receiver安全,建议设置不可导出,如需对其他应用开放可通过android:permission进行限制 -->
6
7<intent-filter>
8
9<action android:name="com.alibaba.push2.action.NOTIFICATION_OPENED" />
10
11</intent-filter>
12
13<intent-filter>
14
15<action android:name="com.alibaba.push2.action.NOTIFICATION_REMOVED" />
16
17</intent-filter>
18
19<intent-filter>
20
21<action android:name="com.alibaba.sdk.android.push.RECEIVE" />
22
23</intent-filter>
24
25</receiver>
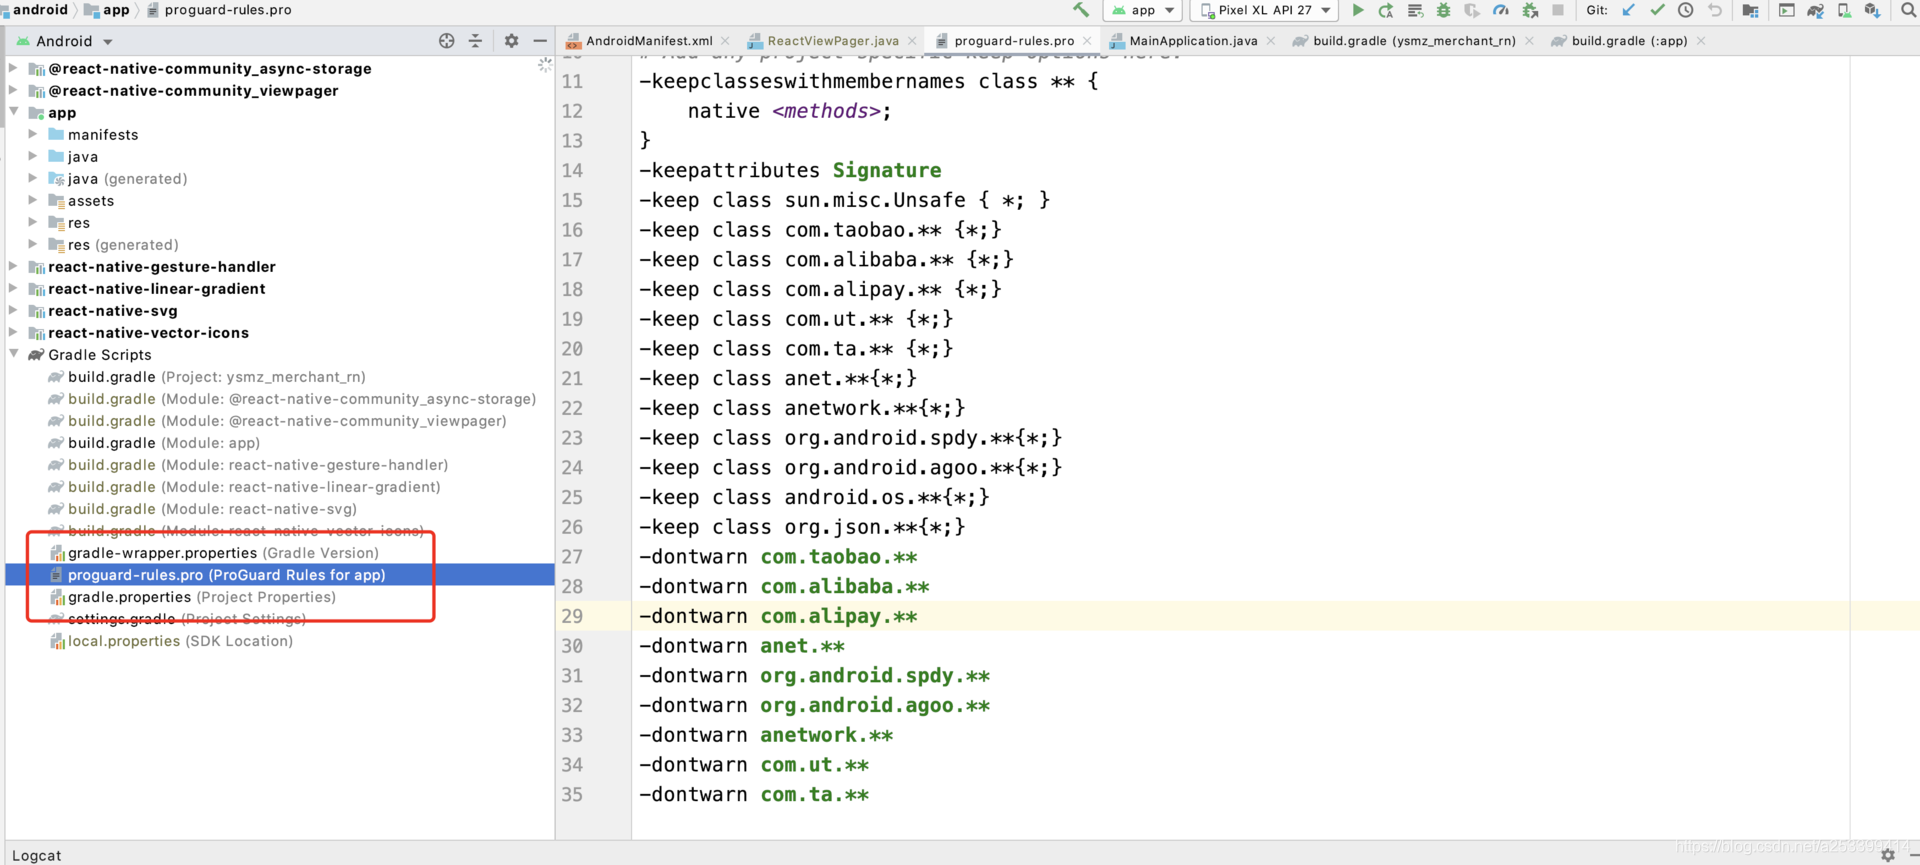
6.配置 Proguard文件
这个文件在android studio中容易找到
1-keepclasseswithmembernames class ** {
2
3native <methods>;
4
5}
6
7-keepattributes Signature
8
9-keep class sun.misc.Unsafe { *; }
10
11-keep class com.taobao.** {*;}
12
13-keep class com.alibaba.** {*;}
14
15-keep class com.alipay.** {*;}
16
17-keep class com.ut.** {*;}
18
19-keep class com.ta.** {*;}
20
21-keep class anet.**{*;}
22
23-keep class anetwork.**{*;}
24
25-keep class org.android.spdy.**{*;}
26
27-keep class org.android.agoo.**{*;}
28
29-keep class android.os.**{*;}
30
31-keep class org.json.**{*;}
32
33-dontwarn com.taobao.**
34
35-dontwarn com.alibaba.**
36
37-dontwarn com.alipay.**
38
39-dontwarn anet.**
40
41-dontwarn org.android.spdy.**
42
43-dontwarn org.android.agoo.**
44
45-dontwarn anetwork.**
46
47-dontwarn com.ut.**
48
49-dontwarn com.ta.**
7.在应用中注册和启动移动推送
在android/app/src/main/java/com/ysmz_merchant_rn/MainApplication.java中添加注册推送方法,并在onCreate()方法中调用
1 @Override
2
3public void onCreate() {
4
5super.onCreate();
6
7SoLoader.init(this, /* native exopackage */ false);
8
9initializeFlipper(this); // Remove this line if you don't want Flipper enabled
10
11//调用推送方法
12
13initCloudChannel(this);
14
15}
16
17
18...
19
20
21
22/**
23
24* 初始化云推送通道
25
26* @param applicationContext
27
28*/
29
30private void initCloudChannel(Context applicationContext) {
31
32this.createNotificationChannel();
33
34PushServiceFactory.init(applicationContext);
35
36CloudPushService pushService = PushServiceFactory.getCloudPushService();
37
38pushService.register(applicationContext, new CommonCallback() {
39
40@Override
41
42public void onSuccess(String response) {
43
44Log.d(TAG, "init cloudchannel success");
45
46}
47
48@Override
49
50public void onFailed(String errorCode, String errorMessage) {
51
52Log.d(TAG, "init cloudchannel failed -- errorcode:" + errorCode + " -- errorMessage:" + errorMessage);
53
54}
55
56
57
58
59
60});
61
62
63
64// MiPushRegister.register(applicationContext, "XIAOMI_ID", "XIAOMI_KEY"); // 初始化小米辅助推送
65
66// HuaWeiRegister.register(this); // 接入华为辅助推送
67
68// VivoRegister.register(applicationContext);
69
70// OppoRegister.register(applicationContext, "OPPO_KEY", "OPPO_SECRET");
71
72// MeizuRegister.register(applicationContext, "MEIZU_ID", "MEIZU_KEY");
73
74}
75
76
77private void createNotificationChannel() {
78
79if (Build.VERSION.SDK_INT >= Build.VERSION_CODES.O) {
80
81NotificationManager mNotificationManager = (NotificationManager) getSystemService(Context.NOTIFICATION_SERVICE);
82
83// 通知渠道的id
84
85String id = "1";
86
87// 用户可以看到的通知渠道的名字.
88
89CharSequence name = "notification channel";
90
91// 用户可以看到的通知渠道的描述
92
93String description = "notification description";
94
95int importance = NotificationManager.IMPORTANCE_HIGH;
96
97NotificationChannel mChannel = new NotificationChannel(id, name, importance);
98
99// 配置通知渠道的属性
100
101mChannel.setDescription(description);
102
103// 设置通知出现时的闪灯(如果 android 设备支持的话)
104
105mChannel.enableLights(true);
106
107mChannel.setLightColor(Color.RED);
108
109// 设置通知出现时的震动(如果 android 设备支持的话)
110
111mChannel.enableVibration(true);
112
113mChannel.setVibrationPattern(new long[]{100, 200, 300, 400, 500, 400, 300, 200, 400});
114
115//最后在notificationmanager中创建该通知渠道
116
117mNotificationManager.createNotificationChannel(mChannel);
118
119
120
121// context.startForegroundService(new Intent(context, ServedService.class));
122
123}
124
125// }else {
126
127// context.startService(new Intent(context, ServedService.class));
128
129// }
130
131}
至此,移动推送配置已经完成,接着需要在android studio中build一下文件,系统会自动导入移动推送所需的依赖包,没有错误后在阿里云移动推送控制台中推送通知测试。下面两个链接是阿里云官网开发文档,可以自行参考。
Android SDK 3.0配置:https://help.aliyun.com/document\_detail/51056.html?spm=a2c4g.11186623.2.29.10895241WeUcI0
Android SDK 常见错误:https://help.aliyun.com/knowledge\_list/39996.html?spm=a2c4g.11186623.6.611.5b7552e749NL7p