

前言
Hi,大家好,我是麦叔,今天给大家带来使用阿里云服务器部署前后端分离项目的实战。最近买了个阿里云服务器和域名,买来之后就扔在哪里放着了(想不通当时为什么买,哈哈哈)!刚好赶上公司新项目上线,老大让我部署前后端分离项目,就用他来搞一场演习部署吧!
阅读完本文章,你会掌握利用nginx做代理和跨域处理,如果在两台服务器部署前后端分离项目。如果以后有需要,建议收藏,真的会少踩很多坑.
一 你需要准备?
在这里交代一下我的环境
- 两台阿里云
ECS服务器:服务器A部署前端项目 服务器B部署后端项目 - vue 2.6.10
- Spring Boot 2.2.4.RELEASE
二 项目打包
2.1 前端项目
我们的前端项目使用vue开发,在前端项目的package.json文件中,一般都会定义用于打包的脚本
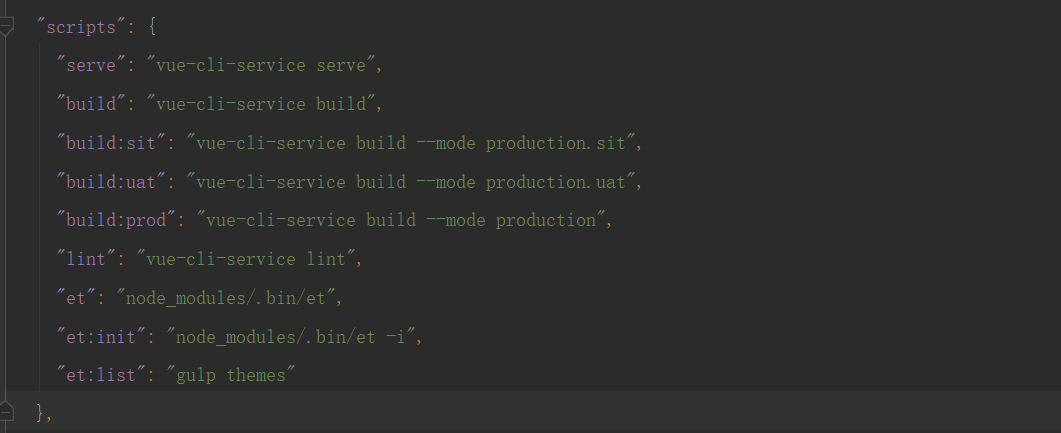
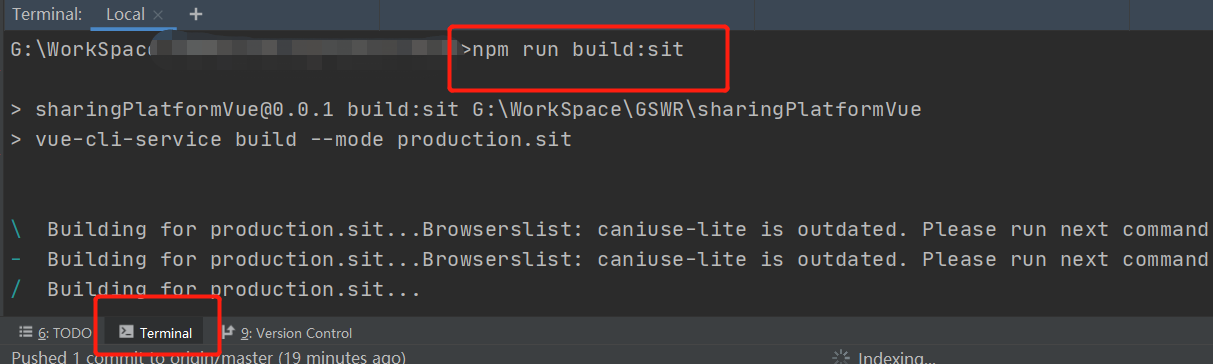
在我们开发工具的控制台输入命令npm run build:sit进行打包
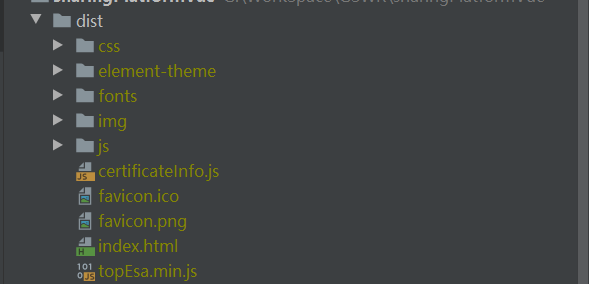
当我们打包完成之后,会在我们项目目录下出现dist目录,里面存放的就是我们打包出来的文件
2.2 后端项目
我们后端项目采用spring boot+maven开发,请注意要在父级项目(root)下依次执行clean->install就能成功打包
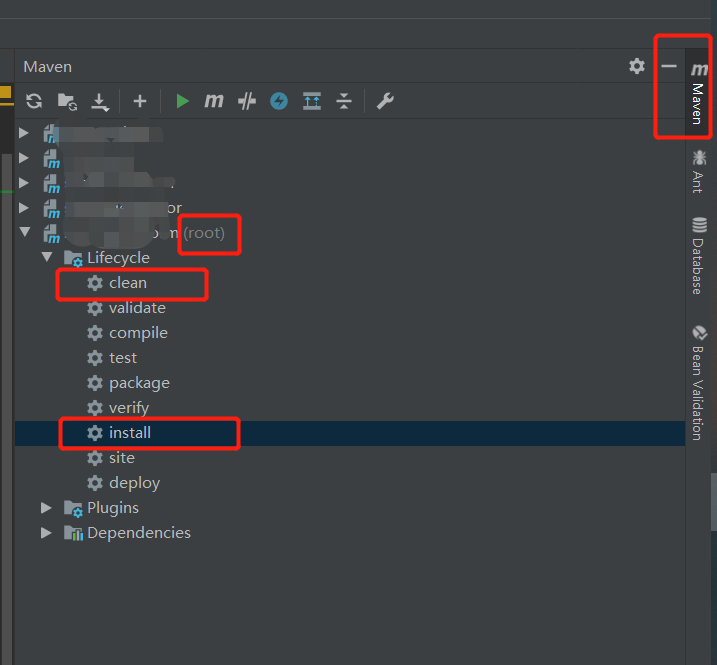
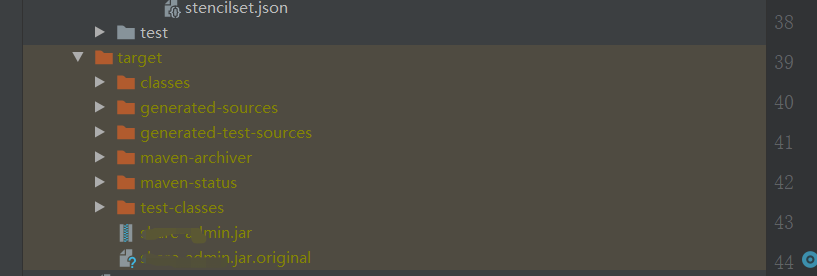
打完包的文件位于target目录,xxxxx.jar文件就是我们要部署的
三 项目部署
我这里采用阿里云服务器进行部署,会将前端项目和后端项目部署到不同的服务器,通过nginx进行代理和跨域处理
| 服务器 | 部署项目 | 环境 |
|---|---|---|
| 服务器A | 前端项目 | nginx |
| 服务器B | 后端项目 | nginx+jdk8 |
因为除了nginx以为,其他环境搭建不是我们本文重点,如果你的服务器第一次部署项目,预计还需要安装jdk mysql redis 等环境
3.1 开启ECS服务器端口
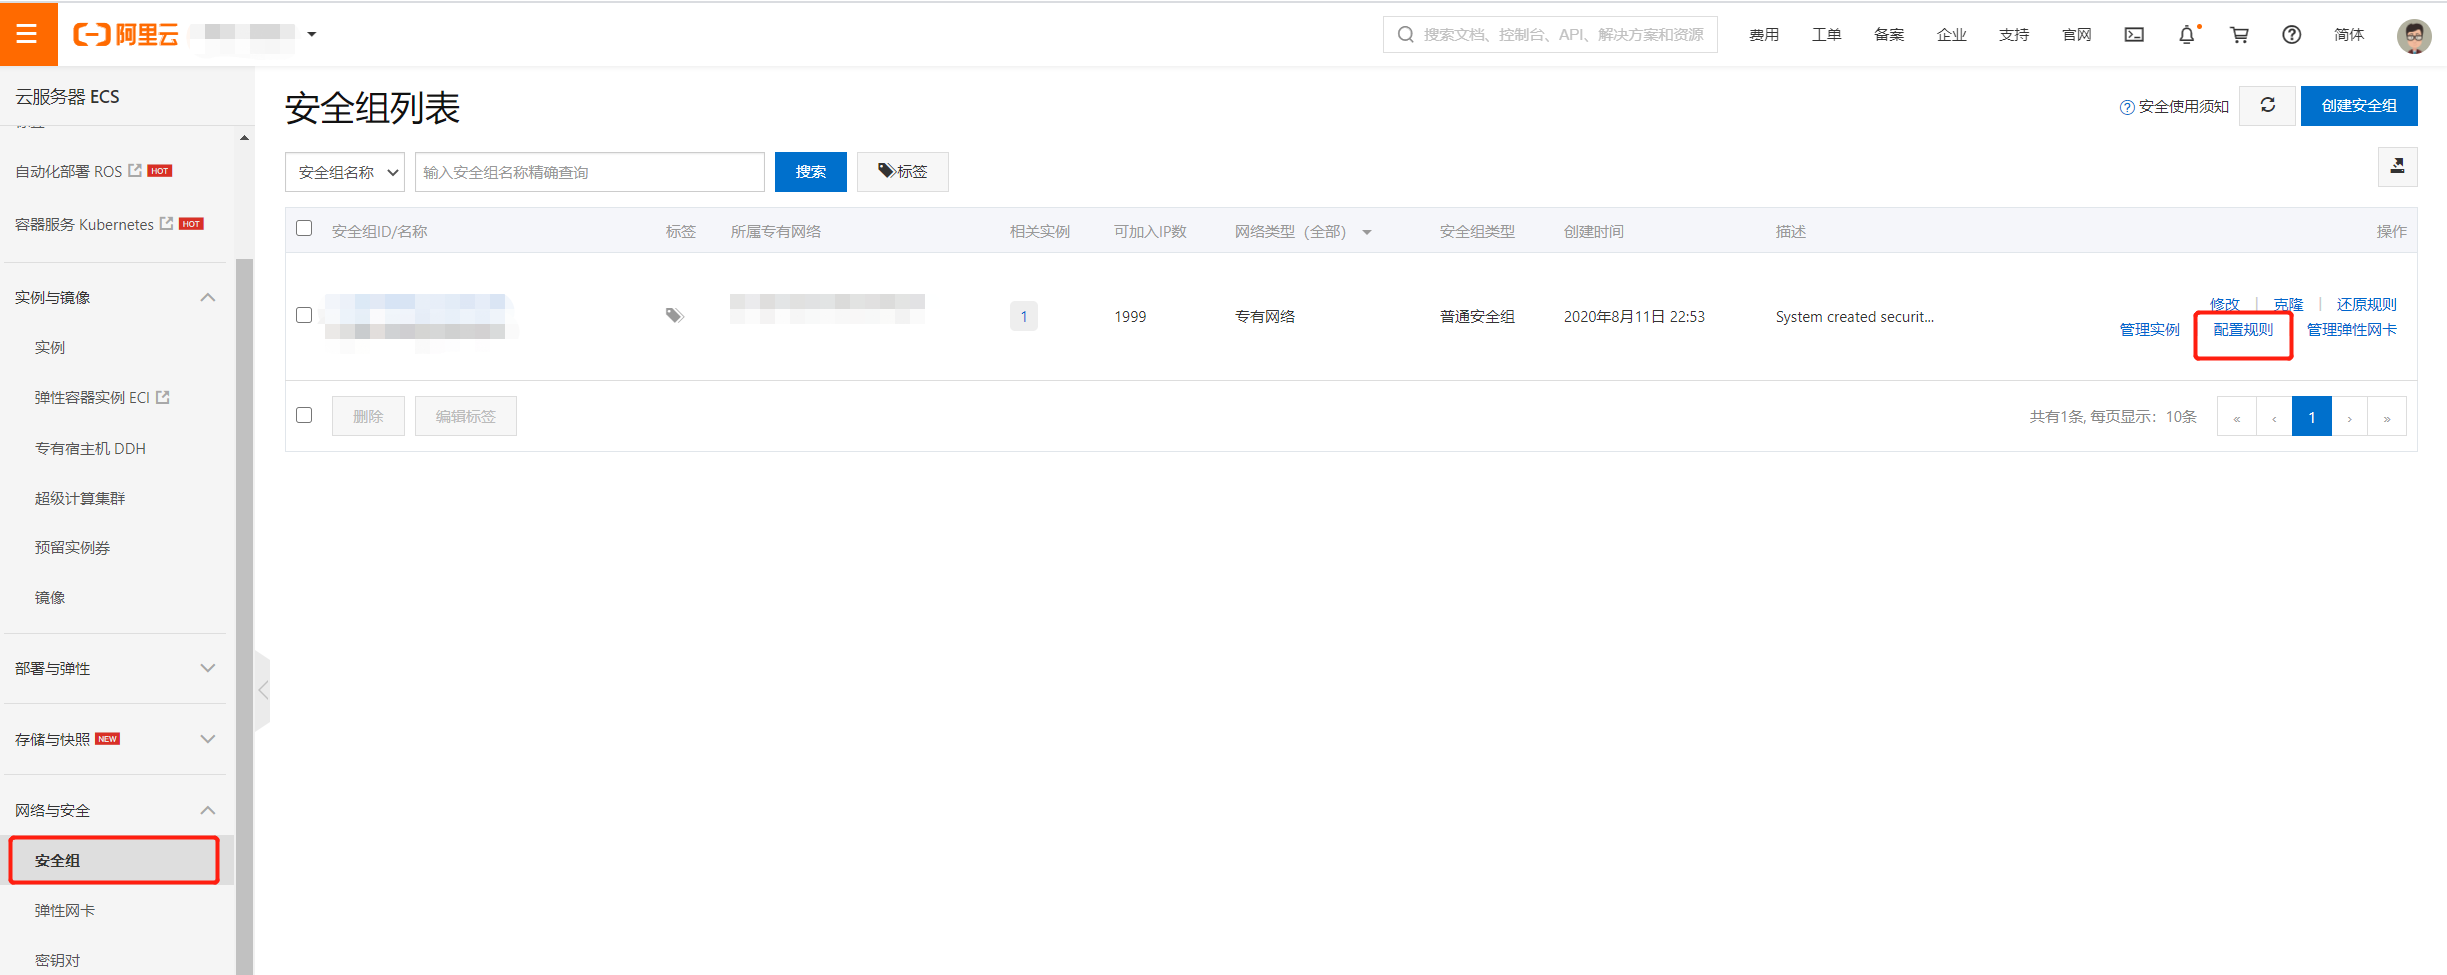
首先,登录阿里云进入云服务器ECS控制台,点击安全组---->配置规则
大家点击手动添加添加规则即可:大家可以仿照填写我下面那个红框配置即可
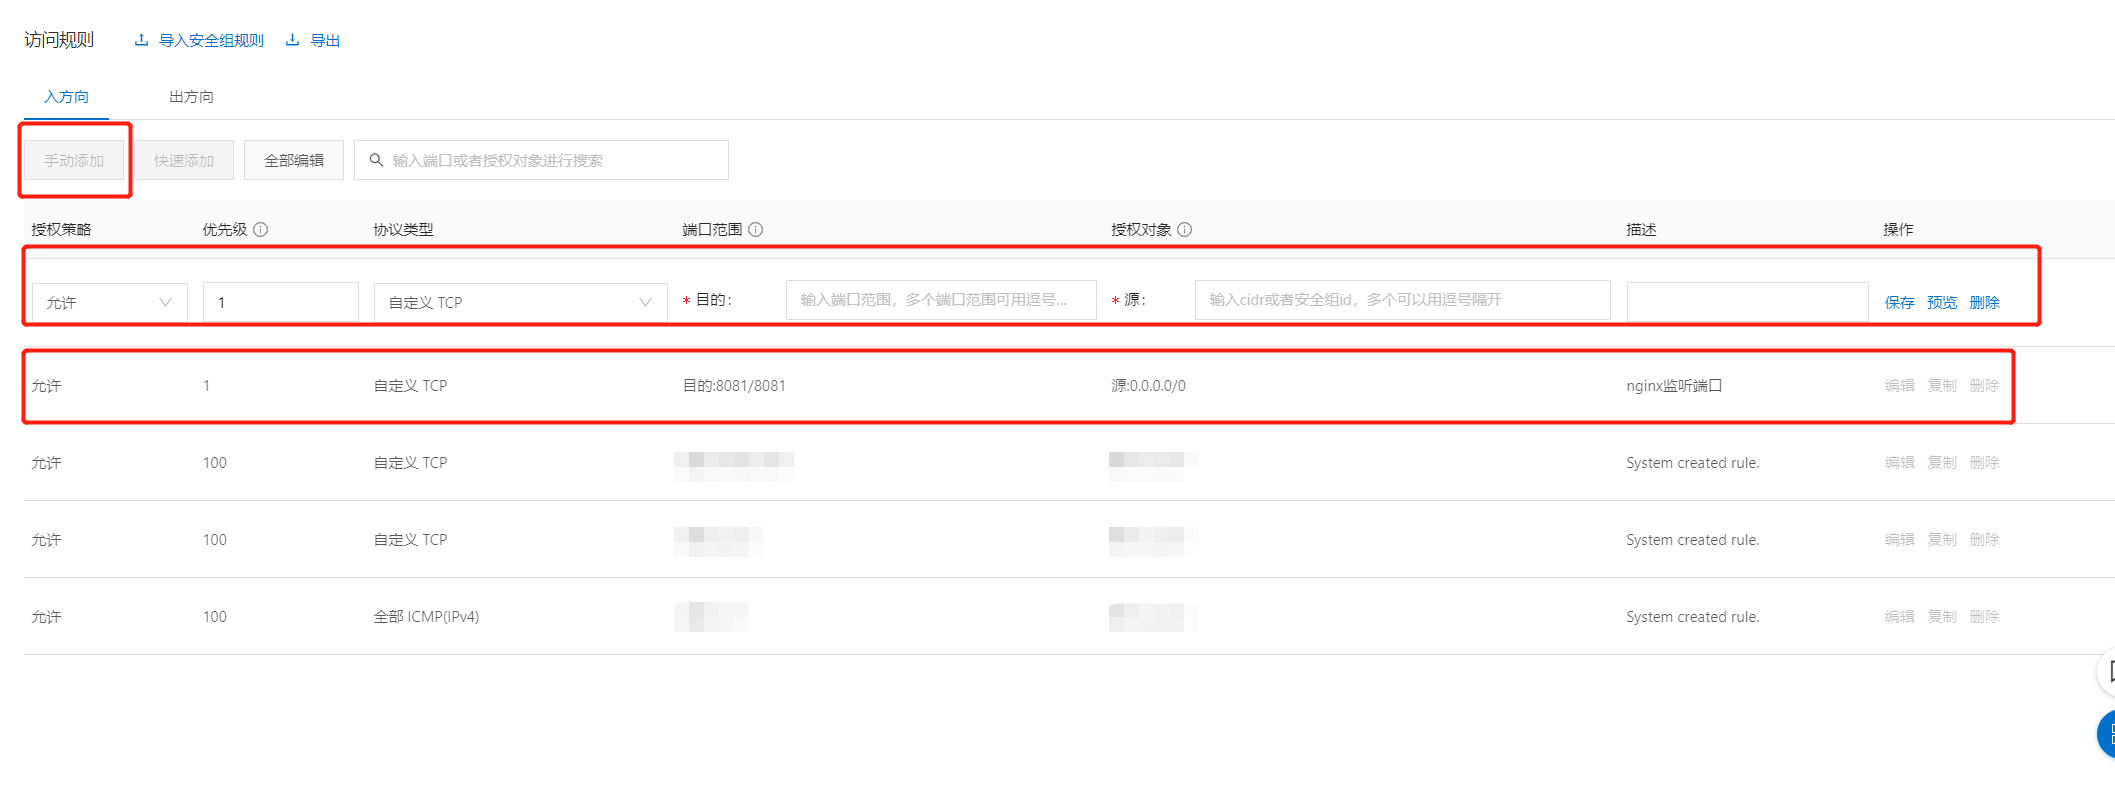
为什么需要开启端口?
因为我待会要装的nginx的监听端口需要配置为8081,阿里云服务器需要在后台开启才可以,不然nginx无法监听
3.2 Linux 下nginx的安装
服务器A和服务器B都需要安装nginx,主要用作项目代理.大家参考我的另一篇文章
3.3 部署前端项目
登录服务器A,新建一个文件夹,一般我是在根目录下新建data目录,在data目录按项目名区分,比如:/data/milogenius/将打包的前端项目dist目录上传即可
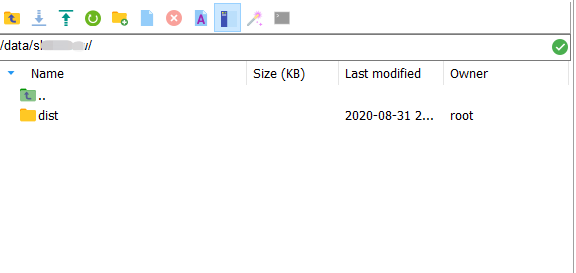
服务器A中nginx配置,监听端口号就是刚刚我们开启的8081
大家在使用时候,需要更改的地方为 8081 /web alias后面的绝对路径
1server {
2        listen       8081;
3        server_name  localhost;
4
5        #charset koi8-r;
6
7        #access_log  logs/access.log  main;
8
9        location /web {
10                        alias /data/milogenius/dist;
11                        index index.html;
12                }
13    }
14
注意:服务器A只需要配置前端项目代理就行,后端项目代理不需要配置,因为在前后端项目部署在不同的服务器,在前端项目请求后端接口,不走前端服务器
3.4 部署后端服务
登录服务器A,新建一个文件夹,一般我是在根目录下新建data目录,在data目录按项目名区分,比如:/data/milogenius/将打包的后端项目jar包上传即可
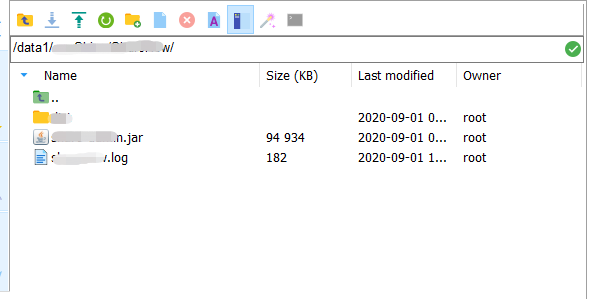
启动jar包,将xxxx替换为自己的名称
1nohup java -jar xxxxx.jar >./xxxxxx.log 2>&1 &
服务器B中nginx的配置,监听端口号就是刚刚我们开启的8081,9888是我们后端项目启动的端口.这里我们采用nginx统一处理跨域问题
大家在使用时候,需要将端口号:8081 /api proxy_pass都修改为自己项目的配置
1server {
2        listen       8081;
3        server_name  localhost;
4
5        #charset koi8-r;
6
7        #access_log  logs/access.log  main;
8
9       location /api {
10                        if ($request_method = 'OPTIONS') {
11                                add_header 'Access-Control-Allow-Origin' '$http_origin';
12                                add_header 'Access-Control-Allow-Credentials' 'true';
13                                add_header 'Access-Control-Allow-Methods' 'GET, POST, PUT, DELETE, OPTIONS';
14                                add_header 'Access-Control-Allow-Headers' 'DNT,X-CustomHeader,Keep-Alive,User-Age
15                                nt,X-Requested-With,If-Modified-Since,Cache-Control,Content-Type,token';
16                                add_header 'Access-Control-Max-Age' 1728000;
17                                add_header 'Content-Type' 'text/plain charset=UTF-8';
18                                add_header 'Content-Length' 0;
19                                return 204;
20                }
21                        add_header 'Access-Control-Allow-Origin' '$http_origin';
22                        add_header 'Access-Control-Allow-Credentials' 'true';
23                        add_header 'Access-Control-Allow-Methods' 'GET, POST, PUT, DELETE, OPTIONS';
24                        add_header 'Access-Control-Allow-Headers' 'DNT,X-CustomHeader,Keep-Alive,User-Agent,X
25                        -Requested-With,If-Modified-Since,Cache-Control,Content-Type,token';
26                        proxy_pass http://localhost:9888;
27                        client_max_body_size 1024m;
28                        proxy_set_header X-Real-IP $remote_addr;
29                        proxy_set_header X-Forwarded-For $proxy_add_x_forwarded_for;
30                        proxy_set_header Host $host;
31                        proxy_redirect off;
32                }
33    }
34
四 跨域处理
在前后端分离项目中,跨域问题是必须要解决的,在刚刚部署后端项目时候,我们已经在nginx中配置了统一的跨域解决方案,接下来我们在了解一下这一块知识
4.1 什么是跨域
出于浏览器的同源策略限制。同源策略(Sameoriginpolicy)是一种约定,它是浏览器最核心也最基本的安全功能,如果缺少了同源策略,则浏览器的正常功能可能都会受到影响。可以说Web是构建在同源策略基础之上的,浏览器只是针对同源策略的一种实现。同源策略会阻止一个域的javascript脚本和另外一个域的内容进行交互。所谓同源(即指在同一个域)就是两个页面具有相同的协议(protocol),主机(host)和端口号(port)
当一个请求url的协议、域名、端口三者之间任意一个与当前页面url不同即为跨域
| 当前页面url | 被请求页面url | 是否跨域 | 原因 |
|---|---|---|---|
| http://www.test.com/ | http://www.test.com/index.html | 否 | 同源(协议、域名、端口号相同) |
| http://www.test.com/ | https://www.test.com/index.html | 跨域 | 协议不同(http/https) |
| http://www.test.com/ | http://www.baidu.com/ | 跨域 | 主域名不同(test/baidu) |
| http://www.test.com/ | http://blog.test.com/ | 跨域 | 子域名不同(www/blog) |
| http://www.test.com:8080/ | http://www.test.com:7001/ | 跨域 | 端口号不同(8080/7001) |
4.2 跨域的解决方案
1 Java后端全局配置
1@Configuration
2public class GlobalCorsConfig {
3    @Bean
4    public CorsFilter corsFilter() {
5        CorsConfiguration config = new CorsConfiguration();
6          config.addAllowedOrigin("*");
7          config.setAllowCredentials(true);
8          config.addAllowedMethod("*");
9          config.addAllowedHeader("*");
10          config.addExposedHeader("*");
11
12
13        UrlBasedCorsConfigurationSource configSource = new UrlBasedCorsConfigurationSource();
14        configSource.registerCorsConfiguration("/**", config);
15
16
17        return new CorsFilter(configSource);
18    }
19}
1@Configuration
2public class MyConfiguration extends WebMvcConfigurerAdapter  {
3
4
5  @Override
6    public void addCorsMappings(CorsRegistry registry) {
7        registry.addMapping("/**")
8                .allowCredentials(true)
9                .allowedHeaders("*")
10                .allowedOrigins("*")
11                .allowedMethods("*");
12
13
14    }
15}
controller方法加注解CrossOrigin,origin="*"代表所有域名都可访问
1@RequestMapping("/tet")
2@CrossOrigin(origins = "*",maxAge = 3600)
3public String test( ){
4  return "本方法支持跨域请求!!!";
5}
2 vue-cli项目 webpack代理解决跨域问题,在vue.config.js文件中加入如下代码
1// 生成代理配置对象,可配置多个代理地址
2let proxyObj = {
3    '/test': {
4        target: "http://localhost:8080"
5    },
6    '/test2': {
7        target: "http://localhost:8081"
8    }
9};
10
11
12module.exports = {
13    baseUrl: '/',
14    outputDir: 'dist',
15    lintOnSave: false,
16    runtimeCompiler: true,
17    devServer: {
18        contentBase: "./",
19        port: 8080,
20        disableHostCheck: true,
21        proxy: proxyObj,
22        before: app => { }
23    }
24}
3 jQuery的ajax jsonp解决跨域问题
1$.ajax({
2        type : "get",
3        async:false,
4        url : "http://localhost:8080/test",
5        dataType : "jsonp",//数据类型为jsonp
6        jsonp: "jsonpCallback",//服务端返回回调方法名
7        success : function(data){
8            alert(JSON.stringify(data));
9        },
10        error:function(){
11            alert('请求错误!');
12        }
13    });
4 nginx全局处理
最后一种就是我们本次采用的nginx配置方式,
1       location /api {
2                        if ($request_method = 'OPTIONS') {
3                                add_header 'Access-Control-Allow-Origin' '$http_origin';
4                                add_header 'Access-Control-Allow-Credentials' 'true';
5                                add_header 'Access-Control-Allow-Methods' 'GET, POST, PUT, DELETE, OPTIONS';
6                                add_header 'Access-Control-Allow-Headers' 'DNT,X-CustomHeader,Keep-Alive,User-Age
7                                nt,X-Requested-With,If-Modified-Since,Cache-Control,Content-Type,token';
8                                add_header 'Access-Control-Max-Age' 1728000;
9                                add_header 'Content-Type' 'text/plain charset=UTF-8';
10                                add_header 'Content-Length' 0;
11                                return 204;
12                }
13                        add_header 'Access-Control-Allow-Origin' '$http_origin';
14                        add_header 'Access-Control-Allow-Credentials' 'true';
15                        add_header 'Access-Control-Allow-Methods' 'GET, POST, PUT, DELETE, OPTIONS';
16                        add_header 'Access-Control-Allow-Headers' 'DNT,X-CustomHeader,Keep-Alive,User-Agent,X
17                        -Requested-With,If-Modified-Since,Cache-Control,Content-Type,token';
18                        proxy_pass http://localhost:9888;
19                        client_max_body_size 1024m;
20                        proxy_set_header X-Real-IP $remote_addr;
21                        proxy_set_header X-Forwarded-For $proxy_add_x_forwarded_for;
22                        proxy_set_header Host $host;
23                        proxy_redirect off;
24                }
四 访问项目
现在我们访问前端项目,使用地址http://服务器A外网ip:8081/web,发现报了如下错误
1Access to XMLHttpRequest at 'http://ip地址:8081/api/login' from origin 'http://ip地址:8081' has been blocked by CORS policy: Request header field tenant_code is not allowed by Access-Control-Allow-Headers in preflight response.
可以看出使我们前端项目访问后端项目,请求头中的tenant_code不被允许,所以我们需要在服务器B中的nginx中添加允许此请求头
1add_header 'Access-Control-Allow-Headers' 'DNT,X-CustomHeader,Keep-Alive,User-Agent,X-Requested-With,If-Modified-Since,Cache-Control,Content-Type,token,tenant_code';
配置完以后,重启nginx,进行重新访问,发现报了如下错误
1The 'Access-Control-Allow-Origin' header contains multiple values 'http://ip地址:8081, http://ip地址:8081', but only one is allowed.app.07bc0251.js:1 Error: Network Error
可以看出使我们配置了两次跨域处理,既然我们通过nginx统一处理跨域问题,于是我们需要注释掉后端代码中的配置
1@Configuration
2public class WebMvcConfig implements WebMvcConfigurer {
3
4    @Override
5    public void addCorsMappings(CorsRegistry registry) {
6        registry.addMapping("/**")
7            .allowedOrigins("*")
8            .allowCredentials(true)
9            .allowedMethods("GET", "POST", "PUT", "DELETE", "OPTIONS")
10            .maxAge(3600);
11     }
12    }
重新部署项目以后,我们再次访问,发现正常了
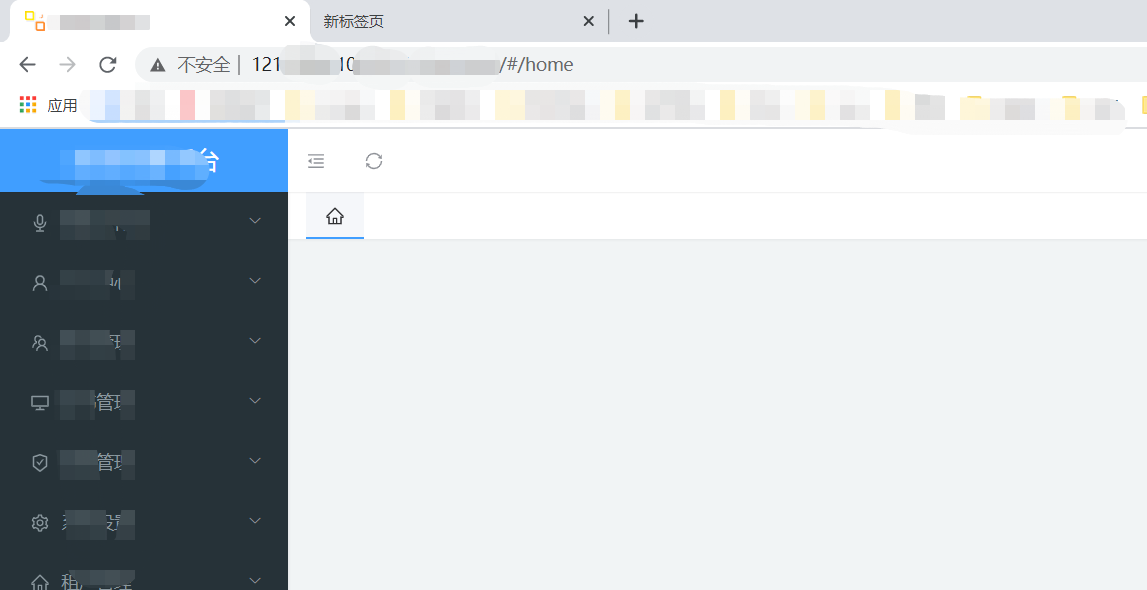
到这里,文章就结束了,谢谢大家阅读
关于作者
大家好,我是麦叔,目前从事Java开发,前端和后端略懂一点。希望喜欢我的伙伴关注我的个人公众号,方便获取一手文章信息。当然也可以加我个人微信(下方右侧),大家交个朋友,谢谢大家对我的支持。