
什么是Selenium Grid
Selenium Grid是Selenium套件的一部分,它专门用于并行运行多个测试用例在不同的浏览器、操作系统和机器上。
Selenium Grid有两个版本——老版本Grid 1和新版本Grid 2。我们只对新版本做介绍,因为Selenium团队已经逐渐遗弃老版本了。
Selenium Grid 主要使用 master-slaves (or hub-nodes) 理念 --一个 master/hub 和多个 基于master/hub注册的子节点 slaves/nodes。当我们在master上基于不同的浏览器/系统运行测试用例时,master将会分发给适当的node运行。
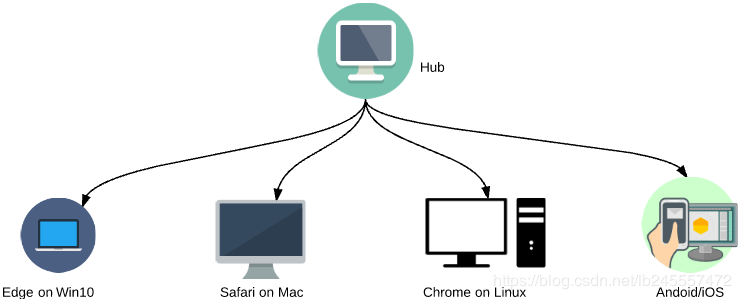
什么时候用Selenium Grid
- 同时在不同的浏览器、操作系统和机器上运行测试。最大程度用于兼容性测试
- 减少运行时间
怎样启动Selenium Grid?
启动Selenium Grid的三种方式,一种直接用命令行,另一种用JSON配置文件,最后一种docker启动。
1. 命令行启动
将会使用2台机器,一台运行hub另一台运行node,为了方便描述,将运行hub的机器命名为“Machine H”(IP:192.168.1.100),运行node的机器命名为“Machine N”(IP:192.168.1.101)
Step 1
-
已安装需要运行的浏览器
-
下载浏览器driver,放到和selenium server相同的路径下(查看) ,否则在启动node时要加参数,不然启动不了浏览器(
java -Dwebdriver.chrome.driver="C:\your path\chromedriver.exe" -jar selenium-server-standalone-3.141.59.jar -role node -hub http://192.168.1.100:5566/grid/register/,可切换浏览器)driver
link
comments
Firefox
安装的浏览器要和下载的driver版本一致
Chrome
安装的浏览器要和下载的driver版本一致
IE
安装的浏览器要和下载的driver版本一致
Edge
安装的浏览器要和下载的driver版本一致
-
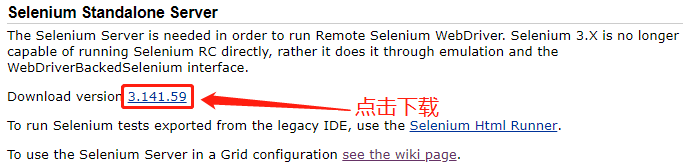
下载selenium server,将selenium-server-standalone-X.XX.jar分别放在“Machine H”和“Machine N”上(自定义路径)
Step 2
- 在机器“Machine H”上打开命令行,到selenium server所在的路径,运行:
java -jar selenium-server-standalone-3.141.59.jar -role hub -port 5566,成功启动你会看到:

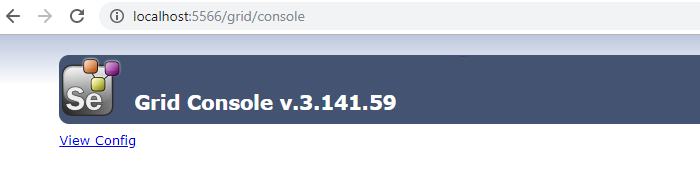
或者直接在机器“Machine H”上的浏览器(“Machine N”则需要将IP修改为“Machine H”的)打开:http://localhost:5566/grid/console ,将会看到:
- 在机器“Machine N”上打开命令行,到selenium server所在的路径,运行:
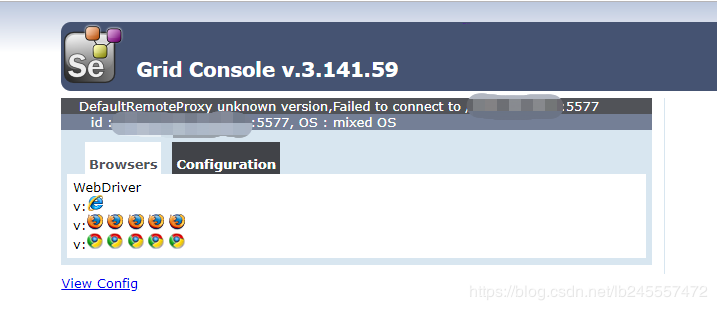
java -jar selenium-server-standalone-3.141.59.jar -role node -hub http://192.168.1.100:5566/grid/register/ -port 5577,成功启动你会看到:
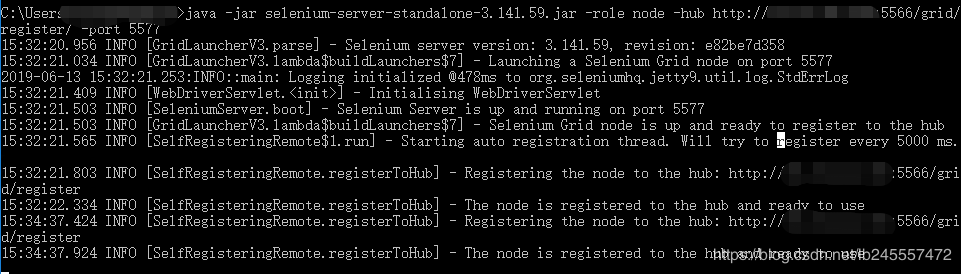
刷新:http://localhost:5566/grid/console ,将会看到:
Step 3
运行测试脚本,将会看到在机器“Machine N”上打开了Chrome浏览器,并运行了测试用例:
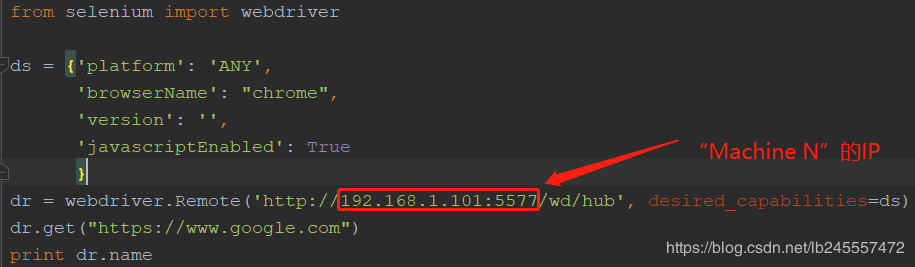
1from selenium import webdriver
2
3ds = {'platform': 'ANY',
4      'browserName': "chrome",
5      'version': '',
6      'javascriptEnabled': True
7      }
8dr = webdriver.Remote('http://192.168.1.101:5577/wd/hub', desired_capabilities=ds)
9dr.get("https://www.baidu.com")
10print dr.name
2. Json配置文件启动
Step 1
-
创建hub的
Json配置文件( 查看)
代码如下:1{ 2 "port": 4444, 3 "newSessionWaitTimeout": -1, 4 "servlets" : [], 5 "withoutServlets": [], 6 "custom": {}, 7 "capabilityMatcher": "org.openqa.grid.internal.utils.DefaultCapabilityMatcher", 8 "registry": "org.openqa.grid.internal.DefaultGridRegistry", 9 "throwOnCapabilityNotPresent": true, 10 "cleanUpCycle": 5000, 11 "role": "hub", 12 "debug": false, 13 "browserTimeout": 0, 14 "timeout": 1800 15}将上述代码保存为
hub_config.json文件,放在“Machine H”上和selenium server相同的路径下。 -
创建nodes的
Json配置文件(如果selenium版本是3.0或更高则查看,否则查看)
代码如下:1{ 2 "capabilities": 3 [ 4 { 5 "browserName": "firefox", 6 "marionette": true, 7 "maxInstances": 5, 8 "seleniumProtocol": "WebDriver" 9 }, 10 { 11 "browserName": "chrome", 12 "maxInstances": 5, 13 "seleniumProtocol": "WebDriver" 14 }, 15 { 16 "browserName": "internet explorer", 17 "platform": "WINDOWS", 18 "maxInstances": 1, 19 "seleniumProtocol": "WebDriver" 20 }, 21 { 22 "browserName": "safari", 23 "technologyPreview": false, 24 "platform": "MAC", 25 "maxInstances": 1, 26 "seleniumProtocol": "WebDriver" 27 } 28 ], 29 "proxy": "org.openqa.grid.selenium.proxy.DefaultRemoteProxy", 30 "maxSession": 5, 31 "port": -1, 32 "register": true, 33 "registerCycle": 5000, 34 "hub": "http://192.168.1.100:4444", 35 "nodeStatusCheckTimeout": 5000, 36 "nodePolling": 5000, 37 "role": "node", 38 "unregisterIfStillDownAfter": 60000, 39 "downPollingLimit": 2, 40 "debug": false, 41 "servlets" : [], 42 "withoutServlets": [], 43 "custom": {} 44}保存为
node_config.json文件(注意将hub对应的值改为机器“Machine H”的IP),放在“Machine N”上和selenium server相同的路径下。(当多个node时需将该文件放在多个node机器上或者同一个机器上启动多个node)
Step 2
hub机器上命令行运行:java -jar selenium-server-standalone-3.141.59.jar -role hub -hubConfig hub_config.json
node机器上命令行运行:java -jar selenium-server-standalone-3.141.59.jar -role node -nodeConfig node_config.json
运行之前的验证方法和脚本查看是否正确
(1、2)方式启动的挑战
不易启动和维护:
- 每个node需要下载和配置依赖
- java 进程占内存
- 出现问题时需手动启动
- 不易维护
- 扩展性差
3. docker启动
docker简介
- https://docs.docker.com/docker-hub/
- https://yeasy.gitbooks.io/docker_practice/appendix/repo/mysql.html
- https://docker-curriculum.com/
- https://towardsdatascience.com/learn-enough-docker-to-be-useful-1c40ea269fa8
docker启动Selenium Grid
docker上已经有selenium官方的Selenium Grid镜像,只有你已经安装了docker,即可使用。
- 启动hub:
docker run -d -p 4444:4444 --name selenium-hub selenium/hub - 启动node(Chrome&&Firefox):
docker run -d --link selenium-hub:hub selenium/node-chromedocker run -d --link selenium-hub:hub selenium/node-firefox
运行命令将会下载内置镜像文件(包括java、Chrome、Firefox、selenium-server-standalone-XXX.jar 等运行selenium所需的环境);此时你可以访问:http://localhost:4444/grid/console
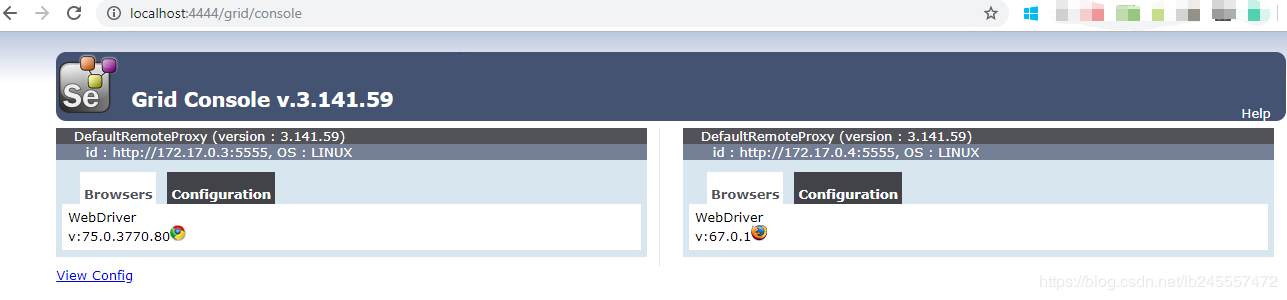
如果需要多个Chrome node则继续运行这个命令:docker run -d --link selenium-hub:hub selenium/node-chrome,刷新则看到多了一个Chrome实例。
通过运行命令:docker ps,显示正在运行的容器

关闭docker-grid的命令:docker stop $(docker ps -a -q), docker rm $(docker ps -a -q)
docker已经简化了selenium Grid的搭建流程,但是还是有很多的手动工作。需要一个一个的启动/关闭hub/nodes.
docker 组件启动Selenium Grid
selenium Grid通常需要启动一个hub,多个nodes像Chrome、Firefox等。我们可以把他们定义到一个文件中叫做docker-compose.yml,通过一个命令来整体启动,docker提供了一个这样的工具 –Docker-Compose。
安装docker-compose查看,一旦安装成功,则创建一个新的文件夹,创建文件 docker-compose.yml, docker-compose.yml内容:
1version: "3"
2services:
3  selenium-hub:
4    image: selenium/hub
5    container_name: selenium-hub
6    ports:
7      - "4444:4444"
8  chrome:
9    image: selenium/node-chrome
10    depends_on:
11      - selenium-hub
12    environment:
13      - HUB_PORT_4444_TCP_ADDR=selenium-hub
14      - HUB_PORT_4444_TCP_PORT=4444
15  firefox:
16    image: selenium/node-firefox
17    depends_on:
18      - selenium-hub
19    environment:
20      - HUB_PORT_4444_TCP_ADDR=selenium-hub
21      - HUB_PORT_4444_TCP_PORT=4444
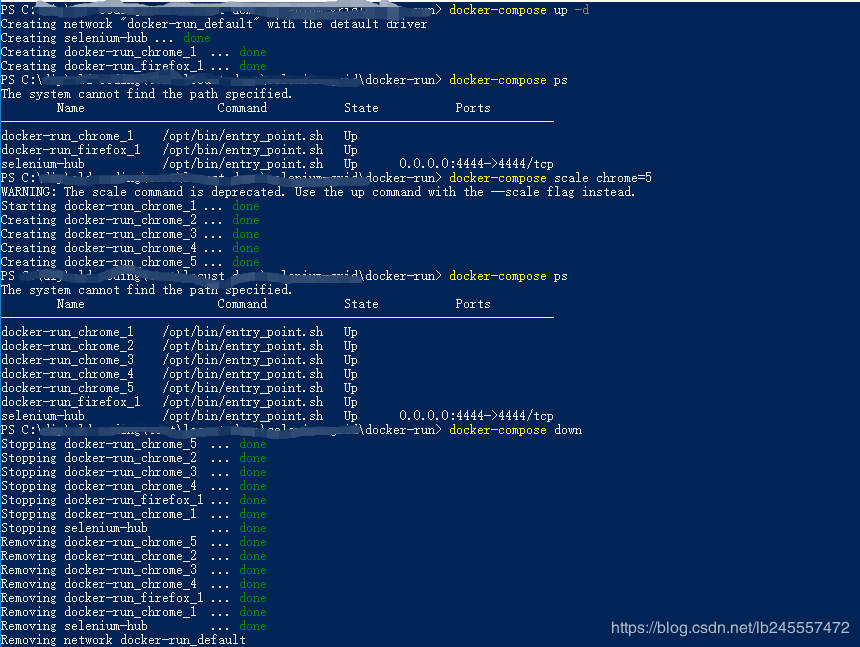
docker-compose命令:
- 运行命令启动(到
docker-compose.yml路径下):docker-compose up -d - 查看启动是否成功:
docker-compose ps - 创建更多实例:
docker-compose scale chrome=5 - 关闭命令:
docker-compose down
浏览器打开http://localhost:4444/grid/console将会看到:
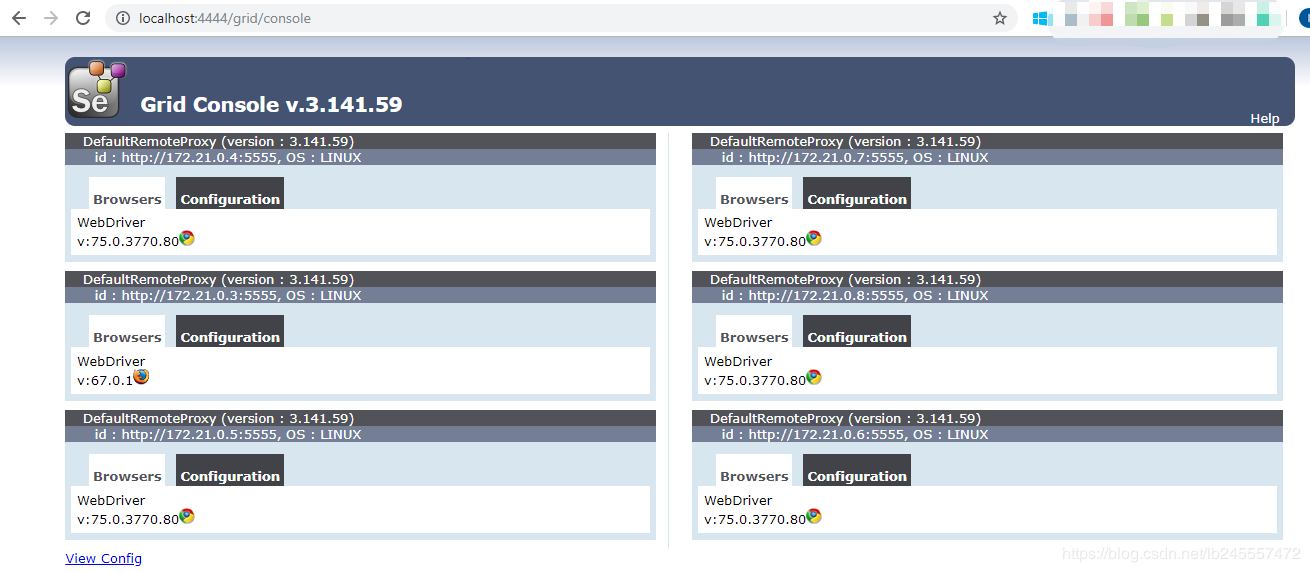
运行脚本的话直接运行就好(IP:http://localhost:4444/wd/hub) ,和上边两种的方法不太一样;不会有浏览器打开(容器内部运行),但是已经运行成功:
1import unittest
2from selenium import webdriver
3
4
5class MyTestCase(unittest.TestCase):
6
7    def setUp(self):
8        ds = {'platform': 'ANY',
9              'browserName': "chrome",
10              'version': '',
11              'javascriptEnabled': True
12              }
13        self.dr = webdriver.Remote('http://localhost:4444/wd/hub', desired_capabilities=ds)
14
15    def test_something(self):
16        self.dr.get("https://www.baidu.com")
17        self.assertEqual(self.dr.name, "chrome")
18
19    def test_search_button(self):
20        self.dr.get("https://www.baidu.com")
21        self.assertTrue(self.dr.find_element_by_id("su").is_displayed())
22
23    def tearDown(self):
24        self.dr.quit()
25
26
27if __name__ == '__main__':
28    unittest.main()
总结
主要对启动Selenium Grid的三种方式做了整理,方便使用者选出最佳的方式。