
MicroService实现技术:
用springBoot来创建单个服务,用SpringCloud来管理这些微服务。
##SpringCloud的五大神兽
#1.注册/服务发现——Netflix Eureka
管理服务器地址和ip的
#2.客服端负载均衡——Netflix Ribbon\Feign
服务请求的分配
#3.断路器——Netflix Hystrix
对有故障的服务进行处理
#4.服务网关——Netflix Zuul
微服务的统一入口。
#5.分布式配置——Spring Cloud Config
对微服务的配置文件做同一管理
SpringCloud入门步奏
1.注册中心
用于管理微服务的地址
1.1当微服务可以解决注册的注册表(IP、端口、服务名称)
1.2从每个微服务注册微服务地址清单
1.3使用心跳机制微服务合同:每N秒发送一个请求到注册表,告诉注册表,
我还活着,如果微服务挂,有心跳合同失败,
注册表微服务地址列表,其他服务将更新地址列表
2.用户管理微服务
3.订单管理微服务
1.注册中心配置
1.1先创建个普通的maven项目父级模块,
在pom.xml里配置公用的jar包管理
1<properties>
2        <!--编码-->
3        <project.build.sourceEncoding>UTF-8</project.build.sourceEncoding>
4
5        <maven.compiler.source>1.8</maven.compiler.source>
6        <maven.compiler.target>1.8</maven.compiler.target>
7    </properties>
8
9    <!--
10   1.管理SpringBoot的jar包
11   -->
12    <parent>
13        <groupId>org.springframework.boot</groupId>
14        <artifactId>spring-boot-starter-parent</artifactId>
15        <version>2.0.5.RELEASE</version>
16    </parent>
17
18    <!--
19    2.管理spring-cloud的jar包
20    -->
21    <dependencyManagement>
22        <dependencies>
23            <dependency>
24                <groupId>org.springframework.cloud</groupId>
25                <artifactId>spring-cloud-dependencies</artifactId>
26                <version>Finchley.SR1</version>
27                <type>pom</type>
28                <scope>import</scope>
29            </dependency>
30        </dependencies>
31    </dependencyManagement>
32    <!--
33        测试
34    -->
35    <dependencies>
36        <dependency>
37            <groupId>junit</groupId>
38            <artifactId>junit</artifactId>
39            <version>4.12</version>
40        </dependency>
41    </dependencies>
1.2.创建注册中心 --项目名:eureka-server-1000
在父级模块中创建个spring-boot项目,也是maven项目,
但是要选中quickstart

1.3在eureka-server-1000模块中的pom.xml添加依赖
1<parent>
2        <artifactId>spring-cloud-parent</artifactId>
3        <groupId>spring-cloud-parent</groupId>
4        <version>1.0-SNAPSHOT</version>
5    </parent>
6    <modelVersion>4.0.0</modelVersion>
7
8    <artifactId>eureka-server-1000</artifactId>
9
10    <name>eureka-server-1000</name>
11
12
13
14    <dependencies>
15        <!--
16            注册/服务发现的依赖
17            有了它,才能获取到所有微服务的ip,端口,服务名
18            有了它,其他的微服务才能获取到所有微服务的ip,端口,服务名清单
19        -->
20        <dependency>
21            <groupId>org.springframework.cloud</groupId>
22            <artifactId>spring-cloud-starter-netflix-eureka-server</artifactId>
23        </dependency>
24        <!--
25            springboot-web的环境依赖
26        -->
27        <dependency>
28            <groupId>org.springframework.boot</groupId>
29            <artifactId>spring-boot-starter-web</artifactId>
30        </dependency>
31    </dependencies>
1.4再建个resources配置文件夹,
在配置文件夹中建个application.yml文件
在yml文件中添加
1server:
2  port: 1000 #端口号
3eureka:
4  instance:
5    hostname: localhost #主机
6  client:
7    registerWithEureka: false #禁止注册中心向自己注册
8    fetchRegistry: false #禁止注册中心拉取注册地址清单
9    serviceUrl: #微服务向注册中心注册的地址
10      defaultZone: http://localhost:1000/eureka/
1.5在java中建个配置类添加
1/**
2 * @EnableEurekaServer
3 * 启动注册中心,默认关闭
4 */
5@SpringBootApplication
6@EnableEurekaServer
7public class EurekaServerApplication {
8
9    public static void main(String[] args) {
10        SpringApplication.run(EurekaServerApplication.class,args);
11    }
12
13}
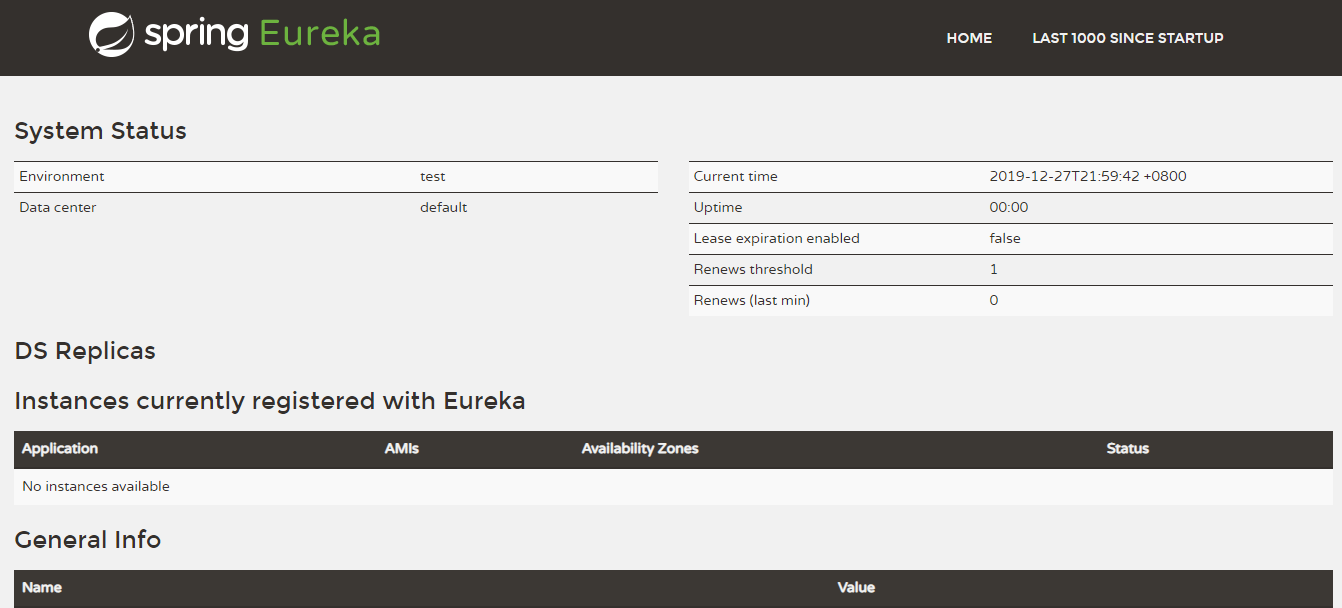
启动main方法可以看见页面
在网页上输入http://localhost:1000/显示如下页面说明配置成功
2..用户管理微服务
模块名:order-server-2000
和创建注册模块一样但配置不一样
2.1在pom.xml中添加依赖
1<parent>
2        <artifactId>spring-cloud-parent</artifactId>
3        <groupId>spring-cloud-parent</groupId>
4        <version>1.0-SNAPSHOT</version>
5    </parent>
6    <modelVersion>4.0.0</modelVersion>
7
8    <artifactId>order-server-2000</artifactId>
9
10    <name>order-server-2000</name>
11
12
13
14    <dependencies>
15        <!--
16            注册的微服务控制器
17        -->
18        <dependency>
19            <groupId>org.springframework.cloud</groupId>
20            <artifactId>spring-cloud-starter-netflix-eureka-client</artifactId>
21        </dependency>
22        <!--
23            springboot的web环境配置
24        -->
25        <dependency>
26            <groupId>org.springframework.boot</groupId>
27            <artifactId>spring-boot-starter-web</artifactId>
28        </dependency>
29
30    </dependencies>
2.2在resources配置文件夹中新建个application.yml
在yml中添加配置
1eureka:
2  client:
3    serviceUrl: #指定注册中心的地址
4      defaultZone: http://localhost:1000/eureka/
5  instance: #是否显示ip地址
6    prefer-ip-address: true
7server: #端口号
8  port: 2000
9spring:
10  application: #服务名
11    name: orders-server
12  cloud:
13    discovery:
14      client:
15        simple:
16          local:
17            service-id: orders-server:2000 #显示的id
2.3在java文件夹中建个
1OrdersServerApplication.java添加如下代码
2
3@SpringBootApplication
4@RestController
5public class OrdersServerApplication {
6
7    @RequestMapping("/")
8    public String home() {
9        return "Hello world";
10    }
11
12    public static void main(String[] args) {
13        SpringApplication.run(OrdersServerApplication.class);
14    }
15
16}
启动main方法可以看见页面
在网页上输入http://localhost:2000/页面显示
Hello world 说明配置成功 再重启动注册模块的main方法 在网页上输入http://localhost:1000/页面显示如下就说明微服务配置成功
3.订单管理微服务
项目名:user-server-3000
和创建注册模块一样但配置不一样
3.1在pom.xml中添加依赖
1<parent>
2        <artifactId>spring-cloud-parent</artifactId>
3        <groupId>spring-cloud-parent</groupId>
4        <version>1.0-SNAPSHOT</version>
5    </parent>
6    <modelVersion>4.0.0</modelVersion>
7
8    <artifactId>user-server-3000</artifactId>
9
10    <name>user-server-3000</name>
11
12
13
14    <dependencies>
15        <!--
16            注册的微服务控制器
17        -->
18        <dependency>
19            <groupId>org.springframework.cloud</groupId>
20            <artifactId>spring-cloud-starter-netflix-eureka-client</artifactId>
21        </dependency>
22
23        <!--
24            springboot的web环境配置
25        -->
26        <dependency>
27            <groupId>org.springframework.boot</groupId>
28            <artifactId>spring-boot-starter-web</artifactId>
29        </dependency>
30
31    </dependencies>
3.2在resources配置文件夹中新建个application.yml
在yml中添加配置
1eureka:
2  client:
3    serviceUrl:
4      defaultZone: http://localhost:1000/eureka/
5  instance:
6    prefer-ip-address: true
7server:
8  port: 3000
9spring:
10  application:
11    name: user-server
12  cloud:
13    discovery:
14      client:
15        simple:
16          local:
17            service-id: user-server:3000
3.3在java文件夹中建个
1OrdersServerApplication.java添加如下代码
2
3/**
4 * @EnableEurekaClient
5 * 启动微服务;
6 * 默认开启
7 */
8@SpringBootApplication
9@RestController
10@EnableEurekaClient
11public class UserServerApplication {
12
13    @RequestMapping("/")
14    public String home() {
15        return "Hello world2";
16    }
17
18    public static void main(String[] args) {
19        SpringApplication.run(UserServerApplication.class);
20    }
21
22}
启动main方法可以看见页面
在网页上输入http://localhost:3000/页面显示
Hello world2 说明配置成功 再重启动注册模块的main方法 在网页上输入http://localhost:1000/页面显示如下就说明微服务配置成功