
前言
上一篇Spring博文主要讲解了如何使用Spring来实现AOP编程,本博文主要讲解Spring的对JDBC的支持…
对于JDBC而言,我们肯定不会陌生,我们在初学的时候肯定写过非常非常多的JDBC模板代码!
回顾对模版代码优化过程
我们来回忆一下我们怎么对模板代码进行优化的!
-
首先来看一下我们原生的JDBC:需要手动去数据库的驱动从而拿到对应的连接..
1 try { 2 String sql = "insert into t_dept(deptName) values('test');"; 3 Connection con = null; 4 Statement stmt = null; 5 Class.forName("com.mysql.jdbc.Driver"); 6 // 连接对象 7 con = DriverManager.getConnection("jdbc:mysql:///hib_demo", "root", "root"); 8 // 执行命令对象 9 stmt = con.createStatement(); 10 // 执行 11 stmt.execute(sql); 12 13 // 关闭 14 stmt.close(); 15 con.close(); 16 } catch (Exception e) { 17 e.printStackTrace(); 18 } -
因为JDBC是面向接口编程的,因此数据库的驱动都是由数据库的厂商给做到好了,我们只要加载对应的数据库驱动,便可以获取对应的数据库连接….因此,我们写了一个工具类,专门来获取与数据库的连接(Connection),当然啦,为了更加灵活,我们的工具类是读取配置文件的方式来做的。
/* * 连接数据库的driver,url,username,password通过配置文件来配置,可以增加灵活性 * 当我们需要切换数据库的时候,只需要在配置文件中改以上的信息即可 * * */ private static String driver = null; private static String url = null; private static String username = null; private static String password = null; static { try { //获取配置文件的读入流 InputStream inputStream = UtilsDemo.class.getClassLoader().getResourceAsStream("db.properties"); Properties properties = new Properties(); properties.load(inputStream); //获取配置文件的信息 driver = properties.getProperty("driver"); url = properties.getProperty("url"); username = properties.getProperty("username"); password = properties.getProperty("password"); //加载驱动类 Class.forName(driver); } catch (IOException e) { e.printStackTrace(); } catch (ClassNotFoundException e) { e.printStackTrace(); } } public static Connection getConnection() throws SQLException { return DriverManager.getConnection(url,username,password); } public static void release(Connection connection, Statement statement, ResultSet resultSet) { if (resultSet != null) { try { resultSet.close(); } catch (SQLException e) { e.printStackTrace(); } } if (statement != null) { try { statement.close(); } catch (SQLException e) { e.printStackTrace(); } } if (connection != null) { try { connection.close(); } catch (SQLException e) { e.printStackTrace(); } } }
-
经过上面一层的封装,我们可以**在使用的地方直接使用工具类来得到与数据库的连接…那么比原来就方便很多了!**但是呢,每次还是需要使用Connection去创建一个Statement对象。并且无论是什么方法,其实就是SQL语句和传递进来的参数不同!
-
于是,我们就自定义了一个JDBC的工具类,详情可以看http://blog.csdn.net/hon_3y/article/details/53760782#t6
-
我们自定义的工具类其实就是以DbUtils组件为模板来写的,因此我们在开发的时候就一直使用DbUtils组件了。
使用Spring的JDBC
上面已经回顾了一下以前我们的JDBC开发了,那么看看Spring对JDBC又是怎么优化的
首先,想要使用Spring的JDBC模块,就必须引入两个jar文件:
-
引入jar文件
- spring-jdbc-3.2.5.RELEASE.jar
- spring-tx-3.2.5.RELEASE.jar
-
首先还是看一下我们原生的JDBC代码:获取Connection是可以抽取出来的,直接使用dataSource来得到Connection就行了。
1public void save() { 2 try { 3 String sql = "insert into t_dept(deptName) values('test');"; 4 Connection con = null; 5 Statement stmt = null; 6 Class.forName("com.mysql.jdbc.Driver"); 7 // 连接对象 8 con = DriverManager.getConnection("jdbc:mysql:///hib_demo", "root", "root"); 9 // 执行命令对象 10 stmt = con.createStatement(); 11 // 执行 12 stmt.execute(sql); 13 14 // 关闭 15 stmt.close(); 16 con.close(); 17 } catch (Exception e) { 18 e.printStackTrace(); 19 } 20} -
值得注意的是,JDBC对C3P0数据库连接池是有很好的支持的。因此我们直接可以使用Spring的依赖注入,在配置文件中配置dataSource就行了!
1<bean id="dataSource" class="com.mchange.v2.c3p0.ComboPooledDataSource"> 2 <property name="driverClass" value="com.mysql.jdbc.Driver"></property> 3 <property name="jdbcUrl" value="jdbc:mysql:///hib_demo"></property> 4 <property name="user" value="root"></property> 5 <property name="password" value="root"></property> 6 <property name="initialPoolSize" value="3"></property> 7 <property name="maxPoolSize" value="10"></property> 8 <property name="maxStatements" value="100"></property> 9 <property name="acquireIncrement" value="2"></property> 10</bean> 11 12 13// IOC容器注入 14private DataSource dataSource; 15public void setDataSource(DataSource dataSource) { 16 this.dataSource = dataSource; 17} 18 19 20public void save() { 21 try { 22 String sql = "insert into t_dept(deptName) values('test');"; 23 Connection con = null; 24 Statement stmt = null; 25 // 连接对象 26 con = dataSource.getConnection(); 27 // 执行命令对象 28 stmt = con.createStatement(); 29 // 执行 30 stmt.execute(sql); 31 32 // 关闭 33 stmt.close(); 34 con.close(); 35 } catch (Exception e) { 36 e.printStackTrace(); 37 } 38} -
Spring来提供了JdbcTemplate这么一个类给我们使用!它封装了DataSource,也就是说我们可以在Dao中使用JdbcTemplate就行了。
-
创建dataSource,创建jdbcTemplate对象
<?xml version="1.0" encoding="UTF-8"?> <beans xmlns="http://www.springframework.org/schema/beans" xmlns:xsi="http://www.w3.org/2001/XMLSchema-instance" xmlns:context="http://www.springframework.org/schema/context" xmlns:c="http://www.springframework.org/schema/c" xsi:schemaLocation="http://www.springframework.org/schema/beans http://www.springframework.org/schema/beans/spring-beans.xsd http://www.springframework.org/schema/context http://www.springframework.org/schema/context/spring-context.xsd">
</beans>1<bean id="dataSource" class="com.mchange.v2.c3p0.ComboPooledDataSource"> 2 <property name="driverClass" value="com.mysql.jdbc.Driver"></property> 3 <property name="jdbcUrl" value="jdbc:mysql:///zhongfucheng"></property> 4 <property name="user" value="root"></property> 5 <property name="password" value="root"></property> 6 <property name="initialPoolSize" value="3"></property> 7 <property name="maxPoolSize" value="10"></property> 8 <property name="maxStatements" value="100"></property> 9 <property name="acquireIncrement" value="2"></property> 10</bean> 11 12<!--扫描注解--> 13<context:component-scan base-package="bb"/> 14 15<!-- 2. 创建JdbcTemplate对象 --> 16<bean id="jdbcTemplate" class="org.springframework.jdbc.core.JdbcTemplate"> 17 <property name="dataSource" ref="dataSource"></property> 18</bean> -
userDao
package bb;
import org.springframework.beans.factory.annotation.Autowired; import org.springframework.jdbc.core.JdbcTemplate; import org.springframework.stereotype.Component;
/** * Created by ozc on 2017/5/10. */
@Component public class UserDao implements IUser {
1//使用Spring的自动装配
2@Autowired
3private JdbcTemplate template;
4
5@Override
6public void save() {
7    String sql = "insert into user(name,password) values('zhoggucheng','123')";
8    template.update(sql);
9}
}
-
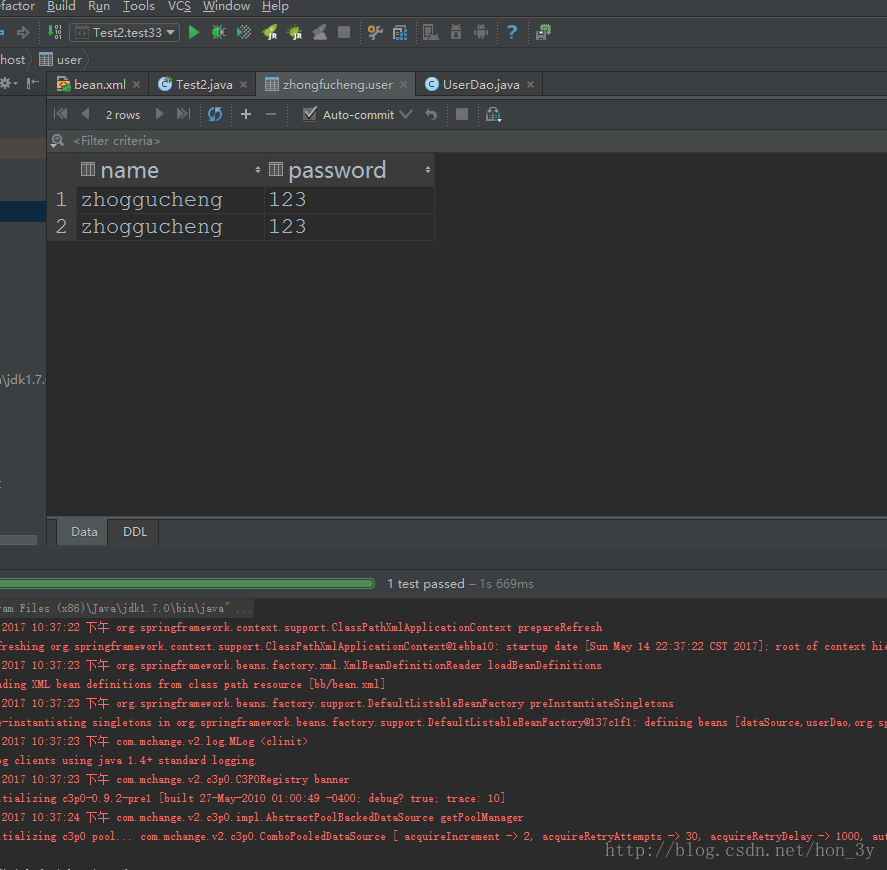
测试:
1@Test
2public void test33() {
3    ApplicationContext ac = new ClassPathXmlApplicationContext("bb/bean.xml");
4
5    UserDao userDao = (UserDao) ac.getBean("userDao");
6    userDao.save();
7}
JdbcTemplate查询
我们要是使用JdbcTemplate查询会发现有很多重载了query()方法
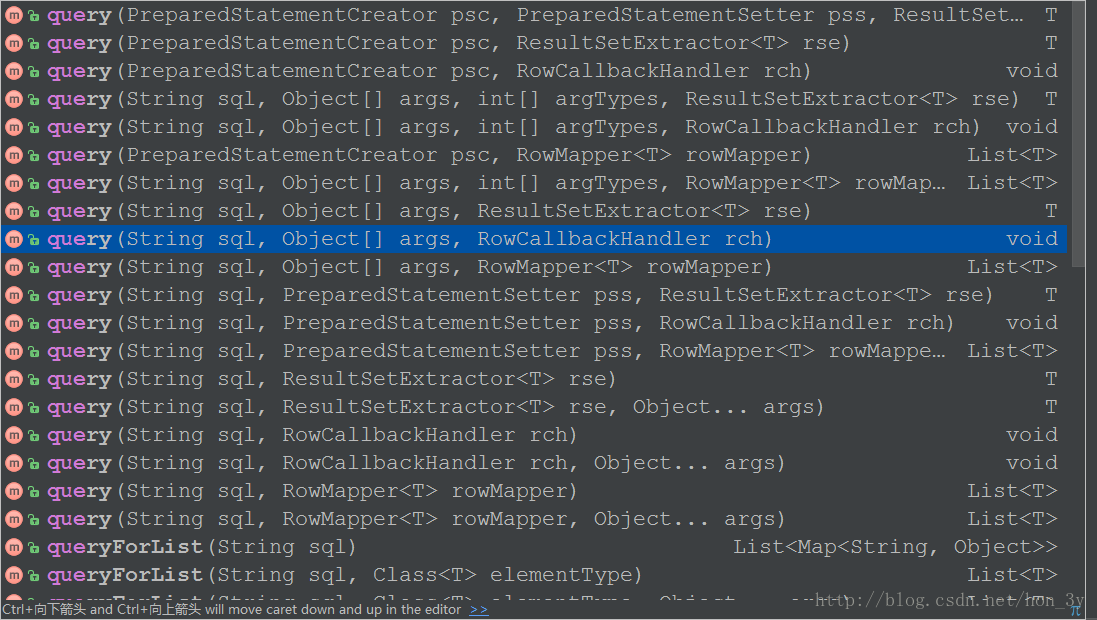
一般地,如果我们使用queryForMap(),那么只能封装一行的数据,如果封装多行的数据、那么就会报错!并且,Spring是不知道我们想把一行数据封装成是什么样的,因此返回值是Map集合…我们得到Map集合的话还需要我们自己去转换成自己需要的类型。
我们一般使用下面这个方法:
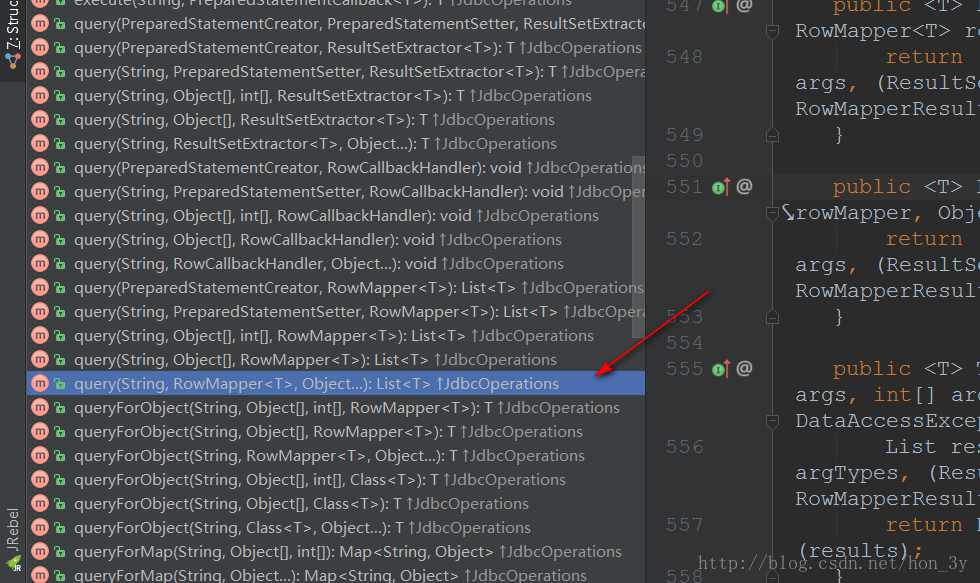
我们可以实现RowMapper,告诉Spriing我们将每行记录封装成怎么样的。
1    public void query(String id) {
2        String sql = "select * from USER where password=?";
3
4        List<User> query = template.query(sql, new RowMapper<User>() {
5
6
7            //将每行记录封装成User对象
8            @Override
9            public User mapRow(ResultSet resultSet, int i) throws SQLException {
10                User user = new User();
11                user.setName(resultSet.getString("name"));
12                user.setPassword(resultSet.getString("password"));
13
14                return user;
15            }
16
17        },id);
18
19
20        System.out.println(query);
21    }
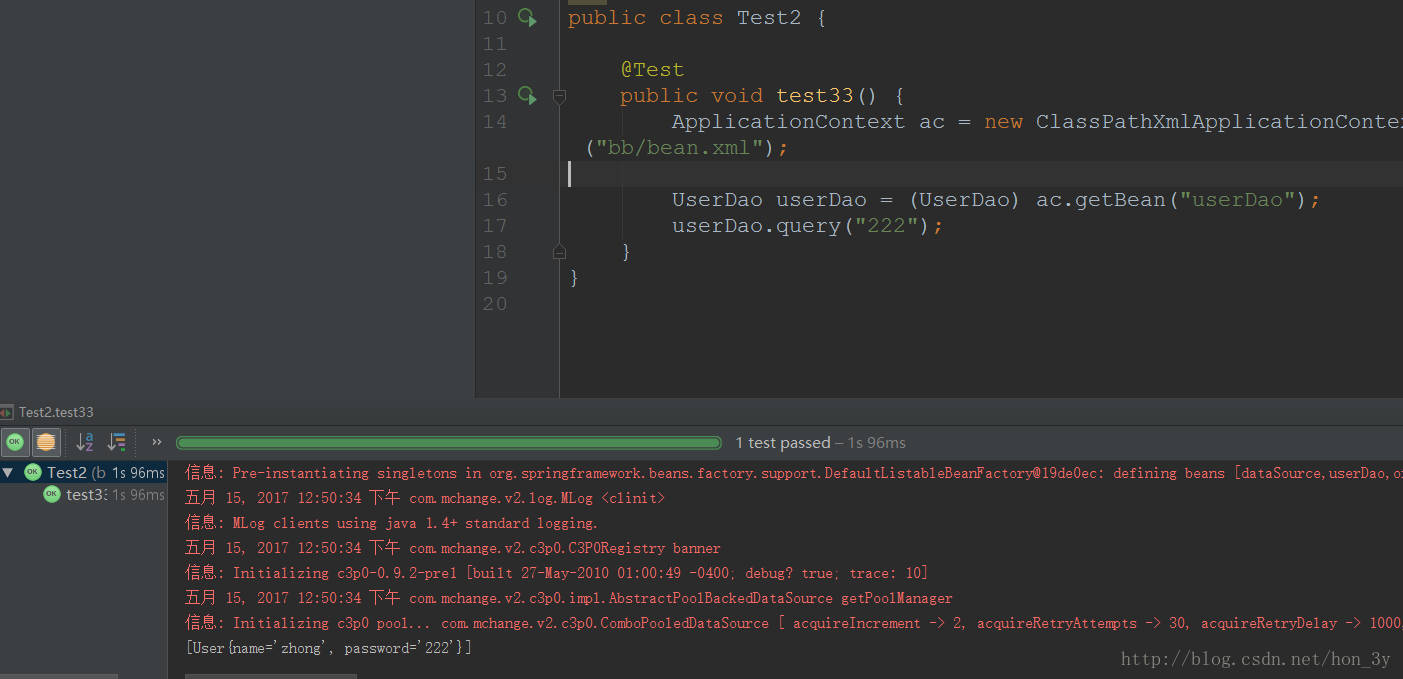
当然了,一般我们都是将每行记录封装成一个JavaBean对象的,因此直接实现RowMapper,在使用的时候创建就好了。
1    class MyResult implements RowMapper<Dept>{
2
3        // 如何封装一行记录
4        @Override
5        public Dept mapRow(ResultSet rs, int index) throws SQLException {
6            Dept dept = new Dept();
7            dept.setDeptId(rs.getInt("deptId"));
8            dept.setDeptName(rs.getString("deptName"));
9            return dept;
10        }
11
12    }