
Spring Boot Admin 监控介绍
Spring Boot Admin是一个Web应用,用于管理和监视Spring Boot应用程序的运行状态。
每个Spring Boot应用程序都被视为客户端并注册到管理服务器。
背后的数据采集是由Spring Boot Actuator端点提供。
Spring Boot Admin 是由服务端和客户端组成
在 Spring Boot 项目中,Spring Boot Admin 作为 Server 端,其他的要被监控的应用作为 Client 端
Spring Boot Admin 设计目的
问题:在微服务生态中,由于一个项目中服务过多,导致排查问题等造成很大的困难。
目的:实时监控各个服务的健康状态,日志及时查看,服务异常及时通知人员进行修复等。
Spring Boot Admin 实现原理
1.所有需要被监控的服务,均加上SpringBoot提供的Actuator包
2.启动Admin Server端,作为注册中心,监控所有客户端当前状态(自己也需要被注册并且被监控)
3.启动Admin Clinet端,第一次主动向Admin Server端提供健康信息
4.Admin Server端定时轮询所有监控Admin Client端的节点及时获得最新信息
5.Admin Client端如果发生异常,Admin Server端提供了邮件功能等,及时通知用户进行修复
Spring Boot Admin 提供了哪些功能
- 显示健康状况
- 显示详细信息,例如
-
- JVM和内存指标
-
- micrometer.io指标
-
- 数据源指标
-
- 缓存指标
- 显示内部编号
- 关注并下载日志文件
- 查看JVM系统和环境属性
- 查看Spring Boot配置属性
- 支持Spring Cloud的可发布/ env-和// refresh-endpoint
- 轻松的日志级别管理
- 与JMX-beans交互
- 查看线程转储
- 查看http跟踪
- 查看审核事件
- 查看http端点
- 查看预定的任务
- 查看和删除活动会话(使用spring-session)
- 查看Flyway / Liquibase数据库迁移
- 下载heapdump
- 状态更改通知(通过电子邮件,Slack,Hipchat等)
- 状态更改的事件日志(非持久性)
SpringBootAdmin2.0集成eureka
创建sunny-eureka-service
这是eureka-server端,注册中心。
pom文件
1<parent>
2        <groupId>org.springframework.boot</groupId>
3        <artifactId>spring-boot-starter-parent</artifactId>
4        <version>2.2.1.RELEASE</version>
5    </parent>
6
7    <dependencies>
8        <dependency>
9            <groupId>org.springframework.boot</groupId>
10            <artifactId>spring-boot-starter-actuator</artifactId>
11        </dependency>
12        <dependency>
13            <groupId>org.springframework.cloud</groupId>
14            <artifactId>spring-cloud-starter-netflix-eureka-server</artifactId>
15        </dependency>
16    </dependencies>
17
18    <dependencyManagement>
19        <dependencies>
20            <dependency>
21                <groupId>org.springframework.cloud</groupId>
22                <artifactId>spring-cloud-dependencies</artifactId>
23                <version>Hoxton.SR1</version>
24                <type>pom</type>
25                <scope>import</scope>
26            </dependency>
27        </dependencies>
28    </dependencyManagement>
application.yml
配置应用名和端口信息,以及向sunny-admin-server-service注册的地址为http://localhost:8888,最后暴露自己的actuator的所有端口信息,具体配置如下:
1#服务端口号
2server:
3  port: 8888
4
5spring:
6  application:
7    name: sunny-eureka-service
8
9eureka:
10  instance:
11    #为false时,那么注册到Eureka中的Ip地址就是本机的Ip地址
12    prefer-ip-address: false
13    #服务注册中心实例的主机名
14    hostname: localhost
15    health-check-url-path: /actuator/health
16    status-page-url-path: /actuator/info
17  client:
18    # 表示是否从 eureka server 中获取注册信息(检索服务),默认是true
19    fetch-registry: false
20    # 表示是否将自己注册到 eureka server(向服务注册中心注册自己),默认是true
21    register-with-eureka: false
22    service-url:
23      #服务注册中心的配置内容,指定服务注册中心的位置,eureka 服务器的地址(注意:地址最后面的 /eureka/ 这个是固定值)
24      #defaultZone: http://${eureka.instance.hostname}:${server.port}/eureka/
25      #2、在原先的基础上添加security用户名和密码(例如:http://username:password@localhost:8000/eureka/)
26      defaultZone: http://${eureka.instance.hostname}:${server.port}/eureka/
27
28management:
29  endpoints:
30    web:
31      exposure:
32        include: "*"
33  endpoint:
34    health:
35      show-details: ALWAYS #显示详细信息
启动类
1@EnableEurekaServer
2@SpringBootApplication
3public class SpringBootApplicationEurekaServer {
4    public static void main(String[] args) {
5        SpringApplication.run(SpringBootApplicationEurekaServer.class);
6    }
7}
创建sunny-admin-server-service
这是SpringBootAdmin Server端
pom文件
1<parent>
2        <groupId>org.springframework.boot</groupId>
3        <artifactId>spring-boot-starter-parent</artifactId>
4        <version>2.2.1.RELEASE</version>
5    </parent>
6
7    <dependencies>
8        <dependency>
9            <groupId>org.springframework.boot</groupId>
10            <artifactId>spring-boot-starter-web</artifactId>
11            <exclusions>
12                <exclusion>
13                    <groupId>org.springframework.boot</groupId>
14                    <artifactId>spring-boot-starter-tomcat</artifactId>
15                </exclusion>
16            </exclusions>
17        </dependency>
18        <!--如果spring-boot-starter-web 排除掉tomcat,则可以引入jetty-->
19        <dependency>
20            <groupId>org.springframework.boot</groupId>
21            <artifactId>spring-boot-starter-jetty</artifactId>
22        </dependency>
23
24        <!-- admin server -->
25        <dependency>
26            <groupId>de.codecentric</groupId>
27            <artifactId>spring-boot-admin-starter-server</artifactId>
28            <version>2.2.1</version>
29        </dependency>
30
31        <!-- eureka客户端 -->
32        <dependency>
33            <groupId>org.springframework.cloud</groupId>
34            <artifactId>spring-cloud-starter-netflix-eureka-client</artifactId>
35        </dependency>
36
37        <!-- 健康监控 -->
38        <dependency>
39            <groupId>org.springframework.boot</groupId>
40            <artifactId>spring-boot-starter-actuator</artifactId>
41            <version>2.2.1.RELEASE</version>
42        </dependency>
43
44    </dependencies>
45
46    <dependencyManagement>
47        <dependencies>
48            <dependency>
49                <groupId>org.springframework.cloud</groupId>
50                <artifactId>spring-cloud-dependencies</artifactId>
51                <version>Hoxton.SR1</version>
52                <type>pom</type>
53                <scope>import</scope>
54            </dependency>
55        </dependencies>
56    </dependencyManagement>
application.yml
management.endpoints.web.exposure.include 配置,我这里的配置暴露的所有节点进行监控
1server:
2  port: 8889
3
4spring:
5  application:
6    name: sunny-admin-server-service
7
8eureka:
9  instance:
10    #服务注册中心实例的主机名
11    hostname: localhost
12    health-check-url-path: /actuator/health
13    status-page-url-path: /actuator/info
14  client:
15    serviceUrl:
16      defaultZone: http://${eureka.instance.hostname}:8888/eureka/
17
18management:
19  endpoints:
20    web:
21      exposure:
22        include: "*"
23  endpoint:
24    health:
25      show-details: ALWAYS #显示详细信息
启动类
启动类添加@EnableAdminServer注解,开启监控
1@EnableDiscoveryClient
2@SpringBootApplication
3public class SpringBootApplicationMainAdminServer {
4    public static void main(String[] args) {
5        SpringApplication.run(SpringBootApplicationMainAdminServer.class);
6    }
7}
创建sunny-admin-client-service
这是SpringBootAdmin Client端
pom文件
1<parent>
2        <groupId>org.springframework.boot</groupId>
3        <artifactId>spring-boot-starter-parent</artifactId>
4        <version>2.2.1.RELEASE</version>
5    </parent>
6
7    <dependencies>
8        <dependency>
9            <groupId>org.springframework.boot</groupId>
10            <artifactId>spring-boot-starter-actuator</artifactId>
11        </dependency>
12        <dependency>
13            <groupId>org.springframework.cloud</groupId>
14            <artifactId>spring-cloud-starter-netflix-eureka-client</artifactId>
15        </dependency>
16        <dependency>
17            <groupId>org.springframework.boot</groupId>
18            <artifactId>spring-boot-starter-web</artifactId>
19        </dependency>
20    </dependencies>
21    <dependencyManagement>
22        <dependencies>
23            <dependency>
24                <groupId>org.springframework.cloud</groupId>
25                <artifactId>spring-cloud-dependencies</artifactId>
26                <version>Hoxton.SR1</version>
27                <type>pom</type>
28                <scope>import</scope>
29            </dependency>
30        </dependencies>
31    </dependencyManagement>
application.yml
1server:
2  port: 8183
3
4spring:
5  application:
6    name: sunny-admin-client-service
7
8eureka:
9  instance:
10    #服务注册中心实例的主机名
11    hostname: localhost
12    health-check-url-path: /actuator/health
13    status-page-url-path: /actuator/info
14  client:
15    serviceUrl:
16      defaultZone: http://${eureka.instance.hostname}:8888/eureka/
17
18
19management:
20  endpoints:
21    web:
22      exposure:
23        include: "*"
24  endpoint:
25    health:
26      show-details: ALWAYS #显示详细信息
启动类
1@EnableDiscoveryClient
2@SpringBootApplication
3public class SpringBootApplicationMainAdminClient {
4    public static void main(String[] args) {
5        SpringApplication.run(SpringBootApplicationMainAdminClient.class);
6    }
7
8}
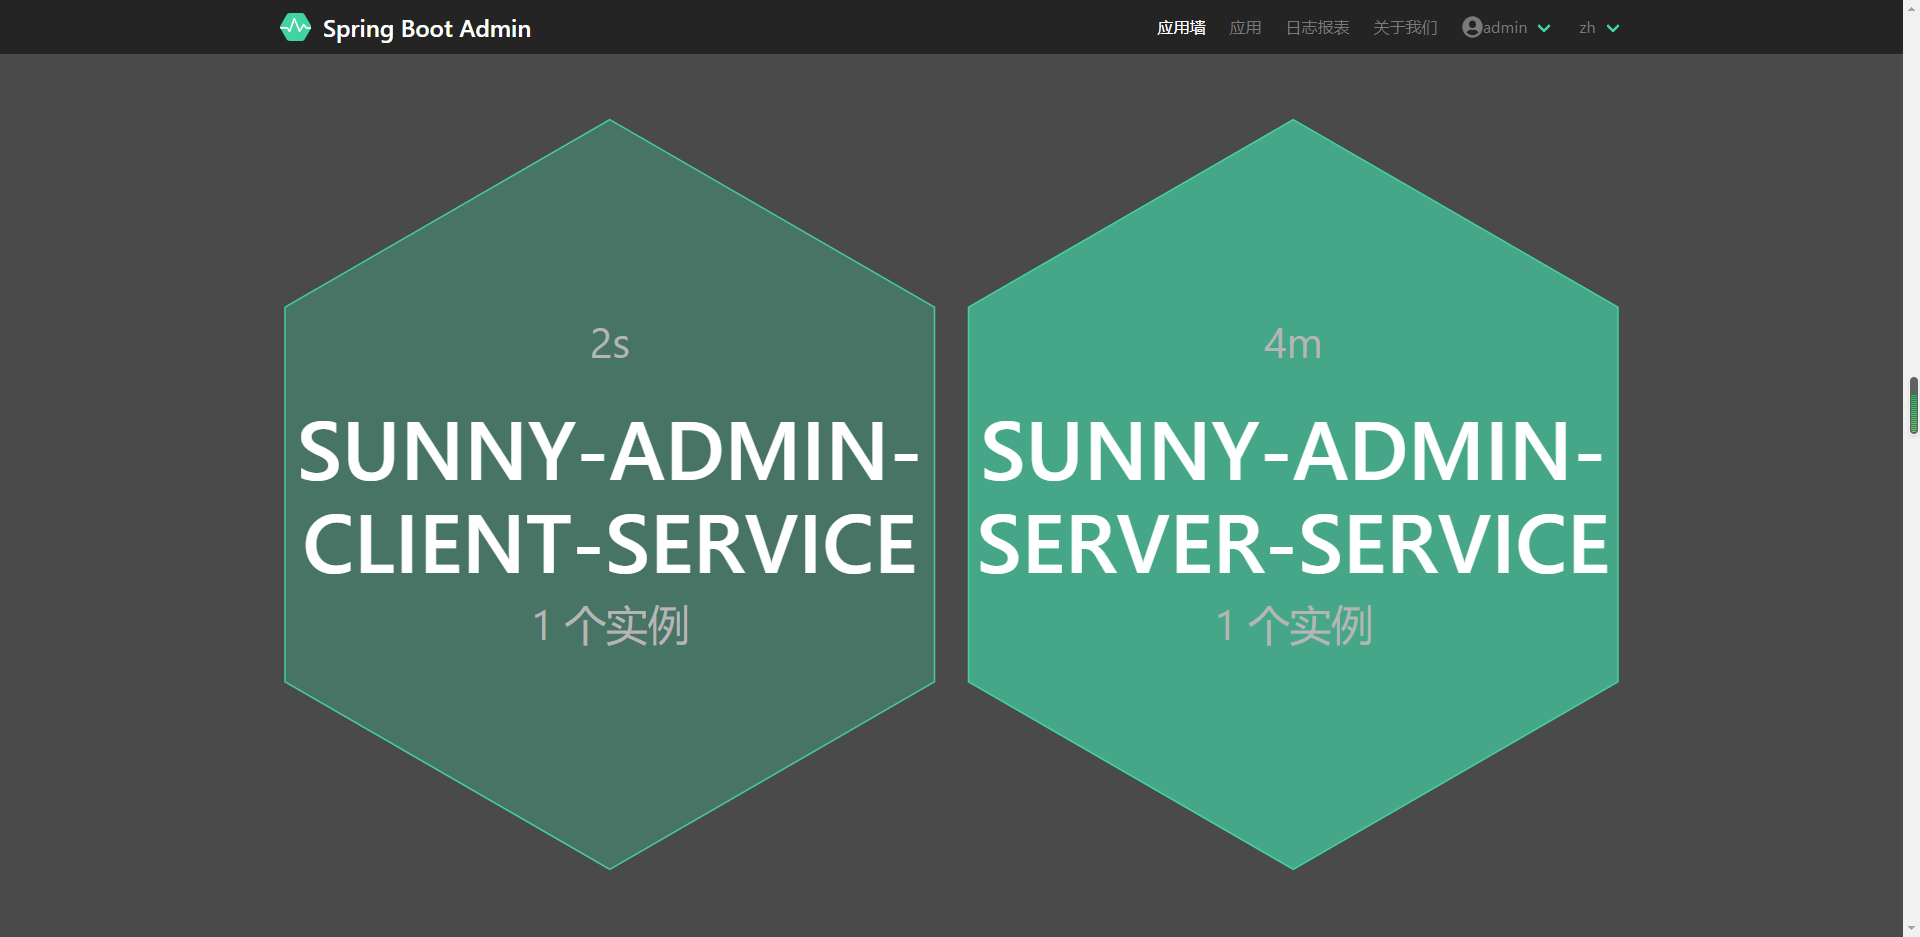
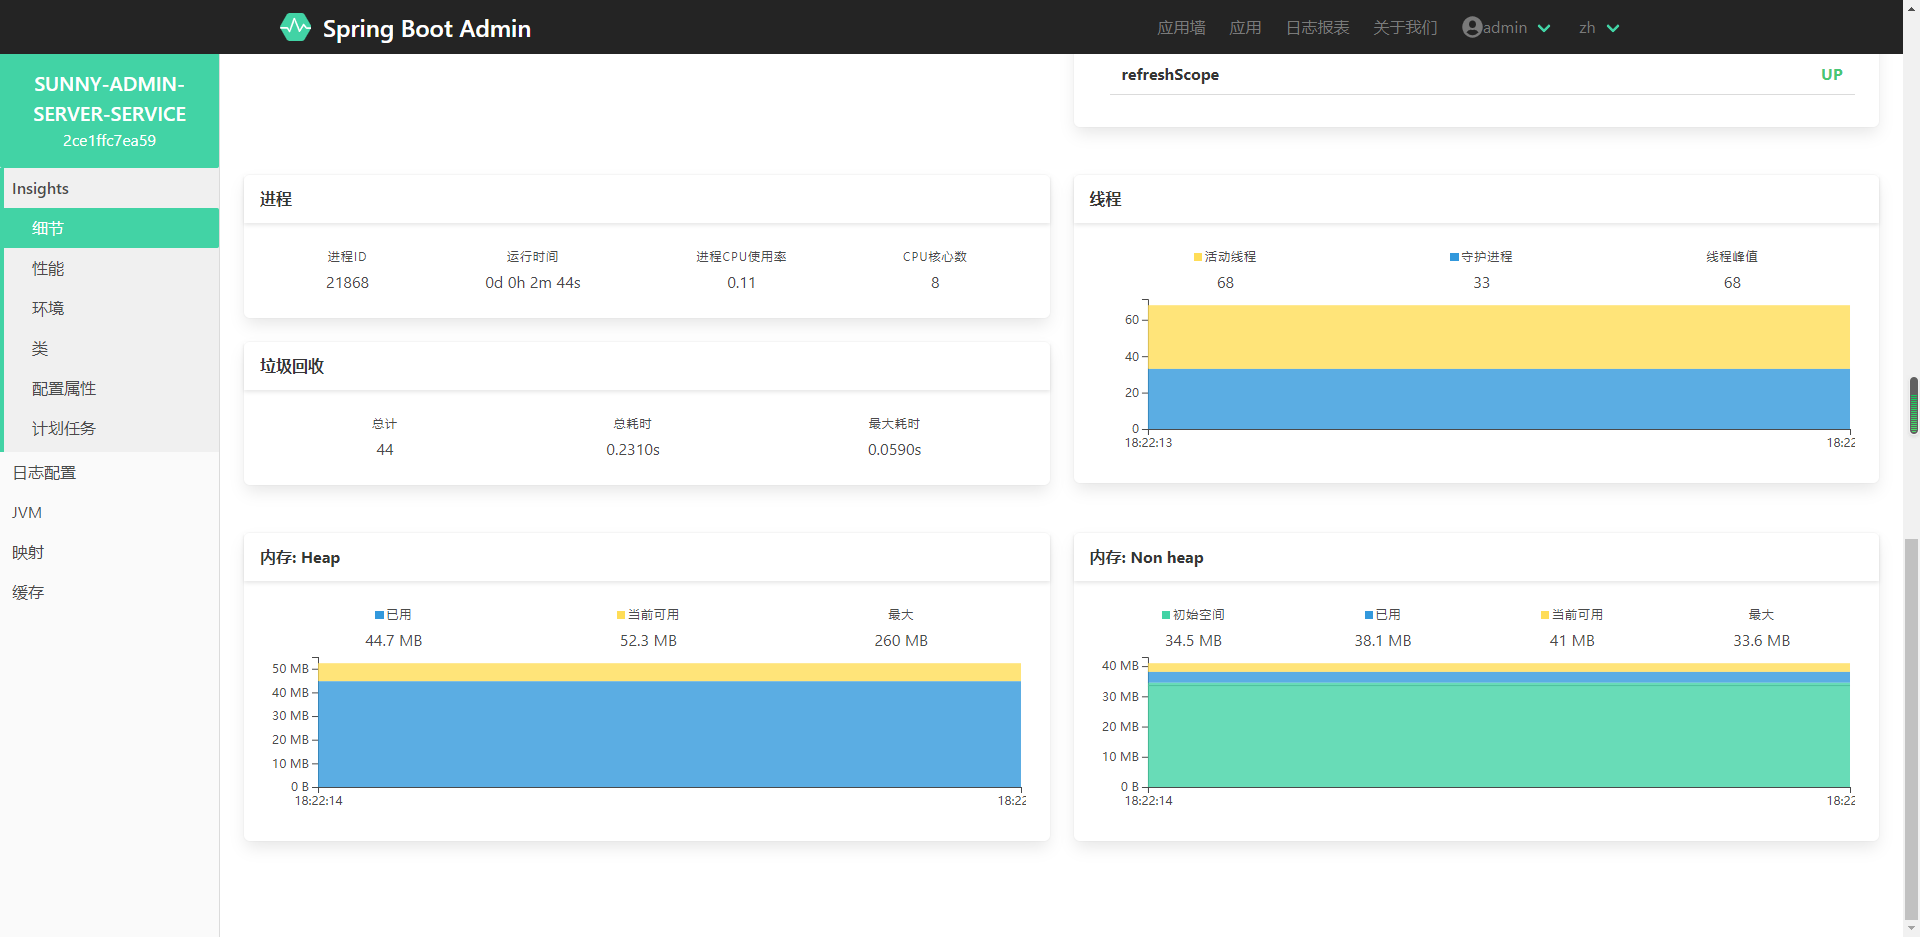
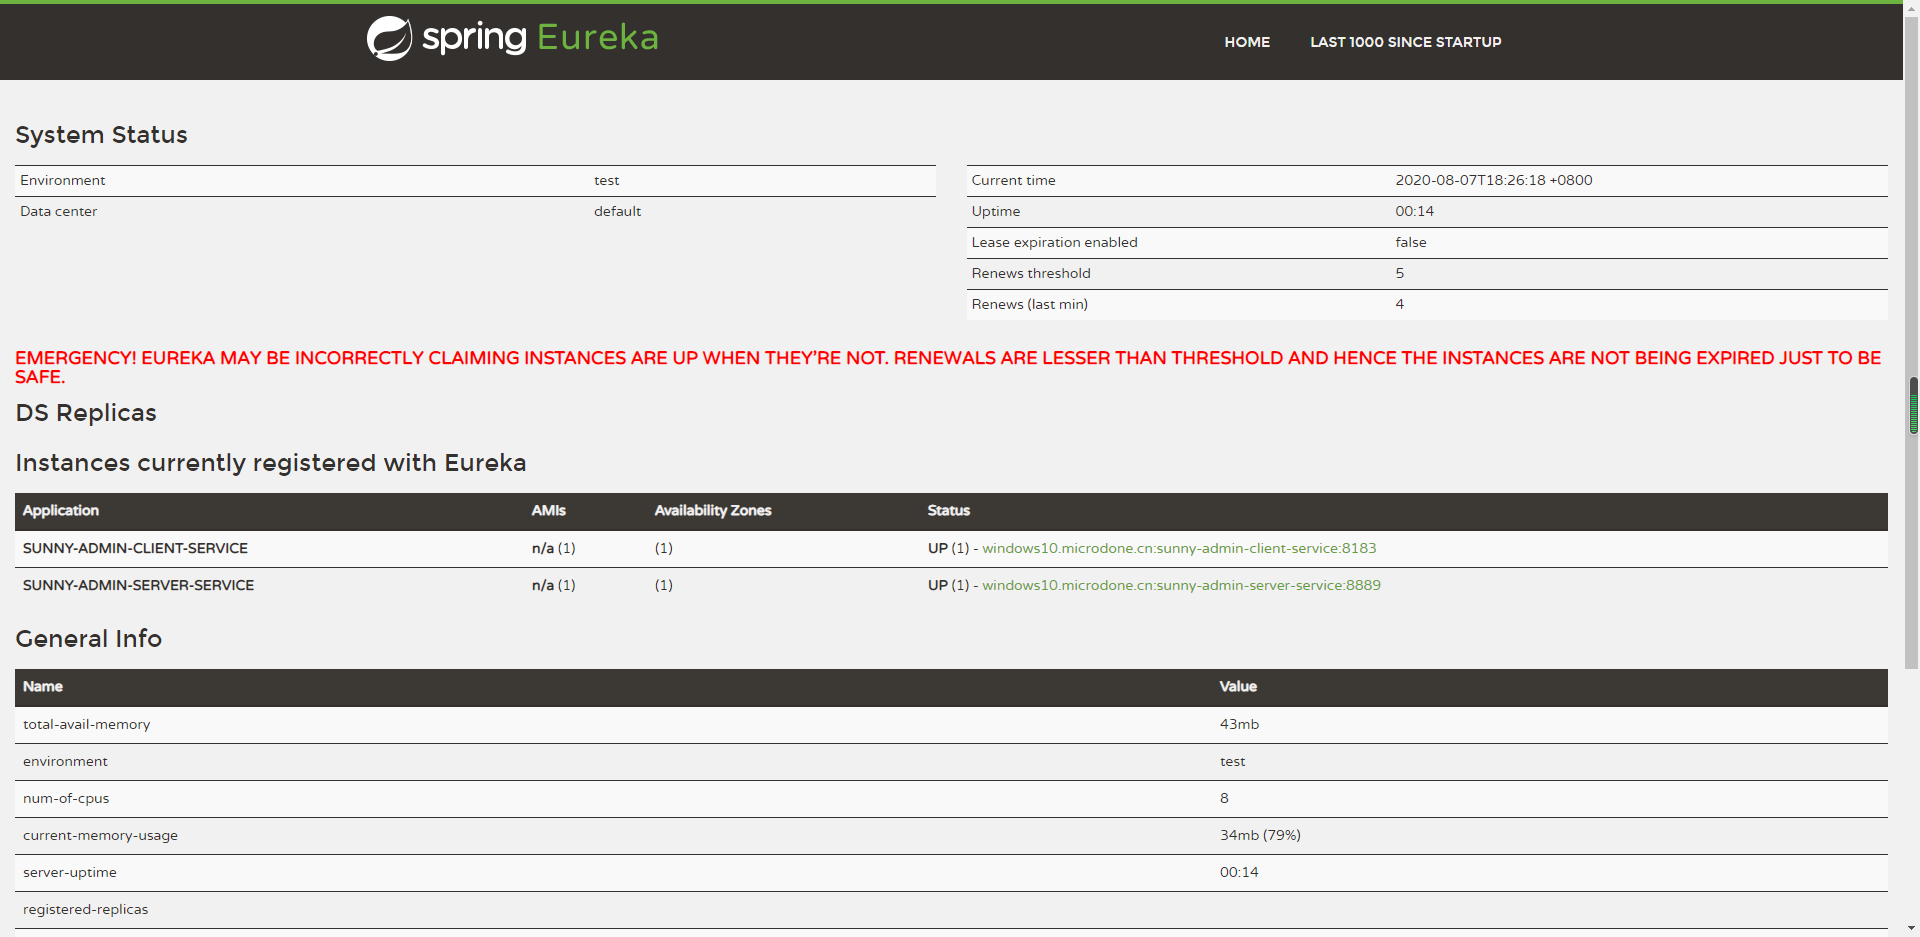
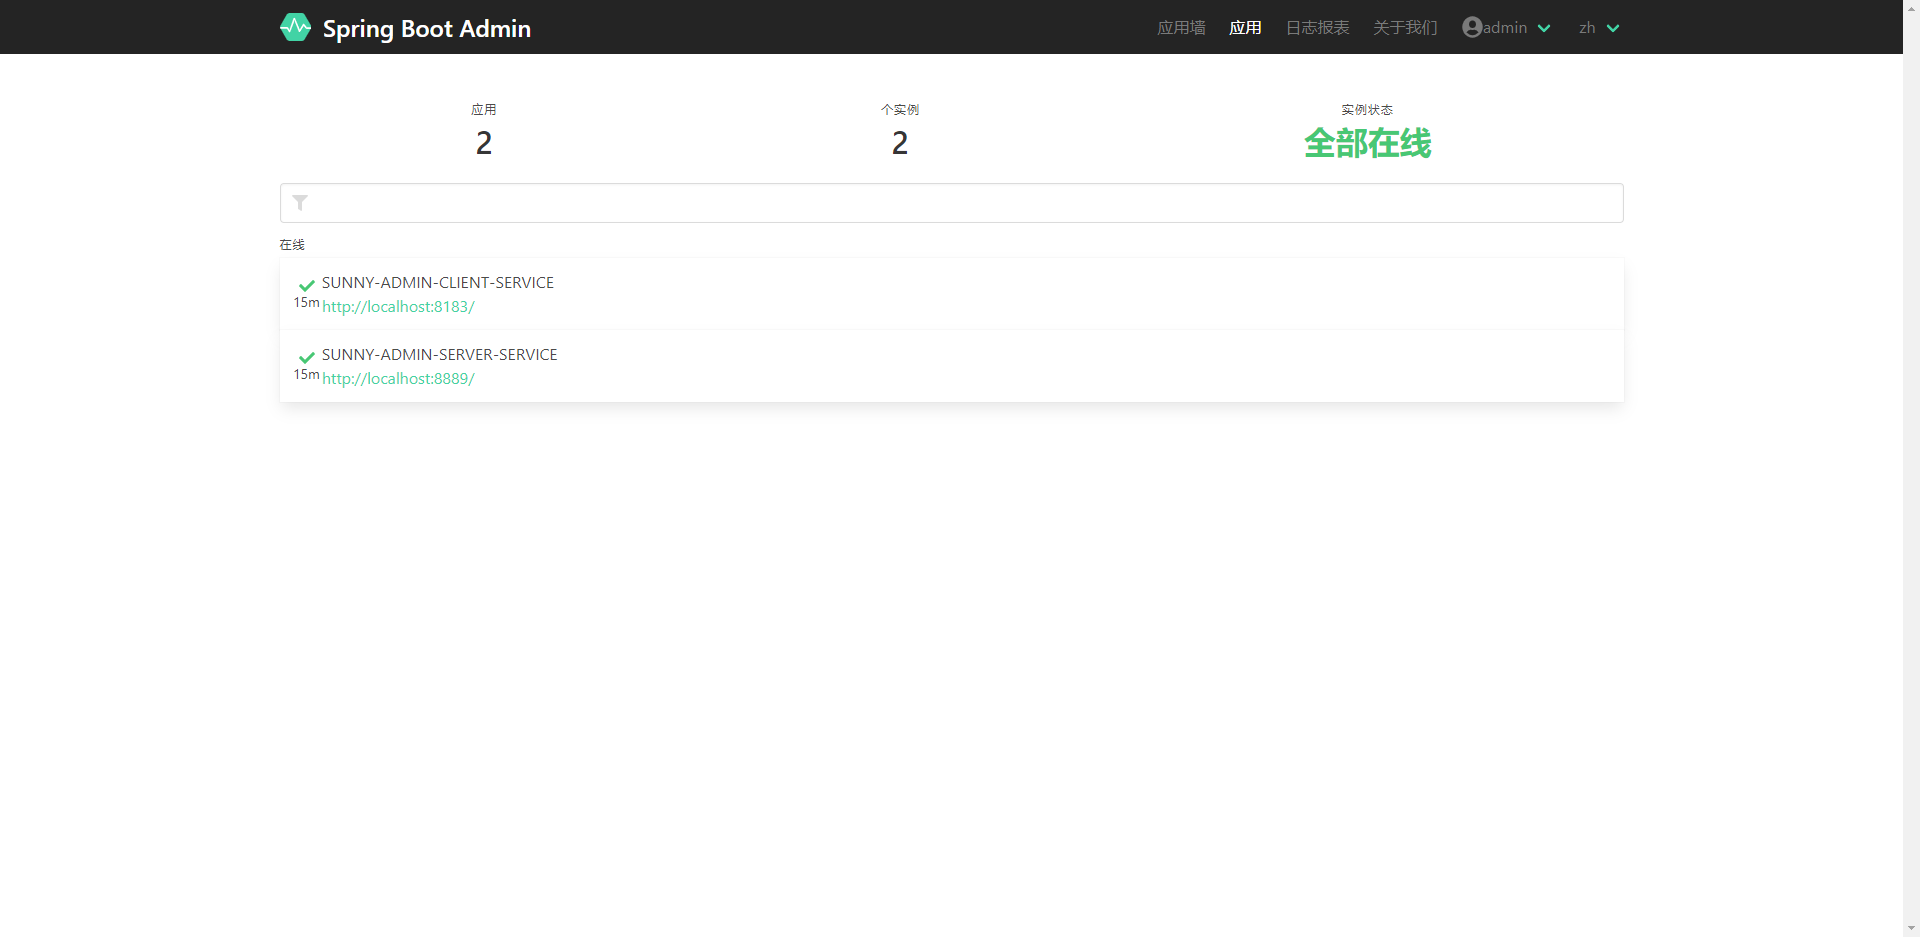
启动三个工程,在浏览器上输入localhost:8889 ,监控平台显示的界面如下:
Spring Boot Admin Server 可以监控的功能很多,使用起来没有难度,下面描述下可以监测的部分内容:
- 应用运行状态,如时间、垃圾回收次数,线程数量,内存使用走势。
- 应用性能监测,通过选择 JVM 或者 Tomcat 参数,查看当前数值。
- 应用环境监测,查看系统环境变量,应用配置参数,自动配置参数。
- 应用 bean 管理,查看 Spring Bean ,并且可以查看是否单例。
- 应用计划任务,查看应用的计划任务列表。
- 应用日志管理,动态更改日志级别,查看日志。
- 应用 JVM 管理,查看当前线程运行情况,dump 内存堆栈信息。
- 应用映射管理,查看应用接口调用方法、返回类型、处理类等信息。
SpringBootAdmin2.0集成eureka+securty认证
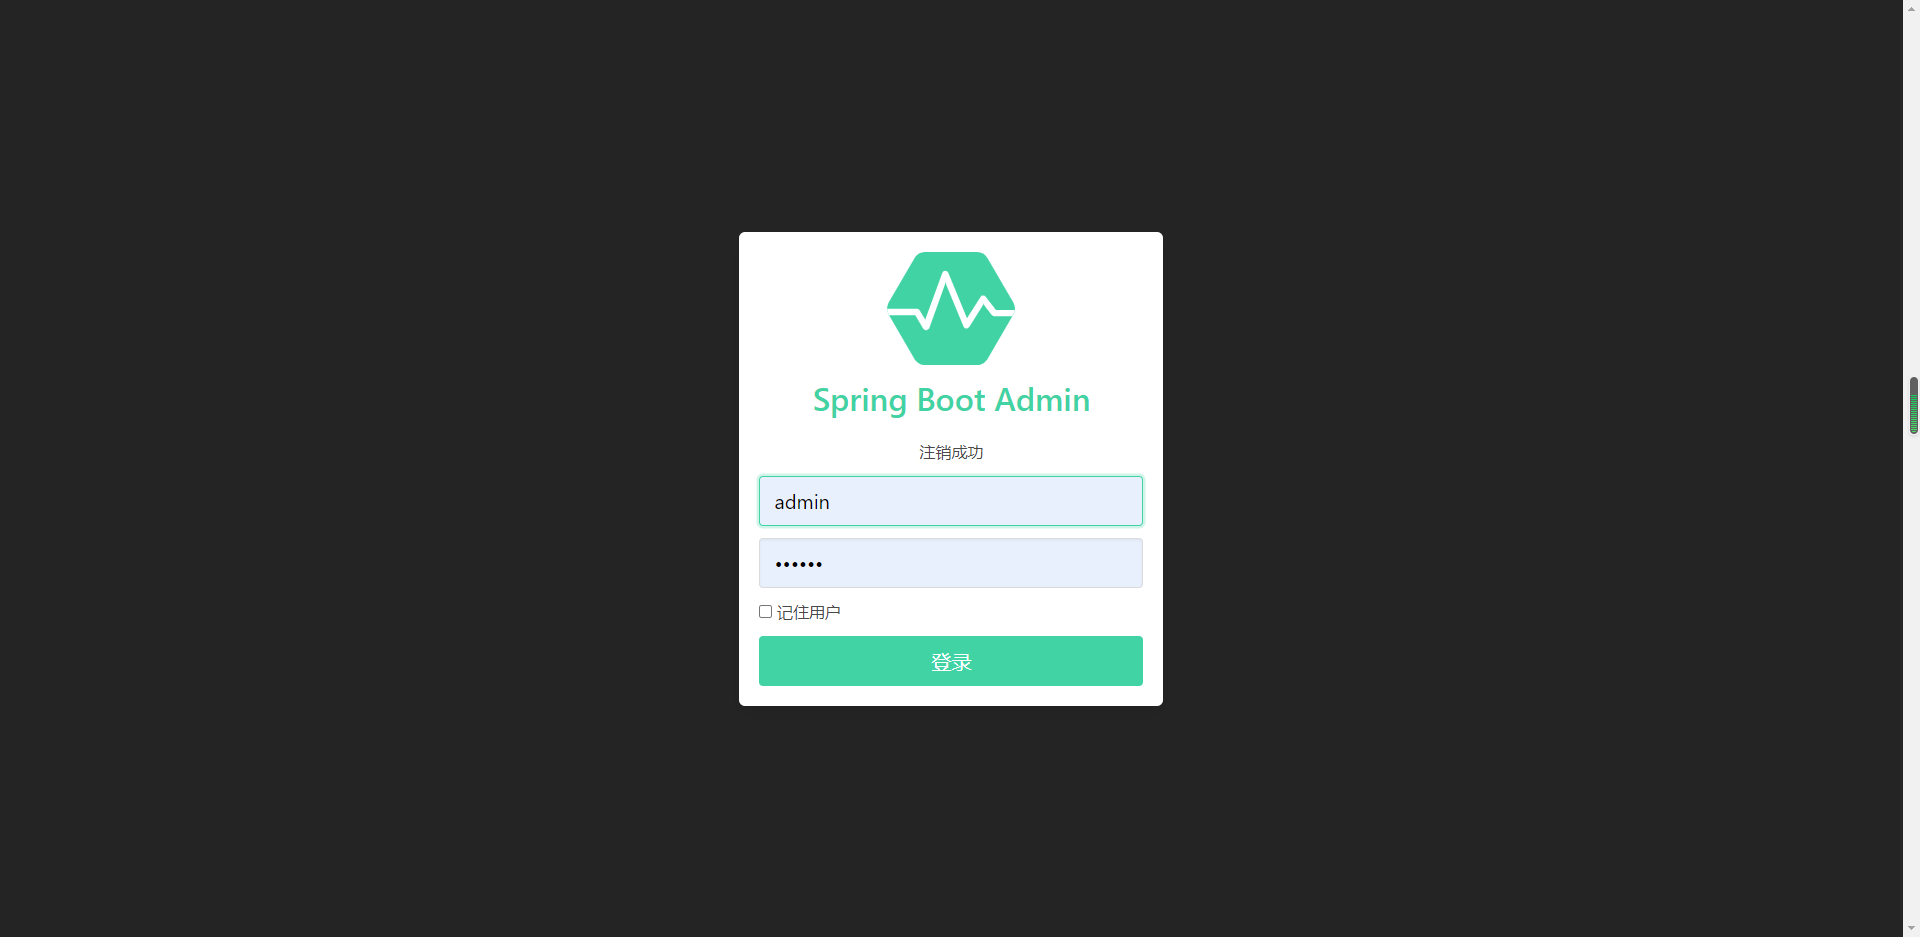
Web应用程序中的身份验证和授权有多种方法,因此Spring Boot Admin不提供默认方法。默认情况下,spring-boot-admin-server-ui提供登录页面和注销按钮。我们结合 Spring Security 实现需要用户名和密码登录的安全认证
创建sunny-eureka-service
这是eureka-server端,注册中心。
pom文件
1<parent>
2    <groupId>org.springframework.boot</groupId>
3    <artifactId>spring-boot-starter-parent</artifactId>
4    <version>2.2.1.RELEASE</version>
5</parent>
6
7<dependencies>
8
9    <dependency>
10        <groupId>org.springframework.boot</groupId>
11        <artifactId>spring-boot-starter-security</artifactId>
12    </dependency>
13    <dependency>
14        <groupId>org.springframework.boot</groupId>
15        <artifactId>spring-boot-starter-actuator</artifactId>
16    </dependency>
17    <dependency>
18        <groupId>org.springframework.cloud</groupId>
19        <artifactId>spring-cloud-starter-netflix-eureka-server</artifactId>
20    </dependency>
21</dependencies>
22
23<dependencyManagement>
24    <dependencies>
25        <dependency>
26            <groupId>org.springframework.cloud</groupId>
27            <artifactId>spring-cloud-dependencies</artifactId>
28            <version>Hoxton.SR1</version>
29            <type>pom</type>
30            <scope>import</scope>
31        </dependency>
32    </dependencies>
33</dependencyManagement>
application.yml
改动点:
1.默认设置security登录账号密码
2.注册中心的地址,需要加上自己设置的账号密码
1#服务端口号
2server:
3  port: 8888
4
5spring:
6  application:
7    name: sunny-eureka-service
8  security:
9    user:
10      name: admin
11      password: 123456
12
13eureka:
14  instance:
15    #为false时,那么注册到Eureka中的Ip地址就是本机的Ip地址
16    prefer-ip-address: false
17    #服务注册中心实例的主机名
18    hostname: localhost
19    health-check-url-path: /actuator/health
20    status-page-url-path: /actuator/info
21    metadata-map:
22      user.name:  ${spring.security.user.name}
23      user.password:  ${spring.security.user.password}
24  client:
25    # 表示是否从 eureka server 中获取注册信息(检索服务),默认是true
26    fetch-registry: false
27    # 表示是否将自己注册到 eureka server(向服务注册中心注册自己),默认是true
28    register-with-eureka: false
29    service-url:
30      #服务注册中心的配置内容,指定服务注册中心的位置,eureka 服务器的地址(注意:地址最后面的 /eureka/ 这个是固定值)
31      #defaultZone: http://${eureka.instance.hostname}:${server.port}/eureka/
32      #2、在原先的基础上添加security用户名和密码(例如:http://username:password@localhost:8000/eureka/)
33      defaultZone: http://${spring.security.user.name}:${spring.security.user.password}@${eureka.instance.hostname}:${server.port}/eureka/
34
35management:
36  endpoints:
37    web:
38      exposure:
39        include: "*"
40  endpoint:
41    health:
42      show-details: ALWAYS #显示详细信息
config类
新版本的spring-cloud2.0中: Spring Security默认开启了CSRF攻击防御
CSRF会将微服务的注册也给过滤了,虽然不会影响注册中心,但是其他客户端是注册不了的,这里配置i就是将csrf给关闭掉
1@EnableWebSecurity
2public class SpringSecurityConfig extends WebSecurityConfigurerAdapter {
3    @Override
4    protected void configure(HttpSecurity http) throws Exception {
5        http.authorizeRequests()
6                .anyRequest().authenticated()
7                .and().httpBasic()
8                .and()
9                .csrf()
10                .disable();
11    }
12}
启动类
1@EnableEurekaServer
2@SpringBootApplication
3public class SpringBootApplicationEurekaServer {
4    public static void main(String[] args) {
5        SpringApplication.run(SpringBootApplicationEurekaServer.class);
6    }
7}
创建sunny-admin-server-service
这是SpringBootAdmin Server端。
pom文件
1<parent>
2    <groupId>org.springframework.boot</groupId>
3    <artifactId>spring-boot-starter-parent</artifactId>
4    <version>2.2.1.RELEASE</version>
5</parent>
6
7<dependencies>
8    <dependency>
9        <groupId>org.springframework.boot</groupId>
10        <artifactId>spring-boot-starter-web</artifactId>
11        <exclusions>
12            <exclusion>
13                <groupId>org.springframework.boot</groupId>
14                <artifactId>spring-boot-starter-tomcat</artifactId>
15            </exclusion>
16        </exclusions>
17    </dependency>
18    <!--如果spring-boot-starter-web 排除掉tomcat,则可以引入jetty-->
19    <dependency>
20        <groupId>org.springframework.boot</groupId>
21        <artifactId>spring-boot-starter-jetty</artifactId>
22    </dependency>
23
24    <!-- admin server -->
25    <dependency>
26        <groupId>de.codecentric</groupId>
27        <artifactId>spring-boot-admin-starter-server</artifactId>
28        <version>2.2.1</version>
29    </dependency>
30
31    <dependency>
32        <groupId>org.springframework.boot</groupId>
33        <artifactId>spring-boot-starter-security</artifactId>
34    </dependency>
35
36    <!-- eureka客户端 -->
37    <dependency>
38        <groupId>org.springframework.cloud</groupId>
39        <artifactId>spring-cloud-starter-netflix-eureka-client</artifactId>
40    </dependency>
41
42    <!-- 健康监控 -->
43    <dependency>
44        <groupId>org.springframework.boot</groupId>
45        <artifactId>spring-boot-starter-actuator</artifactId>
46        <version>2.2.1.RELEASE</version>
47    </dependency>
48
49</dependencies>
50
51<dependencyManagement>
52    <dependencies>
53        <dependency>
54            <groupId>org.springframework.cloud</groupId>
55            <artifactId>spring-cloud-dependencies</artifactId>
56            <version>Hoxton.SR1</version>
57            <type>pom</type>
58            <scope>import</scope>
59        </dependency>
60    </dependencies>
61</dependencyManagement>
application.yml
1server:
2  port: 8889
3
4spring:
5  application:
6    name: sunny-admin-server-service
7  security:
8    user:
9      name: admin
10      password: 123456
11
12eureka:
13  instance:
14    #服务注册中心实例的主机名
15    hostname: localhost
16    health-check-url-path: /actuator/health
17    status-page-url-path: /actuator/info
18    metadata-map:
19      user.name:  ${spring.security.user.name}
20      user.password:  ${spring.security.user.password}
21  client:
22    serviceUrl:
23      defaultZone: http://${spring.security.user.name}:${spring.security.user.password}@${eureka.instance.hostname}:8888/eureka/
24
25management:
26  endpoints:
27    web:
28      exposure:
29        include: "*"
30  endpoint:
31    health:
32      show-details: ALWAYS #显示详细信息
config类
1@Configuration
2public class SecuritySecureConfig extends WebSecurityConfigurerAdapter {
3
4    private final String adminContextPath;
5
6    public SecuritySecureConfig(AdminServerProperties adminServerProperties) {
7        this.adminContextPath = adminServerProperties.getContextPath();
8    }
9
10    @Override
11    protected void configure(HttpSecurity http) throws Exception {
12        // @formatter:off
13        SavedRequestAwareAuthenticationSuccessHandler successHandler = new SavedRequestAwareAuthenticationSuccessHandler();
14        successHandler.setTargetUrlParameter( "redirectTo" );
15
16        http.authorizeRequests()
17                .antMatchers( adminContextPath + "/assets/**" ).permitAll()
18                .antMatchers( adminContextPath + "/login" ).permitAll()
19                .anyRequest().authenticated()
20                .and()
21                .formLogin().loginPage( adminContextPath + "/login" ).successHandler( successHandler ).and()
22                .logout().logoutUrl( adminContextPath + "/logout" ).and()
23                .httpBasic().and()
24                .csrf().disable();
25        // @formatter:on
26    }
27}
启动类
1@EnableAdminServer
2@EnableDiscoveryClient
3@SpringBootApplication
4public class SpringBootApplicationMainAdminServer {
5    public static void main(String[] args) {
6        SpringApplication.run(SpringBootApplicationMainAdminServer.class);
7    }
8}
创建sunny-admin-client-service
这是SpringBootAdmin Server端。
pom文件
1<parent>
2    <groupId>org.springframework.boot</groupId>
3    <artifactId>spring-boot-starter-parent</artifactId>
4    <version>2.2.1.RELEASE</version>
5</parent>
6
7<dependencies>
8    <dependency>
9        <groupId>org.springframework.boot</groupId>
10        <artifactId>spring-boot-starter-actuator</artifactId>
11    </dependency>
12    <dependency>
13        <groupId>org.springframework.cloud</groupId>
14        <artifactId>spring-cloud-starter-netflix-eureka-client</artifactId>
15    </dependency>
16    <dependency>
17        <groupId>org.springframework.boot</groupId>
18        <artifactId>spring-boot-starter-security</artifactId>
19    </dependency>
20    <dependency>
21        <groupId>org.springframework.boot</groupId>
22        <artifactId>spring-boot-starter-web</artifactId>
23    </dependency>
24</dependencies>
25<dependencyManagement>
26    <dependencies>
27        <dependency>
28            <groupId>org.springframework.cloud</groupId>
29            <artifactId>spring-cloud-dependencies</artifactId>
30            <version>Hoxton.SR1</version>
31            <type>pom</type>
32            <scope>import</scope>
33        </dependency>
34    </dependencies>
35</dependencyManagement>
application.yml
1server:
2  port: 8183
3
4spring:
5  application:
6    name: sunny-admin-client-service
7  security:
8    user:
9      name: admin
10      password: 123456
11
12eureka:
13  instance:
14    #服务注册中心实例的主机名
15    hostname: localhost
16    health-check-url-path: /actuator/health
17    status-page-url-path: /actuator/info
18    metadata-map:
19      user.name:  ${spring.security.user.name}
20      user.password:  ${spring.security.user.password}
21  client:
22    serviceUrl:
23      defaultZone: http://${spring.security.user.name}:${spring.security.user.password}@${eureka.instance.hostname}:8888/eureka/
24
25management:
26  endpoints:
27    web:
28      exposure:
29        include: "*"
30  endpoint:
31    health:
32      show-details: ALWAYS #显示详细信息
启动类
1@EnableDiscoveryClient
2@SpringBootApplication
3public class SpringBootApplicationMainAdminClient {
4    public static void main(String[] args) {
5        SpringApplication.run(SpringBootApplicationMainAdminClient.class);
6    }
7}
SpringBootAdmin集成邮箱服务
邮件通知
在 Spring Boot Admin 中 当注册的应用程序状态更改为DOWN、UNKNOWN、OFFLINE 都可以指定触发通知,下面讲解配置邮件通知。
在sunny-admin-server-service工程的pom文件中,加上email的依赖,如下
1<dependency>
2    <groupId>org.springframework.boot</groupId>
3    <artifactId>spring-boot-starter-mail</artifactId>
4</dependency>
在配置文件application.yml文件中,配置收发邮件的配置:
1spring:
2  application:
3    name: sunny-admin-server-service
4  boot:
5    admin:
6      ui:
7        title: sunny-admin-server-service
8      notify:
9        mail:
10          from: xxxx@163.com #发件人
11          to: xxxx@163.com,xxxx@163.com  #逗号分隔的收件人列表
12          cc: xxxx@163.com,xxxx@163.com #逗号分隔的抄送收件人列表
13          enabled: true # 开启邮箱通知
14  mail:
15    host: smtp.163.com
16    username: xxxx@163.com #自己的邮箱
17    password: xxx #授权码
18    properties:
19      mail:
20        smtp:
21          auth: true
22          starttls:
23            enable: true
24            required: true
25    default-encoding: utf-8
配置后,重启sunny-admin-server-service工程,之后若出现注册的客户端的状态从 UP 变为 OFFLINE 或其他状态,服务端就会自动将电子邮件发送到上面配置的收件地址。
注意 : 配置了邮件通知后,会出现 反复通知 service offline / up。这个问题的原因在于 查询应用程序的状态和信息超时,下面给出两种解决方案:
1#方法一:增加超时时间(单位:ms)
2
3spring.boot.admin.monitor.read-timeout=20000
4
5#方法二:关闭闭未使用或不重要的检查点
6
7management.health.db.enabled=false
8management.health.mail.enabled=false
9management.health.redis.enabled=false
10management.health.mongo.enabled=false
自定义通知
可以通过添加实现Notifier接口的Spring Beans来添加您自己的通知程序,最好通过扩展 AbstractEventNotifier或AbstractStatusChangeNotifier。在sunny-admin-server-service工程中编写一个自定义的通知器:
1@Component
2public class CustomNotifier  extends AbstractStatusChangeNotifier {
3    private static final Logger LOGGER = LoggerFactory.getLogger( LoggingNotifier.class);
4
5    public CustomNotifier(InstanceRepository repository) {
6        super(repository);
7    }
8
9    @Override
10    protected Mono<Void> doNotify(InstanceEvent event, Instance instance) {
11        return Mono.fromRunnable(() -> {
12            if (event instanceof InstanceStatusChangedEvent) {
13                LOGGER.info("Instance {} ({}) is {}", instance.getRegistration().getName(), event.getInstance(),
14                        ((InstanceStatusChangedEvent) event).getStatusInfo().getStatus());
15
16                String status = ((InstanceStatusChangedEvent) event).getStatusInfo().getStatus();
17
18                switch (status) {
19                    // 健康检查没通过
20                    case "DOWN":
21                        System.out.println("发送 健康检查没通过 的通知!");
22                        break;
23                    // 服务离线
24                    case "OFFLINE":
25                        System.out.println("发送 服务离线 的通知!");
26                        break;
27                    //服务上线
28                    case "UP":
29                        System.out.println("发送 服务上线 的通知!");
30                        break;
31                    // 服务未知异常
32                    case "UNKNOWN":
33                        System.out.println("发送 服务未知异常 的通知!");
34                        break;
35                    default:
36                        break;
37                }
38
39            } else {
40                LOGGER.info("Instance {} ({}) {}", instance.getRegistration().getName(), event.getInstance(),
41                        event.getType());
42            }
43        });
44    }
45}
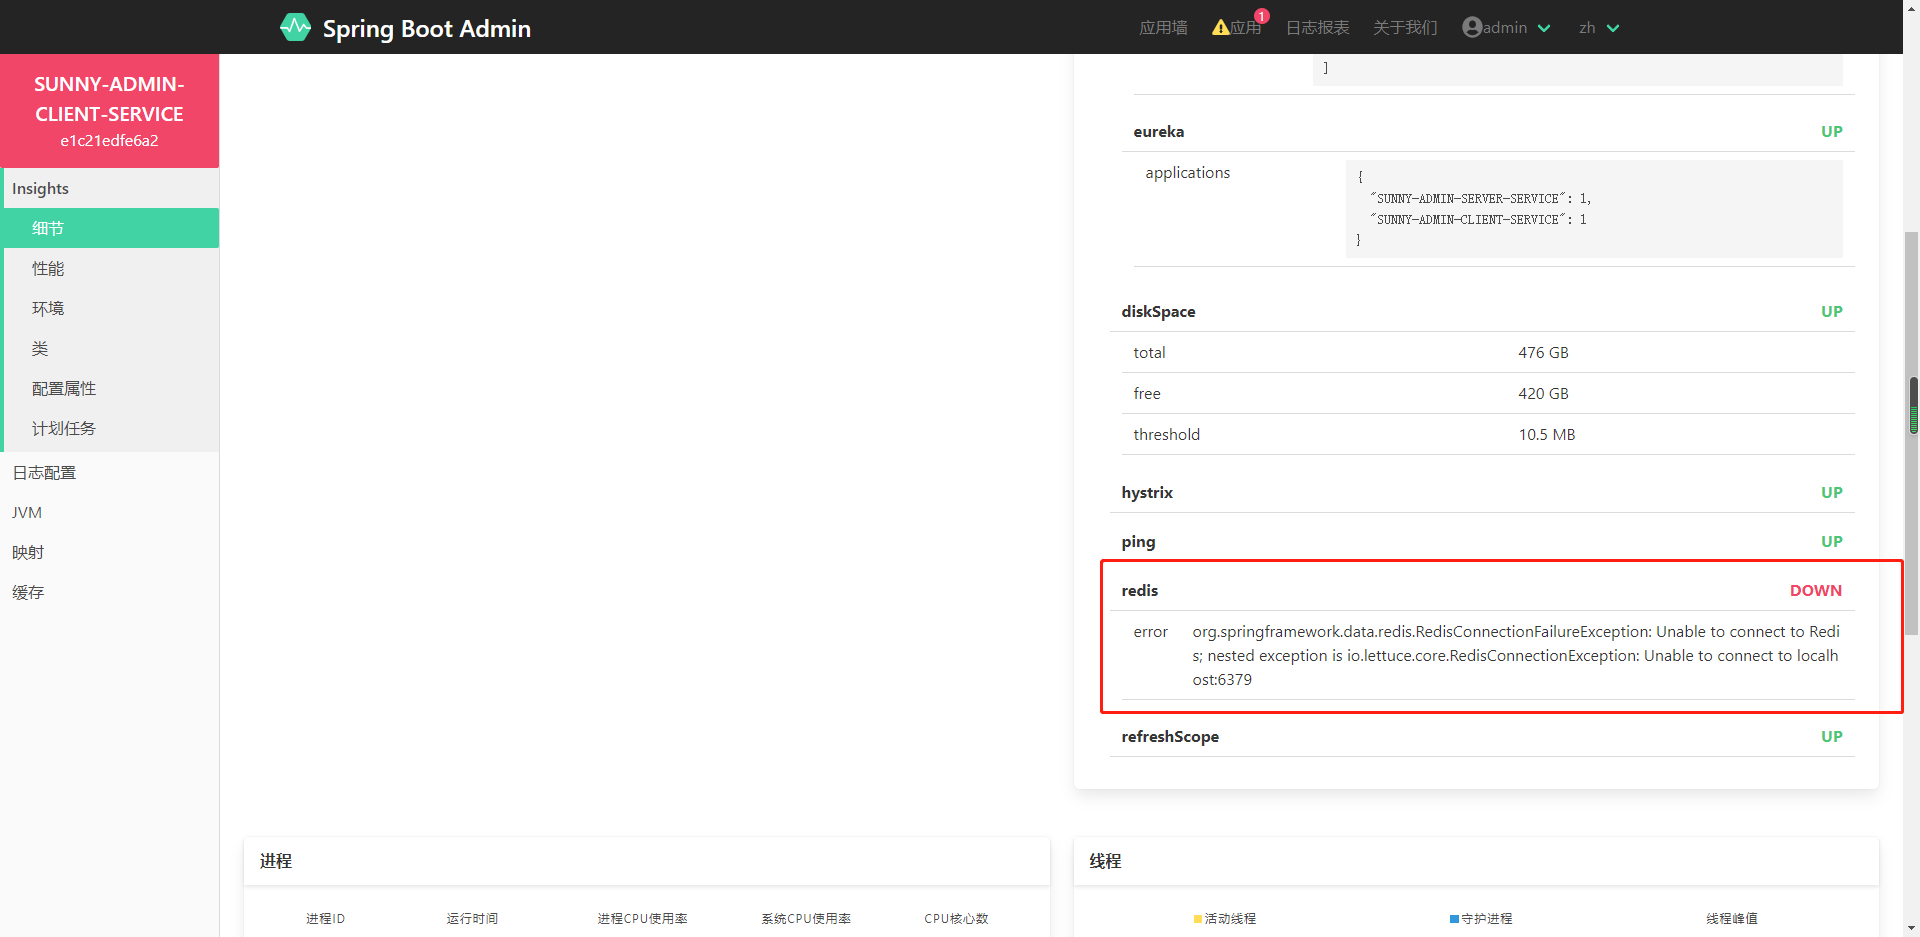
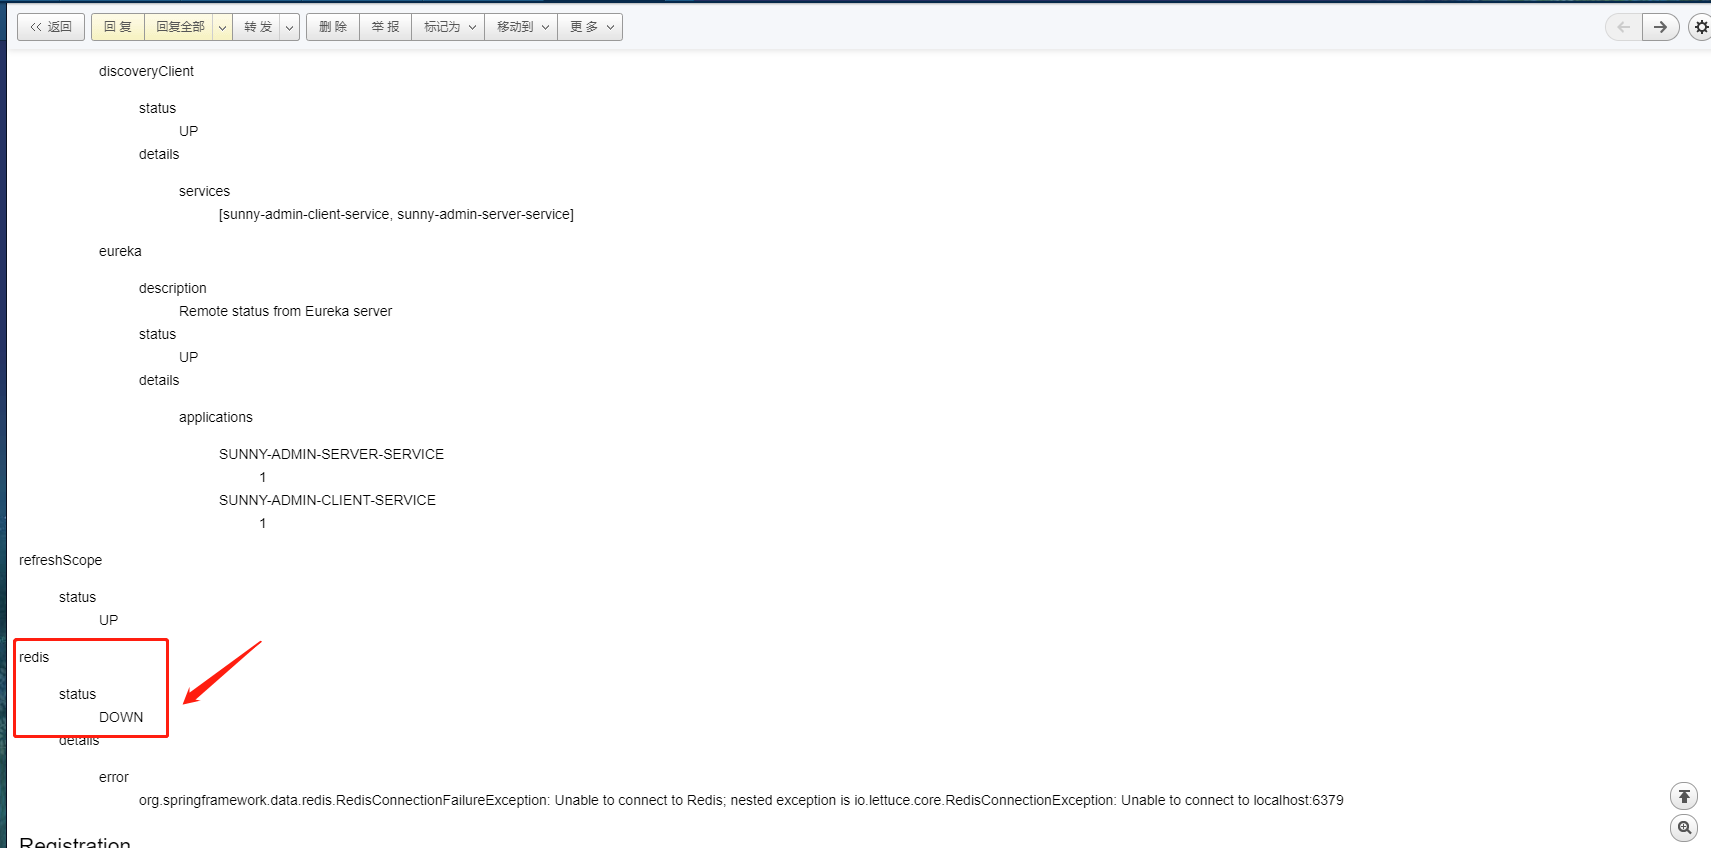
效果图,邮件通知
我的博客即将同步至腾讯云+社区,邀请大家一同入驻:https://cloud.tencent.com/developer/support-plan?invite_code=12tesopfl6i5t