
1.步骤:
1.注意
这个是编译时技术,就是要过程中要记得编译,不然没有出来想要的代码
2.依赖
1.Build.gradle(Project)
全部:
1// Top-level build file where you can add configuration options common to all sub-projects/modules.
2buildscript {
3
4
5    repositories {
6
7
8
9        maven {
10
11    url 'https://maven.aliyun.com/repository/google' }
12
13        maven {
14
15    url 'https://maven.aliyun.com/repository/gradle-plugin' }
16
17        maven {
18
19    url 'https://maven.aliyun.com/repository/public' }
20
21        maven {
22
23    url 'https://maven.aliyun.com/repository/jcenter' }
24        maven {
25
26    url 'https://dl.bintray.com/umsdk/release' }
27        maven {
28
29    url 'https://jitpack.io' }
30        //添加
31        mavenCentral() // add repository
32    }
33    dependencies {
34
35
36        classpath "com.android.tools.build:gradle:4.0.0"
37        //greenDAO数据库
38        classpath 'org.greenrobot:greendao-gradle-plugin:3.3.0' // add plugin
39        // NOTE: Do not place your application dependencies here; they belong
40        // in the individual module build.gradle files
41    }
42}
43
44allprojects {
45
46
47    repositories {
48
49
50        maven {
51
52    url 'https://maven.aliyun.com/repository/google' }
53
54        maven {
55
56    url 'https://maven.aliyun.com/repository/gradle-plugin' }
57
58        maven {
59
60    url 'https://maven.aliyun.com/repository/public' }
61
62        maven {
63
64    url 'https://maven.aliyun.com/repository/jcenter' }
65        maven {
66
67    url 'https://dl.bintray.com/umsdk/release' }
68        maven {
69
70    url 'https://jitpack.io' }
71        mavenCentral()
72    }
73}
74
75task clean(type: Delete) {
76
77
78    delete rootProject.buildDir
79}
关键:
1        //添加
2        mavenCentral() // add repository
3
4
5//greenDAO数据库
6        classpath 'org.greenrobot:greendao-gradle-plugin:3.3.0' // add plugin
2.Build.gradle(APP)
全部:
1apply plugin: 'com.android.application'
2apply plugin: 'org.greenrobot.greendao' // apply plugin
3android {
4
5
6    compileSdkVersion 28
7    buildToolsVersion "28.0.1"
8    compileOptions {
9
10
11        sourceCompatibility 1.8
12        targetCompatibility 1.8
13    }
14    defaultConfig {
15
16
17        applicationId "com.kunminx.examplegreendao"
18        minSdkVersion 16
19        targetSdkVersion 28
20        versionCode 1
21        versionName "1.0"
22
23        testInstrumentationRunner "androidx.test.runner.AndroidJUnitRunner"
24    }
25
26    buildTypes {
27
28
29        release {
30
31
32            minifyEnabled false
33            proguardFiles getDefaultProguardFile('proguard-android-optimize.txt'), 'proguard-rules.pro'
34        }
35    }
36    //数据库
37    greendao{
38
39
40        schemaVersion 1 //数据库版本
41        daoPackage 'com.kunminx.examplegreendao.green_dao'
42        targetGenDir 'src/main/java'
43    }
44}
45dependencies {
46
47
48    implementation fileTree(dir: "libs", include: ["*.jar"])
49    implementation 'androidx.appcompat:appcompat:1.2.0'
50    implementation 'androidx.constraintlayout:constraintlayout:2.0.4'
51    testImplementation 'junit:junit:4.12'
52    androidTestImplementation 'androidx.test.ext:junit:1.1.2'
53    androidTestImplementation 'androidx.test.espresso:espresso-core:3.3.0'
54    implementation 'org.greenrobot:greendao:3.3.0' // add library
55}
关键:
1apply plugin: 'org.greenrobot.greendao' // apply plugin
2
3
4//数据库
5    greendao{
6
7
8        schemaVersion 1 //数据库版本
9        daoPackage 'com.kunminx.examplegreendao.green_dao'//这里是编译时生成类的路径
10        targetGenDir 'src/main/java'
11    }
12
13
14implementation 'org.greenrobot:greendao:3.3.0' // add library
3.写bean类,编译生成我们想要的代码
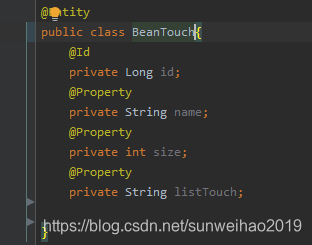
1@Id
2    private Long id;
3    @Property
4    private String name;
5    @Property
6    private int size;
7    @Property
8    private String listTouch;
生成对应的数据库表的样子:
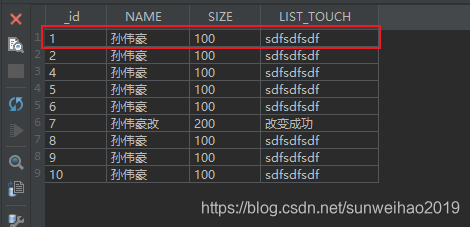
它帮你生成这一坨:
1@Generated(hash = 53676501)
2    public BeanTouch(Long id, String name, int size, String listTouch) {
3
4
5        this.id = id;
6        this.name = name;
7        this.size = size;
8        this.listTouch = listTouch;
9    }
10    @Generated(hash = 1046643494)
11    public BeanTouch() {
12
13
14    }
15    public Long getId() {
16
17
18        return this.id;
19    }
20    public void setId(Long id) {
21
22
23        this.id = id;
24    }
25    public String getName() {
26
27
28        return this.name;
29    }
30    public void setName(String name) {
31
32
33        this.name = name;
34    }
35    public int getSize() {
36
37
38        return this.size;
39    }
40    public void setSize(int size) {
41
42
43        this.size = size;
44    }
45    public String getListTouch() {
46
47
48        return this.listTouch;
49    }
50    public void setListTouch(String listTouch) {
51
52
53        this.listTouch = listTouch;
54    }
还有这三个:
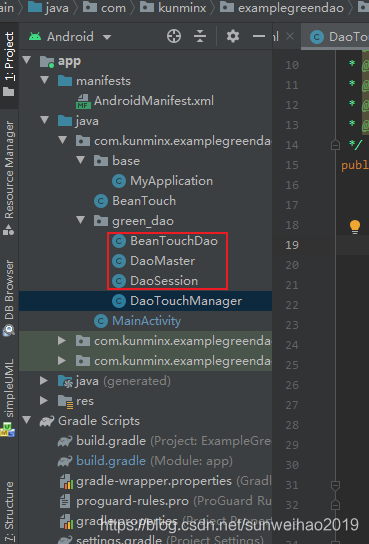
序列化一下:
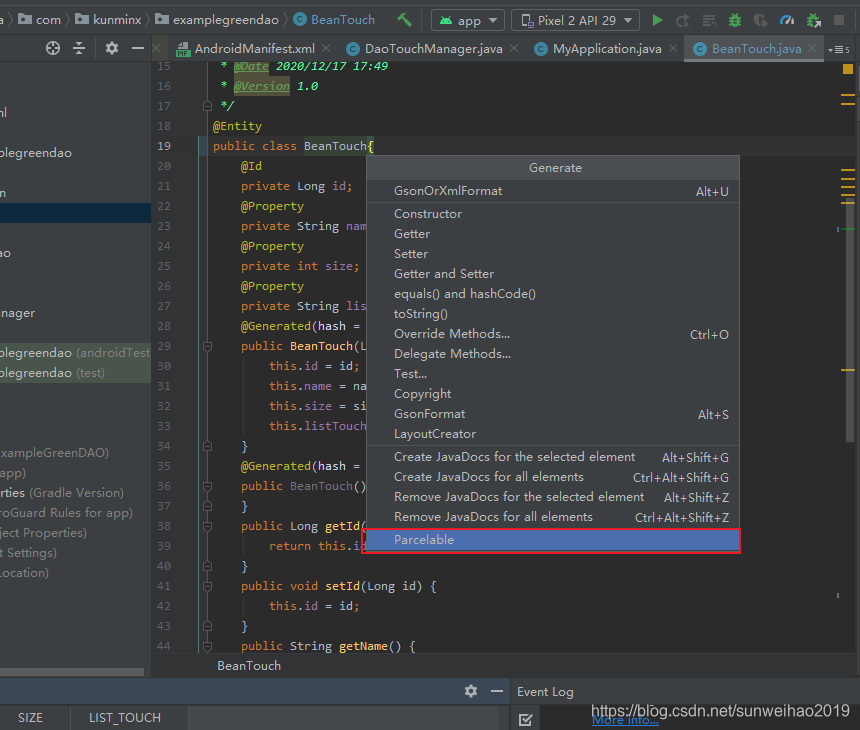
就这样了:
1package com.kunminx.examplegreendao;
2
3import android.os.Parcel;
4import android.os.Parcelable;
5
6import org.greenrobot.greendao.annotation.Entity;
7import org.greenrobot.greendao.annotation.Id;
8import org.greenrobot.greendao.annotation.Property;
9import org.greenrobot.greendao.annotation.Generated;
10
11/**
12 * @ClassName User
13 * @Description TODO
14 * @Author ${孙伟豪}
15 * @Date 2020/12/17 17:49
16 * @Version 1.0
17 */
18@Entity
19public class BeanTouch implements Parcelable {
20
21
22    @Id
23    private Long id;
24    @Property
25    private String name;
26    @Property
27    private int size;
28    @Property
29    private String listTouch;
30    @Generated(hash = 53676501)
31    public BeanTouch(Long id, String name, int size, String listTouch) {
32
33
34        this.id = id;
35        this.name = name;
36        this.size = size;
37        this.listTouch = listTouch;
38    }
39    @Generated(hash = 1046643494)
40    public BeanTouch() {
41
42
43    }
44    public Long getId() {
45
46
47        return this.id;
48    }
49    public void setId(Long id) {
50
51
52        this.id = id;
53    }
54    public String getName() {
55
56
57        return this.name;
58    }
59    public void setName(String name) {
60
61
62        this.name = name;
63    }
64    public int getSize() {
65
66
67        return this.size;
68    }
69    public void setSize(int size) {
70
71
72        this.size = size;
73    }
74    public String getListTouch() {
75
76
77        return this.listTouch;
78    }
79    public void setListTouch(String listTouch) {
80
81
82        this.listTouch = listTouch;
83    }
84
85    @Override
86    public int describeContents() {
87
88
89        return 0;
90    }
91
92    @Override
93    public void writeToParcel(Parcel dest, int flags) {
94
95
96        dest.writeValue(this.id);
97        dest.writeString(this.name);
98        dest.writeInt(this.size);
99        dest.writeString(this.listTouch);
100    }
101
102    protected BeanTouch(Parcel in) {
103
104
105        this.id = (Long) in.readValue(Long.class.getClassLoader());
106        this.name = in.readString();
107        this.size = in.readInt();
108        this.listTouch = in.readString();
109    }
110
111    public static final Parcelable.Creator<BeanTouch> CREATOR = new Parcelable.Creator<BeanTouch>() {
112
113
114        @Override
115        public BeanTouch createFromParcel(Parcel source) {
116
117
118            return new BeanTouch(source);
119        }
120
121        @Override
122        public BeanTouch[] newArray(int size) {
123
124
125            return new BeanTouch[size];
126        }
127    };
128}
129
4.封装使用数据库类
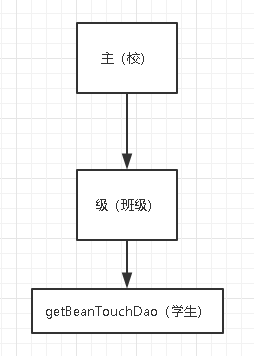
我们的目的是获取BeanTouchDao,它里面就有增删改查了
DaoSession(Dao学级)可以获取BeanTouchDao。
那个可以获取DaoSession呢,就是DaoMaster(主)
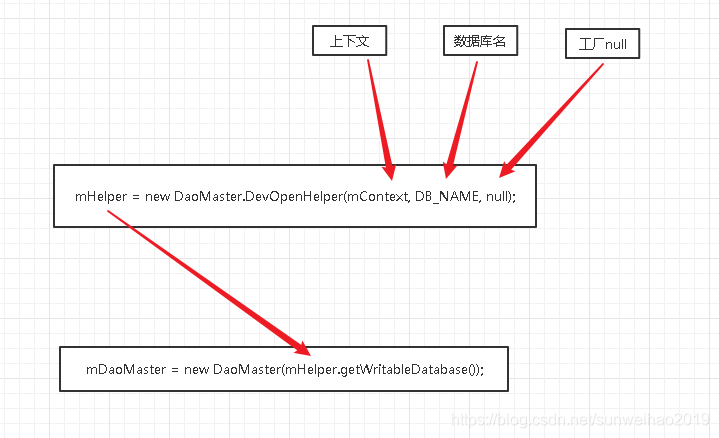
DaoMaster构造方法要传入db属性,是可以写啦,还是怎样,这里一般设置可以写(数据库不能写,那要干啥)
这个属性由DaoMaster的DaoMaster.DevOpenHelper提供,里面可以传递上下文,数据库名,还有工厂(这里不用)
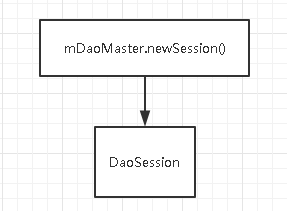
DaoSession的话,用DaoMaster的newSession()来获取(里面都帮你搞好了)
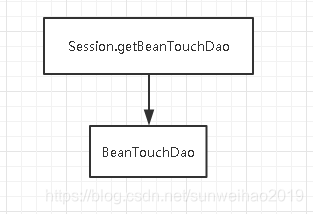
BeanTouchDao用DaoSession的getBeanTouchDao获取即可:
5.初始化参数:这里用全局变量
1public class MyApplication extends Application {
2
3
4    @Override
5    public void onCreate() {
6
7
8        super.onCreate();
9        DaoTouchManager.getInstance().init(this);
10//        DaoTouchManager.getInstance().getDaoMaster();
11    }
12}
13
6.增删改查:
先获取BeanTouch类:
mBeanTouchDao = DaoTouchManager.getInstance().getDaoSession().getBeanTouchDao();
记得要给读写权限哦,不然你会很开心的
增:
1String name="孙伟豪";
2            int size=100;
3            String listTouch="sdfsdfsdf";
4            BeanTouch mBeanTouch=new BeanTouch(null,name,size,listTouch);
5            mBeanTouchDao.insert(mBeanTouch);
删除:
根据_id 来删除
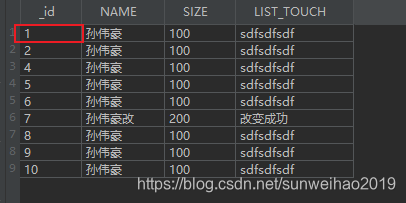
mBeanTouchDao.deleteByKey((long) 3);//根据Long来查询
改:也是根据_id 来改
1BeanTouch beanTouch=new BeanTouch((long) 7,"孙伟豪改",200,"改变成功");
2        mBeanTouchDao.update(beanTouch);
查:
这里是根据第几个来查:
1BeanTouch beanTouch = mBeanTouchDao.queryBuilder().build().list().get(0);
2        Log.d(TAG, "query: beanTouch:"+beanTouch.getName());
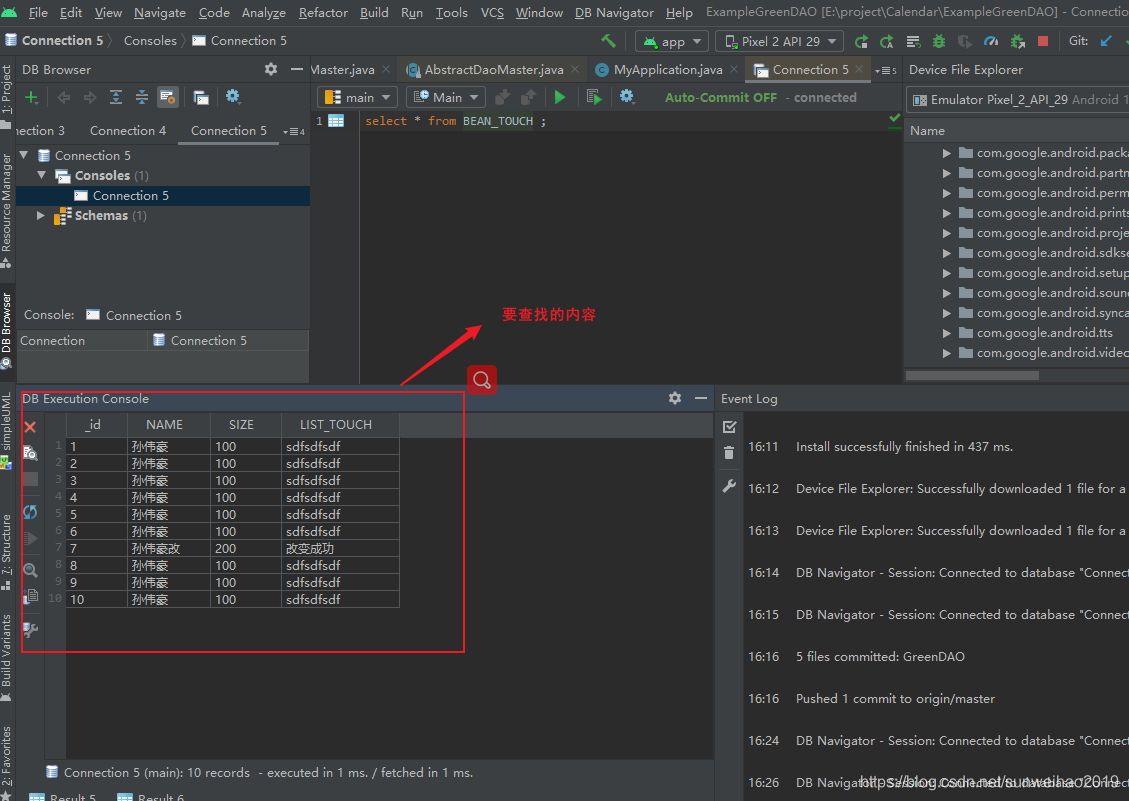
7.查看储存的数据
1.下载数据库插件:
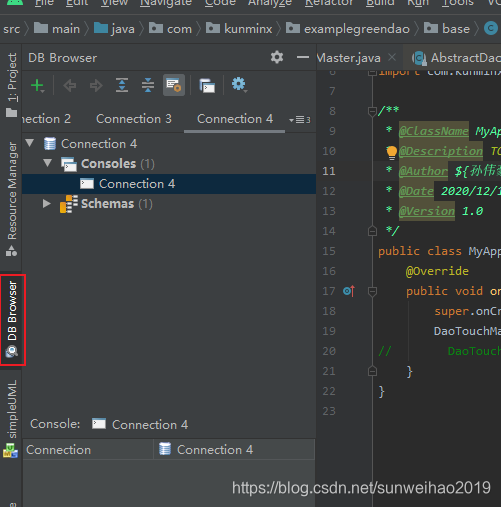
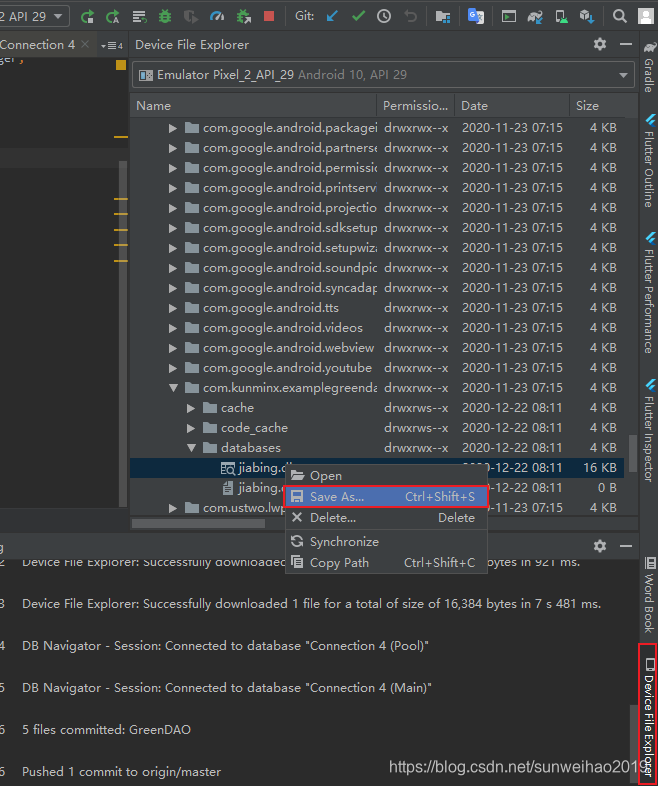
2.保存db数据库(这个路径要记住,等下要打开它)
3.添加
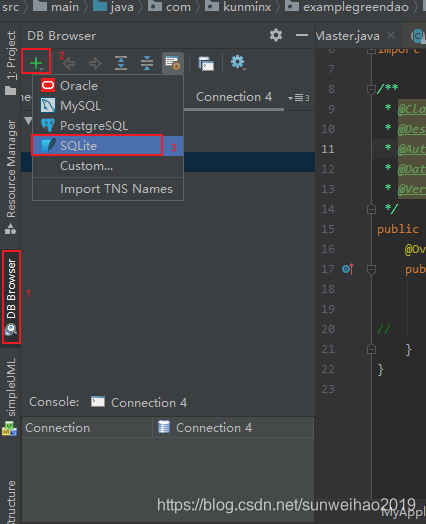
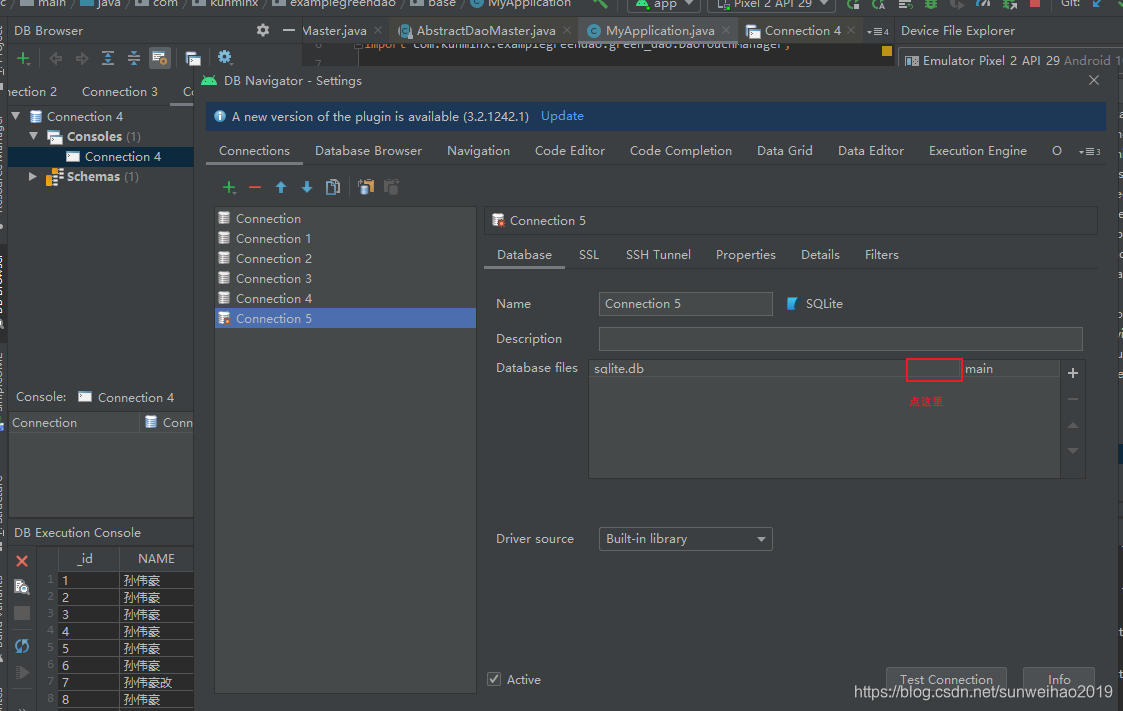
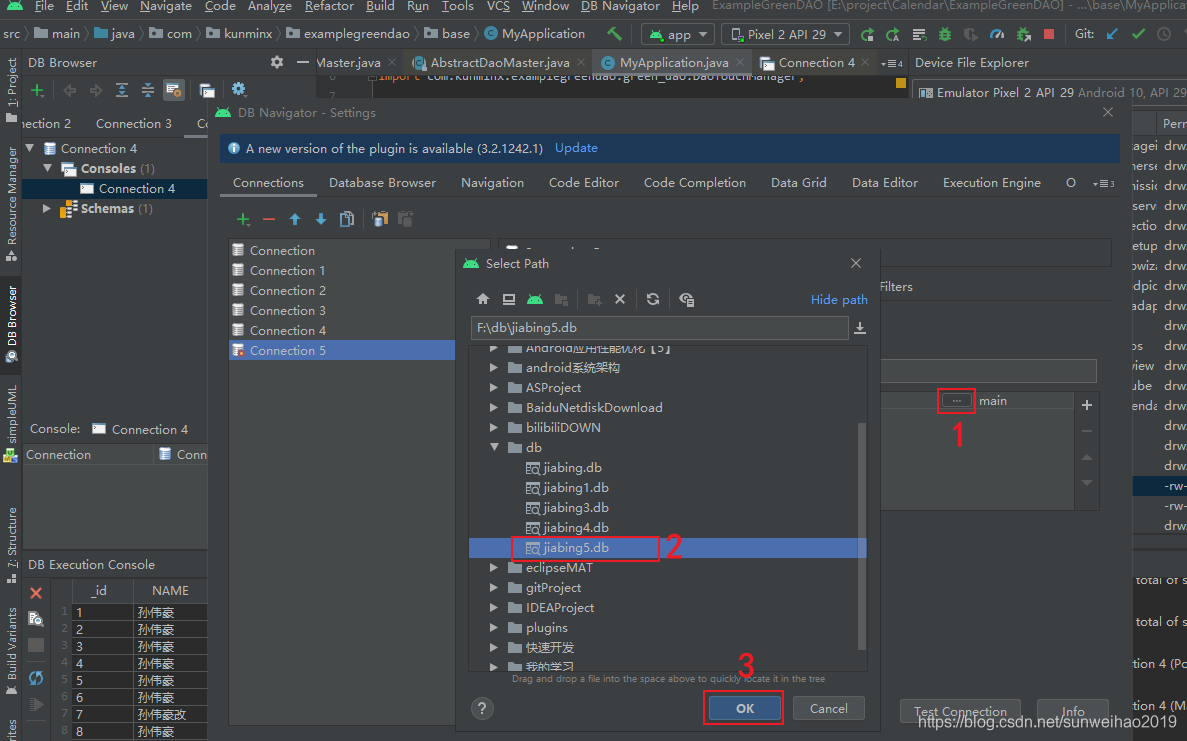
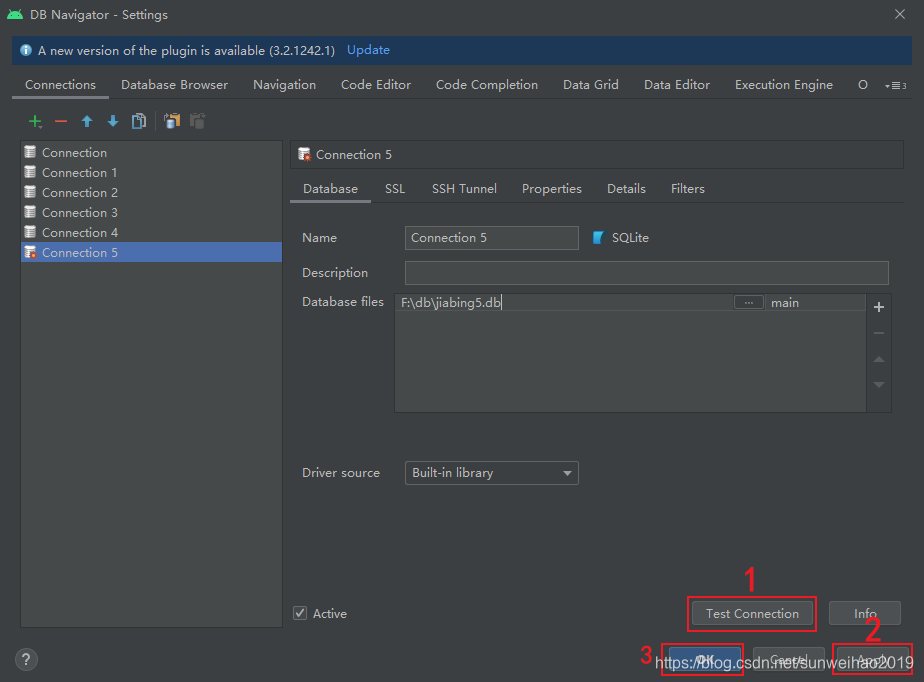
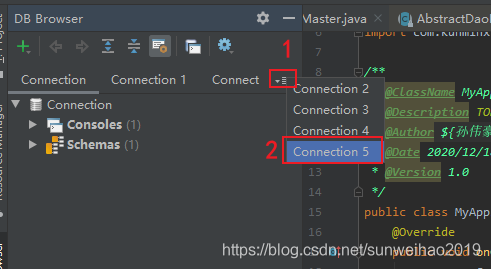
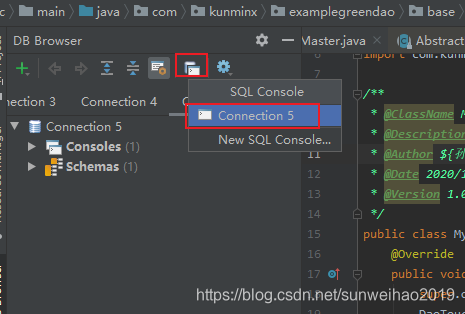
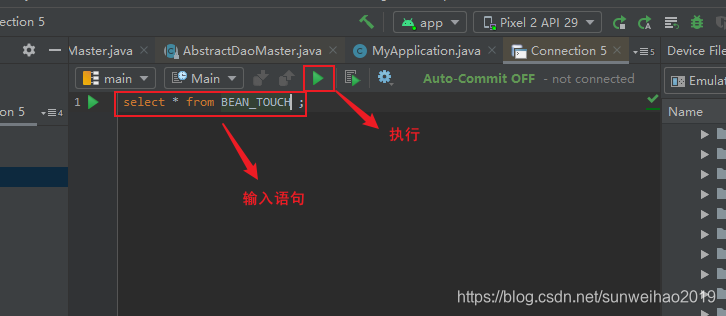
4.查看
2.总结反思:
1.编译错误
这个编译时在编写完Bean类的时候,编译的。其实很多都是这样的,比如AIDL的使用,它也是写完AIDL类后,编译才生成我们想要操作的类