参考博客:https://mritd.me/2018/04/19/set-up-kubernetes-1.10.1-cluster-by-hyperkube/
一、环境
(1)系统环境
IP
操作系统
docker版本
节点用途
172.16.60.95
CentOs7
18.03.0-ce
master-01、etcd1
172.16.60.96
CentOs7
18.03.0-ce
master-02、etcd2
172.16.60.97
CentOs7
18.03.0-ce
node-01、etcd3
172.16.60.98
CentOs7
18.03.0-ce
node-02
172.16.60.99
CentOs7
18.03.0-ce
node-03
环境共5台虚拟机,2个master节点,3个etcd节点,3个node节点,网络采用Calico,集群开启RBAC。
参考博客中有安装包下载,可以使用其中大部分资源
(2)修改hosts(所有设备)
1172.16.60.95 master-01
2172.16.60.96 master-02
3172.16.60.97 node-01
4172.16.60.98 node-02
5172.16.60.99 node-03
(3)开启转发功能(所有设备)
1# cat <<EOF > /etc/sysctl.d/k8s.conf
2
3net.ipv4.ip_forward = 1
4
5net.bridge.bridge-nf-call-ip6tables = 1
6
7net.bridge.bridge-nf-call-iptables = 1
8
9EOF
10
11
12# sysctl -p /etc/sysctl.d/k8s.conf
(4)关闭swap(所有设备)
swapoff -a && sysctl -w vm.swappiness=0
二、搭建ETCD集群
2.1 证书说明
由于 Etcd 和 Kubernetes 全部采用 TLS 通讯,所以先要生成 TLS 证书,证书生成工具采用 cfssl
证书名称
配置文件
用途
etcd-root-ca.pem
etcd-root-ca-csr.json
etcd 根 CA 证书
etcd.pem
etcd-gencert.json、etcd-csr.json
etcd 集群证书
k8s-root-ca.pem
k8s-root-ca-csr.json
k8s 根 CA 证书
kube-proxy.pem
k8s-gencert.json、kube-proxy-csr.json
kube-proxy 使用的证书
admin.pem
k8s-gencert.json、admin-csr.json
kubectl 使用的证书
kubernetes.pem
k8s-gencert.json、kubernetes-csr.json
kube-apiserver 使用的证书
2.2 CFSSL工具安装
首先下载 cfssl,并给予可执行权限,然后扔到 PATH 目录下(etcd安装在master-01上执行)
1wget https://pkg.cfssl.org/R1.2/cfssl_linux-amd64
2wget https://pkg.cfssl.org/R1.2/cfssljson_linux-amd64
3chmod +x cfssl_linux-amd64 cfssljson_linux-amd64
4mv cfssl_linux-amd64 /usr/local/bin/cfssl
5mv cfssljson_linux-amd64 /usr/local/bin/cfssljson
2.3 生成etcd证书
Etcd 证书生成所需配置文件如下:
(1)vim etcd-csr.json
1{
2  "key": {
3    "algo": "rsa",
4    "size": 2048
5  },
6  "names": [
7    {
8      "O": "etcd",
9      "OU": "etcd Security",
10      "L": "Hangzhou",
11      "ST": "Hangzhou",
12      "C": "CN"
13    }
14  ],
15  "CN": "etcd",
16  "hosts": [
17    "127.0.0.1",
18    "localhost",
19    "172.16.60.95",
20    "172.16.60.96",
21    "172.16.60.97"
22  ]
23}
(2)etcd-gencert.json
1{
2  "signing": {
3    "default": {
4        "usages": [
5          "signing",
6          "key encipherment",
7          "server auth",
8          "client auth"
9        ],
10        "expiry": "87600h"
11    }
12  }
13}
(3)etcd-root-ca-csr.json
1{
2  "key": {
3    "algo": "rsa",
4    "size": 4096
5  },
6  "names": [
7    {
8      "O": "etcd",
9      "OU": "etcd Security",
10      "L": "Hangzhou",
11      "ST": "Hangzhou",
12      "C": "CN"
13    }
14  ],
15  "CN": "etcd-root-ca"
16}
(4)生成证书
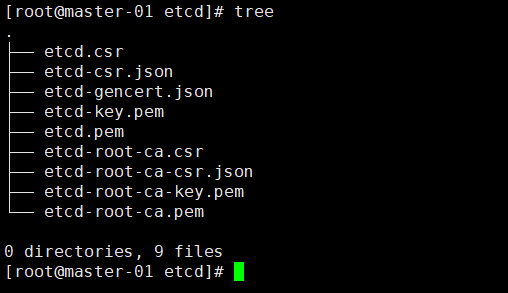
1cfssl gencert --initca=true etcd-root-ca-csr.json | cfssljson --bare etcd-root-ca
2cfssl gencert --ca etcd-root-ca.pem --ca-key etcd-root-ca-key.pem --config etcd-gencert.json etcd-csr.json | cfssljson --bare etcd
2.4 安装Etcd
替换下载包中etcd的conf中证书,并修改etcd.conf中节点信息和ip地址,最后在master-01、master-02、node-01上安装etcd(运行install.sh)
(1)etcd.service
1[Unit]
2Description=Etcd Server
3After=network.target
4After=network-online.target
5Wants=network-online.target
6
7[Service]
8Type=notify
9WorkingDirectory=/var/lib/etcd/
10EnvironmentFile=-/etc/etcd/etcd.conf
11User=etcd
12# set GOMAXPROCS to number of processors
13ExecStart=/bin/bash -c "GOMAXPROCS=$(nproc) /usr/local/bin/etcd --name=\"${ETCD_NAME}\" --data-dir=\"${ETCD_DATA_DIR}\" --listen-client-urls=\"${ETCD_LISTEN_CLIENT_URLS}\""
14Restart=on-failure
15LimitNOFILE=65536
16
17[Install]
18WantedBy=multi-user.target
(2)etcd.conf
1# [member]
2ETCD_NAME=etcd1
3ETCD_DATA_DIR="/var/lib/etcd/etcd1.etcd"
4ETCD_WAL_DIR="/var/lib/etcd/wal"
5ETCD_SNAPSHOT_COUNT="100"
6ETCD_HEARTBEAT_INTERVAL="100"
7ETCD_ELECTION_TIMEOUT="1000"
8ETCD_LISTEN_PEER_URLS="https://172.16.60.95:2380"
9ETCD_LISTEN_CLIENT_URLS="https://172.16.60.95:2379,http://127.0.0.1:2379"
10ETCD_MAX_SNAPSHOTS="5"
11ETCD_MAX_WALS="5"
12#ETCD_CORS=""
13# [cluster]
14ETCD_INITIAL_ADVERTISE_PEER_URLS="https://172.16.60.95:2380"
15# if you use different ETCD_NAME (e.g. test), set ETCD_INITIAL_CLUSTER value for this name, i.e. "test=http://..."
16ETCD_INITIAL_CLUSTER="etcd1=https://172.16.60.95:2380,etcd2=https://172.16.60.96:2380,etcd3=https://172.16.60.97:2380"
17ETCD_INITIAL_CLUSTER_STATE="new"
18ETCD_INITIAL_CLUSTER_TOKEN="etcd-cluster"
19ETCD_ADVERTISE_CLIENT_URLS="https://172.16.60.95:2379"
20#ETCD_DISCOVERY=""
21#ETCD_DISCOVERY_SRV=""
22#ETCD_DISCOVERY_FALLBACK="proxy"
23#ETCD_DISCOVERY_PROXY=""
24#ETCD_STRICT_RECONFIG_CHECK="false"
25#ETCD_AUTO_COMPACTION_RETENTION="0"
26# [proxy]
27#ETCD_PROXY="off"
28#ETCD_PROXY_FAILURE_WAIT="5000"
29#ETCD_PROXY_REFRESH_INTERVAL="30000"
30#ETCD_PROXY_DIAL_TIMEOUT="1000"
31#ETCD_PROXY_WRITE_TIMEOUT="5000"
32#ETCD_PROXY_READ_TIMEOUT="0"
33# [security]
34ETCD_CERT_FILE="/etc/etcd/ssl/etcd.pem"
35ETCD_KEY_FILE="/etc/etcd/ssl/etcd-key.pem"
36ETCD_CLIENT_CERT_AUTH="true"
37ETCD_TRUSTED_CA_FILE="/etc/etcd/ssl/etcd-root-ca.pem"
38ETCD_AUTO_TLS="true"
39ETCD_PEER_CERT_FILE="/etc/etcd/ssl/etcd.pem"
40ETCD_PEER_KEY_FILE="/etc/etcd/ssl/etcd-key.pem"
41ETCD_PEER_CLIENT_CERT_AUTH="true"
42ETCD_PEER_TRUSTED_CA_FILE="/etc/etcd/ssl/etcd-root-ca.pem"
43ETCD_PEER_AUTO_TLS="true"
44# [logging]
45#ETCD_DEBUG="false"
46# examples for -log-package-levels etcdserver=WARNING,security=DEBUG
47#ETCD_LOG_PACKAGE_LEVELS=""
(3)install.sh
1#!/bin/bash
2
3set -e
4
5ETCD_VERSION="3.2.18"
6
7function download(){
8    if [ ! -f "etcd-v${ETCD_VERSION}-linux-amd64.tar.gz" ]; then
9        wget https://github.com/coreos/etcd/releases/download/v${ETCD_VERSION}/etcd-v${ETCD_VERSION}-linux-amd64.tar.gz
10        tar -zxvf etcd-v${ETCD_VERSION}-linux-amd64.tar.gz
11    fi
12}
13
14function preinstall(){
15    getent group etcd >/dev/null || groupadd -r etcd
16    getent passwd etcd >/dev/null || useradd -r -g etcd -d /var/lib/etcd -s /sbin/nologin -c "etcd user" etcd
17}
18
19function install(){
20    echo -e "\033[32mINFO: Copy etcd...\033[0m"
21    tar -zxvf etcd-v${ETCD_VERSION}-linux-amd64.tar.gz
22    cp etcd-v${ETCD_VERSION}-linux-amd64/etcd* /usr/local/bin
23    rm -rf etcd-v${ETCD_VERSION}-linux-amd64
24
25    echo -e "\033[32mINFO: Copy etcd config...\033[0m"
26    cp -r conf /etc/etcd
27    chown -R etcd:etcd /etc/etcd
28    chmod -R 755 /etc/etcd/ssl
29
30    echo -e "\033[32mINFO: Copy etcd systemd config...\033[0m"
31    cp systemd/*.service /lib/systemd/system
32    systemctl daemon-reload
33}
34
35function postinstall(){
36    if [ ! -d "/var/lib/etcd" ]; then
37        mkdir /var/lib/etcd
38        chown -R etcd:etcd /var/lib/etcd
39    fi
40}
41
42
43download
44preinstall
45install
46postinstall
整体目录结构如下
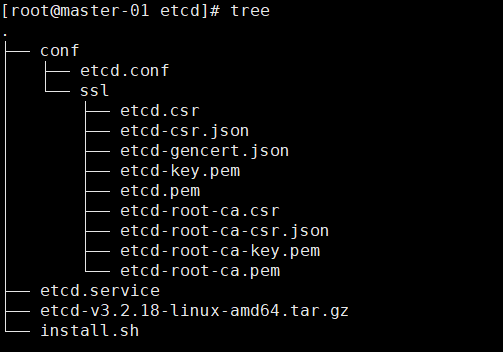
直接运行install.sh就安装好了
2.5 启动和验证
集群 etcd 要 3 个一起启动,单个启动查看状态等半天也没有反应
1systemctl daemon-reload
2
3systemctl start etcd
4
5systemctl enable etcd
验证etcd集群
1export ETCDCTL_API=3
2etcdctl --cacert=/etc/etcd/ssl/etcd-root-ca.pem --cert=/etc/etcd/ssl/etcd.pem --key=/etc/etcd/ssl/etcd-key.pem --endpoints=https://172.16.60.95:2379,https://172.16.60.96:2379,https://172.16.60.97:2379 endpoint health


三、安装Kubernetes集群组件
大部分还是使用参考博客中的安装方法,但是证书要自己生成
3.1 生成Kubernetes证书
由于 kubelet 和 kube-proxy 用到的 kubeconfig 配置文件需要借助 kubectl 来生成,所以需要先安装一下 kubectl(下载包中已经存在)
1wget https://storage.googleapis.com/kubernetes-release/release/v1.10.1/bin/linux/amd64/hyperkube -O hyperkube_1.10.1
2chmod +x hyperkube_1.10.1
3cp hyperkube_1.10.1 /usr/local/bin/hyperkube
4ln -s /usr/local/bin/hyperkube /usr/local/bin/kubectl
(1)admin-csr.json
1{
2  "CN": "admin",
3  "hosts": [],
4  "key": {
5    "algo": "rsa",
6    "size": 2048
7  },
8  "names": [
9    {
10      "C": "CN",
11      "ST": "Hangzhou",
12      "L": "Hangzhou",
13      "O": "system:masters",
14      "OU": "System"
15    }
16  ]
17}
(2)k8s-gencert.json
1{
2  "signing": {
3    "default": {
4      "expiry": "87600h"
5    },
6    "profiles": {
7      "kubernetes": {
8        "usages": [
9            "signing",
10            "key encipherment",
11            "server auth",
12            "client auth"
13        ],
14        "expiry": "87600h"
15      }
16    }
17  }
18}
(3)k8s-root-ca-csr.json
1{
2  "CN": "kubernetes",
3  "key": {
4    "algo": "rsa",
5    "size": 4096
6  },
7  "names": [
8    {
9      "C": "CN",
10      "ST": "Hangzhou",
11      "L": "Hangzhou",
12      "O": "k8s",
13      "OU": "System"
14    }
15  ]
16}
(4)kube-apiserver-csr.json
1{
2    "CN": "kubernetes",
3    "hosts": [
4        "127.0.0.1",    "10.254.0.1",
5    "172.16.60.95",
6    "172.16.60.96",
7    "172.16.60.97",
8    "172.16.60.98",
9    "172.16.60.99",
10        "localhost",
11        "kubernetes",
12        "kubernetes.default",
13        "kubernetes.default.svc",
14        "kubernetes.default.svc.cluster",
15        "kubernetes.default.svc.cluster.local"
16    ],
17    "key": {
18        "algo": "rsa",
19        "size": 2048
20    },
21    "names": [
22        {
23            "C": "CN",
24            "ST": "HangZhou",
25            "L": "HangZhou",
26            "O": "k8s",
27            "OU": "System"
28        }
29    ]
30}
(5)kube-proxy-csr.json
1{
2  "CN": "system:kube-proxy",
3  "hosts": [],
4  "key": {
5    "algo": "rsa",
6    "size": 2048
7  },
8  "names": [
9    {
10      "C": "CN",
11      "ST": "Hangzhou",
12      "L": "Hangzhou",
13      "O": "k8s",
14      "OU": "System"
15    }
16  ]
17}
生成证书和配置
1# 生成 CA
2cfssl gencert --initca=true k8s-root-ca-csr.json | cfssljson --bare k8s-root-ca
3
4# 依次生成其他组件证书
5for targetName in kube-apiserver admin kube-proxy; do
6    cfssl gencert --ca k8s-root-ca.pem --ca-key k8s-root-ca-key.pem --config k8s-gencert.json --profile kubernetes $targetName-csr.json | cfssljson --bare $targetName
7done
8
9# 地址默认为 127.0.0.1:6443
10# 如果在 master 上启用 kubelet 请在生成后的 kubeconfig 中
11# 修改该地址为 当前MASTER_IP:6443
12KUBE_APISERVER="https://127.0.0.1:6443"
13BOOTSTRAP_TOKEN=$(head -c 16 /dev/urandom | od -An -t x | tr -d ' ')
14echo "Tokne: ${BOOTSTRAP_TOKEN}"
15
16# 不要质疑 system:bootstrappers 用户组是否写错了,有疑问请参考官方文档
17# https://kubernetes.io/docs/admin/kubelet-tls-bootstrapping/
18cat > token.csv <<EOF
19${BOOTSTRAP_TOKEN},kubelet-bootstrap,10001,"system:bootstrappers"
20EOF
21
22echo "Create kubelet bootstrapping kubeconfig..."
23# 设置集群参数
24kubectl config set-cluster kubernetes \
25  --certificate-authority=k8s-root-ca.pem \
26  --embed-certs=true \
27  --server=${KUBE_APISERVER} \
28  --kubeconfig=bootstrap.kubeconfig
29# 设置客户端认证参数
30kubectl config set-credentials kubelet-bootstrap \
31  --token=${BOOTSTRAP_TOKEN} \
32  --kubeconfig=bootstrap.kubeconfig
33# 设置上下文参数
34kubectl config set-context default \
35  --cluster=kubernetes \
36  --user=kubelet-bootstrap \
37  --kubeconfig=bootstrap.kubeconfig
38# 设置默认上下文
39kubectl config use-context default --kubeconfig=bootstrap.kubeconfig
40
41echo "Create kube-proxy kubeconfig..."
42# 设置集群参数
43kubectl config set-cluster kubernetes \
44  --certificate-authority=k8s-root-ca.pem \
45  --embed-certs=true \
46  --server=${KUBE_APISERVER} \
47  --kubeconfig=kube-proxy.kubeconfig
48# 设置客户端认证参数
49kubectl config set-credentials kube-proxy \
50  --client-certificate=kube-proxy.pem \
51  --client-key=kube-proxy-key.pem \
52  --embed-certs=true \
53  --kubeconfig=kube-proxy.kubeconfig
54# 设置上下文参数
55kubectl config set-context default \
56  --cluster=kubernetes \
57  --user=kube-proxy \
58  --kubeconfig=kube-proxy.kubeconfig
59# 设置默认上下文
60kubectl config use-context default --kubeconfig=kube-proxy.kubeconfig
61
62# 创建高级审计配置
63cat >> audit-policy.yaml <<EOF
64# Log all requests at the Metadata level.
65apiVersion: audit.k8s.io/v1beta1
66kind: Policy
67rules:
68- level: Metadata
69EOF
生成的证书
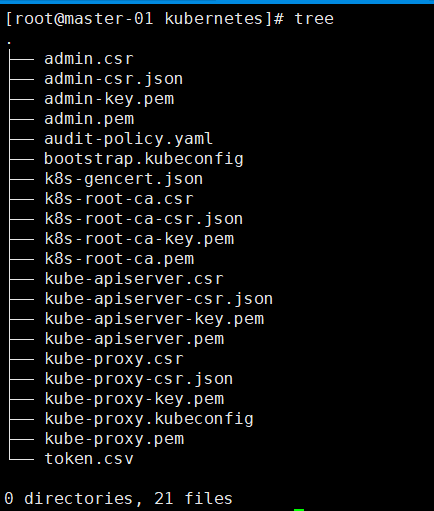
替换下载包中的证书
1# 路径
2$path//k8s/conf
3
4# path是解压后的路径
3.2 准备systemd配置
(1)kube-apiserver.service
1[Unit]
2Description=Kubernetes API Server
3Documentation=https://github.com/GoogleCloudPlatform/kubernetes
4After=network.target
5After=etcd.service
6
7[Service]
8EnvironmentFile=-/etc/kubernetes/config
9EnvironmentFile=-/etc/kubernetes/apiserver
10User=kube
11ExecStart=/usr/local/bin/hyperkube apiserver \
12            $KUBE_LOGTOSTDERR \
13            $KUBE_LOG_LEVEL \
14            $KUBE_ETCD_SERVERS \
15            $KUBE_API_ADDRESS \
16            $KUBE_API_PORT \
17            $KUBELET_PORT \
18            $KUBE_ALLOW_PRIV \
19            $KUBE_SERVICE_ADDRESSES \
20            $KUBE_ADMISSION_CONTROL \
21            $KUBE_API_ARGS
22Restart=on-failure
23Type=notify
24LimitNOFILE=65536
25
26[Install]
27WantedBy=multi-user.target
(2)kube-controller-manager.service
1[Unit]
2Description=Kubernetes Controller Manager
3Documentation=https://github.com/GoogleCloudPlatform/kubernetes
4
5[Service]
6EnvironmentFile=-/etc/kubernetes/config
7EnvironmentFile=-/etc/kubernetes/controller-manager
8User=kube
9ExecStart=/usr/local/bin/hyperkube controller-manager \
10            $KUBE_LOGTOSTDERR \
11            $KUBE_LOG_LEVEL \
12            $KUBE_MASTER \
13            $KUBE_CONTROLLER_MANAGER_ARGS
14Restart=on-failure
15LimitNOFILE=65536
16
17[Install]
18WantedBy=multi-user.target
(3)kubelet.service
1[Unit]
2Description=Kubernetes Kubelet Server
3Documentation=https://github.com/GoogleCloudPlatform/kubernetes
4After=docker.service
5Requires=docker.service
6
7[Service]
8WorkingDirectory=/var/lib/kubelet
9EnvironmentFile=-/etc/kubernetes/config
10EnvironmentFile=-/etc/kubernetes/kubelet
11ExecStart=/usr/local/bin/hyperkube kubelet \
12            $KUBE_LOGTOSTDERR \
13            $KUBE_LOG_LEVEL \
14            $KUBELET_API_SERVER \
15            $KUBELET_ADDRESS \
16            $KUBELET_PORT \
17            $KUBELET_HOSTNAME \
18            $KUBE_ALLOW_PRIV \
19            $KUBELET_ARGS
20Restart=on-failure
21KillMode=process
22
23[Install]
24WantedBy=multi-user.target
(4)kube-proxy.service
1[Unit]
2Description=Kubernetes Kube-Proxy Server
3Documentation=https://github.com/GoogleCloudPlatform/kubernetes
4After=network.target
5
6[Service]
7EnvironmentFile=-/etc/kubernetes/config
8EnvironmentFile=-/etc/kubernetes/proxy
9ExecStart=/usr/local/bin/hyperkube proxy \
10            $KUBE_LOGTOSTDERR \
11            $KUBE_LOG_LEVEL \
12            $KUBE_MASTER \
13            $KUBE_PROXY_ARGS
14Restart=on-failure
15LimitNOFILE=65536
16
17[Install]
18WantedBy=multi-user.target
(5)kube-scheduler.service
1[Unit]
2Description=Kubernetes Scheduler Plugin
3Documentation=https://github.com/GoogleCloudPlatform/kubernetes
4
5[Service]
6EnvironmentFile=-/etc/kubernetes/config
7EnvironmentFile=-/etc/kubernetes/scheduler
8User=kube
9ExecStart=/usr/local/bin/hyperkube scheduler \
10            $KUBE_LOGTOSTDERR \
11            $KUBE_LOG_LEVEL \
12            $KUBE_MASTER \
13            $KUBE_SCHEDULER_ARGS
14Restart=on-failure
15LimitNOFILE=65536
16
17[Install]
18WantedBy=multi-user.target
3.3 Master节点配置
Master 节点主要会运行 3 各组件: kube-apiserver、kube-controller-manager、kube-scheduler,其中用到的配置文件如下(将刚才k8s目录分发到所有节点,待会都需要使用到)
(1)config
config 是一个通用配置文件,值得注意的是由于安装时对于 Node、Master 节点都会包含该文件,在 Node 节点上请注释掉 KUBE_MASTER 变量,因为 Node 节点需要做 HA,要连接本地的 6443 加密端口;而这个变量将会覆盖 kubeconfig 中指定的 127.0.0.1:6443 地址
1###
2# kubernetes system config
3#
4# The following values are used to configure various aspects of all
5# kubernetes services, including
6#
7#   kube-apiserver.service
8#   kube-controller-manager.service
9#   kube-scheduler.service
10#   kubelet.service
11#   kube-proxy.service
12# logging to stderr means we get it in the systemd journal
13KUBE_LOGTOSTDERR="--logtostderr=true"
14# journal message level, 0 is debug
15KUBE_LOG_LEVEL="--v=2"
16# Should this cluster be allowed to run privileged docker containers
17KUBE_ALLOW_PRIV="--allow-privileged=true"
18# How the controller-manager, scheduler, and proxy find the apiserver
19KUBE_MASTER="--master=http://127.0.0.1:8080"
(2)apiserver
apiserver 配置相对于 1.8 略有变动,其中准入控制器(admission control)选项名称变为了 --enable-admission-plugins,控制器列表也有相应变化,这里采用官方推荐配置,具体请参考 官方文档
1###
2# kubernetes system config
3#
4# The following values are used to configure the kube-apiserver
5#
6# The address on the local server to listen to.
7KUBE_API_ADDRESS="--advertise-address=172.16.60.95 --bind-address=172.16.60.95"
8# The port on the local server to listen on.
9KUBE_API_PORT="--secure-port=6443"
10# Port minions listen on
11# KUBELET_PORT="--kubelet-port=10250"
12# Comma separated list of nodes in the etcd cluster
13KUBE_ETCD_SERVERS="--etcd-servers=https://172.16.60.95:2379,https://172.16.60.96:2379,https://172.16.60.97:2379"
14# Address range to use for services
15KUBE_SERVICE_ADDRESSES="--service-cluster-ip-range=10.254.0.0/16"
16# default admission control policies
17KUBE_ADMISSION_CONTROL="--enable-admission-plugins=NamespaceLifecycle,LimitRanger,ServiceAccount,DefaultStorageClass,DefaultTolerationSeconds,MutatingAdmissionWebhook,ValidatingAdmissionWebhook,ResourceQuota,NodeRestriction"
18# Add your own!
19KUBE_API_ARGS=" --anonymous-auth=false \
20                --apiserver-count=3 \
21                --audit-log-maxage=30 \
22                --audit-log-maxbackup=3 \
23                --audit-log-maxsize=100 \
24                --audit-log-path=/var/log/kube-audit/audit.log \
25                --audit-policy-file=/etc/kubernetes/audit-policy.yaml \
26                --authorization-mode=Node,RBAC \
27                --client-ca-file=/etc/kubernetes/ssl/k8s-root-ca.pem \
28                --enable-bootstrap-token-auth \
29                --enable-garbage-collector \
30                --enable-logs-handler \
31                --enable-swagger-ui \
32                --etcd-cafile=/etc/etcd/ssl/etcd-root-ca.pem \
33                --etcd-certfile=/etc/etcd/ssl/etcd.pem \
34                --etcd-keyfile=/etc/etcd/ssl/etcd-key.pem \
35                --etcd-compaction-interval=5m0s \
36                --etcd-count-metric-poll-period=1m0s \
37                --event-ttl=48h0m0s \
38                --kubelet-https=true \
39                --kubelet-timeout=3s \
40                --log-flush-frequency=5s \
41                --token-auth-file=/etc/kubernetes/token.csv \
42                --tls-cert-file=/etc/kubernetes/ssl/kube-apiserver.pem \
43                --tls-private-key-file=/etc/kubernetes/ssl/kube-apiserver-key.pem \
44                --service-node-port-range=30000-50000 \
45                --service-account-key-file=/etc/kubernetes/ssl/k8s-root-ca.pem \
46                --storage-backend=etcd3 \
47                --enable-swagger-ui=true"
(3)controller-manager
1###
2# The following values are used to configure the kubernetes controller-manager
3# defaults from config and apiserver should be adequate
4# Add your own!
5KUBE_CONTROLLER_MANAGER_ARGS="  --bind-address=0.0.0.0 \
6                                --cluster-name=kubernetes \
7                                --cluster-signing-cert-file=/etc/kubernetes/ssl/k8s-root-ca.pem \
8                                --cluster-signing-key-file=/etc/kubernetes/ssl/k8s-root-ca-key.pem \
9                                --controllers=*,bootstrapsigner,tokencleaner \
10                                --deployment-controller-sync-period=10s \
11                                --experimental-cluster-signing-duration=86700h0m0s \
12                                --leader-elect=true \
13                                --node-monitor-grace-period=40s \
14                                --node-monitor-period=5s \
15                                --pod-eviction-timeout=5m0s \
16                                --terminated-pod-gc-threshold=50 \
17                                --root-ca-file=/etc/kubernetes/ssl/k8s-root-ca.pem \
18                                --service-account-private-key-file=/etc/kubernetes/ssl/k8s-root-ca-key.pem \
19                                --feature-gates=RotateKubeletServerCertificate=true"
(5)scheduler
1###
2# kubernetes scheduler config
3
4# default config should be adequate
5
6# Add your own!
7KUBE_SCHEDULER_ARGS="   --address=0.0.0.0 \
8                        --leader-elect=true \
9                        --algorithm-provider=DefaultProvider"
3.4 Node节点配置
Node 节点上主要有 kubelet、kube-proxy 组件,用到的配置如下
(1)kubelet
kubeket 默认也开启了证书轮换能力以保证自动续签相关证书,同时增加了 --node-labels 选项为 node 打一个标签,关于这个标签最后部分会有讨论,如果在 master 上启动 kubelet,请将 node-role.kubernetes.io/k8s-node=true 修改为 node-role.kubernetes.io/k8s-master=true
1###
2# kubernetes kubelet (minion) config
3# The address for the info server to serve on (set to 0.0.0.0 or "" for all interfaces)
4KUBELET_ADDRESS="--node-ip=172.16.60.95"
5# The port for the info server to serve on
6# KUBELET_PORT="--port=10250"
7# You may leave this blank to use the actual hostname
8KUBELET_HOSTNAME="--hostname-override=master-01"
9# location of the api-server
10# KUBELET_API_SERVER=""
11# Add your own!
12KUBELET_ARGS="  --bootstrap-kubeconfig=/etc/kubernetes/bootstrap.kubeconfig \
13                --cert-dir=/etc/kubernetes/ssl \
14                --cgroup-driver=cgroupfs \
15                --cluster-dns=10.254.0.2 \
16                --cluster-domain=cluster.local. \
17                --fail-swap-on=false \
18                --feature-gates=RotateKubeletClientCertificate=true,RotateKubeletServerCertificate=true \
19                --node-labels=node-role.kubernetes.io/k8s-master=true \
20                --image-gc-high-threshold=70 \
21                --image-gc-low-threshold=50 \
22                --kube-reserved=cpu=500m,memory=512Mi,ephemeral-storage=1Gi \
23                --kubeconfig=/etc/kubernetes/kubelet.kubeconfig \
24                --system-reserved=cpu=1000m,memory=1024Mi,ephemeral-storage=1Gi \
25                --serialize-image-pulls=false \
26                --sync-frequency=30s \
27                --pod-infra-container-image=k8s.gcr.io/pause-amd64:3.0 \
28                --resolv-conf=/etc/resolv.conf \
29                --rotate-certificates"
(2)proxy
1###
2# kubernetes proxy config
3# default config should be adequate
4# Add your own!
5KUBE_PROXY_ARGS="--bind-address=0.0.0.0 \
6                 --hostname-override=master-01 \
7                 --kubeconfig=/etc/kubernetes/kube-proxy.kubeconfig \
8                 --cluster-cidr=10.254.0.0/16"
3.5、安装集群组件
1k8s
2├── conf
3│   ├── apiserver
4│   ├── audit-policy.yaml
5│   ├── bootstrap.kubeconfig
6│   ├── config
7│   ├── controller-manager
8│   ├── kubelet
9│   ├── kube-proxy.kubeconfig
10│   ├── proxy
11│   ├── scheduler
12│   ├── ssl
13│   │   ├── admin.csr
14│   │   ├── admin-csr.json
15│   │   ├── admin-key.pem
16│   │   ├── admin.pem
17│   │   ├── k8s-gencert.json
18│   │   ├── k8s-root-ca.csr
19│   │   ├── k8s-root-ca-csr.json
20│   │   ├── k8s-root-ca-key.pem
21│   │   ├── k8s-root-ca.pem
22│   │   ├── kube-apiserver.csr
23│   │   ├── kube-apiserver-csr.json
24│   │   ├── kube-apiserver-key.pem
25│   │   ├── kube-apiserver.pem
26│   │   ├── kube-proxy.csr
27│   │   ├── kube-proxy-csr.json
28│   │   ├── kube-proxy-key.pem
29│   │   └── kube-proxy.pem
30│   └── token.csv
31├── hyperkube_1.10.1
32├── install.sh
33└── systemd
34    ├── kube-apiserver.service
35    ├── kube-controller-manager.service
36    ├── kubelet.service
37    ├── kube-proxy.service
38    └── kube-scheduler.service
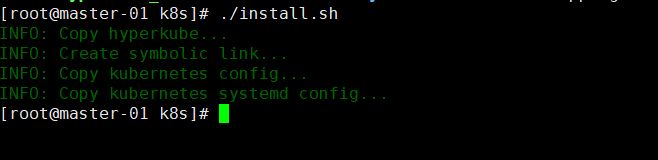
最后执行此脚本安装即可,此外,应确保每个节点安装了 ipset、conntrack 两个包,因为 kube-proxy 组件会使用其处理 iptables 规则等
yum -y install ipset conntrack-tools
运行install.sh安装组件
四、启动Kubernetes master节点
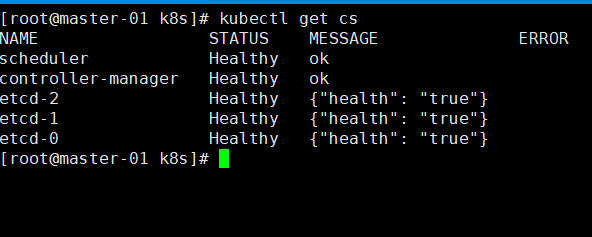
对于 master 节点启动无需做过多处理,多个 master 只要保证 apiserver 等配置中的 ip 地址监听没问题后直接启动即可
1systemctl daemon-reload
2systemctl start kube-apiserver
3systemctl start kube-controller-manager
4systemctl start kube-scheduler
5systemctl enable kube-apiserver
6systemctl enable kube-controller-manager
7systemctl enable kube-scheduler
完成后截图如下
五、启动Kubernetes Node节点
由于 HA 等功能需要,对于 Node 需要做一些处理才能启动,主要有以下两个地方需要处理
5.1 nginx-proxy
在启动 kubelet、kube-proxy 服务之前,需要在本地启动 nginx 来 tcp 负载均衡 apiserver 6443 端口,nginx-proxy 使用 docker + systemd 启动,配置如下
注意: 对于在 master 节点启动 kubelet 来说,不需要 nginx 做负载均衡;可以跳过此步骤,并修改 kubelet.kubeconfig、kube-proxy.kubeconfig 中的 apiserver 地址为当前 master ip 6443 端口即可
-
nginx-proxy.service
[Unit] Description=kubernetes apiserver docker wrapper Wants=docker.socket After=docker.service
[Service] User=root PermissionsStartOnly=true ExecStart=/usr/bin/docker run -p 127.0.0.1:6443:6443
-v /etc/nginx:/etc/nginx
--name nginx-proxy
--net=host
--restart=on-failure:5
--memory=512M
nginx:1.13.12-alpine ExecStartPre=-/usr/bin/docker rm -f nginx-proxy ExecStop=/usr/bin/docker stop nginx-proxy Restart=always RestartSec=15s TimeoutStartSec=30s[Install] WantedBy=multi-user.target
-
nginx.conf
error_log stderr notice;
worker_processes auto; events { multi_accept on; use epoll; worker_connections 1024; }
stream { upstream kube_apiserver { least_conn; server 172.16.60.95:6443; server 172.16.60.96:6443; }
1server {
2    listen        0.0.0.0:6443;
3    proxy_pass    kube_apiserver;
4    proxy_timeout 10m;
启动apiserver的本地负载均衡
1mkdir /etc/nginx
2cp nginx.conf /etc/nginx
3cp nginx-proxy.service /lib/systemd/system
4
5systemctl daemon-reload
6systemctl start nginx-proxy
7systemctl enable nginx-proxy
5.2 TLS bootstrapping
创建好 nginx-proxy 后不要忘记为 TLS Bootstrap 创建相应的 RBAC 规则,这些规则能实现证自动签署 TLS Bootstrap 发出的 CSR 请求,从而实现证书轮换(创建一次即可)
tls-bootstrapping-clusterrole.yaml
1# A ClusterRole which instructs the CSR approver to approve a node requesting a
2# serving cert matching its client cert.
3kind: ClusterRole
4apiVersion: rbac.authorization.k8s.io/v1
5metadata:
6  name: system:certificates.k8s.io:certificatesigningrequests:selfnodeserver
7rules:
8- apiGroups: ["certificates.k8s.io"]
9  resources: ["certificatesigningrequests/selfnodeserver"]
10  verbs: ["create"]
在master执行创建
1# 给与 kubelet-bootstrap 用户进行 node-bootstrapper 的权限
2kubectl create clusterrolebinding kubelet-bootstrap \
3    --clusterrole=system:node-bootstrapper \
4    --user=kubelet-bootstrap
5
6kubectl create -f tls-bootstrapping-clusterrole.yaml
7
8# 自动批准 system:bootstrappers 组用户 TLS bootstrapping 首次申请证书的 CSR 请求
9kubectl create clusterrolebinding node-client-auto-approve-csr \
10        --clusterrole=system:certificates.k8s.io:certificatesigningrequests:nodeclient \
11        --group=system:bootstrappers
12
13# 自动批准 system:nodes 组用户更新 kubelet 自身与 apiserver 通讯证书的 CSR 请求
14kubectl create clusterrolebinding node-client-auto-renew-crt \
15        --clusterrole=system:certificates.k8s.io:certificatesigningrequests:selfnodeclient \
16        --group=system:nodes
17
18# 自动批准 system:nodes 组用户更新 kubelet 10250 api 端口证书的 CSR 请求
19kubectl create clusterrolebinding node-server-auto-renew-crt \
20        --clusterrole=system:certificates.k8s.io:certificatesigningrequests:selfnodeserver \
21        --group=system:nodes
5.3 修改配置文件
在所有node服务器上,也要运行install.sh,然后修改/etc/kubernetes中的配置文件
(1)config
注释掉最后一句
# KUBE_MASTER="--master=http://127.0.0.1:8080"
(2)kubelet
1###
2# kubernetes kubelet (minion) config
3# The address for the info server to serve on (set to 0.0.0.0 or "" for all interfaces)
4KUBELET_ADDRESS="--node-ip=172.16.60.98"
5# The port for the info server to serve on
6# KUBELET_PORT="--port=10250"
7# You may leave this blank to use the actual hostname
8KUBELET_HOSTNAME="--hostname-override=node-02"
9# location of the api-server
10# KUBELET_API_SERVER=""
11# Add your own!
12KUBELET_ARGS="  --bootstrap-kubeconfig=/etc/kubernetes/bootstrap.kubeconfig \
13                --cert-dir=/etc/kubernetes/ssl \
14                --cgroup-driver=cgroupfs \
15                --cluster-dns=10.254.0.2 \
16                --cluster-domain=cluster.local. \
17                --fail-swap-on=false \
18                --feature-gates=RotateKubeletClientCertificate=true,RotateKubeletServerCertificate=true \
19                --node-labels=node-role.kubernetes.io/k8s-node=true \
20                --image-gc-high-threshold=70 \
21                --image-gc-low-threshold=50 \
22                --kube-reserved=cpu=250m,memory=256Mi,ephemeral-storage=1Gi \
23                --kubeconfig=/etc/kubernetes/kubelet.kubeconfig \
24                --system-reserved=cpu=500m,memory=512Mi,ephemeral-storage=1Gi \
25                --serialize-image-pulls=false \
26                --sync-frequency=30s \
27                --pod-infra-container-image=k8s.gcr.io/pause-amd64:3.0 \
28                --resolv-conf=/etc/resolv.conf \
29                --rotate-certificates"
(3)proxy
1###
2# kubernetes proxy config
3# default config should be adequate
4# Add your own!
5KUBE_PROXY_ARGS="--bind-address=0.0.0.0 \
6                 --hostname-override=node-02 \
7                 --kubeconfig=/etc/kubernetes/kube-proxy.kubeconfig \
8                 --cluster-cidr=10.254.0.0/16"
5.4 执行启动
1systemctl daemon-reload
2systemctl start kubelet
3systemctl start kube-proxy
4systemctl enable kubelet
5systemctl enable kube-proxy
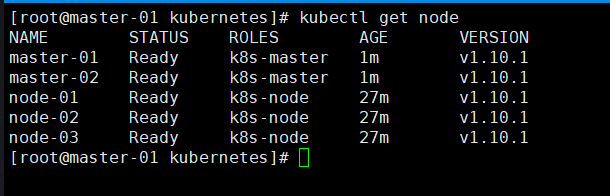
这样3个node节点就好了,截图如下:

5.5 将master节点也加入node集群中
在master启动kubelet和proxy前,先修改/etc/kubernetes中bootstrap.kubeconfig 和kube-proxy.kubeconfig,将 https://127.0.0.1:6443 改为 https://master\_ip:6443
1systemctl daemon-reload
2systemctl start kubelet
3systemctl start kube-proxy
4systemctl enable kubelet
5systemctl enable kube-proxy
六、安装calico
6.1 修改calico配置
master-01执行
1mkdir calico
2cd calico
3vim getCalico.sh
4
5
6wget https://docs.projectcalico.org/v3.1/getting-started/kubernetes/installation/hosted/calico.yaml -O calico.example.yaml
7
8ETCD_CERT=`cat /etc/etcd/ssl/etcd.pem | base64 | tr -d '\n'`
9ETCD_KEY=`cat /etc/etcd/ssl/etcd-key.pem | base64 | tr -d '\n'`
10ETCD_CA=`cat /etc/etcd/ssl/etcd-root-ca.pem | base64 | tr -d '\n'`
11ETCD_ENDPOINTS="https://172.16.60.95:2379,https://172.16.60.96:2379,https://172.16.60.97:2379"
12
13cp calico.example.yaml calico.yaml
14
15sed -i "s@.*etcd_endpoints:.*@\ \ etcd_endpoints:\ \"${ETCD_ENDPOINTS}\"@gi" calico.yaml
16
17sed -i "s@.*etcd-cert:.*@\ \ etcd-cert:\ ${ETCD_CERT}@gi" calico.yaml
18sed -i "s@.*etcd-key:.*@\ \ etcd-key:\ ${ETCD_KEY}@gi" calico.yaml
19sed -i "s@.*etcd-ca:.*@\ \ etcd-ca:\ ${ETCD_CA}@gi" calico.yaml
20
21sed -i 's@.*etcd_ca:.*@\ \ etcd_ca:\ "/calico-secrets/etcd-ca"@gi' calico.yaml
22sed -i 's@.*etcd_cert:.*@\ \ etcd_cert:\ "/calico-secrets/etcd-cert"@gi' calico.yaml
23sed -i 's@.*etcd_key:.*@\ \ etcd_key:\ "/calico-secrets/etcd-key"@gi' calico.yaml
24
25# 注释掉 calico-node 部分(由 Systemd 接管)
26sed -i '123,219s@.*@#&@gi' calico.yaml
6.2 创建systemd文件
创建 systemd service 配置文件要在每个节点上都执行
calico-systemd.sh
1K8S_MASTER_IP="172.16.60.95"
2HOSTNAME=`cat /etc/hostname`
3ETCD_ENDPOINTS="https://172.16.60.95:2379,https://172.16.60.96:2379,https://172.16.60.97:2379"
4
5cat > /lib/systemd/system/calico-node.service <<EOF
6[Unit]
7Description=calico node
8After=docker.service
9Requires=docker.service
10
11[Service]
12User=root
13Environment=ETCD_ENDPOINTS=${ETCD_ENDPOINTS}
14PermissionsStartOnly=true
15ExecStart=/usr/bin/docker run   --net=host --privileged --name=calico-node \\
16                                -e ETCD_ENDPOINTS=\${ETCD_ENDPOINTS} \\
17                                -e ETCD_CA_CERT_FILE=/etc/etcd/ssl/etcd-root-ca.pem \\
18                                -e ETCD_CERT_FILE=/etc/etcd/ssl/etcd.pem \\
19                                -e ETCD_KEY_FILE=/etc/etcd/ssl/etcd-key.pem \\
20                                -e NODENAME=${HOSTNAME} \\
21                                -e IP= \\
22                                -e IP_AUTODETECTION_METHOD=can-reach=${K8S_MASTER_IP} \\
23                                -e AS=64512 \\
24                                -e CLUSTER_TYPE=k8s,bgp \\
25                                -e CALICO_IPV4POOL_CIDR=10.20.0.0/16 \\
26                                -e CALICO_IPV4POOL_IPIP=always \\
27                                -e CALICO_LIBNETWORK_ENABLED=true \\
28                                -e CALICO_NETWORKING_BACKEND=bird \\
29                                -e CALICO_DISABLE_FILE_LOGGING=true \\
30                                -e FELIX_IPV6SUPPORT=false \\
31                                -e FELIX_DEFAULTENDPOINTTOHOSTACTION=ACCEPT \\
32                                -e FELIX_LOGSEVERITYSCREEN=info \\
33                                -e FELIX_IPINIPMTU=1440 \\
34                                -e FELIX_HEALTHENABLED=true \\
35                                -e CALICO_K8S_NODE_REF=${HOSTNAME} \\
36                                -v /etc/calico/etcd-root-ca.pem:/etc/etcd/ssl/etcd-root-ca.pem \\
37                                -v /etc/calico/etcd.pem:/etc/etcd/ssl/etcd.pem \\
38                                -v /etc/calico/etcd-key.pem:/etc/etcd/ssl/etcd-key.pem \\
39                                -v /lib/modules:/lib/modules \\
40                                -v /var/lib/calico:/var/lib/calico \\
41                                -v /var/run/calico:/var/run/calico \\
42                                quay.io/calico/node:v3.1.0
43ExecStop=/usr/bin/docker rm -f calico-node
44Restart=always
45RestartSec=10
46
47[Install]
48WantedBy=multi-user.target
49EOF
执行shell文件,将calico-systemd.sh复制集群其他机器。并修改其中的节点信息和ip
对于以上脚本中的 K8S_MASTER_IP 变量,只需要填写一个 master ip 即可,这个变量用于 calico 自动选择 IP 使用;在宿主机有多张网卡的情况下,calcio node 会自动获取一个 IP,获取原则就是尝试是否能够联通这个 master ip
由于 calico 需要使用 etcd 存储数据,所以需要复制 etcd 证书到相关目录,/etc/calico 需要在每个节点都有
1mkdir -p /etc/calico
2
3cp /etc/etcd/ssl/* /etc/calico
6.3 修改kubelet配置
使用 Calico 后需要修改 kubelet 配置增加 CNI 设置(--network-plugin=cni),修改后配置如下
1###
2# kubernetes kubelet (minion) config
3# The address for the info server to serve on (set to 0.0.0.0 or "" for all interfaces)
4KUBELET_ADDRESS="--node-ip=172.16.60.99"
5# The port for the info server to serve on
6# KUBELET_PORT="--port=10250"
7# You may leave this blank to use the actual hostname
8KUBELET_HOSTNAME="--hostname-override=node-03"
9# location of the api-server
10# KUBELET_API_SERVER=""
11# Add your own!
12KUBELET_ARGS="  --bootstrap-kubeconfig=/etc/kubernetes/bootstrap.kubeconfig \
13                --cert-dir=/etc/kubernetes/ssl \
14                --cgroup-driver=cgroupfs \
15                --network-plugin=cni \
16                --cluster-dns=10.254.0.2 \
17                --cluster-domain=cluster.local. \
18                --fail-swap-on=false \
19                --feature-gates=RotateKubeletClientCertificate=true,RotateKubeletServerCertificate=true \
20                --node-labels=node-role.kubernetes.io/k8s-node=true \
21                --image-gc-high-threshold=70 \
22                --image-gc-low-threshold=50 \
23                --kube-reserved=cpu=250m,memory=256Mi,ephemeral-storage=1Gi \
24                --kubeconfig=/etc/kubernetes/kubelet.kubeconfig \
25                --system-reserved=cpu=500m,memory=512Mi,ephemeral-storage=1Gi \
26                --serialize-image-pulls=false \
27                --sync-frequency=30s \
28                --pod-infra-container-image=k8s.gcr.io/pause-amd64:3.0 \
29                --resolv-conf=/etc/resolv.conf \
30                --rotate-certificates"
6**.4 创建Calico Daemonset**
1# 先创建 RBAC
2kubectl apply -f \
3https://docs.projectcalico.org/v3.1/getting-started/kubernetes/installation/rbac.yaml
4
5# 再创建 Calico Daemonset
6kubectl create -f calico.yaml
6.5 启动Calico Node
1systemctl daemon-reload
2systemctl restart calico-node
3systemctl enable calico-node
4
5# 等待 20s 拉取镜像
6sleep 20
7systemctl restart kubelet
8
9# 由于防火墙的原因,有些镜像获取不到,所以可以下载一个可以使用的镜像,再为其打个tag(所有节点执行)
10
11docker pull kubernetes/pause
12
13docker tag kubernetes/pause k8s.gcr.io/pause-amd64:3.0
6.6 测试网络
网络测试与其他几篇文章一样,创建几个 pod 测试即可
在master-01上执行
1# 创建 deployment
2cat << EOF >> demo.deploy.yml
3apiVersion: apps/v1
4kind: Deployment
5metadata:
6  name: demo-deployment
7spec:
8  replicas: 5
9  selector:
10    matchLabels:
11      app: demo
12  template:
13    metadata:
14      labels:
15        app: demo
16    spec:
17      containers:
18      - name: demo
19        image: mritd/demo
20        imagePullPolicy: IfNotPresent
21        ports:
22        - containerPort: 80
23EOF
24kubectl create -f demo.deploy.yml
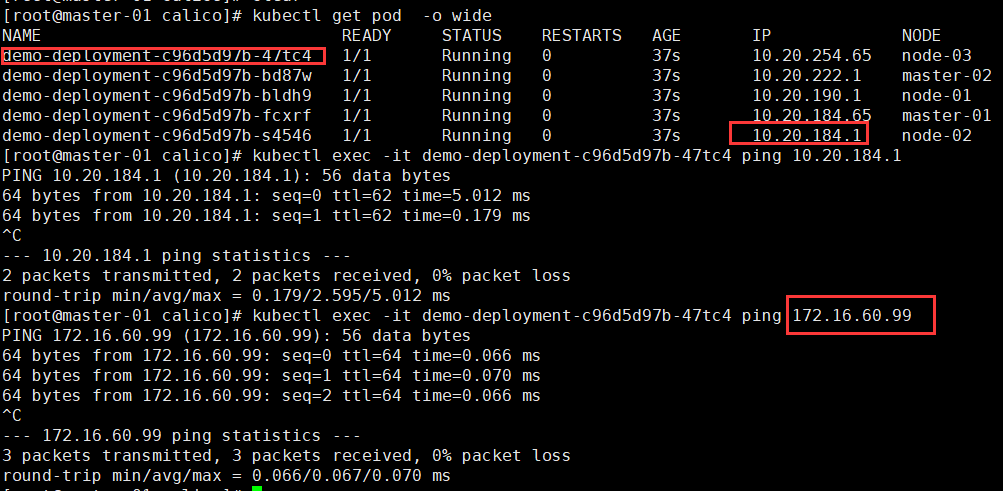
执行结果:

测试相互执行能否ping通:
pod 之间 和 pod 与主机之间都能ping通
七、部署集群DNS
7.1 部署CoreDNS
CoreDNS 给出了标准的 deployment 配置,如下
-
coredns.yaml.sed
apiVersion: v1 kind: ServiceAccount metadata: name: coredns namespace: kube-system
apiVersion: rbac.authorization.k8s.io/v1beta1 kind: ClusterRole metadata: labels: kubernetes.io/bootstrapping: rbac-defaults name: system:coredns rules:
- apiGroups:
- "" resources:
- endpoints
- services
- pods
- namespaces verbs:
- list
- watch
apiVersion: rbac.authorization.k8s.io/v1beta1 kind: ClusterRoleBinding metadata: annotations: rbac.authorization.kubernetes.io/autoupdate: "true" labels: kubernetes.io/bootstrapping: rbac-defaults name: system:coredns roleRef: apiGroup: rbac.authorization.k8s.io kind: ClusterRole name: system:coredns subjects:
- kind: ServiceAccount name: coredns namespace: kube-system
apiVersion: v1 kind: ConfigMap metadata: name: coredns namespace: kube-system data: Corefile: | .:53 { errors health kubernetes CLUSTER_DOMAIN REVERSE_CIDRS { pods insecure upstream fallthrough in-addr.arpa ip6.arpa } prometheus :9153 proxy . /etc/resolv.conf cache 30 }
apiVersion: extensions/v1beta1 kind: Deployment metadata: name: coredns namespace: kube-system labels: k8s-app: kube-dns kubernetes.io/name: "CoreDNS" spec: replicas: 2 strategy: type: RollingUpdate rollingUpdate: maxUnavailable: 1 selector: matchLabels: k8s-app: kube-dns template: metadata: labels: k8s-app: kube-dns spec: serviceAccountName: coredns tolerations: - key: "CriticalAddonsOnly" operator: "Exists" containers: - name: coredns image: coredns/coredns:1.1.1 imagePullPolicy: IfNotPresent args: [ "-conf", "/etc/coredns/Corefile" ] volumeMounts: - name: config-volume mountPath: /etc/coredns ports: - containerPort: 53 name: dns protocol: UDP - containerPort: 53 name: dns-tcp protocol: TCP - containerPort: 9153 name: metrics protocol: TCP livenessProbe: httpGet: path: /health port: 8080 scheme: HTTP initialDelaySeconds: 60 timeoutSeconds: 5 successThreshold: 1 failureThreshold: 5 dnsPolicy: Default volumes: - name: config-volume configMap: name: coredns items: - key: Corefile path: Corefile
apiVersion: v1 kind: Service metadata: name: kube-dns namespace: kube-system annotations: prometheus.io/scrape: "true" labels: k8s-app: kube-dns kubernetes.io/cluster-service: "true" kubernetes.io/name: "CoreDNS" spec: selector: k8s-app: kube-dns clusterIP: CLUSTER_DNS_IP ports:
- name: dns port: 53 protocol: UDP
- name: dns-tcp port: 53 protocol: TCP
- apiGroups:
然后直接使用脚本替换即可(脚本变量我已经修改了)
1#!/bin/bash
2
3# Deploys CoreDNS to a cluster currently running Kube-DNS.
4
5SERVICE_CIDR=${1:-10.254.0.0/16}
6POD_CIDR=${2:-10.20.0.0/16}
7CLUSTER_DNS_IP=${3:-10.254.0.2}
8CLUSTER_DOMAIN=${4:-cluster.local}
9YAML_TEMPLATE=${5:-`pwd`/coredns.yaml.sed}
10
11sed -e s/CLUSTER_DNS_IP/$CLUSTER_DNS_IP/g -e s/CLUSTER_DOMAIN/$CLUSTER_DOMAIN/g -e s?SERVICE_CIDR?$SERVICE_CIDR?g -e s?POD_CIDR?$POD_CIDR?g $YAML_TEMPLATE > coredns.yaml
创建
1# 执行上面的替换脚本
2./deploy.sh
3
4# 创建 CoreDNS
5kubectl create -f coredns.yaml
查看
1[root@master-01 coredns]# kubectl exec -it demo-deployment-c96d5d97b-47tc4 bash
2bash-4.4# cat /etc/resolv.conf
3nameserver 10.254.0.2
4search default.svc.cluster.local. svc.cluster.local. cluster.local.
5options ndots:5
注意:直接ping ClusterIP是ping不通的,ClusterIP是根据IPtables路由到服务的endpoint上,只有结合ClusterIP加端口才能访问到对应的服务。
八、部署heapster
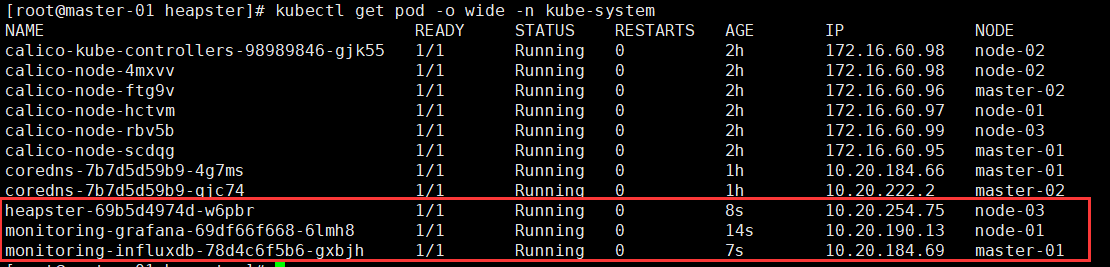
heapster 部署相对简单的多,yaml 创建一下就可以了
1kubectl create -f https://raw.githubusercontent.com/kubernetes/heapster/master/deploy/kube-config/influxdb/grafana.yaml
2kubectl create -f https://raw.githubusercontent.com/kubernetes/heapster/master/deploy/kube-config/influxdb/heapster.yaml
3kubectl create -f https://raw.githubusercontent.com/kubernetes/heapster/master/deploy/kube-config/influxdb/influxdb.yaml
4kubectl create -f https://raw.githubusercontent.com/kubernetes/heapster/master/deploy/kube-config/rbac/heapster-rbac.yaml
这些yaml文件中个的镜像很可能由于防火墙的原因下载不下来,需要自己搜合适的镜像,再为其打个tag
如:
1docker search heapster-grafana-amd64
2
3docker pull pupudaye/heapster-grafana-amd64
4
5docker tag pupudaye/heapster-grafana-amd64 k8s.gcr.io/heapster-grafana-amd64:v4.4.3
九、部署Dashboard
9.1 安装dashboard
(1)下载yaml文件
wget https://raw.githubusercontent.com/kubernetes/dashboard/master/src/deploy/recommended/kubernetes-dashboard.yaml -O kubernetes-dashboard.yaml
将最后部分的端口暴露修改如下
1# ------------------- Dashboard Service ------------------- #
2
3kind: Service
4apiVersion: v1
5metadata:
6  labels:
7    k8s-app: kubernetes-dashboard
8  name: kubernetes-dashboard
9  namespace: kube-system
10spec:
11  type: NodePort
12  ports:
13    - name: dashboard-tls
14      port: 443
15      targetPort: 8443
16      nodePort: 30000
17      protocol: TCP
18  selector:
19    k8s-app: kubernetes-dashboard
(2)修改镜像地址
1docker pull k8scn/kubernetes-dashboard-amd64
2
3docker tag k8scn/kubernetes-dashboard-amd64 k8s.gcr.io/kubernetes-dashboard-amd64:v1.8.3
(3)制作证书
使用NodePort的方式来访问Dashboard时,需要指定有效的证书,才能访问。参考Certificate management。
1mkdir ~/certs
2
3[root@master-01 certs]# openssl genrsa -des3 -passout pass:x -out dashboard.pass.key 2048
4Generating RSA private key, 2048 bit long modulus
5.....................+++
6.............................................+++
7e is 65537 (0x10001)
8[root@master-01 certs]# openssl rsa -passin pass:x -in dashboard.pass.key -out dashboard.key
9writing RSA key
10[root@master-01 certs]# ls
11dashboard.key  dashboard.pass.key
12[root@master-01 certs]# rm dashboard.pass.key
13rm: remove regular file ‘dashboard.pass.key’? y
14[root@master-01 certs]#  openssl req -new -key dashboard.key -out dashboard.csr
15You are about to be asked to enter information that will be incorporated
16into your certificate request.
17What you are about to enter is what is called a Distinguished Name or a DN.
18There are quite a few fields but you can leave some blank
19For some fields there will be a default value,
20If you enter '.', the field will be left blank.
21-----
22Country Name (2 letter code) [XX]:CN
23State or Province Name (full name) []:ZJ
24Locality Name (eg, city) [Default City]:HZ
25Organization Name (eg, company) [Default Company Ltd]:YM
26Organizational Unit Name (eg, section) []:YM
27Common Name (eg, your name or your server's hostname) []:JF
28Email Address []:123@qq.com
29
30Please enter the following 'extra' attributes
31to be sent with your certificate request
32A challenge password []:123456
33An optional company name []:123456
34[root@master-01 certs]# openssl x509 -req -sha256 -days 365 -in dashboard.csr -signkey dashboard.key -out dashboard.crt
35Signature ok
36subject=/C=CN/ST=ZJ/L=HZ/O=YM/OU=YM/CN=JF/emailAddress=123@qq.com
37Getting Private key
查看证书
1[root@master-01 ~]# tree ~/certs
2/root/certs
3├── dashboard.crt
4├── dashboard.csr
5└── dashboard.key
(4)使用证书生成kubernetes-dashboard 秘钥
kubectl create secret generic kubernetes-dashboard-certs --from-file=$HOME/certs -n kube-system
查看kubernetes secret
1[root@master-01 ~]# kubectl describe secret kubernetes-dashboard-certs -n kube-system
2Name:         kubernetes-dashboard-certs
3Namespace:    kube-system
4Labels:       <none>
5Annotations:  <none>
6
7Type:  Opaque
8
9Data
10====
11dashboard.crt:  1208 bytes
12dashboard.csr:  1070 bytes
13dashboard.key:  1679 bytes
(5)安装dashboard
1kubectl create -f kubernetes-dashboard.yaml
2
3[root@master-01 ~]# kubectl get pod -o wide -n kube-system | grep dashboard
4kubernetes-dashboard-7d5dcdb6d9-pfkm8    1/1       Running   0          15h       10.20.222.6    master-02
5[root@master-01 ~]# kubectl get service kubernetes-dashboard -n kube-system
6NAME                   TYPE       CLUSTER-IP      EXTERNAL-IP   PORT(S)         AGE
7kubernetes-dashboard   NodePort   10.254.105.48   <none>        443:30000/TCP   15h
9.2 创建admin账户
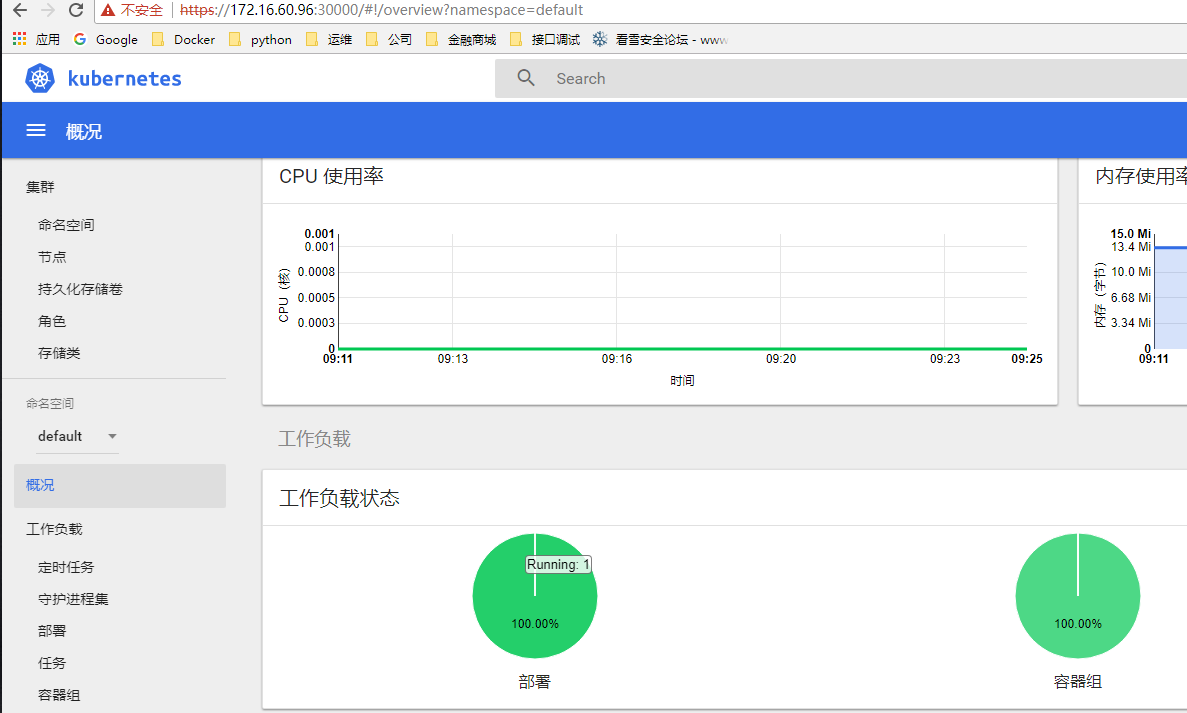
默认情况下部署成功后可以直接访问 https://NODE_IP:30000 访问,但是想要登录进去查看的话需要使用 kubeconfig 或者 access token 的方式;实际上这个就是 RBAC 授权控制,以下提供一个创建 admin access token 的脚本
1#!/bin/bash
2
3
4if kubectl get sa dashboard-admin -n kube-system &> /dev/null;then
5    echo -e "\033[33mWARNING: ServiceAccount dashboard-admin exist!\033[0m"
6else
7    kubectl create sa dashboard-admin -n kube-system
8    kubectl create clusterrolebinding dashboard-admin --clusterrole=cluster-admin --serviceaccount=kube-system:dashboard-admin
9fi
10
11kubectl describe secret -n kube-system $(kubectl get secrets -n kube-system | grep dashboard-admin | cut -f1 -d ' ') | grep -E '^token'

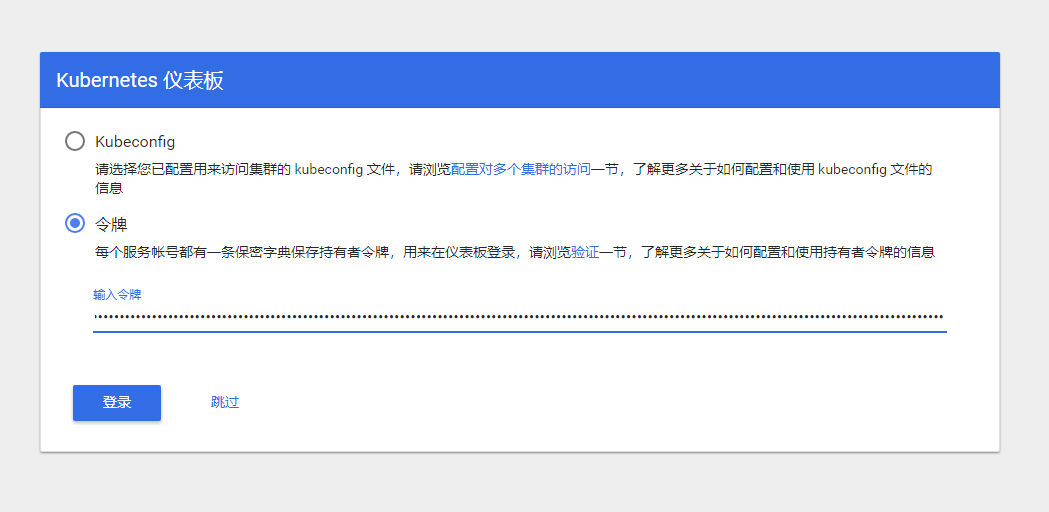
选择令牌,复制token