
欢迎访问我的GitHub
https://github.com/zq2599/blog_demos
内容:所有原创文章分类汇总及配套源码,涉及Java、Docker、Kubernetes、DevOPS等;
概览
- 本文是《Kubernetes官方java客户端》系列的第八篇,以下提到的<font color="blue">java客户端</font>都是指client-jar.jar;
- 前文《Kubernetes官方java客户端之七:patch操作》涉及的知识点、代码、操作都太多了,<font color="red">对作者和读者都是莫大的折磨</font>,到了本篇咱们轻松一下,写几段简单流畅的代码,了解java客户端对fluent style编程的支持,并且编码完成后的验证操作也很简单;
关于fluent styel
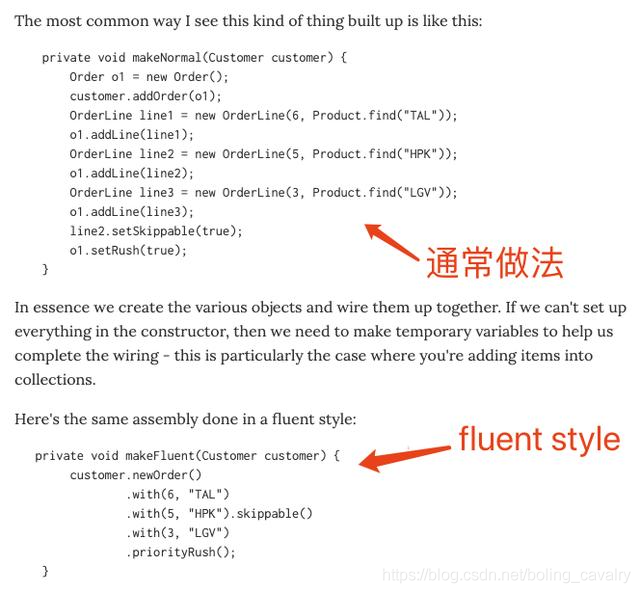
- 也称为fluid coding, fluent programming,是一种增强代码可读性的风格,使得阅读代码时更加自然流畅,特点是函数返回有关类型,使得多个函数的调用前后链接起来。
- 关于fluent style可以参考Martin Flowler于2005年发表的文章,地址是:https://martinfowler.com/bliki/FluentInterface.html ,使用fluent style前后的代码对比如下图所示:
源码下载
- 如果您不想编码,可以在GitHub下载所有源码,地址和链接信息如下表所示(https://github.com/zq2599/blog_demos):
名称
链接
备注
项目主页
https://github.com/zq2599/blog_demos
该项目在GitHub上的主页
git仓库地址(https)
https://github.com/zq2599/blog_demos.git
该项目源码的仓库地址,https协议
git仓库地址(ssh)
git@github.com:zq2599/blog_demos.git
该项目源码的仓库地址,ssh协议
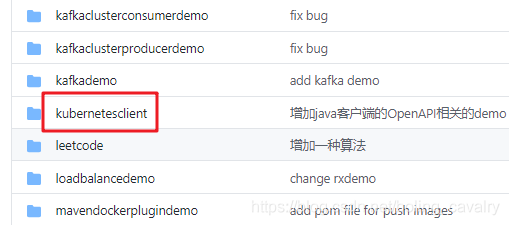
- 这个git项目中有多个文件夹,本章的应用在<font color="blue">kubernetesclient</font>文件夹下,如下图红框所示:
实战步骤概述
- 在父工程<font color="blue">kubernetesclient</font>下面新建名为<font color="red">fluent</font>的子工程;
- fluent工程中只有一个类FluentStyleApplication,启动的main方法以及fluent style的代码都在此类中;
- <font color="blue">FluentStyleApplication.java</font>提供四个web接口,功能分别是:新建namespace、新建deployment、新建service、删除前面三个接口新建的所有资源;
- <font color="blue">fluent</font>工程编码完成后,不需要做成镜像部署在kubernetes环境内部,而是作为一个普通SpringBoot应用找个java环境启动即可,与《Kubernetes官方java客户端之三:外部应用 》一文的部署和启动一致;
- 依次调用每个接口,验证功能是否符合预期;
编码
-
在父工程<font color="blue">kubernetesclient</font>下面新建名为<font color="red">fluent</font>的maven子工程,pom.xml内容如下,需要注意的是排除掉<font color="blue">spring-boot-starter-json</font>,原因请参考《Kubernetes官方java客户端之二:序列化和反序列化问题 》:
<?xml version="1.0" encoding="UTF-8"?><project xmlns="http://maven.apache.org/POM/4.0.0" xmlns:xsi="http://www.w3.org/2001/XMLSchema-instance" xsi:schemaLocation="http://maven.apache.org/POM/4.0.0 https://maven.apache.org/xsd/maven-4.0.0.xsd"> <modelVersion>4.0.0</modelVersion>
</project>1<parent> 2 <groupId>com.bolingcavalry</groupId> 3 <artifactId>kubernetesclient</artifactId> 4 <version>1.0-SNAPSHOT</version> 5 <relativePath>../pom.xml</relativePath> 6</parent> 7 8<groupId>com.bolingcavalry</groupId> 9<artifactId>fluent</artifactId> 10<version>0.0.1-SNAPSHOT</version> 11<name>fluent</name> 12<description>Demo project for fluent style</description> 13<packaging>jar</packaging> 14 15<dependencies> 16 <dependency> 17 <groupId>org.springframework.boot</groupId> 18 <artifactId>spring-boot-starter-web</artifactId> 19 <exclusions> 20 <exclusion> 21 <groupId>org.springframework.boot</groupId> 22 <artifactId>spring-boot-starter-json</artifactId> 23 </exclusion> 24 </exclusions> 25 </dependency> 26 27 <dependency> 28 <groupId>org.projectlombok</groupId> 29 <artifactId>lombok</artifactId> 30 <optional>true</optional> 31 </dependency> 32 33 <dependency> 34 <groupId>io.kubernetes</groupId> 35 <artifactId>client-java</artifactId> 36 </dependency> 37 38</dependencies> 39 40<build> 41 <plugins> 42 <plugin> 43 <groupId>org.springframework.boot</groupId> 44 <artifactId>spring-boot-maven-plugin</artifactId> 45 <version>2.3.0.RELEASE</version> 46 </plugin> 47 </plugins> 48</build> -
新建<font color="blue">FluentStyleApplication.java</font>,首先,该类作为启动类,要有main方法:
public static void main(String[] args) { SpringApplication.run(FluentStyleApplication.class, args); }
-
定义常量<font color="blue">NAMESPACE</font>作为本次实战的namespace:
private final static String NAMESPACE = "fluent";
-
用@PostConstruct注解修饰setDefaultApiClient方法,令其在实例化时执行一次,里面做了一些全局性的初始化设置,注意<font color="blue">kubeConfigPath</font>变量对应的config文件路径要正确:
/** * 默认的全局设置 * @return * @throws Exception */ @PostConstruct private void setDefaultApiClient() throws Exception { // 存放K8S的config文件的全路径 String kubeConfigPath = "/Users/zhaoqin/temp/202007/05/config"; // 以config作为入参创建的client对象,可以访问到K8S的API Server ApiClient client = ClientBuilder .kubeconfig(KubeConfig.loadKubeConfig(new FileReader(kubeConfigPath))) .build();
1 // 会打印和API Server之间请求响应的详细内容,生产环境慎用 2 client.setDebugging(true); 3 4 // 创建操作类 5 Configuration.setDefaultApiClient(client); 6} -
接下来是创建namespace的web服务,如下所示,由于namespace在kubernetes的apiVersion是v1,因此创建的是<font color="blue">V1Namespace</font>实例:
@RequestMapping(value = "/fluent/createnamespace") public V1Namespace createnamespace() throws Exception {
1 V1Namespace v1Namespace = new V1NamespaceBuilder() 2 .withNewMetadata() 3 .withName(NAMESPACE) 4 .addToLabels("label1", "aaa") 5 .addToLabels("label2", "bbb") 6 .endMetadata() 7 .build(); 8 9 return new CoreV1Api().createNamespace(v1Namespace, null, null, null); 10} -
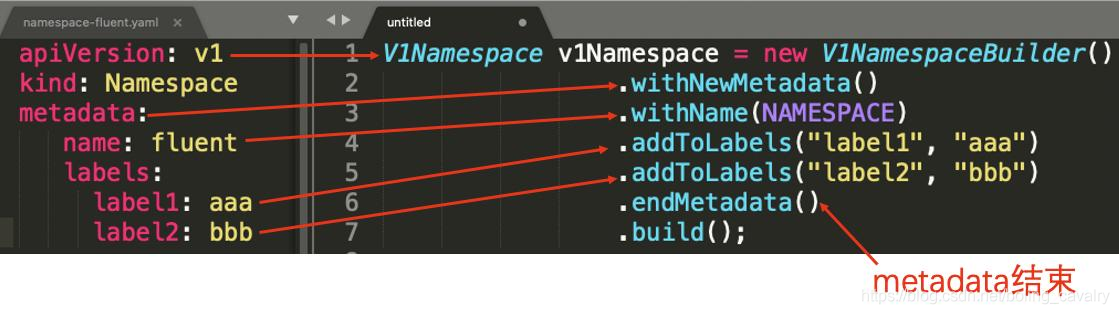
为了更清晰的展现<font color="blue">fluent style</font>效果,将上述代码与创建namespace的yaml文件内容放在一起对比,如下图所示,可见对照着yaml文件就能将代码写出来:
-
接下来是创建service的代码,为了便于和yaml对应起来,代码中特意加了缩进:
@RequestMapping(value = "/fluent/createservice") public V1Service createservice() throws Exception { V1Service v1Service = new V1ServiceBuilder() // meta设置 .withNewMetadata() .withName("nginx") .endMetadata()
1 // spec设置 2 .withNewSpec() 3 .withType("NodePort") 4 .addToPorts(new V1ServicePort().port(80).nodePort(30103)) 5 .addToSelector("name", "nginx") 6 .endSpec() 7 .build(); 8 9 return new CoreV1Api().createNamespacedService(NAMESPACE, v1Service, null, null, null); 10} -
创建deployment的代码如下,因为内容较多所以相对复杂一些,请注意,由于deployment在kubernetes的apiVersion是<font color="blue">extensions/v1beta1</font>,因此创建的是<font color="red">ExtensionsV1beta1Deployment</font>实例:
@RequestMapping(value = "/fluent/createdeployment") public ExtensionsV1beta1Deployment createdeployment() throws Exception { ExtensionsV1beta1Deployment v1Deployment = new ExtensionsV1beta1DeploymentBuilder() // meta设置 .withNewMetadata() .withName("nginx") .endMetadata()
1 // spec设置 2 .withNewSpec() 3 .withReplicas(1) 4 // spec的templat 5 .withNewTemplate() 6 // template的meta 7 .withNewMetadata() 8 .addToLabels("name", "nginx") 9 .endMetadata() 10 11 // template的spec 12 .withNewSpec() 13 .addNewContainer() 14 .withName("nginx") 15 .withImage("nginx:1.18.0") 16 .addToPorts(new V1ContainerPort().containerPort(80)) 17 .endContainer() 18 .endSpec() 19 20 .endTemplate() 21 .endSpec() 22 .build(); 23 24 return new ExtensionsV1beta1Api().createNamespacedDeployment(NAMESPACE, v1Deployment, null, null, null); 25} -
从上述代码可见,<font color="blue">withXXX</font>和<font color="blue">endXXX</font>是成对出现的,请在编程的时候注意不要遗漏了endXXX,建议在写withXXX的同时就把endXXX写上;
-
最后一个方法是清理所有资源的,前面创建的deployment、service、namespace都在此一次性清理掉,实际操作中发现了一个尴尬的情况:删除deployment和namespace时,发送到API Server的删除请求都收到的操作成功的响应,但kubernetes客户端在反序列化响应内容时抛出异常(日志中显示了详细情况),<font color="red">鄙人能力有限暂未找到解决之道</font>,因此只能用try catch来避免整个方法抛出异常,好在kubernetes实际上已经删除成功了,影响不大:
@RequestMapping(value = "/fluent/clear") public String clear() throws Exception {
1   // 删除deployment
2   try {
3       new ExtensionsV1beta1Api().deleteNamespacedDeployment("nginx", NAMESPACE, null, null, null, null, null, null);
4   } catch (Exception e)
5   {
6       log.error("delete deployment error", e);
7   }
8
9   CoreV1Api coreV1Api = new CoreV1Api();
10
11   // 删除service
12   coreV1Api.deleteNamespacedService("nginx", NAMESPACE, null, null, null, null, null, null);
13
14   // 删除namespace
15   try {
16       coreV1Api.deleteNamespace(NAMESPACE, null, null, null, null, null, null);
17   } catch (Exception e)
18   {
19       log.error("delete namespace error", e);
20   }
21
22   return "clear finish, " + new Date();
}
-
编码已完成,启动fluent工程,接下来开始验证功能是否正常;
验证
-
将fluent工程直接在IEDA环境启动;
-
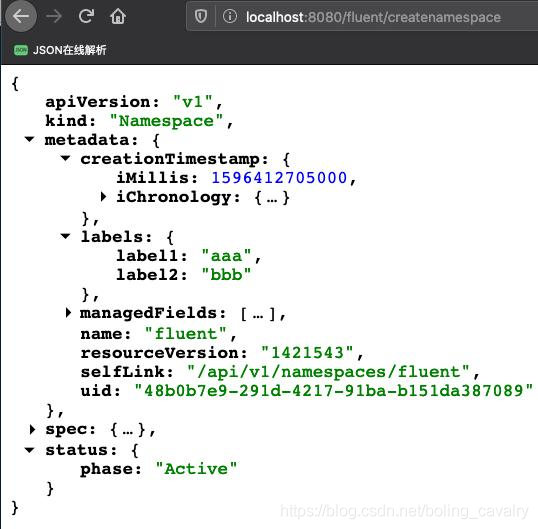
浏览器访问:<font color="blue">http://localhost:8080/fluent/createnamespace</font> ,页面会展示API Server返回的完整namespace信息:
-
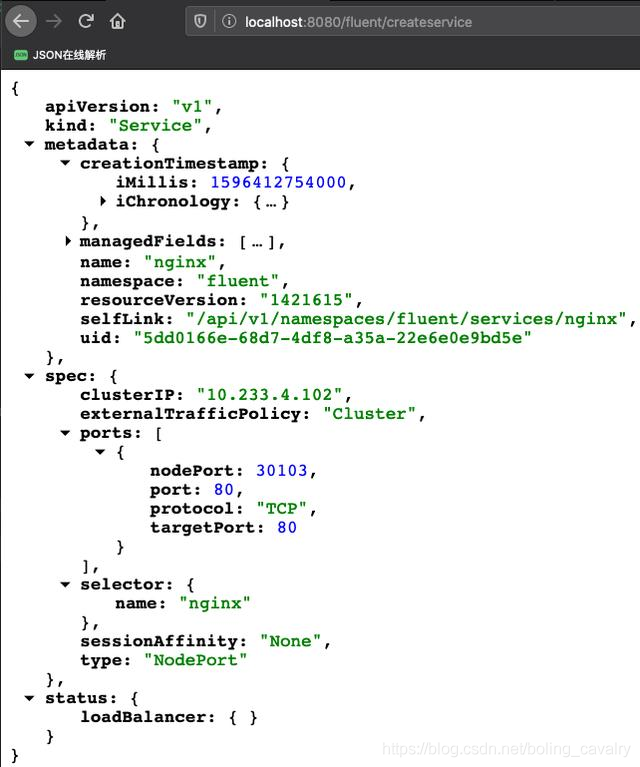
浏览器访问:<font color="blue">http://localhost:8080/fluent/createservice</font> ,页面会展示API Server返回的完整service信息:
-
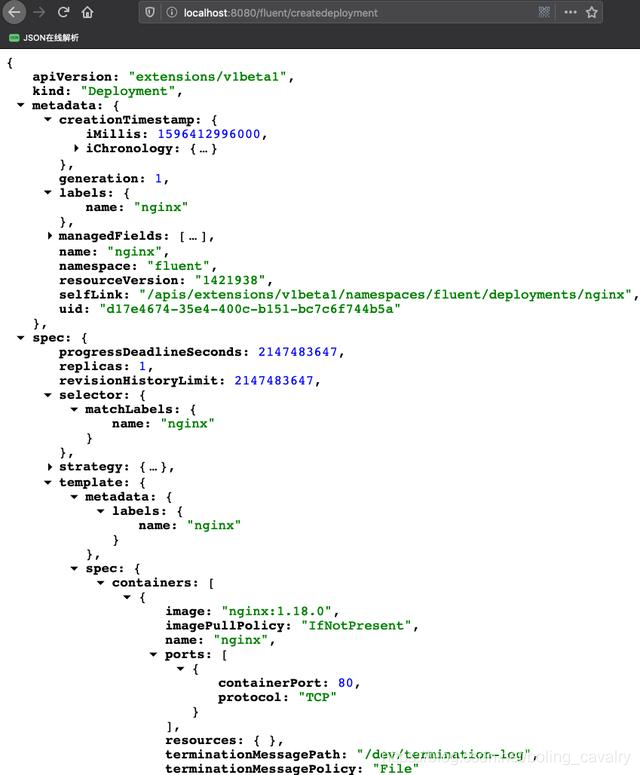
浏览器访问:<font color="blue">http://localhost:8080/fluent/createdeployment</font> ,页面会展示API Server返回的完整deployment信息:
-
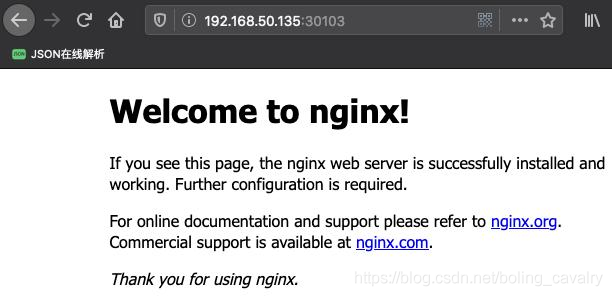
验证前面几个接口创建的服务是否可用,我这里kubernetes的IP地址是<font color="blue">192.168.50.135</font>,因此访问:<font color="blue">http://192.168.50.135:30103</font> ,可以正常显示nginx首页:
-
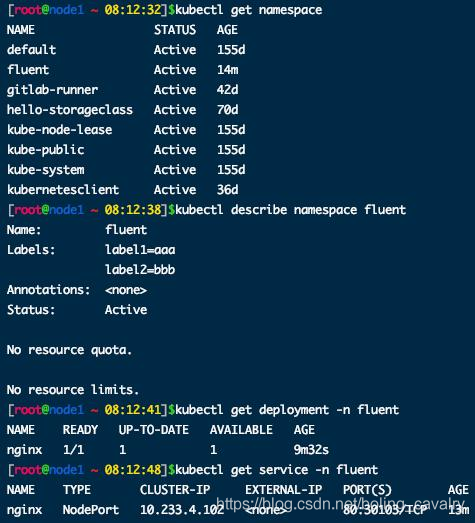
SSH登录kubernetes服务器查看,通过kubernetes的java客户端创建的资源都正常:
-
验证完成后,浏览器访问:<font color="blue">http://localhost:8080/fluent/clear</font> ,即可清理掉前面三个接口创建的资源;
- 至此,基于fluent style调用java客户端的实战就完成了,希望您能熟练使用此风格的API调用,使得编码变得更加轻松流畅,顺便预告一下,下一篇继续做一些简单轻松的操作,目标是熟悉java客户端的常用操作;
你不孤单,欣宸原创一路相伴
欢迎关注公众号:程序员欣宸
微信搜索「程序员欣宸」,我是欣宸,期待与您一同畅游Java世界... https://github.com/zq2599/blog_demos