
##第1章 redis存储系统
###1.1 redis概述
- REmote DIctionary Server(Redis)是一个基于key-value键值对的持久化数据库存储系统。redis和大名鼎鼎的Memcached缓存服务软件很像,但是redis支持的数据存储类型比memcached更丰富,包括strings(字符串),lists(列表),sets(集合)和sorted sets(有序集合)等。
- 这些数据类型支持push/pop,add/remove及取交集,并集和差集及更丰富的操作,而且这些操作都是原子性的。在此基础上,redis支持各种不同方式的排序。与memcached缓存服务一样,为了保证效率,数据都是缓存在内存中提供服务。和memcached不同的是,redis持久化缓存服务还会周期性的把更新的数据写入到磁盘以及把修改的操作记录追加到文件里记录下来,比memcached更有优势的是,redis还支持master-slave(主从)同步,这点很类似关系型数据库MySQL主从复制功能。
- Redis是一个开源的使用C语言编写(3万多行代码),支持网络,可基于内存亦可持久化的日志型,Key-Value数据库,并提供多种语言的API。从2010年3月15日起,Redis的开发工作由VMware主持。
- Redis软件的出现,再一定程度上弥补了memcached这类key-value内存缓存服务的不足,在部分场合可以对关系数据库起到很好的补充作用。redis提供了Python,Ruby,Erlang,PHP客户端,使用起来很方便。redis官方文档如下:
- http://www.redis.io/documentation
###1.2 redis特点
- key-value键值类型存储
- 支持数据可靠存储及落地
- 单进程单线程高性能服务器
- crash safe & recovery slow
- 单机qps可以达到10W
- 适合小数据量高速读写访问
###1.3 Redis优点
- 与memcached不同,Redis可以持久化存储数据
- 性能很高:Redis能支持超过10W每秒的读写频率。
- 丰富的数据类型:Redis支持二进制的Strings,Lists,Hashes,Sets及sorted Sets等数据类型操作
- 原子:Redis的所有操作都是原子性的,同时Redis还支持对几个操作全并后的原子性执行
- 丰富的特性:Redis还支持publish/subscribe(发布/订阅),通知,key过期等等特性。
- redis支持异机主从复制。
###1.4 redis缺陷与陷阱
- 系统运行有毛刺
- 不同命令延迟差别极大
- 内存管理开销大(设置低于物理内存3/5)
- buffer io造成系统OOM(内存溢出)
###1.5 redis的数据类型
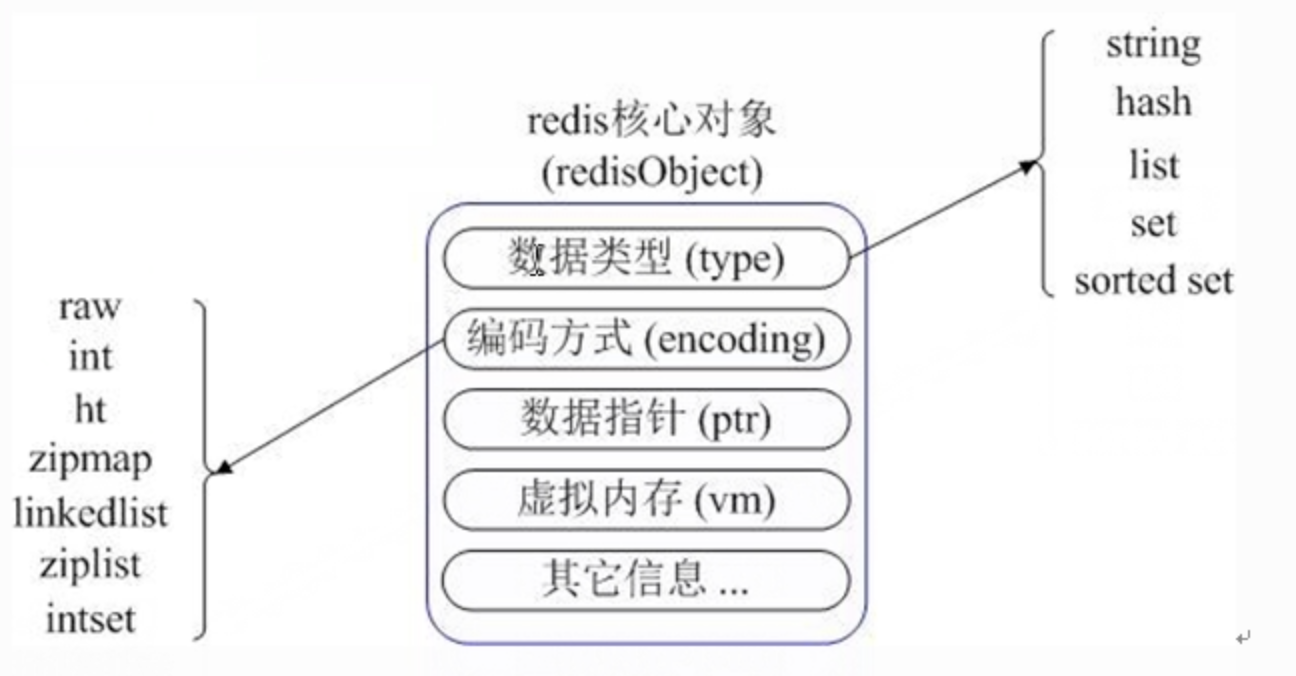
作为Key-value型存储系统数据库,Redis提供了键(Key)和值(value)映射关系。但是,除了常规的数值或字符串,Redis的键值还可以是以下形式之一,下面为最为常用的数据类型:
- String 字符串
- Hash 哈希表
- List 列表
- Set 集合
- Sorted set 有序集合
###1.6 redis 持久化
通常,Redis将数据存储于内存中,或被配置为使用虚拟内存。通过两种方式可以实现数据持久化:使用快照(snapshot)的方式,将内存中的数据不断写入磁盘,或使用类似MySQL的binlog日志(aof但并不用于主从同步)方式,记录每次更新的日志。前者性能较高,但是可能会引起一定程度的数据丢失;后者相反。

1#名词解释
2#Snapshot(快照)
3save 900 1      #900秒有1key容量被更新,则触发快照写入磁盘
4save 300 10
5save 60 10000
6
7#AOF(更新日志)
8appendfsync always  #总是记录更新内容
9appendfsync everysec    #每秒记录更新内容
10appendfsync no  #不记录更新内容

特别提示: 如果选择了快照的策略,那么快照在每次进行保存的时候,都会阻碍执行前端的客户端请求。 快照会一次性将内存里的数据全都写进磁盘。
###1.7 redis的应用场景
(1)MySQL+Memcached网站架构问题
通过MySQL数据库存储数据库数据,加上通过Memcached把热点数据存放到内存cache里,达到加速数据访问减轻数据库压力的目的,这是绝大部分公司都曾经使用过这样的架构,但随着业务数据量的不断增加,和访问量的持续增长,很多问题就会暴露出来:
- 需要不断的对MySQL进行拆库拆表,Memcached也需不断跟着扩容,扩容和维护工作占据大量开发运维时间。
- Memcached与MySQL数据库数据一致性问题是个老大难。
- Memcached数据命中率低或down机,会导致大量访问直接穿透到数据库,导致MySQL无法支撑访问。
- 跨机房cache同步及cache数据一致性问题
(2)redis的最佳应用场景
- Redis最佳试用场景是全部数据in-memory
- Redis更多场景是作为Memcached的替代品来使用。
- 数据比较重要,对数据一致性有一定要求的业务。
- 当需要除key/value之外的更多数据类型支持时,使用Redis更合适。
- 需要提供主从同步以及负载均衡分布式应用场景(redis主从同步)
更多
a.Redis作者谈Redis应用场景 http://blog.nosqlfan.com/html/2235.html
b.使用Redis bitmap进行活跃用户统计 http://blog.nosqlfan.com/html/3501.html
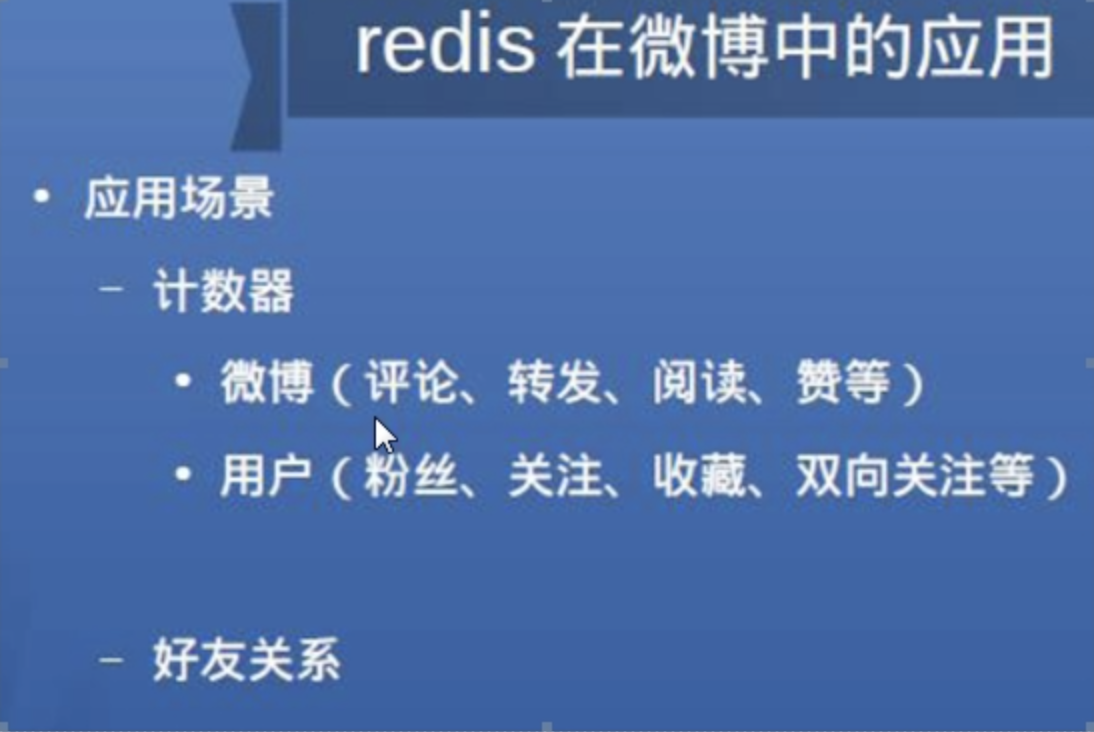
- 计数,cache服务,展示最近,最热,点击率最高,活跃度最高等等条件的top list,用户最近访问记录,Relation List/Message Queue,粉丝列表。
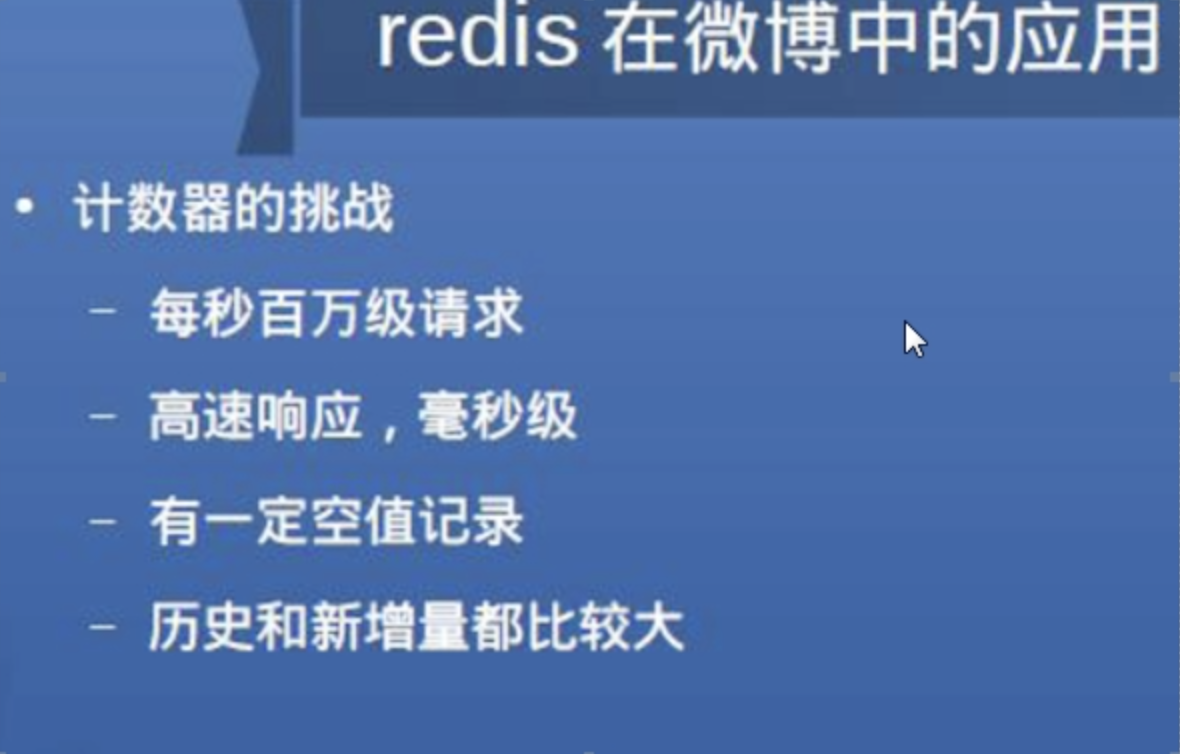
- Key-Value Store 更加注重对海量数据存取的性能,分布式,扩展性支持上,并不需要传统关系数据库的一些特征,例如:Schema,事务,完整SQL查询支持等等,因此在分布式环境下的性能相对于传统的关系数据库有较大提升。
###1.8 redis的应用案例
sina使用redis案例:
(1)application -->redis
(2)应用程序首先访问Redis,只有当Redis没有数据或访问失败时访问redis。
(3)二次开发实现MySQL和redis互相同步
MySQL -->Redis复制
- 通过RBR解析BINLOG同步到redis
- Redis提供特定数据结构的读访问
- 实现关系型数据转变成队列数据
Redis -->MySQL复制
- Redis提供特定数据结构的读写
- 通过replication接口同时写入到MySQL
新浪为什么用redis?
- 数据结构(Data Structure)需求越来越多,但Memcache中没有,影响开发效率。
- 性能需求,随着读操作的量的上升需要解决,经历的过程有:数据库读写分离(M/S)-->数据库使用多个Slave -->增加Cache(memcache)-->转到Redis
- 解决写的问题:水平拆分,对表的拆分,将有的用户放在这个表,有的用户放在另外一个表。
- 可靠性需求:Cache的“雪崩”问题让人纠结;Cache面临着快速恢复的挑战。
- 开发成本需求:Cache和DB的一致性维护成本越来越高(先清理DB,再清理缓存,不行啊,太慢了!)开发需要跟上不断涌入的产品需求,硬件成本最贵的就是数据库层面的机器,基本上比前端的机器要贵几倍,主要是IO密集型,很耗硬件。
- 维护性复杂:一致性维护成本越来越高。BerkeleyDB使用B树,会一直写新的,内部不会有文件重新组织;这样会导致文件越来越大;大的时候需要进行文档归档,归档的操作要定期做;这样,就需要有一定的down time。
所以基于以上考虑,新浪选择了Redis
###1.9 Redis的生产经验教训
- 一定要进行Master-slave主从同步配置,在出现服务故障时可以切换
- 在master禁用数据持久化,只需要在slave上配置数据持久化
- 物理内存+虚拟内存不足,这个时候dump一直死着,时间久了机器挂掉。这个情况就是灾难!
- 当Redis物理内存使用超过内存总容量的3/5时就会开始比较危险了,就开始做swap,内存碎片大!
- 当达到最大内存时,会清空带有过期时间的key,即使key未到过期时间。
- redis与DB同步写的问题,先写DB,后写redis,因为写内存基本上没有问题。
##第2章 快速部署一个redis环境
###2.1 Redis部署环境搭建
主机名
eth0
用途
Master-redis01
10.0.0.135
主Redis
Slave-redis02
10.0.0.136
从Redis
###2.2 开始安装redis服务
在redis的官方网站(http://www.redis.io)下载最新的稳定版本redis。
1wget -q http://download.redis.io/releases/redis-2.8.9.tar.gz
2
3#在redis01和redis02都执行如下操作
4[root@redis01 ~]# tar xf redis-2.8.9.tar -C /usr/src/
5[root@redis01 ~]# cd /usr/src/redis-2.8.9/
6[root@redis01 redis-2.8.9]# make MALLOC=jemalloc
7[root@redis01 redis-2.8.9]# make PREFIX=/usr/local/redis install
8[root@redis01 redis-2.8.9]# LANG=en
9[root@redis01 redis-2.8.9]# tree /usr/local/redis/bin/
10/usr/local/redis/bin/
11├── redis-benchmark
12├── redis-check-aof
13├── redis-check-dump
14├── redis-cli
15└── redis-server
16
170 directories, 5 files
命令执行完成之后,会在/usr/local/redis/bin/目录下生成5个可执行文件,分别是:
redis-server,redis-cli,redis-benchmark,redis-check-aof,redis-check-dump
它们的作用如下:
1redis-server    #Redis服务器的daemon启动程序
2redis-cli       #Redis命令操作工具。当然,你也可以用telnet根据其纯文本协议来操作
3redis-benchmark #Redis性能测试工具,测试Redis在你的系统及你的配置下的读写性能。
4redis-check-aof #对更新日志appendonly.aof检查,是否可用,类似检查mysql binlog的工具
5redis-check-dump    #用于本地数据库rdb文件的检查
###2.3 配置并启动redis服务
(1)配置启动命令
操作过程:
[root@redis01 redis-2.8.9]# ln -s /usr/local/redis/bin/* /usr/local/bin/
(2)查看命令帮助:
1[root@redis01 redis-2.8.9]# redis-server -h
2Usage: ./redis-server [/path/to/redis.conf] [options]
3       ./redis-server - (read config from stdin)
4       ./redis-server -v or --version
5       ./redis-server -h or --help
6       ./redis-server --test-memory <megabytes>
7
8Examples:
9       ./redis-server (run the server with default conf)
10       ./redis-server /etc/redis/6379.conf
11       ./redis-server --port 7777
12       ./redis-server --port 7777 --slaveof 127.0.0.1 8888
13       ./redis-server /etc/myredis.conf --loglevel verbose
14
15Sentinel mode:
16       ./redis-server /etc/sentinel.conf --sentinel
(3)启动redis服务
操作过程:
1#从源程序目录复制redis.conf到程序安装目录下
2[root@redis01 redis-2.8.9]# cd /usr/src/redis-2.8.9/
3[root@redis01 redis-2.8.9]# pwd
4/usr/src/redis-2.8.9
5[root@redis01 redis-2.8.9]# mkdir /usr/local/redis/conf
6[root@redis01 redis-2.8.9]# cp redis.conf /usr/local/redis/conf/
7
8#启动redis服务
9[root@redis01 redis-2.8.9]# redis-server /usr/local/redis/conf/redis.conf &
10
11#查看redis进程启动情况
12[root@redis01 redis-2.8.9]# ps -ef | grep redis | grep -v grep
13root       3169   1288  0 10:17 pts/0    00:00:00 redis-server *:6379
特别提示:
redis启动成功后,在最后会出现如下警示信息:
1[3169] 02 Oct 10:17:30.689 # Server started, Redis version 2.8.9
2[3169] 02 Oct 10:17:30.690 # WARNING overcommit_memory is set to 0! Background save may fail under low memory condition. To fix this issue add 'vm.overcommit_memory = 1' to /etc/sysctl.conf and then reboot or run the command 'sysctl vm.overcommit_memory=1' for this to take effect.
3[3169] 02 Oct 10:17:30.690 * The server is now ready to accept connections on port 6379
4
5#警示大概意思为:
6overcommit_memory被设置为了0.如果内存不够的情况下后台保存可能会失败;要解决这个问题,需要在/etc/sysctl.conf配置文件中将vm.overcommit_memory设置为1;或者通过命令“sysctl vm.overcommit_memory=1”来修改。
因此,我们做一下处理后在启动redis进程
1[root@redis01 redis-2.8.9]# pkill redis
2[root@redis01 redis-2.8.9]# sysctl vm.overcommit_memory=1
3vm.overcommit_memory = 1
4[root@redis01 redis-2.8.9]# redis-server /usr/local/redis/conf/redis.conf &
经过处理后,再启动redis就没有任何警告了。 vm.overcommit_memory参数说明: 根据内核文档,该参数有三个值,分别是: 0:当用户空间请求更多的内存时,内核尝试估算出剩余可用的内存。 1:当设这个参数值为1时,内核允许超量使用内存直到用完为止,主要用于科学计算 2:当设这个参数值为2时,内核会使用一个绝不过量使用内存的算法,即系统整个内存地址空间不能超过swap+50%的RAM值,50%参数的设定是在overcommit_ratio中设定。
测试关闭redis服务的命令
redis-cli shutdown 关闭redis进程
1[root@redis01 redis-2.8.9]# ps -ef | grep redis | grep -v grep
2root       3200   1288  0 10:38 pts/0    00:00:08 redis-server *:6379
3[root@redis01 redis-2.8.9]# redis-cli shutdown
4[3200] 02 Oct 12:43:46.621 # User requested shutdown...
5[3200] 02 Oct 12:43:46.621 * Saving the final RDB snapshot before exiting.
6[3200] 02 Oct 12:43:46.630 * DB saved on disk
7[3200] 02 Oct 12:43:46.631 # Redis is now ready to exit, bye bye...
8[1]+  Done                    redis-server /usr/local/redis/conf/redis.conf
9[root@redis01 redis-2.8.9]# ps -ef | grep redis | grep -v grep
10[root@redis01 redis-2.8.9]# redis-server /usr/local/redis/conf/redis.conf
###2.4 通过客户端操作redis数据库
下面我们来简单操作一下数据库。 插入数据:设置一个key-value对
1[root@redis01 redis-2.8.9]# redis-cli   #通过客户端连接本地redis
2127.0.0.1:6379> set id 001  #写入一条数据key(id),value(001)
3OK
4127.0.0.1:6379> get id  #取值key(id)
5"001"   #显示key对应的值
6127.0.0.1:6379> del id  #删除key(id)
7(integer) 1     #1表示成功
8127.0.0.1:6379> exists id   #验证key是否存在
9(integer) 0     #0表示不存在
10127.0.0.1:6379> get id  #取key的值
11(nil)           #报错信息
12127.0.0.1:6379> set user001 benet
13OK
14127.0.0.1:6379> set user002 yunjisuan
15OK
16127.0.0.1:6379> set user003 yun123
17OK
18127.0.0.1:6379> get user001
19"benet"
20127.0.0.1:6379> get user002
21"yunjisuan"
22127.0.0.1:6379> keys *  #查看redis里所有的key
231) "user003"
242) "user002"
253) "user001"
26
###2.5 更多操作方式及命令帮助
(1)redis数据库的表模式
1127.0.0.1:6379> keys *  #查看所有key
21) "user003"
32) "user002"
43) "user001"
5127.0.0.1:6379> select 1    #切换到表1模式
6OK
7127.0.0.1:6379[1]> keys *   #查询所有key
8(empty list or set)     #什么都没有
9127.0.0.1:6379[1]> set name wangwu  #写入一个key-value对
10OK
11127.0.0.1:6379[1]> keys *   #查看所有key
121) "name"           #key(name)已经有了
13127.0.0.1:6379[1]> get name #查看key(name)的值
14"wangwu"
15127.0.0.1:6379[1]> select 0 #切换回表0模式(初始模式)
16OK
17127.0.0.1:6379> keys *      #查看所有key
181) "user003"
192) "user002"
203) "user001"
21
(2)redis-cli客户端的远程连接及非交互式操作数据库
1[root@redis01 redis-2.8.9]# redis-cli -h 10.0.0.135 -p 6379
210.0.0.135:6379> quit
3[root@redis01 redis-2.8.9]# redis-cli -h 10.0.0.135 -p 6379 set aaa 111
4OK
5[root@redis01 redis-2.8.9]# redis-cli -h 10.0.0.135 -p 6379 get aaa
6"111"
7
(3)通过telnet连接redis数据库
telnet 10.0.0.135 6379
###2.6 redis命令帮助
(1)redis-cli客户端命令帮助:
110.0.0.135:6379> ?      #查看帮助命令用法
2redis-cli 2.8.9
3Type: "help @<group>" to get a list of commands in <group>
4      "help <command>" for help on <command>
5      "help <tab>" to get a list of possible help topics
6      "quit" to exit
710.0.0.135:6379> help   #查看帮助命令用法
8redis-cli 2.8.9
9Type: "help @<group>" to get a list of commands in <group>
10      "help <command>" for help on <command>
11      "help <tab>" to get a list of possible help topics
12      "quit" to exit
1310.0.0.135:6379> help set       #查看set命令用法
14
15  SET key value [EX seconds] [PX milliseconds] [NX|XX]
16  summary: Set the string value of a key
17  since: 1.0.0
18  group: string
19
2010.0.0.135:6379>
21
(2)通过help命令来查找命令
1#输入help + 空格 + 多次<Tab>键来切换所有命令
210.0.0.135:6379> help @generic  #这里需要狂按Tab键
###2.7 redis安全
(1)为redis客户端设置外部链接密码
警告: 因为redis速度相当快,所以在一台比较好的服务器下,一个外部的用户可以在1秒内进行上万次的密码尝试,这意味着你需要指定非常非常强大的密码来防止暴力破解。
1[root@redis01 redis-2.8.9]# grep -n requirepass /usr/local/redis/conf/redis.conf    #修改redis配置文件,添加密码
2198:# If the master is password protected (using the "requirepass" configuration
3339:# requirepass foobared
4[root@redis01 redis-2.8.9]# sed -i '339 s@# requirepass foobared@requirepass yunjisuan@g'   #密码是yunjisuan /usr/local/redis/conf/redis.conf
5[root@redis01 redis-2.8.9]# grep -n requirepass /usr/local/redis/conf/redis.conf
6198:# If the master is password protected (using the "requirepass" configuration
7339:requirepass yunjisuan
重启redis后测试
1#重启redis进程
2[root@redis01 redis-2.8.9]# ps -ef | grep redis | grep -v grep
3root       3442   1288  0 13:40 pts/0    00:00:17 redis-server *:6379
4[root@redis01 redis-2.8.9]# redis-cli shutdown
5[3442] 02 Oct 18:17:03.370 # User requested shutdown...
6[3442] 02 Oct 18:17:03.370 * Saving the final RDB snapshot before exiting.
7[3442] 02 Oct 18:17:03.380 * DB saved on disk
8[3442] 02 Oct 18:17:03.380 # Redis is now ready to exit, bye bye...
9[1]+  Done                    redis-server /usr/local/redis/conf/redis.conf
10[root@redis01 redis-2.8.9]# ps -ef | grep redis | grep -v grep
11[root@redis01 redis-2.8.9]# redis-server /usr/local/redis/conf/redis.conf &
12[root@redis01 redis-2.8.9]# ps -ef | grep redis | grep -v grep
13root       3843   1288  0 18:18 pts/0    00:00:00 redis-server *:6379
14
15#测试验证效果
16#第一种登陆验证方式
17[root@redis01 redis-2.8.9]# redis-cli   #登陆本地redis
18127.0.0.1:6379> set name 3333   #存数据
19(error) NOAUTH Authentication required. #没有验证权限
20127.0.0.1:6379> keys *  #查看所有key
21(error) NOAUTH Authentication required. #没有验证权限
22127.0.0.1:6379> auth yunjisuan  #提交验证密码
23OK          #验证通过
24127.0.0.1:6379> keys *  #查看所有keys
251) "user003"
262) "ab"
273) "user002"
284) "aaa"
295) "user001"
30
31#第二种登录验证方式
32[root@redis01 redis-2.8.9]# redis-cli -a yunjisuan  #登陆时提交密码
33127.0.0.1:6379> keys *
341) "user003"
352) "ab"
363) "user002"
374) "aaa"
385) "user001"
特别提示: redis没有用户的概念,只能设置连接密码,并且redis的连接速度非常快。因此密码需要设置的很复杂才安全。
(2)将危险的命令改名
1#查看配置文件说明
2[root@redis01 redis-2.8.9]# cat -n /usr/local/redis/conf/redis.conf | sed -n '326,359p'
3   326	################################## SECURITY ###################################安全相关
4   327
5   328	# Require clients to issue AUTH <PASSWORD> before processing any other
6   329	# commands.  This might be useful in environments in which you do not trust
7   330	# others with access to the host running redis-server.
8   331	#
9   332	# This should stay commented out for backward compatibility and because most
10   333	# people do not need auth (e.g. they run their own servers).
11   334	#
12   335	# Warning: since Redis is pretty fast an outside user can try up to
13   336	# 150k passwords per second against a good box. This means that you should
14   337	# use a very strong password otherwise it will be very easy to break.
15   338	#
16   339	requirepass yunjisuan           ##添加的密码验证
17   340
18   341	# Command renaming.
19   342	#
20   343	# It is possible to change the name of dangerous commands in a shared
21   344	# environment. For instance the CONFIG command may be renamed into something
22   345	# hard to guess so that it will still be available for internal-use tools
23   346	# but not available for general clients.
24   347	#
25   348	# Example:
26   349	#
27   350	# rename-command CONFIG b840fc02d524045429941cc15f59e41cb7be6c52
28   351	#
29   352	# It is also possible to completely kill a command by renaming it into
30   353	# an empty string:
31   354	#
32   355	# rename-command CONFIG ""      ##命令修改示例
33   356	#
34   357	# Please note that changing the name of commands that are logged into the
35   358	# AOF file or transmitted to slaves may cause problems.
36   359
37
38
39#修改配置文件
40[root@redis01 redis-2.8.9]# sed -i '359i rename-command set "sset"' /usr/local/redis/conf/redis.conf
41[root@redis01 redis-2.8.9]# sed -n '359p' /usr/local/redis/conf/redis.conf
42rename-command set "sset"
43
44#重启redis进程
45[root@redis01 redis-2.8.9]# redis-cli -a yunjisuan shutdown
46[3843] 02 Oct 18:56:54.245 # User requested shutdown...
47[3843] 02 Oct 18:56:54.245 * Saving the final RDB snapshot before exiting.
48[3843] 02 Oct 18:56:54.255 * DB saved on disk
49[3843] 02 Oct 18:56:54.255 # Redis is now ready to exit, bye bye...
50[1]+  Done                    redis-server /usr/local/redis/conf/redis.conf
51[root@redis01 redis-2.8.9]# redis-server /usr/local/redis/conf/redis.conf &
52
53#验证命令改名效果
54[root@redis01 redis-2.8.9]# redis-cli -a yunjisuan
55127.0.0.1:6379> set xxx 555     #命令输入错误(因为修改过了)
56(error) ERR unknown command 'set'
57127.0.0.1:6379> sset xxx 555    #写入key-value正确
58OK
59127.0.0.1:6379> get xxx
60"555"
###2.8 为php安装redis客户端扩展
(1)获取源码包
wget https://github.com/nicolasff/phpredis/archive/master.zip
(2)安装
1[root@redis01 ~]# ls -l phpredis-master.tar.gz
2-rw-r--r--. 1 root root 164509 Oct  2 19:23 phpredis-master.tar.gz
3[root@redis01 ~]# tar xf phpredis-master.tar.gz -C /usr/src/
4[root@redis01 ~]# cd /usr/src/phpredis-master/
5[root@redis01 phpredis-master]# /usr/local/php/bin/phpize
6[root@redis01 phpredis-master]# ./configure --with-php-config=/usr/local/php/bin/php-config
7[root@redis01 phpredis-master]# make && make install
(3)修改php.ini设置,重启php
1#添加
2echo "extension = redis.so" >> /usr/local/php/lib/php.ini
3
4#将php.ini配置文件中的extension_dir修改成如下:
5extension_dir = "/usr/local/php/lib/php/extensions/no-debug-non-zts-20090626/"

###2.9 开发php程序操作redis
在操作之前,请将之前redis配置文件里修改的redis命令注释掉
1[root@redis01 scripts]# cat redis.php
2#!/bin/bash
3
4<?php
5
6$redis = new Redis();
7$redis -> connect("10.0.0.135",6379);
8$redis -> auth("yunjisuan");
9$redis -> set("name","yunjisuan");
10$var = $redis -> get("name");
11echo "$var\n";
12
13?>
14
###2.10 安装Python redis客户端操作redis
1wget https://pypi.python.org/packages/source/r/redis/redis-2.10.1.tar.gz
2tar xf redis-2.10.1.tar.gz
3cd redis-2.10.1
4python setup.py install
开发python程序操作redis
在操作前请将之前redis配置文件里修改的redis命令注释掉,否则报错
1[root@redis01 redis-2.10.1]# python
2Python 2.6.6 (r266:84292, Nov 22 2013, 12:16:22)
3[GCC 4.4.7 20120313 (Red Hat 4.4.7-4)] on linux2
4Type "help", "copyright", "credits" or "license" for more information.
5>>> import redis        #引用redis支持库
6>>> r = redis.Redis(host='10.0.0.135',port='6379',password='yunjisuan') #建立redis数据库的连接对象(面向对象方式)
7>>> r.set('name','benet')   #操作对象调用set方法写入数据
8True
9>>> r.get('name')           #操作对象调用get方式读取数据
10'benet'
11>>> r.dbsize()              #操作对象查看redis数据库的数据条数
121L
13>>> r.keys()                #查看所有的key
14['name']
15>>> exit()                  #退出
16
###2.11 通过Web界面连接Python程序展示redis
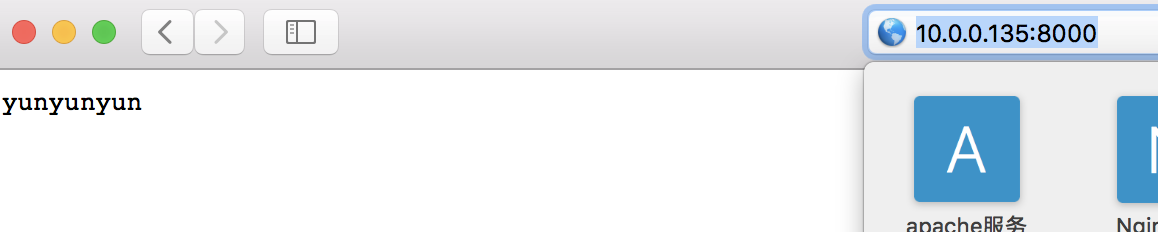
开发Python脚本
1[root@redis01 scripts]# cat python-redis.py
2#/usr/bin/python
3
4from wsgiref.simple_server import make_server
5import redis
6
7def get_redis():
8	r = redis.Redis(host='10.0.0.135',port='6379',password='yunjisuan',db=0)
9	r.set('name','yunyunyun')
10	return r.get('name')
11
12def hello_world_app(environ,start_response):
13	status = '200 OK'	#HTTP Status
14	headers = [('Content-type','text/plain')]	#HTTP Headers
15	start_response(status,headers)
16
17	# The returned object is going to be printed
18	return get_redis()
19
20httpd = make_server('',8000,hello_world_app)
21print "Serving on port 8000..."
22
23# Server until process is killed
24httpd.serve_forever()
25
启动python脚本
注意关闭iptables
1[root@redis01 scripts]# python python-redis.py
2Serving on port 8000...     #监听8000端口
通过客户端浏览器连接Python程序
###2.12 解读redis默认配置文件
1#redis支持include功能
2[root@redis01 scripts]# cat -n /usr/local/redis/conf/redis.conf | sed -n '30,31p'
3    30	# include /path/to/local.conf
4    31	# include /path/to/other.conf
5
6#redis是否后台运行
7[root@redis01 scripts]# cat -n /usr/local/redis/conf/redis.conf | sed -n '37p'
8    37	daemonize no
9
10#pid号保存文件的位置
11[root@redis01 scripts]# cat -n /usr/local/redis/conf/redis.conf | sed -n '41p'
12    41	pidfile /var/run/redis.pid
13
14#redis默认监听端口
15[root@redis01 scripts]# cat -n /usr/local/redis/conf/redis.conf | sed -n '45p'
16    45	port 6379
17
18#调整tcp监听队列
19[root@redis01 scripts]# cat -n /usr/local/redis/conf/redis.conf | sed -n '54p'
20    54	tcp-backlog 511
21
22#调整redis的监听地址
23[root@redis01 scripts]# cat -n /usr/local/redis/conf/redis.conf | sed -n '63,64p'
24    63	# bind 192.168.1.100 10.0.0.1
25    64	# bind 127.0.0.1
26
27#调整客户端超时时间
28[root@redis01 scripts]# cat -n /usr/local/redis/conf/redis.conf | sed -n '74p'
29    74	timeout 0
30
31#调整tcp的会话保持时间
32[root@redis01 scripts]# cat -n /usr/local/redis/conf/redis.conf | sed -n '90p'
33    90	tcp-keepalive 0
34
35#调整日志级别
36[root@redis01 scripts]# cat -n /usr/local/redis/conf/redis.conf | sed -n '98p'
37    98	loglevel notice
38
39#redis日志记录位置,默认是打印到屏幕上
40[root@redis01 scripts]# cat -n /usr/local/redis/conf/redis.conf | sed -n '103p'
41   103	logfile ""
42
43#是否启用syslog来接收日志(比如日志集中收集)
44[root@redis01 scripts]# cat -n /usr/local/redis/conf/redis.conf | sed -n '113p'
45   113	# syslog-facility local0
46
47#设置数据库的数量,如果缺省,默认为0(select0...select 15)
48[root@redis01 scripts]# cat -n /usr/local/redis/conf/redis.conf | sed -n '118p'
49   118	databases 16
50
51#redis快照设置
52[root@redis01 scripts]# cat -n /usr/local/redis/conf/redis.conf | sed -n '120,144p'
53   120	################################ SNAPSHOTTING  ################################
54   121	#
55   122	# Save the DB on disk:
56   123	#
57   124	#   save <seconds> <changes>
58   125	#
59   126	#   Will save the DB if both the given number of seconds and the given
60   127	#   number of write operations against the DB occurred.
61   128	#
62   129	#   In the example below the behaviour will be to save:
63   130	#   after 900 sec (15 min) if at least 1 key changed
64   131	#   after 300 sec (5 min) if at least 10 keys changed
65   132	#   after 60 sec if at least 10000 keys changed
66   133	#
67   134	#   Note: you can disable saving at all commenting all the "save" lines.
68   135	#
69   136	#   It is also possible to remove all the previously configured save
70   137	#   points by adding a save directive with a single empty string argument
71   138	#   like in the following example:
72   139	#
73   140	#   save ""     #如果不想保存在磁盘,就如此设置
74   141
75   142	save 900 1      #900秒内至少1key数据变化,但会阻塞用户请求,高并发时不用
76   143	save 300 10     #300秒内至少10key数据变化,但会阻塞用户请求,高并发时不用
77   144	save 60 10000   #60秒内至少10000key数据变化,但会阻塞用户请求,高并发时不用
78
79#如果bgsave出错是否停止写入
80[root@redis01 scripts]# cat -n /usr/local/redis/conf/redis.conf | sed -n '159p'
81   159	stop-writes-on-bgsave-error yes
82
83#redis将数据存储在磁盘的什么位置
84[root@redis01 scripts]# cat -n /usr/local/redis/conf/redis.conf | sed -n '177p'
85   177	dbfilename dump.rdb
86
87#指定redis配置文件当前工作的路径(指定dbfilename的当前路径位置)
88[root@redis01 scripts]# cat -n /usr/local/redis/conf/redis.conf | sed -n '187p'
89   187	dir ./
90
91#给redis设定密码
92[root@redis01 scripts]# cat -n /usr/local/redis/conf/redis.conf | sed -n '339p'
93   339	requirepass yunjisuan
94
95#修改redis操作命令的名称
96[root@redis01 scripts]# cat -n /usr/local/redis/conf/redis.conf | sed -n '355,357p'
97   355	# rename-command CONFIG ""
98   356	# rename-command set ""
99   357	# rename=command get yunjisuan
100
101#设定redis内存限制(但是内存用完后,redis就会开始删除key)
102[root@redis01 scripts]# cat -n /usr/local/redis/conf/redis.conf | sed -n '398p'
103   398	# maxmemory <bytes>
104
105#设定redis内存清理的算法
106[root@redis01 scripts]# cat -n /usr/local/redis/conf/redis.conf | sed -n '403,408p'
107   403	# volatile-lru -> remove the key with an expire set using an LRU algorithm
108   404	# allkeys-lru -> remove any key accordingly to the LRU algorithm
109   405	# volatile-random -> remove a random key with an expire set
110   406	# allkeys-random -> remove a random key, any key
111   407	# volatile-ttl -> remove the key with the nearest expire time (minor TTL)
112   408	# noeviction -> don't expire at all, just return an error on write operations
113
114#设定redis内存限制及内存清理的算法示例
115[root@redis01 scripts]# cat -n /usr/local/redis/conf/redis.conf | sed -n '421p'
116   421	# maxmemory-policy volatile-lru
117
118#关于redis的流模式的存储说明
119[root@redis01 scripts]# cat -n /usr/local/redis/conf/redis.conf | sed -n '431,449p'
120   431	############################## APPEND ONLY MODE ###############################
121   432
122   433	# By default Redis asynchronously dumps the dataset on disk. This mode is
123   434	# good enough in many applications, but an issue with the Redis process or
124   435	# a power outage may result into a few minutes of writes lost (depending on
125   436	# the configured save points).
126   437	#
127   438	# The Append Only File is an alternative persistence mode that provides
128   439	# much better durability. For instance using the default data fsync policy
129   440	# (see later in the config file) Redis can lose just one second of writes in a
130   441	# dramatic event like a server power outage, or a single write if something
131   442	# wrong with the Redis process itself happens, but the operating system is
132   443	# still running correctly.
133   444	#
134   445	# AOF and RDB persistence can be enabled at the same time without problems.
135   446	# If the AOF is enabled on startup Redis will load the AOF, that is the file
136   447	# with the better durability guarantees.
137   448	#
138   449	# Please check http://redis.io/topics/persistence for more information.
139
140#是否启用AOF存储模式
141[root@redis01 scripts]# cat -n /usr/local/redis/conf/redis.conf | sed -n '451p'
142   451	appendonly no
143
144#设定AOF文件的存储位置
145[root@redis01 scripts]# cat -n /usr/local/redis/conf/redis.conf | sed -n '455p'
146   455	appendfilename "appendonly.aof"     #并不用于主从同步,只是redis在启动时,读取此文件用于恢复数据
147
148#设定AOF同步存储的时间周期
149[root@redis01 scripts]# cat -n /usr/local/redis/conf/redis.conf | sed -n '481p'
150   481	appendfsync everysec    #每秒或不用