
系列文章目录
Linux操作系统笔记【超详细】
<font color=black face="微软雅黑" size=3 >
本篇文章主要从准备篇、项目开发、项目打包、项目部署四个部分去介绍如何把前后端分离的项目部署到阿里云服务器,在服务器上去玩自己的项目。
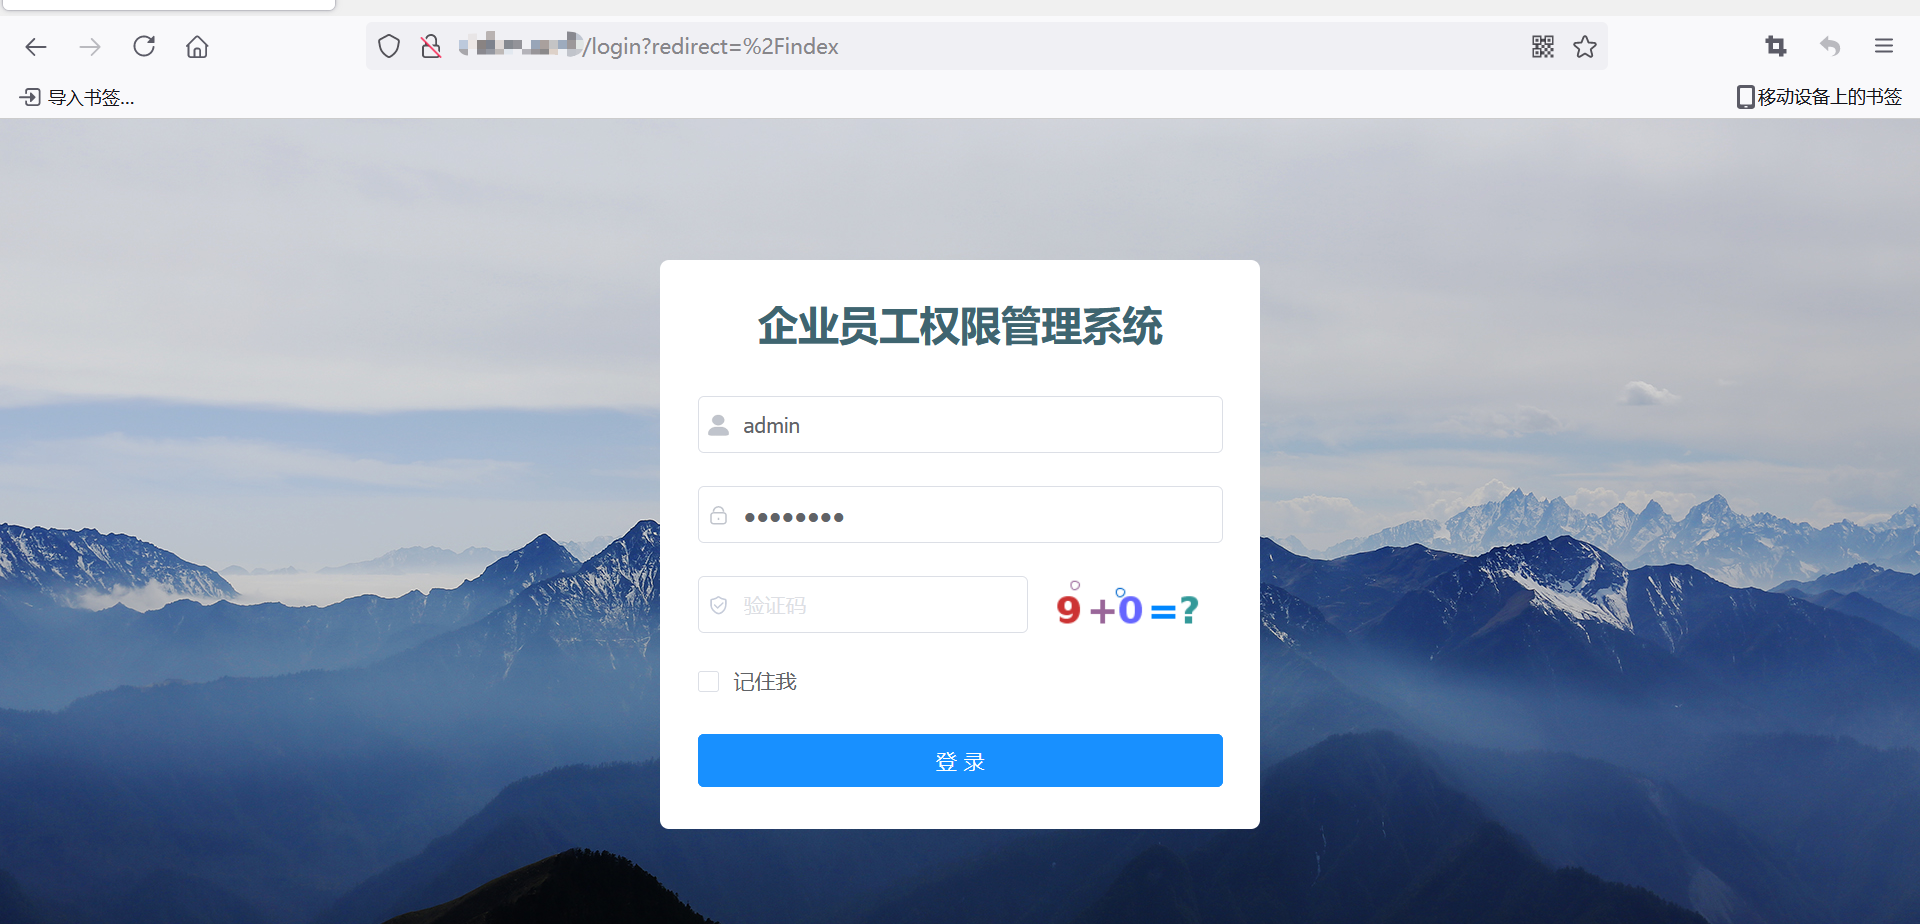
项目最终效果图:输入ip即可访问!!!
@TOC </font>
<hr style=" border:solid; width:100px; height:1px;" color=#000000 size=1">前言
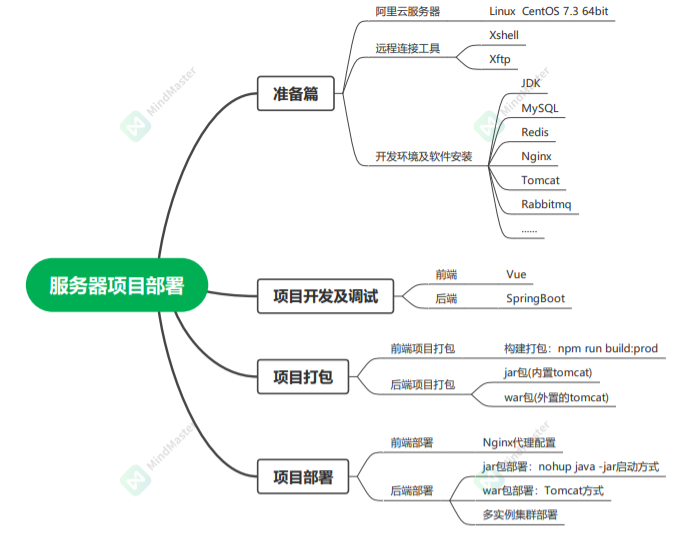
<font color=black face="微软雅黑" size=3 >部署的大概的步骤流程如下图:
一、准备篇
<font color=black face="微软雅黑" size=2 >1、阿里云服务器(Linux CentOS 7.3 64bit) 2、安装Xshell、Xftp连接工具并成功连接服务器。 3、在服务器上安装JDK、Mysql、Redis、Tomcat、Nginx等环境,并确保安装成功! 4、Mysql安装成功后,使用Navicat连接工具连接服务器上的Mysql。 5、Redis安装成功后,使用RedisDesktopManager连接工具连接服务器上的Reids。
二、项目开发及调试
<font color=black face="微软雅黑" size=2 >部署的项目是之前做的一个小项目,Vue+SpringBoot前后端分离的项目。 1、执行SQL脚本,在服务器mysql上创建表。 2、修改Mysql连接配置。修改配置文件application.yml中Mysql数据库url、username、password为你实际服务器上数据库配置。 3、修改Redis的连接配置。修改Redis缓存的 host 、 password 等连接信息为你实际服务器上Redis配置。 4、本地运行测试。启动前端、后端项目确保项目成功运行。
三、项目打包
<font color=black face="微软雅黑" size=2 >1、前端项目构建打包。切换到项目根目录下,执行下面命令。
1npm run build:prod
<font color=black face="微软雅黑" size=2 >注:构建打包成功之后,会在根⽬录⽣成 dist ⽂件夹,⾥⾯就是构建打包好的前端项⽬⽂件!
<font color=black face="微软雅黑" size=2 >2、后端项目构建打包。为了方便起见,Spring Boot 由于自带 Tomcat 应用服务器,项目默认会打包为可执行的 jar 包。
切换到项目的根目录,执行 mvn package 命令即可构建打包。构建打包完成并可执行的 jar 包位于target文件夹。
四、项目部署
<font color=black face="微软雅黑" size=2 >1、前端部署。使用Xftp工具将前端打包完成的dist文件夹,上传至服务器的/usr/local/web文件夹下。
修改Nginx的配置文件nginx.conf。位于目录/etc/nginx
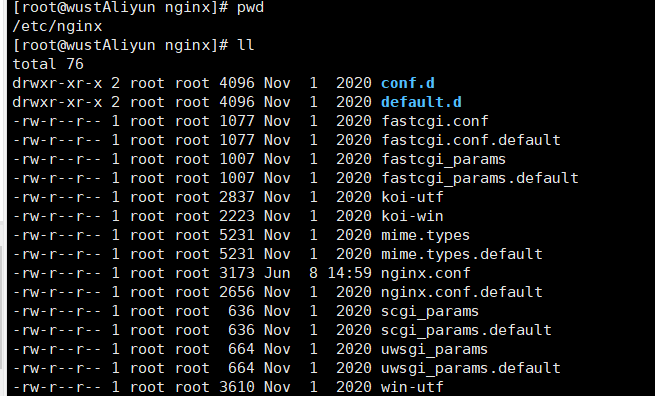 修改配置如下:
1# For more information on configuration, see:
2#   * Official English Documentation: http://nginx.org/en/docs/
3#   * Official Russian Documentation: http://nginx.org/ru/docs/
4
5user nginx;
6worker_processes auto;
7error_log /var/log/nginx/error.log;
8pid  /run/nginx.pid;
9
10# Load dynamic modules. See /usr/share/doc/nginx/README.dynamic.
11include /usr/share/nginx/modules/*.conf;
12
13events {
14    worker_connections 1024;
15}
16
17http {
18    log_format  main  '$remote_addr - $remote_user [$time_local] "$request" '
19                      '$status $body_bytes_sent "$http_referer" '
20                      '"$http_user_agent" "$http_x_forwarded_for"';
21
22    access_log  /var/log/nginx/access.log  main;
23
24    sendfile            on;
25    tcp_nopush          on;
26    tcp_nodelay         on;
27    keepalive_timeout   65;
28    types_hash_max_size 2048;
29
30    include             /etc/nginx/mime.types;
31    default_type        application/octet-stream;
32
33    # Load modular configuration files from the /etc/nginx/conf.d directory.
34    # See http://nginx.org/en/docs/ngx_core_module.html#include
35    # for more information.
36    include /etc/nginx/conf.d/*.conf;
37
38    server {
39        listen       80 default_server;
40        listen       [::]:80 default_server;
41        server_name  118.31.187.5;
42     #  root         /usr/share/nginx/html;
43
44        # Load configuration files for the default server block.
45        include /etc/nginx/default.d/*.conf;
46
47        location / {
48           root   /usr/local/web/dist;
49           try_files $uri $uri/ /index.html;
50           index  index.html;
51        }
52      location /prod-api/ {  # 反向代理到后端工程
53            proxy_set_header Host $http_host;
54            proxy_set_header X-Real-IP $remote_addr;
55            proxy_set_header REMOTE-HOST $remote_addr;
56            proxy_set_header X-Forwarded-For $proxy_add_x_forwarded_for;
57            proxy_pass http://localhost:8088/;
58        }
59
60
61     #     error_page 404 /404.html;
62    #     location = /404.html {
63    #    }
64
65        error_page 500 502 503 504 /50x.html;
66        location = /50x.html {
67            root html;
68        }
69    }
70
71# Settings for a TLS enabled server.
72#
73#    server {
74#        listen       443 ssl http2 default_server;
75#        listen       [::]:443 ssl http2 default_server;
76#        server_name  _;
77#        root         /usr/share/nginx/html;
78#
79#        ssl_certificate "/etc/pki/nginx/server.crt";
80#        ssl_certificate_key "/etc/pki/nginx/private/server.key";
81#        ssl_session_cache shared:SSL:1m;
82#        ssl_session_timeout  10m;
83#        ssl_ciphers HIGH:!aNULL:!MD5;
84#        ssl_prefer_server_ciphers on;
85#
86#        # Load configuration files for the default server block.
87#        include /etc/nginx/default.d/*.conf;
88#
89#        location / {
90#        }
91#
92#        error_page 404 /404.html;
93#        location = /404.html {
94#        }
95#
96#        error_page 500 502 503 504 /50x.html;
97#        location = /50x.html {
98#        }
99#    }
100
101}
102
<font color=black face="微软雅黑" size=2 >改动的地方如下:
1  location / {
2           root   /usr/local/web/dist;
3           try_files $uri $uri/ /index.html;
4           index  index.html;
5        }
1 location /prod-api/ {  # 反向代理到后端工程
2            proxy_set_header Host $http_host;
3            proxy_set_header X-Real-IP $remote_addr;
4            proxy_set_header REMOTE-HOST $remote_addr;
5            proxy_set_header X-Forwarded-For $proxy_add_x_forwarded_for;
6            proxy_pass http://localhost:8088/;
7        }
<font color=black face="微软雅黑" size=2 >执行如下命令,重新加载 Nginx 使其生效。
1nginx -s reload
<font color=black face="微软雅黑" size=2 >2、后端部署。使用Xftp工具将打包完成的jar包,上传至服务器的/usr/local/web目录下面。
使用后台的方式启动后端工程。
1nohup java -jar xx_web.jar >/dev/null 2>&1 &
<font color=black face="微软雅黑" size=2 >注:阿里云服务器需要配置安全组,并支持端口访问;比如80,8080,3306、6379端口等。
<hr style=" border:solid; width:100px; height:1px;" color=#000000 size=1">测试
<font color=black face="微软雅黑" size=2 >在浏览器的地址栏中,访问IP, 即可进入后台管理系统!!!
<hr>个人博客:https://blog.csdn.net/weixin_43759352 微信公众号:【小小开发者】