
软件基础+版本:
1、3台centos7系统,其中都已经配置完成了jdk环境,jdk的版本为
1[root@node03 bin]# java -version
2java version "1.8.0_144"
3Java(TM) SE Runtime Environment (build 1.8.0_144-b01)
4Java HotSpot(TM) 64-Bit Server VM (build 25.144-b01, mixed mode)
具体的linux的jdk配置方式可见其他文章
2、解压版的linux的tomcat,版本如下:
1[root@node02 soft]# ll
2总用量 191220
3-rw-r--r--  1 root root  10291220 11月 26 15:44 apache-tomcat-8.5.49.tar.gz
3、
1[root@node02 soft]# ll
2
3总用量 182060
4drwxr-xr-x. 8    10   143       255 7月  22 2017 jdk1.8.0_144
5-rw-r--r--. 1 root  root  185515842 9月   4 17:09 jdk-8u144-linux-x64.tar.gz
6drwxr-xr-x  9 nginx nginx       186 11月 26 16:58 nginx-1.10.2
7-rw-r--r--  1 root  root     910812 10月 18 2016 nginx-1.10.2.tar.gz
三台centos的别名和ip为:下面是三台虚拟机
192.168.27.202 node02
192.168.27.203 node03
192.168.27.204 node04
其中的node02和node03是安装两个tomcat,搭建tomcat集群用
node04是搭建nginx做负载均衡服务器
1、配置搭建tomcat集群的两台服务器的jdk环境
步骤:
2、node02上面安装tomcat:
[root@node02 soft]# tar zxfapache-tomcat-8.5.49.tar.gz
解压完毕之后
在tomcat的解压目录下面的webapps的ROOT下面创建一个jsp页面用于测试tomcat是否安装成功
具体的创建jsp和验证的过程如下:
1在tomcat的ROOT目录下执行命令:
2
3[root@node03 ROOT]# vim test.jsp 写一个测试页
4
5[root@node03 ROOT]# cat test.jsp
[root@node03 ROOT]# more test.jsp
server03:the time is: <%=new java.util.Date()%>
[root@node03 ROOT]#
1[root@node03 ROOT]# ll
2总用量 184
3-rw-r----- 1 root root 27235 11月 18 02:48 asf-logo-wide.svg
4-rw-r----- 1 root root   713 11月 18 02:46 bg-button.png
5-rw-r----- 1 root root  1918 11月 18 02:46 bg-middle.png
6-rw-r----- 1 root root  1401 11月 18 02:46 bg-nav.png
7-rw-r----- 1 root root  3103 11月 18 02:46 bg-upper.png
8-rw-r----- 1 root root 21630 11月 18 02:46 favicon.ico
9-rw-r----- 1 root root 12219 11月 18 02:48 index.jsp
10-rw-r----- 1 root root  7136 11月 18 02:48 RELEASE-NOTES.txt
11-rw-r--r-- 1 root root    48 11月 26 16:24 test.jsp
12-rw-r----- 1 root root  5581 11月 18 02:48 tomcat.css
13-rw-r----- 1 root root  2066 11月 18 02:46 tomcat.gif
14-rw-r----- 1 root root  5103 11月 18 02:46 tomcat.png
15-rw-r----- 1 root root  2376 11月 18 02:46 tomcat-power.gif
16-rw-r----- 1 root root 67795 11月 18 02:48 tomcat.svg
17drwxr-x--- 2 root root    21 11月 26 15:52 WEB-INF
18[root@node03 ROOT]# pwd
19/opt/soft/apache-tomcat-8.5.49/webapps/ROOT
20[root@node03 ROOT]#
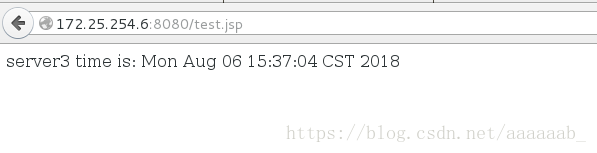
之后在自己的本地机子上,浏览器中进行测试,
输入安装tomcat的那台机子的ip:8080/test.jsp如果能够进入页面,则代表配置成功
test.jsp页面测试效果如下:
同样的node03也进行同样的配置和检测
2、node04服务器的nginx环境搭建:
编译nginx进行负载均衡的配置:
[root@node04]# tar zxf nginx-1.10.2.tar.gz
解压完毕之后:
我配置的并没有sticky模块,这个是借助于网上的一个人的图片,哈哈,自己忘截图了
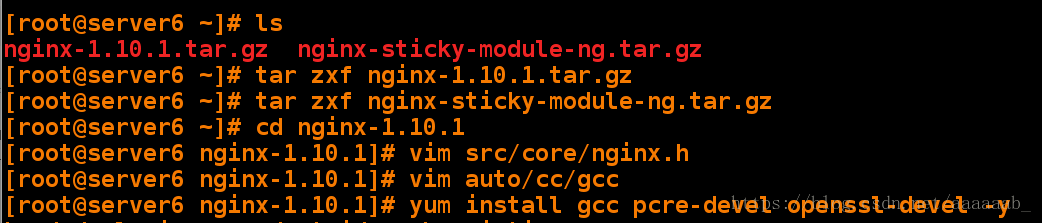
安装完毕之后进行下面的配置更改
1[root@node04 nginx-1.10.2] # vim auto/cc/gcc
2179 #CFLAGS="$CFLAGS -g"      ##注释掉这行,忽略编译信息,安装的容量会变小。
3
4[root@node04 nginx-1.10.2] # yum install gcc pcre-devel openssl-devel -y
5[root@node04 nginx-1.10.2] # ./configure  #注意这个后面可以见参数:比如prefix等参数,具体的参数的含义:见链接:https://blog.csdn.net/qq_32907349/article/details/53814194
再进行
1[root@node04 nginx-1.10.2]# yum install gcc pcre-devel openssl-devel -y
2[root@node04 nginx-1.10.2] # ./configure#也可以指定参数:
[root@server6 nginx-1.10.1]# ./configure --prefix=/usr/local/lnmp/nginx --with-http_ssl_module --with-http_stub_status_module --with-file-aio --with-threads --user=nginx --group=nginx --add-module=/root/nginx-sticky-module-ng
1但我没有指定:
2
3[root@node04 nginx-1.10.2] #make && make install 编译三部曲
4
5[root@node04 nginx-1.10.2] #useradd nginx 建立用户
6
7 [root@node04 sbin]# cd /usr/local/nginx/sbin/nginx下面的sbin目录下面有nginx命令,通过./nginx即可启动nginx,###############特别需要注意的是上面安装nginx的过程中:配置
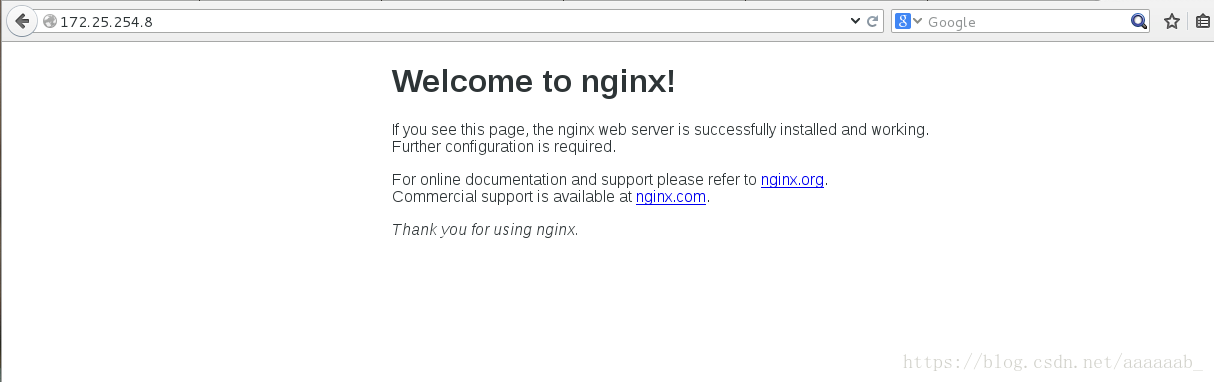
之后在本机的浏览器中输入地址http://192.168.27:80/
如果见到下面的页面,即是安装成功
nginx的欢迎也即是成功
之后需要配置的是nginx集成tomcat集群:
配置如下
注意nginx.conf是/usr/local/nginx/conf的nginx.conf,而不是nginx安装目录下的那个conf下的,安装目录下的conf下面没有nginx.conf文件
[root@node04 nginx]# ll
总用量 4
drwx------ 2 nobody root 6 11月 26 17:14 client_body_temp
drwxr-xr-x 2 root root 4096 11月 26 17:42 conf
drwx------ 2 nobody root 6 11月 26 17:14 fastcgi_temp
drwxr-xr-x 2 root root 40 11月 26 17:03 html
drwxr-xr-x 2 root root 58 11月 26 17:14 logs
drwx------ 2 nobody root 6 11月 26 17:14 proxy_temp
drwxr-xr-x 2 root root 19 11月 26 17:03 sbin
drwx------ 2 nobody root 6 11月 26 17:14 scgi_temp
drwx------ 2 nobody root 6 11月 26 17:14 uwsgi_temp
[root@node04 nginx]# cd conf
[root@node04 conf]# pwd
/usr/local/nginx/conf
[root@node04 conf]#
具体的配置如下:
1[root@node04 conf]# ll
2总用量 64
3-rw-r--r-- 1 root root 1077 11月 26 17:03 fastcgi.conf
4-rw-r--r-- 1 root root 1077 11月 26 17:03 fastcgi.conf.default
5-rw-r--r-- 1 root root 1007 11月 26 17:03 fastcgi_params
6-rw-r--r-- 1 root root 1007 11月 26 17:03 fastcgi_params.default
7-rw-r--r-- 1 root root 2837 11月 26 17:03 koi-utf
8-rw-r--r-- 1 root root 2223 11月 26 17:03 koi-win
9-rw-r--r-- 1 root root 3957 11月 26 17:03 mime.types
10-rw-r--r-- 1 root root 3957 11月 26 17:03 mime.types.default
11-rw-r--r-- 1 root root 2731 11月 26 17:42 nginx.conf
12-rw-r--r-- 1 root root 2656 11月 26 17:24 nginx.conf.bak
13-rw-r--r-- 1 root root 2656 11月 26 17:03 nginx.conf.default
14-rw-r--r-- 1 root root  636 11月 26 17:03 scgi_params
15-rw-r--r-- 1 root root  636 11月 26 17:03 scgi_params.default
16-rw-r--r-- 1 root root  664 11月 26 17:03 uwsgi_params
17-rw-r--r-- 1 root root  664 11月 26 17:03 uwsgi_params.default
18-rw-r--r-- 1 root root 3610 11月 26 17:03 win-utf
19[root@node04 conf]# vim nginx.conf
20        listen       80;
21        server_name  tomcat;
22
23        #charset koi8-r;
24
25        #access_log  logs/host.access.log  main;
26
27        location / {
28            root   html;
29            index  index.html index.htm;
30        }
31
32        error_page  404              /404.html;
33
34        # redirect server error pages to the static page /50x.html
35        #
36        error_page   500 502 503 504  /50x.html;
37        location = /50x.html {
38            root   html;
39        }
40
41       # proxy the PHP scripts to Apache listening on 127.0.0.1:80
42
43        location ~ \.jsp$ {
44            proxy_pass   http://tomcat;
45        }
46
47        # pass the PHP scripts to FastCGI server listening on 127.0.0.1:9000
48        #
49        #location ~ \.php$ {
50        #    root           html;
51        #    fastcgi_pass   127.0.0.1:9000;
52        #    fastcgi_index  index.php;
53        #    fastcgi_param  SCRIPT_FILENAME  /scripts$fastcgi_script_name;
54        #    include        fastcgi_params;
55        #}
56
57        # deny access to .htaccess files, if Apache's document root
58        # concurs with nginx's one
59        #
60        #location ~ /\.ht {
61        #    deny  all;
62        #}
63    }
64
65
66    # another virtual host using mix of IP-, name-, and port-based configuration
67    #
68    #server {
69    #    listen       8000;
70    #    listen       somename:8080;
71    #    server_name  somename  alias  another.alias;
72
73    #    location / {
74    #        root   html;
75    #        index  index.html index.htm;
76    #    }
77    #}
78
79
80    # HTTPS server
81    #
82    #server {
83    #    listen       443 ssl;
84    #    server_name  localhost;
85
86    #    ssl_certificate      cert.pem;
87    #    ssl_certificate_key  cert.key;
88
89    #    ssl_session_cache    shared:SSL:1m;
90    #    ssl_session_timeout  5m;
91
92    #    ssl_ciphers  HIGH:!aNULL:!MD5;
93    #    ssl_prefer_server_ciphers  on;
94
95    #    location / {
96    #        root   html;
97    #        index  index.html index.htm;
98    #    }
99    #}
100
101}
102
配置完毕之后:
在本机中的浏览器中输入nginx服务器的地址:+80端口+test.jsp见到 下面的界面则是成功了
第一次刷新和_第二次,就会进入不同的tomcat服务器了_
完毕!