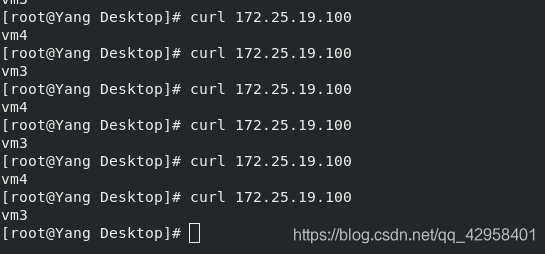
用LVS实现负载均衡
实现步骤:
1    #若在虚拟环境中需执行此步骤创建两个新的虚拟机,VMWARE可忽略此步骤
2
3   真实主机:
4              cd /var/lib/libvirt/images/
5          ls
6          qemu-img create -f qcow2 -b rhel7.6.qcow2 server3
7          qemu-img create -f qcow2 -b rhel7.6.qcow2 server4
8
9
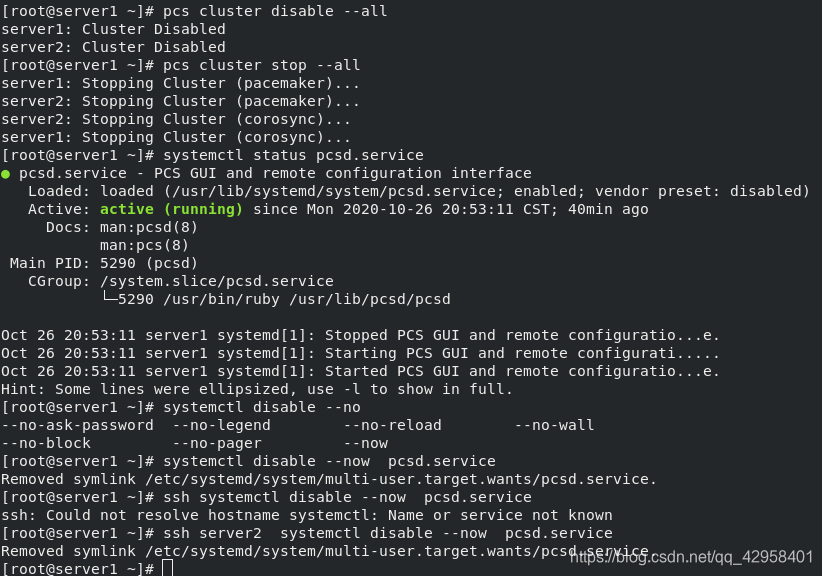
10server1:
11      pcs cluster disable --all
12      pcs cluster stop --all
13      systemctl status pcsd
14      systemctl disable --now pcsd
15      ssh server2 disable --now pcsd
16      ssh server2 systemctl disable --now pcsd
1  server3:
2          hostnamectl set-hostname server3
3          cd /etc/yum.repos.d/
4          vim dvd.repo
5          yum install httpd
6          systemctl enable --now httpd
7          systemctl start httpd
8          cd /var/www/html/
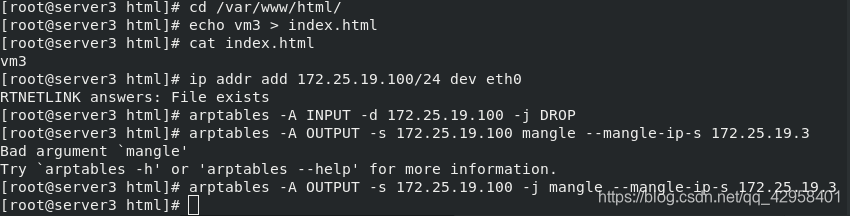
9          echo vm3> index.html
10          ip addr add 172.25.19.100/24 dev eth0
11          yum install -y arptables
12          arptables -A INPUT -d 172.25.19.100 -j DROP
13          arptables -A OUTPUT -s 172.25.19.100 -j mangle --mangle-ip-s 172.25.19.3
1   server4:
2          hostnamectl set-hostname server4
3          cd /etc/yum.repos.d/
4          vim dvd.repo
5          yum install httpd
6          systemctl enable --now httpd
7          systemctl start httpd
8          cd /var/www/html/
9          echo vm3> index.html
10          ip addr add 172.25.19.100/24 dev eth0
11          yum install -y arptables
12          arptables -A INPUT -d 172.25.19.100 -j DROP
13          arptables -A OUTPUT -s 172.25.19.100 -j mangle --mangle-ip-s 172.25.19.4

1 server2:
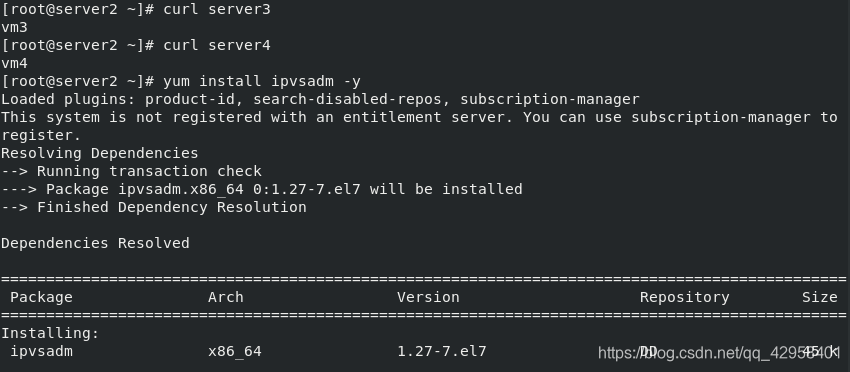
2        curl server3
3        curl server4
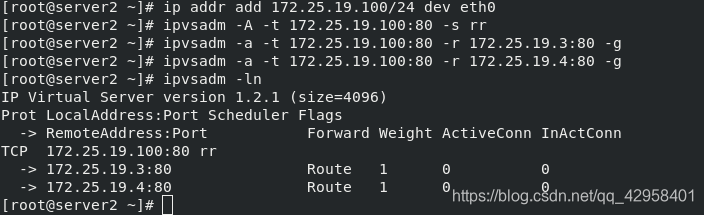
4        yum install ipvsadm -y
5        ip addr add 172.25.19.100/24 dev eth0
6        ipvsadm -A -t 172.25.19.100:80 -s rr
7        ipvsadm -a -t 172.25.19.100:80 -r 172.25.19.3:80 -g
8        ipvsadm -a -t 172.25.19.100:80 -r 172.25.19.4:80 -g
9        ipvsadm -ln
1    真实主机:
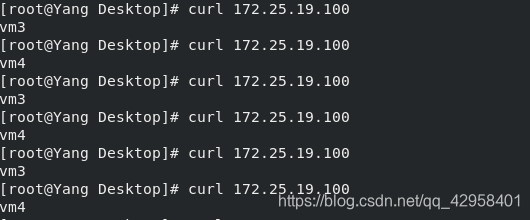
2          curl 172.25.19.100
负载均衡(轮询机制)实现
LVS+keepalived实现负载均衡健康监测
实验目的
上个实验中实现了负载均衡。本实验中我们将结合keepalived实现负载均衡高级群的健康监测,即在一真实主机的apache关闭后,主机可以监测到,并不再访问这台关闭apache的主机。
实验环境
五台虚拟机:home为主机,server1、server2为VS调度,server3、server4为RS真实主机。
实验步骤
1.环境搭建
1server1、server2:
2
3
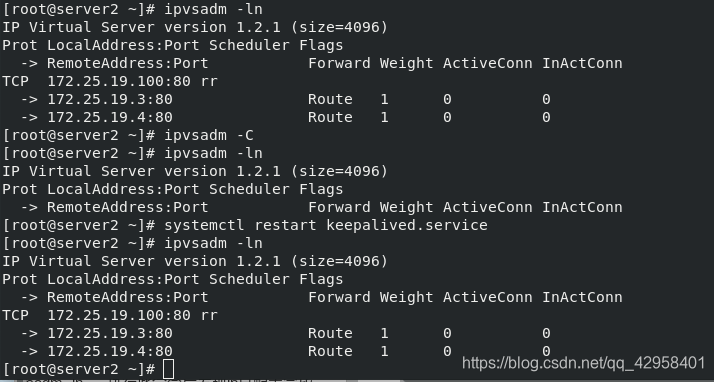
4  ipvsadm -C            清除IPVS中的IP,因为IPVS的配置会与keepalived冲突
5   ipvsadm -ln
6   yum install keepalived -y
7   ip addr del 172.25.19.100/24 dev eth0
8   vim /etc/keepalived/keepalived.conf   编写此文件相当于用配置文件的方式实现负载均衡
9        server1 keepalived.conf:
10
11
12 ! Configuration File for keepalived
13global_defs {
14    notification_email {
15      root@localhost
16    }
17    notification_email_from keepalived@localhost
18    smtp_server 127.0.0.1
19    smtp_connect_timeout 30
20    router_id LVS_DEVEL
21    vrrp_skip_check_adv_addr
22    #vrrp_strict
23    vrrp_garp_interval 0
24    vrrp_gna_interval 0
25 }
26
27vrrp_instance VI_1 {
28     state MASTER
29     interface eth0
30     virtual_router_id 51
31     priority 100
32     advert_int 1
33     authentication {
34         auth_type PASS
35         auth_pass 1111
36     }
37     virtual_ipaddress {
38         172.25.19.100
39     }
40 }
41
42virtual_server 172.25.19.100 80 {
43     delay_loop 6
44     lb_algo rr
45     lb_kind DR
46     #persistence_timeout 50
47     protocol TCP
48        real_server 172.25.19.3 80 {
49         weight 1
50         TCP_CHECK {
51             connect_timeout 3
52             nb_get_retry 3
53             delay_before_retry 3
54         }
55     }
56        real_server 172.25.19.4 80 {
57         weight 1
58         TCP_CHECK {
59             connect_timeout 3
60             nb_get_retry 3
61             delay_before_retry 3
62         }
63     }
64 }
65
66
67   server2 keepalived.conf:
68    ! Configuration File for keepalived
69         global_defs {
70       notification_email {
71         root@localhost
72       }
73       notification_email_from keepalived@localhost
74       smtp_server 127.0.0.1
75       smtp_connect_timeout 30
76       router_id LVS_DEVEL
77       vrrp_skip_check_adv_addr
78       #vrrp_strict
79       vrrp_garp_interval 0
80       vrrp_gna_interval 0
81    }
82
83   vrrp_instance VI_1 {
84        state BACKUP
85        interface eth0
86        virtual_router_id 51
87        priority 50
88        advert_int 1
89        authentication {
90            auth_type PASS
91            auth_pass 1111
92        }
93        virtual_ipaddress {
94            172.25.19.100
95        }
96    }
97         virtual_server 172.25.19.100 80 {
98        delay_loop 6
99        lb_algo rr
100        lb_kind DR
101        #persistence_timeout 50
102        protocol TCP
103
104   real_server 172.25.19.3 80 {
105            weight 1
106            TCP_CHECK {
107                connect_timeout 3
108                nb_get_retry 3
109                delay_before_retry 3
110            }
111        }
112            real_server 172.25.19.4 80 {
113            weight 1
114            TCP_CHECK {
115                connect_timeout 3
116                nb_get_retry 3
117                delay_before_retry 3
118            }
119        }
120    }
121
122
123 systemctl restart keepalived.service
124 tail -f /var/log/messages
125 ipvsadm -ln      执行此命令后发现ip已配置完毕
2.健康检测
1)RS真实主机健康检测
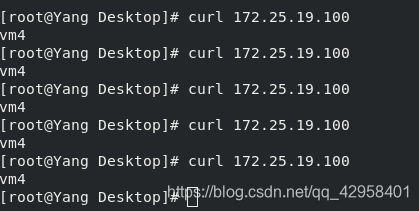
1在server3中 关闭httpd服务
2
3systemctl stop httpd
此时在真实主机中执行
curl 172.25.19.100
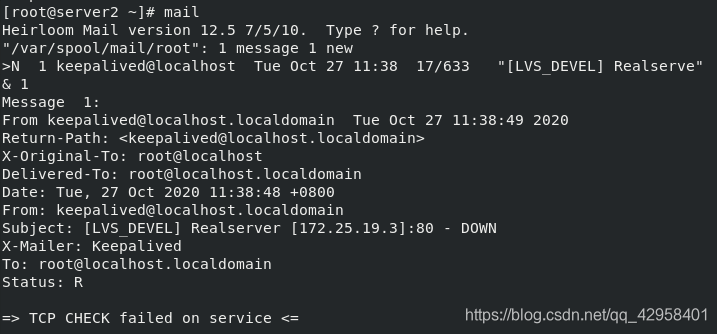
发现主机已知晓3的服务关闭,并且主机策略已不存在server3
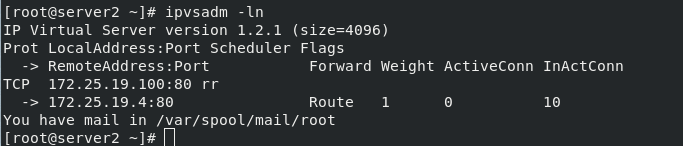
并发送邮件给了server1、server2
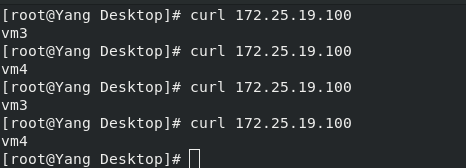
再开启server3中的httpd,并在主机中检测,发现已恢复正常
2)DS健康检测
1关闭server1中的keepalived服务
2
3[root@server1 ~]# systemctl stop keepalived.service
4
5此时在server2中:
6
7tail -f /var/log/messages
8
9发现server2已接管server1
在主机中探测RS发现不收任何影响,即keepalived解决了DS的单点故障