这本食谱包含演示如何在写Flutter应用程序时解决常见问题的食谱。 每个配方都是独立的,可以作为参考帮助您构建应用程序。
使用主题共享颜色和字体样式
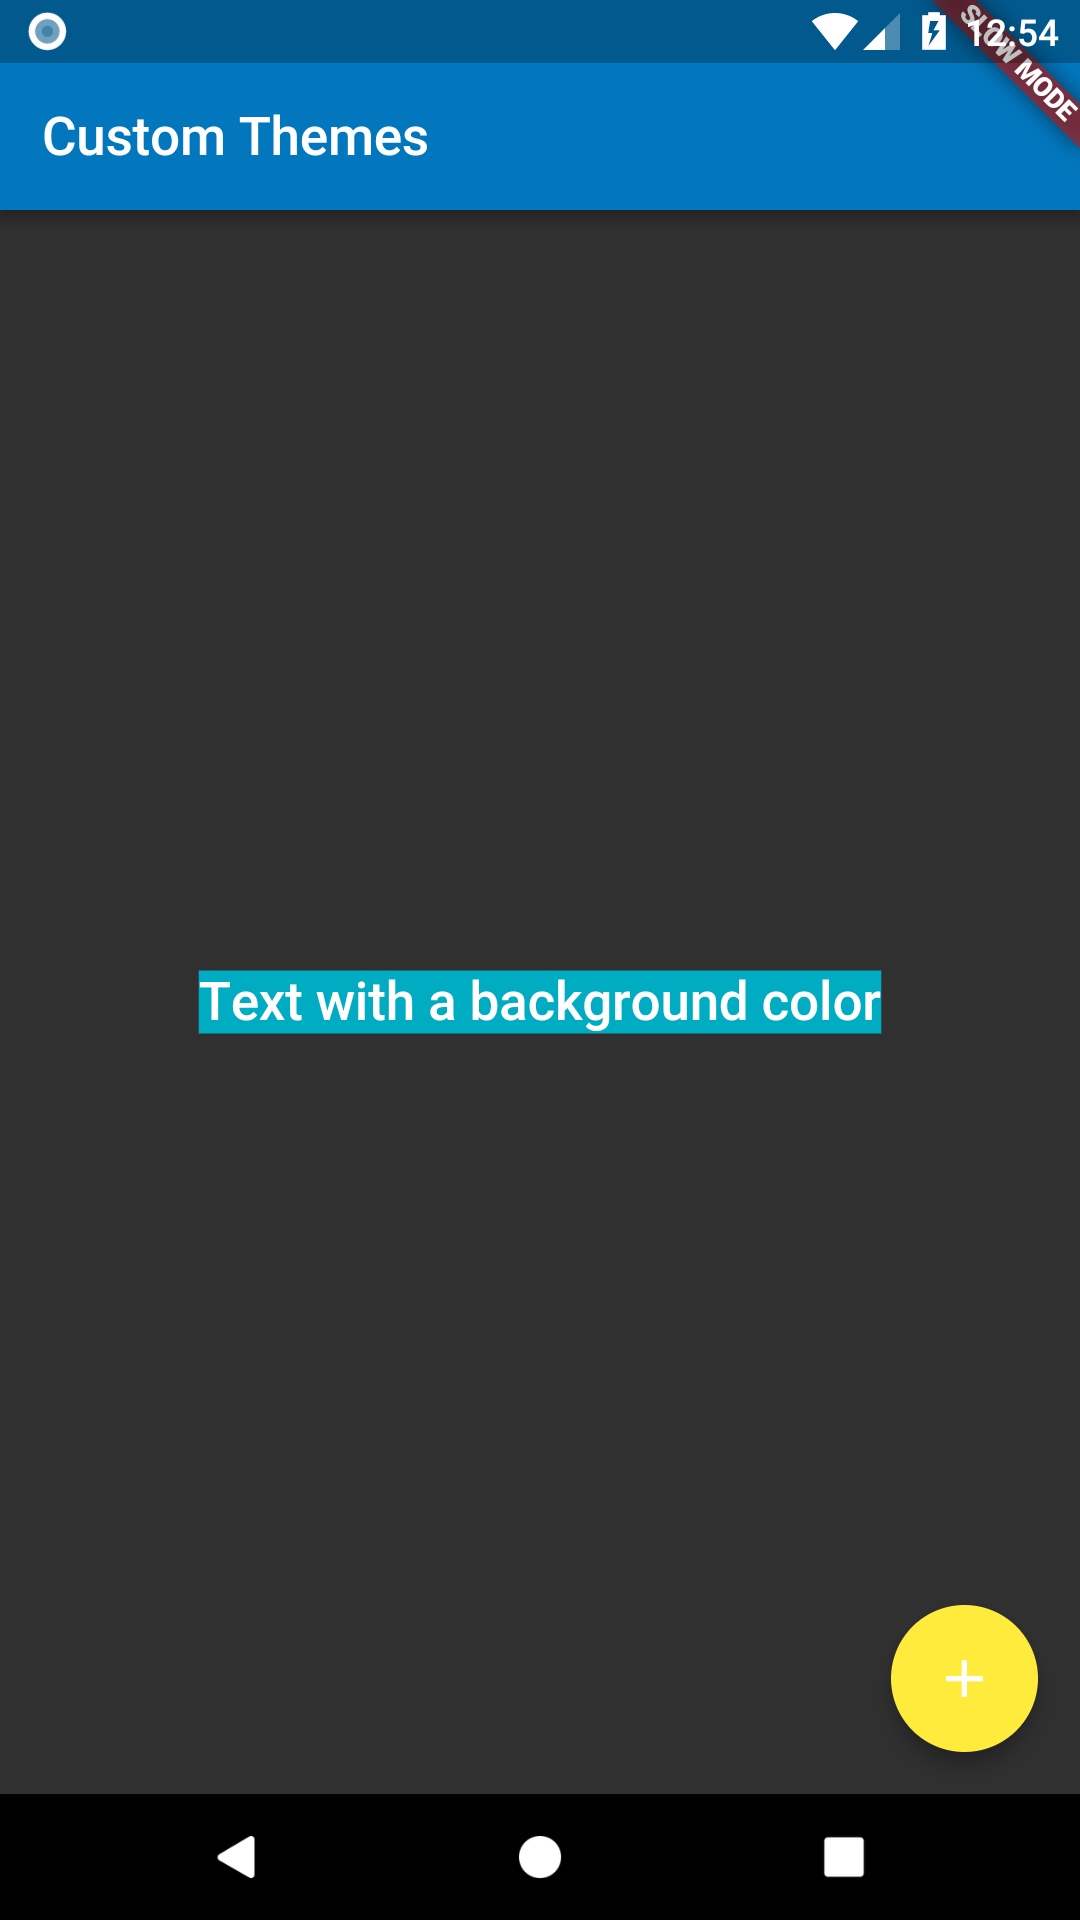
为了在整个应用中共享颜色和字体样式,我们可以利用主题。定义主题有两种方式:应用程序范围或使用Theme小部件来定义应用程序特定部分的颜色和字体样式。事实上,应用程序范围的主题只是由MaterialApp在应用程序根部创建的主题小部件!
在我们定义一个主题后,我们可以在自己的部件中使用它。另外,Flutter提供的Material Widgets将使用我们的主题为AppBars,Buttons,Checkboxes等设置背景颜色和字体样式。
创建应用主题
为了在整个应用程序中共享包含颜色和字体样式的主题,我们可以将ThemeData提供给MaterialApp构造函数。
如果没有提供Theme,Flutter将在后台创建一个后备主题。
1new MaterialApp(
2  title: title,
3  theme: new ThemeData(
4    brightness: Brightness.dark,
5    primaryColor: Colors.lightBlue[800],
6    accentColor: Colors.cyan[600],
7  ),
8);
请参阅ThemeData文档以查看您可以定义的所有颜色和字体。
部分应用程序的主题
如果我们想在我们的应用程序的一部分中覆盖应用程序范围的主题,我们可以将我们的应用程序的一部分包装在Theme小部件中。
有两种方法可以解决这个问题:创建唯一的ThemeData,或者扩展父主题。
创建唯一的ThemeData
如果我们不想继承任何应用程序的颜色或字体样式,我们可以创建一个新的ThemeData()实例并将其传递给Theme部件。
1new Theme(
2  // Create a unique theme with "new ThemeData"
3  data: new ThemeData(
4    accentColor: Colors.yellow,
5  ),
6  child: new FloatingActionButton(
7    onPressed: () {},
8    child: new Icon(Icons.add),
9  ),
10);
扩展父主题
扩展父主题通常是有意义的,而不是覆盖所有。 我们可以通过使用copyWith方法来实现这一点。
1new Theme(
2  // Find and Extend the parent theme using "copyWith". Please see the next
3  // section for more info on `Theme.of`.
4  data: Theme.of(context).copyWith(accentColor: Colors.yellow),
5  child: new FloatingActionButton(
6    onPressed: null,
7    child: new Icon(Icons.add),
8  ),
9);
使用主题
现在我们已经定义了一个主题,我们可以使用Theme.of(context)函数在我们的部件build方法中使用它!
Theme.of(context)将查找部件树并返回树中最近的Theme。 如果我们的部件上方定义了独立的Theme,则返回该Theme。 如果不是,则返回应用程序范围Theme。
实际上,FloatingActionButton使用这种精确的技术来查找accentColor!
1new Container(
2  color: Theme.of(context).accentColor,
3  child: new Text(
4    'Text with a background color',
5    style: Theme.of(context).textTheme.title,
6  ),
7);
完整的例子
1import 'package:flutter/foundation.dart';
2import 'package:flutter/material.dart';
3
4void main() {
5  runApp(new MyApp());
6}
7
8class MyApp extends StatelessWidget {
9  @override
10  Widget build(BuildContext context) {
11    final appName = 'Custom Themes';
12
13    return new MaterialApp(
14      title: appName,
15      theme: new ThemeData(
16        brightness: Brightness.dark,
17        primaryColor: Colors.lightBlue[800],
18        accentColor: Colors.cyan[600],
19      ),
20      home: new MyHomePage(
21        title: appName,
22      ),
23    );
24  }
25}
26
27class MyHomePage extends StatelessWidget {
28  final String title;
29
30  MyHomePage({Key key, @required this.title}) : super(key: key);
31
32  @override
33  Widget build(BuildContext context) {
34    return new Scaffold(
35      appBar: new AppBar(
36        title: new Text(title),
37      ),
38      body: new Center(
39        child: new Container(
40          color: Theme.of(context).accentColor,
41          child: new Text(
42            'Text with a background color',
43            style: Theme.of(context).textTheme.title,
44          ),
45        ),
46      ),
47      floatingActionButton: new Theme(
48        data: Theme.of(context).copyWith(accentColor: Colors.yellow),
49        child: new FloatingActionButton(
50          onPressed: null,
51          child: new Icon(Icons.add),
52        ),
53      ),
54    );
55  }
56}
显示SnackBars
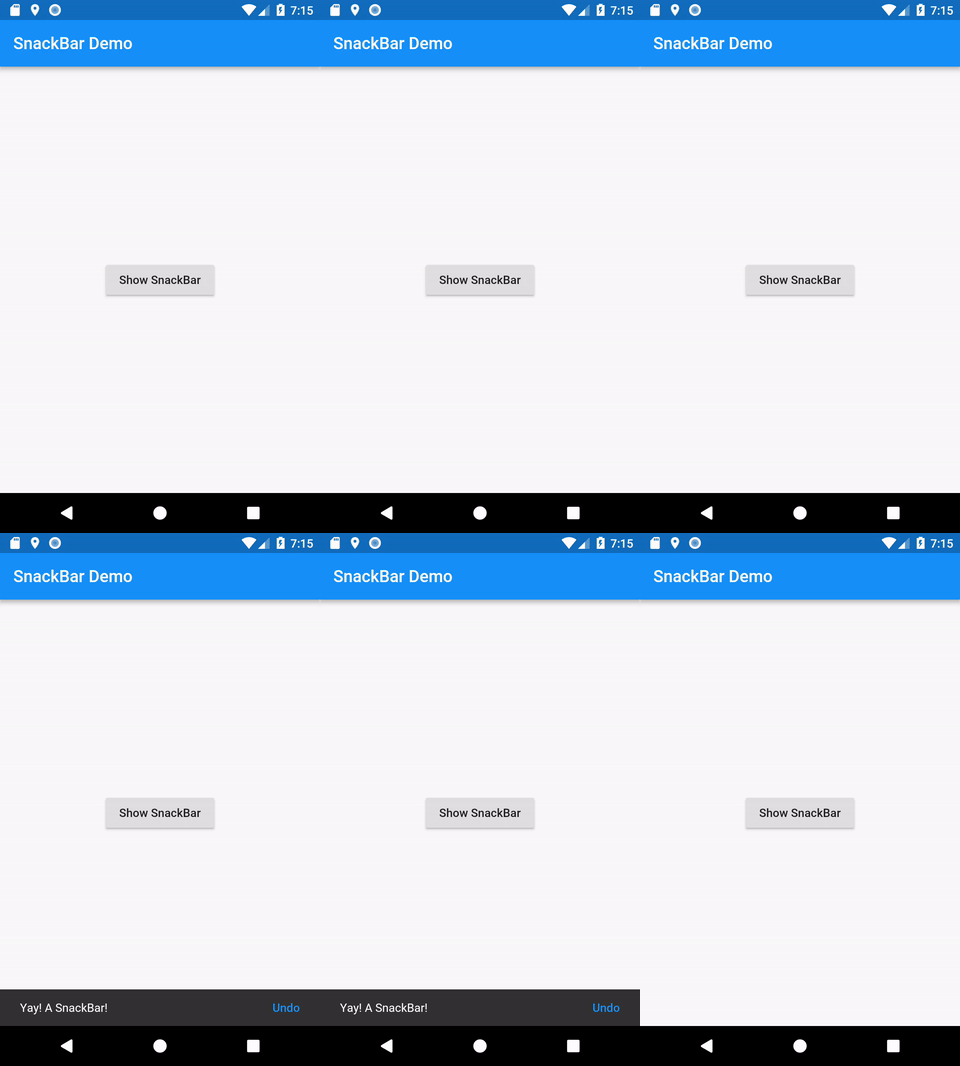
在某些情况下,当发生某些操作时可以方便地向用户简单通知。 例如,当用户在列表中删除消息时,我们可能想通知他们消息已被删除。 我们甚至可能想给他们一个撤消行为的选择!
在Material Design中,这是SnackBar的工作。
路线
- 创建一个Scaffold
- 显示一个SnackBar
- 提供额外的操作
1.创建一个Scaffold
在创建遵循材质设计指南的应用程序时,我们希望为我们的应用程序提供一致的可视化结构。 在这种情况下,我们需要在屏幕底部显示SnackBar,而不会与其它重要的部件重叠,例如FloatingActionButton!
材料库中的Scaffold部件为我们创建了这个视觉结构,并确保重要的部件不会重叠!
1new Scaffold(
2  appBar: new AppBar(
3    title: new Text('SnackBar Demo'),
4  ),
5  body: new SnackBarPage(), // We'll fill this in below!
6);
2.显示一个SnackBar
使用Scaffold,我们可以展示SnackBar! 首先,我们需要创建一个SnackBar,然后使用Scaffold显示它。
1final snackBar = new SnackBar(content: new Text('Yay! A SnackBar!'));
2
3// Find the Scaffold in the Widget tree and use it to show a SnackBar
4Scaffold.of(context).showSnackBar(snackBar);
3.提供额外的操作
在某些情况下,我们可能希望在显示SnackBar时向用户提供额外的操作。 例如,如果他们意外删除了一条消息,我们可以提供撤消该更改的操作。
为了达到这个目的,我们可以为SnackBar部件提供额外的action。
1final snackBar = new SnackBar(
2  content: new Text('Yay! A SnackBar!'),
3  action: new SnackBarAction(
4    label: 'Undo',
5    onPressed: () {
6      // Some code to undo the change!
7    },
8  ),
9);
完整的例子
注意:在本例中,我们将在用户点击按钮时显示SnackBar。 有关处理用户输入的更多信息,请参阅食谱的处理手势部分。
1import 'package:flutter/material.dart';
2
3void main() => runApp(new SnackBarDemo());
4
5class SnackBarDemo extends StatelessWidget {
6  @override
7  Widget build(BuildContext context) {
8    return new MaterialApp(
9      title: 'SnackBar Demo',
10      home: new Scaffold(
11        appBar: new AppBar(
12          title: new Text('SnackBar Demo'),
13        ),
14        body: new SnackBarPage(),
15      ),
16    );
17  }
18}
19
20class SnackBarPage extends StatelessWidget {
21  @override
22  Widget build(BuildContext context) {
23    return new Center(
24      child: new RaisedButton(
25        onPressed: () {
26          final snackBar = new SnackBar(
27            content: new Text('Yay! A SnackBar!'),
28            action: new SnackBarAction(
29              label: 'Undo',
30              onPressed: () {
31                // Some code to undo the change!
32              },
33            ),
34          );
35
36          // Find the Scaffold in the Widget tree and use it to show a SnackBar!
37          Scaffold.of(context).showSnackBar(snackBar);
38        },
39        child: new Text('Show SnackBar'),
40      ),
41    );
42  }
43}
使用选项卡
使用选项卡是遵循Material Design指南的应用程序中的常见模式。 Flutter包含创建选项卡布局作为材料库的一部分的便捷方式。
路线
-
创建一个TabController
-
创建选项卡
-
为每个选项卡创建内容
1.创建一个TabController
为了让选项卡工作,我们需要保持所选选项卡和内容部分的同步。 这是TabController的工作。
我们可以手动创建TabController或使用DefaultTabController部件。 使用DefaultTabController是最简单的选择,因为它会为我们创建一个TabController并使其可供所有后代控件使用。
1new DefaultTabController(
2  // The number of tabs / content sections we need to display
3  length: 3,
4  child: // See the next step!
5);
2.创建选项卡
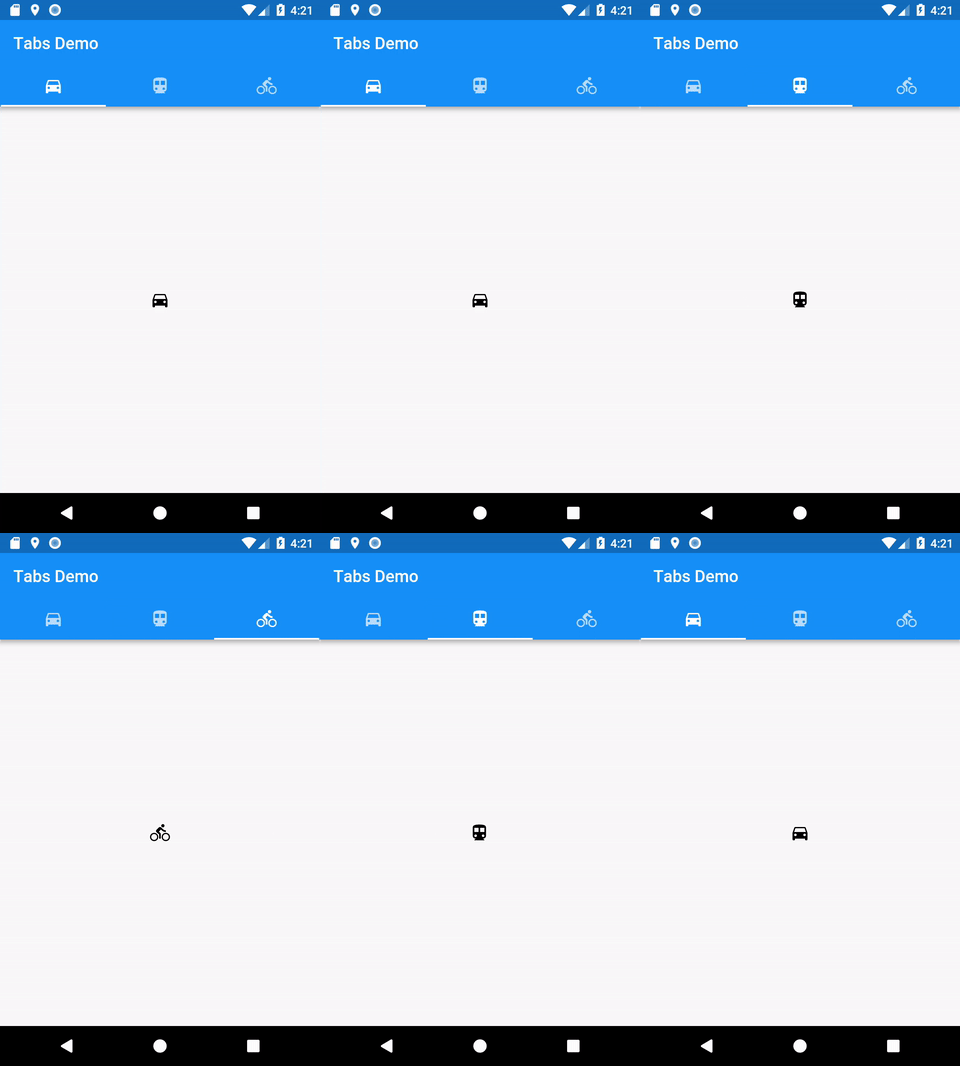
既然我们有一个TabController可以使用,我们可以使用TabBar部件创建我们的选项卡。 在这个例子中,我们将创建一个带有3个Tab小部件的TabBar,并将其放置在AppBar中。
1new DefaultTabController(
2  length: 3,
3  child: new Scaffold(
4    appBar: new AppBar(
5      bottom: new TabBar(
6        tabs: [
7          new Tab(icon: new Icon(Icons.directions_car)),
8          new Tab(icon: new Icon(Icons.directions_transit)),
9          new Tab(icon: new Icon(Icons.directions_bike)),
10        ],
11      ),
12    ),
13  ),
14);
默认情况下,TabBar查找最近的DefaultTabController的部件树。 如果你手动创建一个TabController,你需要将它传递给TabBar。
3.为每个选项卡创建内容
现在我们有了选项卡,我们希望在选择标签时显示内容。 为此,我们将使用TabBarView部件。
注意:顺序很重要,必须与TabBar中的选项卡顺序相对应!
1new TabBarView(
2  children: [
3    new Icon(Icons.directions_car),
4    new Icon(Icons.directions_transit),
5    new Icon(Icons.directions_bike),
6  ],
7);
完整实例
1import 'package:flutter/material.dart';
2
3void main() {
4  runApp(new TabBarDemo());
5}
6
7class TabBarDemo extends StatelessWidget {
8  @override
9  Widget build(BuildContext context) {
10    return new MaterialApp(
11      home: new DefaultTabController(
12        length: 3,
13        child: new Scaffold(
14          appBar: new AppBar(
15            bottom: new TabBar(
16              tabs: [
17                new Tab(icon: new Icon(Icons.directions_car)),
18                new Tab(icon: new Icon(Icons.directions_transit)),
19                new Tab(icon: new Icon(Icons.directions_bike)),
20              ],
21            ),
22            title: new Text('Tabs Demo'),
23          ),
24          body: new TabBarView(
25            children: [
26              new Icon(Icons.directions_car),
27              new Icon(Icons.directions_transit),
28              new Icon(Icons.directions_bike),
29            ],
30          ),
31        ),
32      ),
33    );
34  }
35}
使用自定义字体
虽然Android和iOS提供高质量的系统字体,但设计师最常见的要求之一是使用自定义字体! 例如,我们可能会从我们的设计人员那里获得一个定制的字体,或者从谷歌字体中下载一种字体。
Flutter使用自定义字体开箱即用。 我们可以将字体应用到整个应用程序或个别小部件。
路线
- 导入字体文件
- 在pubspec.yaml中声明该字体
- 将字体设置为默认值
- 在特定的部件中使用字体
1.导入字体文件
为了处理字体,我们需要将字体文件导入到项目中。 将字体文件放在Flutter项目的根目录下的fonts或assets文件夹中是很常见的做法。
例如,如果我们想将Raleway和Roboto Mono字体文件导入到我们的项目中,那么文件夹结构如下所示:
1awesome_app/
2  fonts/
3    Raleway-Regular.ttf
4    Raleway-Italic.ttf
5    RobotoMono-Regular.ttf
6    RobotoMono-Bold.ttf
2.在pubspec.yaml中声明该字体
现在我们有一个可以使用的字体,我们需要告诉Flutter在哪里找到它。 我们可以通过在pubspec.yaml中包含一个字体定义来实现。
1flutter:
2  fonts:
3    - family: Raleway
4      fonts:
5        - asset: fonts/Raleway-Regular.ttf
6        - asset: fonts/Raleway-Italic.ttf
7          style: italic
8    - family: RobotoMono
9      fonts:
10        - asset: fonts/RobotoMono-Regular.ttf
11        - asset: fonts/RobotoMono-Bold.ttf
12          weight: 700
pubspec.yaml选项定义
family决定字体的名称,我们可以在TextStyle对象的fontFamily属性中使用它。
asset是相对于pubspec.yaml文件的字体文件的路径。 这些文件包含字体中字形的轮廓。 在构建我们的应用程序时,这些文件包含在我们应用程序的asset包中。
单个字体可以引用具有不同轮廓重量和样式的许多不同文件:
- weight属性指定文件中轮廓线的权重为100到900之间的整数倍。这些值对应于FontWeight,可用于TextStyle对象的fontWeight属性。
- style属性指定文件中的轮廓是italic还是normal。 这些值对应于FontStyle,可用于TextStyle对象的fontStyle属性。
3.将字体设置为默认值
对于如何将字体应用于文本,我们有两种选择:作为默认字体或仅在特定的小部件中。
要使用字体作为默认字体,我们可以将fontFamily属性设置为应用theme的一部分。 我们提供给fontFamily的值必须与pubspec.yaml中声明的family相匹配。
1new MaterialApp(
2  title: 'Custom Fonts',
3  // Set Raleway as the default app font
4  theme: new ThemeData(fontFamily: 'Raleway'),
5  home: new MyHomePage(),
6);
有关主题的更多信息,请查看“使用主题共享颜色和字体样式”配方。
4.在特定的部件中使用字体
如果我们想将字体应用于特定的部件,比如Text部件,我们可以向部件提供一个TextStyle。
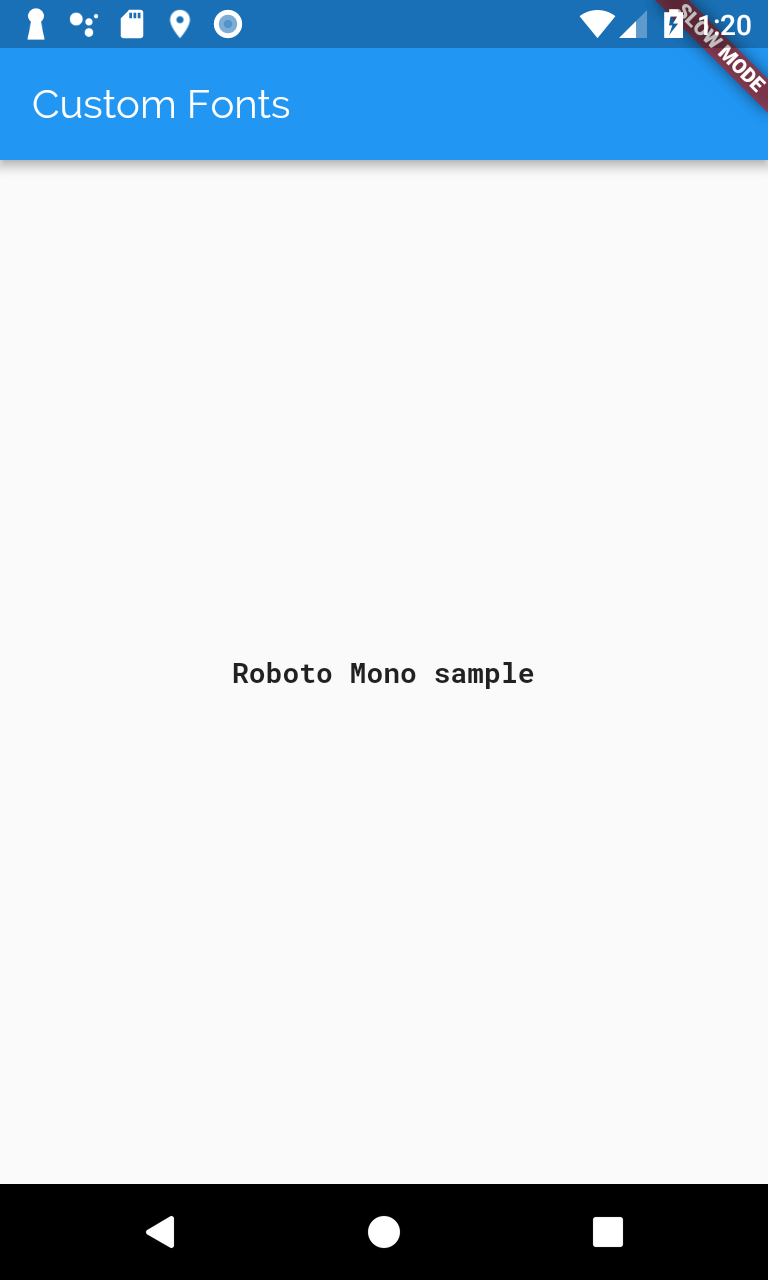
在这个例子中,我们将RobotoMono字体应用于单个Text部件。fontFamily再一次必须与我们在pubspec.yaml中声明的family相匹配。
1new Text(
2  'Roboto Mono sample',
3  style: new TextStyle(fontFamily: 'RobotoMono'),
4);
TextStyle
如果TextStyle对象指定没有确切字体文件的权重或样式,则该引擎使用该字体的更通用文件之一,并尝试针对所请求的权重和样式推断轮廓。
完整的例子
Fonts
Raleway和RobotoMono字体是从谷歌字体下载的。
pubspec.yaml
1name: custom_fonts
2description: An example of how to use custom fonts with Flutter
3
4dependencies:
5  flutter:
6    sdk: flutter
7
8dev_dependencies:
9  flutter_test:
10    sdk: flutter
11
12flutter:
13  fonts:
14    - family: Raleway
15      fonts:
16        - asset: fonts/Raleway-Regular.ttf
17        - asset: fonts/Raleway-Italic.ttf
18          style: italic
19    - family: RobotoMono
20      fonts:
21        - asset: fonts/RobotoMono-Regular.ttf
22        - asset: fonts/RobotoMono-Bold.ttf
23          weight: 700
24  uses-material-design: true
main.dart
1import 'package:flutter/material.dart';
2
3void main() => runApp(new MyApp());
4
5class MyApp extends StatelessWidget {
6  @override
7  Widget build(BuildContext context) {
8    return new MaterialApp(
9      title: 'Custom Fonts',
10      // Set Raleway as the default app font
11      theme: new ThemeData(fontFamily: 'Raleway'),
12      home: new MyHomePage(),
13    );
14  }
15}
16
17class MyHomePage extends StatelessWidget {
18  @override
19  Widget build(BuildContext context) {
20    return new Scaffold(
21      // The AppBar will use the app-default Raleway font
22      appBar: new AppBar(title: new Text('Custom Fonts')),
23      body: new Center(
24        // This Text Widget will use the RobotoMono font
25        child: new Text(
26          'Roboto Mono sample',
27          style: new TextStyle(fontFamily: 'RobotoMono'),
28        ),
29      ),
30    );
31  }
32}
从包中导出字体
我们可以将字体声明为单独程序包的一部分,而不是将字体声明为我们的应用程序的一部分。 这是一种方便的方式,可以跨几个不同的项目共享相同的字体,也可以将包发布到 pub website。
路线
- 将字体添加到包中
- 将包和字体添加到我们的应用程序
- 使用字体
1.将字体添加到包中
要从包中导出字体,我们需要将字体文件导入到我们包项目的lib文件夹中。 我们可以将字体文件直接放在lib文件夹或子目录中,比如lib/fonts。
在这个例子中,我们假设我们有一个名为awesome_package的Flutter库,其中的字体位于lib/fonts文件夹中。
1awesome_package/
2  lib/
3    awesome_package.dart
4    fonts/
5      Raleway-Regular.ttf
6      Raleway-Italic.ttf
2.将包和字体添加到我们的应用程序
我们现在可以使用该包并使用它提供的字体。 这涉及到更新应用根目录中的pubspec.yaml。
将该包添加到项目中
1dependencies:
2  awesome_package: <latest_version>
声明字体assets
现在我们已经导入了包,我们需要告诉Flutter从awesome_package中找到哪些字体。
要声明包字体,我们必须用packages/awesome_package前缀到字体的路径。 这将告诉Flutter查看包的字体的lib文件夹。
1flutter:
2  fonts:
3    - family: Raleway
4      fonts:
5        - asset: packages/awesome_package/fonts/Raleway-Regular.ttf
6        - asset: packages/awesome_package/fonts/Raleway-Italic.ttf
7          style: italic
3.使用字体
我们可以使用TextStyle来改变文本的外观。 要使用包字体,我们不仅需要声明我们想要使用哪种字体,还需要声明字体所属的package。
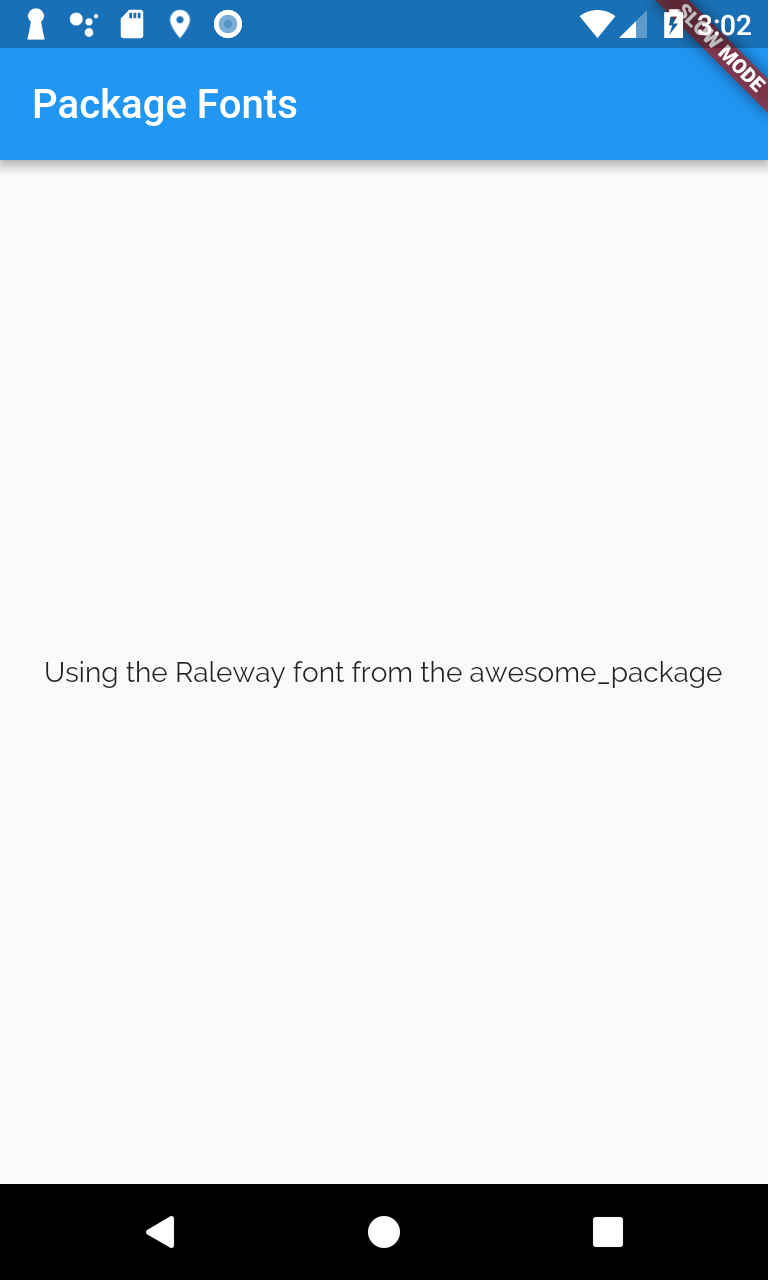
1new Text(
2  'Using the Raleway font from the awesome_package',
3  style: new TextStyle(
4    fontFamily: 'Raleway',
5    package: 'awesome_package',
6  ),
7);
完整的例子
Font
Raleway和RobotoMono字体是从谷歌字体下载的。
pubspec.yaml
1name: package_fonts
2description: An example of how to use package fonts with Flutter
3
4dependencies:
5  awesome_package:
6  flutter:
7    sdk: flutter
8
9dev_dependencies:
10  flutter_test:
11    sdk: flutter
12
13flutter:
14  fonts:
15    - family: Raleway
16      fonts:
17        - asset: packages/awesome_package/fonts/Raleway-Regular.ttf
18        - asset: packages/awesome_package/fonts/Raleway-Italic.ttf
19          style: italic
20  uses-material-design: true
main.dart
1import 'package:flutter/material.dart';
2
3void main() => runApp(new MyApp());
4
5class MyApp extends StatelessWidget {
6  @override
7  Widget build(BuildContext context) {
8    return new MaterialApp(
9      title: 'Package Fonts',
10      home: new MyHomePage(),
11    );
12  }
13}
14
15class MyHomePage extends StatelessWidget {
16  @override
17  Widget build(BuildContext context) {
18    return new Scaffold(
19      // The AppBar will use the app-default Raleway font
20      appBar: new AppBar(title: new Text('Package Fonts')),
21      body: new Center(
22        // This Text Widget will use the RobotoMono font
23        child: new Text(
24          'Using the Raleway font from the awesome_package',
25          style: new TextStyle(
26            fontFamily: 'Raleway',
27            package: 'awesome_package',
28          ),
29        ),
30      ),
31    );
32  }
33}
添加一个抽屉到屏幕上
在采用Material Design的应用中,导航有两个主要选项:选项卡和抽屉。 当没有足够的空间来支持标签时,抽屉提供了一个方便的选择。
在Flutter中,我们可以将Drawer小工具与Scaffold结合使用,以创建带有材质设计Drawer的布局!
路线
1.创建一个Scaffold
为了将Drawer添加到我们的应用程序中,我们需要将其包装在Scaffold部件中。 Scaffold部件为遵循Material Design Guidelines的应用程序提供了一致的可视化结构。 它还支持特殊的Material Design组件,例如Drawers,AppBars和SnackBars。
在这种情况下,我们需要创建一个带Drawer的Scaffold:
1new Scaffold(
2  drawer: // We'll add our Drawer here in the next step!
3);
2.添加一个Drawer
我们现在可以为我们的Scaffold增加一个Drawer。 Drawer可以是任何部件,但通常最好使用材质库中的Drawer部件,该材质库遵守材质设计规范。
1new Scaffold(
2  drawer: new Drawer(
3    child: // We'll populate the Drawer in the next step!
4  )
5);
3.用条目填充Drawer
现在我们有了一个Drawer,我们可以添加内容! 在这个例子中,我们将使用一个ListView。 尽管我们可以使用Column部件,但ListView在这种情况下很方便,因为如果内容占用的空间比屏幕支持的更多,它将允许用户滚动抽屉。
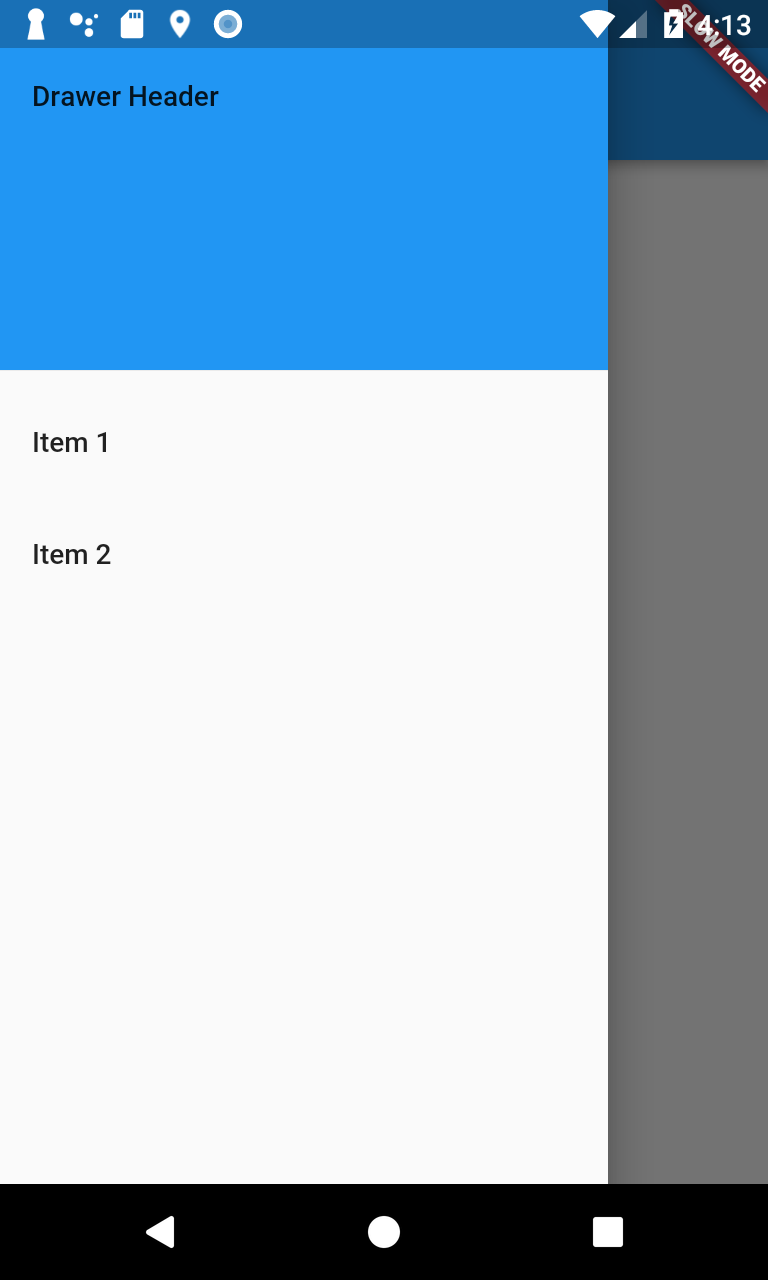
我们将用一个DrawerHeader和两个ListTile部件填充ListView。 有关使用列表的更多信息,请参阅列表配方。
1new Drawer(
2  // Add a ListView to the drawer. This ensures the user can scroll
3  // through the options in the Drawer if there isn't enough vertical
4  // space to fit everything.
5  child: new ListView(
6    // Important: Remove any padding from the ListView.
7    padding: EdgeInsets.zero,
8    children: <Widget>[
9      new DrawerHeader(
10        child: new Text('Drawer Header'),
11        decoration: new BoxDecoration(
12          color: Colors.blue,
13        ),
14      ),
15      new ListTile(
16        title: new Text('Item 1'),
17        onTap: () {
18          // Update the state of the app
19          // ...
20        },
21      ),
22      new ListTile(
23        title: new Text('Item 2'),
24        onTap: () {
25          // Update the state of the app
26          // ...
27        },
28      ),
29    ],
30  ),
31);
4.以编程方式关闭Drawer
用户点击物品后,我们经常想要关闭抽屉。 我们怎样才能做到这一点? 使用Navigator!
当用户打开抽屉时,Flutter会将抽屉添加到引擎盖下的导航堆栈中。 因此,要关闭抽屉,我们可以调用Navigator.pop(context)。
1new ListTile(
2  title: new Text('Item 1'),
3  onTap: () {
4    // Update the state of the app
5    // ...
6    // Then close the drawer
7    Navigator.pop(context);
8  },
9),
完整的例子
1import 'package:flutter/material.dart';
2
3void main() => runApp(new MyApp());
4
5class MyApp extends StatelessWidget {
6  final appTitle = 'Drawer Demo';
7
8  @override
9  Widget build(BuildContext context) {
10    return new MaterialApp(
11      title: appTitle,
12      home: new MyHomePage(title: appTitle),
13    );
14  }
15}
16
17class MyHomePage extends StatelessWidget {
18  final String title;
19
20  MyHomePage({Key key, this.title}) : super(key: key);
21
22  @override
23  Widget build(BuildContext context) {
24    return new Scaffold(
25      appBar: new AppBar(title: new Text(title)),
26      body: new Center(child: new Text('My Page!')),
27      drawer: new Drawer(
28        // Add a ListView to the drawer. This ensures the user can scroll
29        // through the options in the Drawer if there isn't enough vertical
30        // space to fit everything.
31        child: new ListView(
32          // Important: Remove any padding from the ListView.
33          padding: EdgeInsets.zero,
34          children: <Widget>[
35            new DrawerHeader(
36              child: new Text('Drawer Header'),
37              decoration: new BoxDecoration(
38                color: Colors.blue,
39              ),
40            ),
41            new ListTile(
42              title: new Text('Item 1'),
43              onTap: () {
44                // Update the state of the app
45                // ...
46                // Then close the drawer
47                Navigator.pop(context);
48              },
49            ),
50            new ListTile(
51              title: new Text('Item 2'),
52              onTap: () {
53                // Update the state of the app
54                // ...
55                // Then close the drawer
56                Navigator.pop(context);
57              },
58            ),
59          ],
60        ),
61      ),
62    );
63  }
64}