
Docker Compose 一键部署Nginx代理Tomcat集群
目录结构
1[root@localhost ~]# tree compose_nginx_tomcat/
2compose_nginx_tomcat/
3├── docker-compose.yml
4├── mysql
5│   ├── conf
6│   │   └── my.cnf
7│   └── data
8├── nginx
9│   ├── Dockerfile
10│   ├── nginx-1.12.1.tar.gz
11│   └── nginx.conf
12├── tomcat
13│   ├── apache-tomcat-8.0.46.tar.gz
14│   ├── Dockerfile
15│   ├── jdk-8u181-linux-x64.tar.gz
16│   └── server.xml
17└── webapps
18    └── ROOT
19        └── index.jsp
20
217 directories, 10 files
一、创建Nginx Compose
1、创建DockerCompose项目目录
1mkdir compose_nginx_tomcat
2cd compose_nginx_tomcat/
1.2、创建nginx管理目录
1mkdir nginx
2cd nginx
1.3、将nginx源码包下载到本地
- Nginx-1.12.1
- 下载地址:https://pan.baidu.com/s/1IAdODW63jbpwbQX992coYg
- 密码:p89j
1.4、创建Dockerfile文件
vim Dockerfile
1# 指定镜像
2FROM centos:6
3# 指定管理员
4MAINTAINER xiangsikai
5# 执行命令安装编译库文件
6RUN yum install -y gcc gcc-c++ make openssl-devel pcre-devel
7# 添加解压nginx包到/tmp目录下
8ADD nginx-1.12.1.tar.gz /tmp
9# 进入目录进行编译安装
10RUN cd /tmp/nginx-1.12.1 && ./configure --prefix=/usr/local/nginx && make -j 2 && make install
11# 删除容器内置配置文件
12RUN rm -f /usr/local/nginx/conf/nginx.conf
13# 复制本地配置文件到容器内
14COPY nginx.conf /usr/local/nginx/conf
15# 声明暴露端口
16EXPOSE 80
17# 启动容器Nginx服务,指定全局命令daemon off保证服务在前台运行不会关闭
18CMD ["/usr/local/nginx/sbin/nginx", "-g", "daemon off;"]
1.5、创建nginx.conf配置文件
vim nginx.conf


1user  root;
2worker_processes  auto;
3
4error_log  logs/error.log  info;
5
6pid        logs/nginx.pid;
7
8
9events {
10    use epoll;
11}
12
13http {
14
15    include       mime.types;
16    default_type  application/octet-stream;
17
18    log_format  main '$upstream_addr $remote_addr - $remote_user [$time_local] "$request" '
19                      '$status $body_bytes_sent "$http_referer" '
20                      '"$http_user_agent" "$http_x_forwarded_for"';
21
22    access_log logs/access.log main;
23    sendfile        on;
24    keepalive_timeout  65;
25
26# 代理三台tomcat服务
27    upstream www.example.com {
28        #ip_hash;
29        server tomcat01:8080;
30    server tomcat02:8080;
31    server tomcat03:8080;
32    }
33
34# 动静分离
35    server {
36        listen 80;
37        server_name localhost;
38
39# 动态请求转发给tomcat处理
40    location / {
41        proxy_pass http://www.example.com;
42    }
43# 静态资源请求交给nginx处理
44        location ~ \.(html|css|js|jpg|png|gif)$ {
45            root /opt/webapps/ROOT;
46        }
47    }
48}
nginx配置文件
二、创建Mysql Compose
2.1、创建Mysql管理目录
1mkdir mysql
2cd mysql
3mkdir conf
4cd conf
2.2、创建mysql配置文件
vim my.cnf


1[mysqld]
2user=mysql
3port=3306
4datadir=/var/lib/mysql
5socket=/var/run/mysqld/mysqld.sock
6pid-file=/var/run/mysqld/mysqld.pid
7log_error=/var/log/mysql/error.log
8character_set_server = utf8
9max_connections=3600
mysql配置文件
三、创建Tomcat Compose
3.1、创建tomcat管理目录与网站目录
1mkdir tomcat
2mkdir -p webapps/ROOT/
3cd tomcat
3.2、下载tomcat、jdk 压缩文件下载到本地
-
apache-tomcat-8.0.46
-
密码:xydu
-
jdk-8u181-linux-x64
-
密码:gjvv
3.3 创建Dockerfile文件
vim Dockerfile
1# 指定镜像
2FROM centos:6
3# 指定管理员
4MAINTAINER xiangsikai
5# 解压jdk包到指定目录
6ADD jdk-8u181-linux-x64.tar.gz /usr/local
7# 安装jdk包到指定目录
8ENV JAVA_HOME /usr/local/jdk1.8.0_181
9# 解压tomcat包到指定目录
10ADD apache-tomcat-8.0.46.tar.gz /usr/local
11# 将本地配置文件复制到镜像内
12COPY server.xml /usr/local/apache-tomcat-8.0.46/conf
13
14# 指定服务暴露端口
15EXPOSE 8080
16# 启动tomcat服务
17ENTRYPOINT ["/usr/local/apache-tomcat-8.0.46/bin/catalina.sh", "run"]
3.4 创建server.xml配置文件
vim server.xml


1<?xml version='1.0' encoding='utf-8'?> 2<!-- 3 Licensed to the Apache Software Foundation (ASF) under one or more 4 contributor license agreements. See the NOTICE file distributed with 5 this work for additional information regarding copyright ownership. 6 The ASF licenses this file to You under the Apache License, Version 2.0 7 (the "License"); you may not use this file except in compliance with 8 the License. You may obtain a copy of the License at 9 10 http://www.apache.org/licenses/LICENSE-2.0 11 12 Unless required by applicable law or agreed to in writing, software 13 distributed under the License is distributed on an "AS IS" BASIS, 14 WITHOUT WARRANTIES OR CONDITIONS OF ANY KIND, either express or implied. 15 See the License for the specific language governing permissions and 16 limitations under the License. 17--> 18<!-- Note: A "Server" is not itself a "Container", so you may not 19 define subcomponents such as "Valves" at this level. 20 Documentation at /docs/config/server.html 21 --> 22<Server port="8005" shutdown="SHUTDOWN"> 23 <Listener className="org.apache.catalina.startup.VersionLoggerListener" /> 24 <!-- Security listener. Documentation at /docs/config/listeners.html 25 <Listener className="org.apache.catalina.security.SecurityListener" /> 26 --> 27 <!--APR library loader. Documentation at /docs/apr.html --> 28 <Listener className="org.apache.catalina.core.AprLifecycleListener" SSLEngine="on" /> 29 <!-- Prevent memory leaks due to use of particular java/javax APIs--> 30 <Listener className="org.apache.catalina.core.JreMemoryLeakPreventionListener" /> 31 <Listener className="org.apache.catalina.mbeans.GlobalResourcesLifecycleListener" /> 32 <Listener className="org.apache.catalina.core.ThreadLocalLeakPreventionListener" /> 33 34 <!-- Global JNDI resources 35 Documentation at /docs/jndi-resources-howto.html 36 --> 37 <GlobalNamingResources> 38 <!-- Editable user database that can also be used by 39 UserDatabaseRealm to authenticate users 40 --> 41 <Resource name="UserDatabase" auth="Container" 42 type="org.apache.catalina.UserDatabase" 43 description="User database that can be updated and saved" 44 factory="org.apache.catalina.users.MemoryUserDatabaseFactory" 45 pathname="conf/tomcat-users.xml" /> 46 </GlobalNamingResources> 47 48 <!-- A "Service" is a collection of one or more "Connectors" that share 49 a single "Container" Note: A "Service" is not itself a "Container", 50 so you may not define subcomponents such as "Valves" at this level. 51 Documentation at /docs/config/service.html 52 --> 53 <Service name="Catalina"> 54 55 <!--The connectors can use a shared executor, you can define one or more named thread pools--> 56 <!-- 57 <Executor name="tomcatThreadPool" namePrefix="catalina-exec-" 58 maxThreads="150" minSpareThreads="4"/> 59 --> 60 61 62 <!-- A "Connector" represents an endpoint by which requests are received 63 and responses are returned. Documentation at : 64 Java HTTP Connector: /docs/config/http.html (blocking & non-blocking) 65 Java AJP Connector: /docs/config/ajp.html 66 APR (HTTP/AJP) Connector: /docs/apr.html 67 Define a non-SSL/TLS HTTP/1.1 Connector on port 8080 68 --> 69 <Connector port="8080" protocol="HTTP/1.1" 70 connectionTimeout="20000" 71 redirectPort="8443" /> 72 <!-- A "Connector" using the shared thread pool--> 73 <!-- 74 <Connector executor="tomcatThreadPool" 75 port="8080" protocol="HTTP/1.1" 76 connectionTimeout="20000" 77 redirectPort="8443" /> 78 --> 79 <!-- Define a SSL/TLS HTTP/1.1 Connector on port 8443 80 This connector uses the NIO implementation that requires the JSSE 81 style configuration. When using the APR/native implementation, the 82 OpenSSL style configuration is required as described in the APR/native 83 documentation --> 84 <!-- 85 <Connector port="8443" protocol="org.apache.coyote.http11.Http11NioProtocol" 86 maxThreads="150" SSLEnabled="true" scheme="https" secure="true" 87 clientAuth="false" sslProtocol="TLS" /> 88 --> 89 90 <!-- Define an AJP 1.3 Connector on port 8009 --> 91 <Connector port="8009" protocol="AJP/1.3" redirectPort="8443" /> 92 93 94 <!-- An Engine represents the entry point (within Catalina) that processes 95 every request. The Engine implementation for Tomcat stand alone 96 analyzes the HTTP headers included with the request, and passes them 97 on to the appropriate Host (virtual host). 98 Documentation at /docs/config/engine.html --> 99 100 <!-- You should set jvmRoute to support load-balancing via AJP ie : 101 <Engine name="Catalina" defaultHost="localhost" jvmRoute="jvm1"> 102 --> 103 <Engine name="Catalina" defaultHost="localhost"> 104 105 <!--For clustering, please take a look at documentation at: 106 /docs/cluster-howto.html (simple how to) 107 /docs/config/cluster.html (reference documentation) --> 108 <!-- 109 <Cluster className="org.apache.catalina.ha.tcp.SimpleTcpCluster"/> 110 --> 111 112 <!-- Use the LockOutRealm to prevent attempts to guess user passwords 113 via a brute-force attack --> 114 <Realm className="org.apache.catalina.realm.LockOutRealm"> 115 <!-- This Realm uses the UserDatabase configured in the global JNDI 116 resources under the key "UserDatabase". Any edits 117 that are performed against this UserDatabase are immediately 118 available for use by the Realm. --> 119 <Realm className="org.apache.catalina.realm.UserDatabaseRealm" 120 resourceName="UserDatabase"/> 121 </Realm> 122 123 <Host name="localhost" appBase="webapps" 124 unpackWARs="true" autoDeploy="true"> 125 126 <!-- SingleSignOn valve, share authentication between web applications 127 Documentation at: /docs/config/valve.html --> 128 <!-- 129 <Valve className="org.apache.catalina.authenticator.SingleSignOn" /> 130 --> 131 132 <!-- Access log processes all example. 133 Documentation at: /docs/config/valve.html 134 Note: The pattern used is equivalent to using pattern="common" --> 135 <Valve className="org.apache.catalina.valves.AccessLogValve" directory="logs" 136 prefix="localhost_access_log" suffix=".txt" 137 pattern="%h %l %u %t "%r" %s %b" /> 138 139 </Host> 140 </Engine> 141 </Service> 142</Server>
tomcat配置文件
四、创建docker-compose.yml
4.1、在compose_nginx_tomcat目录下创建docker-compose.yml
vim docker-compose.yml
1# 指定服务版本号
2version: '3'
3# 服务
4services:
5# 服务名称
6  nginx:
7# 指定服务容器名字
8    hostname: nginx
9# 构建
10    build:
11# 指定目录上下文构建镜像
12      context: ./nginx
13# 指定dockerfile文件名称
14      dockerfile: Dockerfile
15# 映射数组级的端口
16    ports:
17      - 80:80
18# 映射服务别名
19    links:
20      - tomcat01:tomcat01
21      - tomcat02:tomcat02
22      - tomcat03:tomcat03
23# 映射服务数据卷路径
24    volumes:
25      - ./webapps:/opt/webapps
26# 启动依赖,按顺序启动服务
27    depends_on:
28      - mysql
29      - tomcat01
30      - tomcat02
31      - tomcat03
32
33# 服务名称
34  tomcat01:
35# 指定服务容器名字
36    hostname: tomcat01
37# 指定目录上下文构建镜像
38    build: ./tomcat
39# 映射服务别名
40    links:
41      - mysql:mysql-db
42# 映射服务数据卷路径
43    volumes:
44      - ./webapps:/usr/local/apache-tomcat-8.0.46/webapps
45
46# 服务名称
47  tomcat02:
48# 指定服务容器名字
49    hostname: tomcat02
50# 指定目录上下文构建镜像
51    build: ./tomcat
52# 映射服务别名
53    links:
54      - mysql:mysql-db
55# 映射服务数据卷路径
56    volumes:
57      - ./webapps:/usr/local/apache-tomcat-8.0.46/webapps
58
59# 服务名称
60  tomcat03:
61# 指定服务容器名字
62    hostname: tomcat03
63# 指定目录上下文构建镜像
64    build: ./tomcat
65# 映射服务别名
66    links:
67      - mysql:mysql-db
68# 映射服务数据卷路径
69    volumes:
70      - ./webapps:/usr/local/apache-tomcat-8.0.46/webapps
71
72# 服务名称
73  mysql:
74# 指定服务容器名字
75    hostname: mysql
76# 指定服务容器名字
77    image: mysql:5.6
78# 映射数组级的端口
79    ports:
80      - 3306:3306
81# 映射服务数据卷路径
82    volumes:
83      - ./mysql/conf:/etc/mysql/conf.d
84      - ./mysql/data:/var/lib/mysql
85# 指定数据库变量
86    environment:
87# 设置数据库密码
88      MYSQL_ROOT_PASSWORD: 123456
89# 添加user用户
90      MYSQL_USER: user
91# 设置user用户密码
92      MYSQL_PASSWORD: user123
4.2、编写测试页面
vim webapps/ROOT/index.jsp
java ...........
4.3、执行dockerCompose 一键部署Nginx代理Tomcat集群
1# 管理目录下compose_nginx_tomcat 执行该命令 -d 后台运行
2docker-compose up -d
五、测试容器服务
5.1、查看启动状态终端输出****
1Creating compose_nginx_tomcat_mysql_1 ... done
2Creating compose_nginx_tomcat_tomcat03_1 ... done
3Creating compose_nginx_tomcat_tomcat02_1 ... done
4Creating compose_nginx_tomcat_tomcat01_1 ... done
5Creating compose_nginx_tomcat_nginx_1 ... done
5.2、查看后台运行容器
1docker-compose ps
2
3        Name                 Command         State          Ports
4------------------------------------------------------------------------
5compose_nginx_tomcat   docker-               Up      0.0.0.0:3306->3306/
6_mysql_1               entrypoint.sh                 tcp
7                       mysqld
8compose_nginx_tomcat   /usr/local/nginx/sb   Up      0.0.0.0:80->80/tcp
9_nginx_1               in/ngin ...
10compose_nginx_tomcat   /usr/local/apache-    Up      8080/tcp
11_tomcat01_1            tomcat-8 ...
12compose_nginx_tomcat   /usr/local/apache-    Up      8080/tcp
13_tomcat02_1            tomcat-8 ...
14compose_nginx_tomcat   /usr/local/apache-    Up      8080/tcp
15_tomcat03_1            tomcat-8 ...
5.3、测试数据库
1# 1、进入数据库容器
2docker container exec -it c764f337ffad /bin/bash
3
4# 2、进入数据库
5mysql -h192.168.1.77 -uroot -p123456
6
7# 3、查看创建用户user
8mysql> select user,host from mysql.user;
9
10+------+-----------+
11| user | host |
12+------+-----------+
13| root | % |
14| user | % |
15| root | localhost |
16+------+-----------+
173 rows in set (0.00 sec)
5.4、浏览器测试nginx代理tomcat
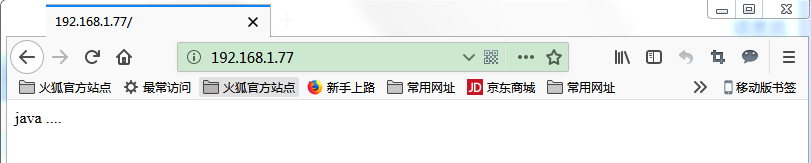
1# 1、进入nginx管理界面
2docker container exec -it c764f337ffad /bin/bash
3
4# 2、查看输出日志测试轮询代理
5[root@nginx /]# tail /usr/local/nginx/logs/access.log -f
6
7172.20.0.4:8080 192.168.1.2 - - [25/Oct/2018:07:34:07 +0000] "GET / HTTP/1.1" 200 10 "-" "Mozilla/5.0 (Windows NT 6.1; Win64; x64; rv:62.0) Gecko/20100101 Firefox/62.0" "-"
8172.20.0.3:8080 192.168.1.2 - - [25/Oct/2018:07:34:07 +0000] "GET /favicon.ico HTTP/1.1" 404 1016 "-" "Mozilla/5.0 (Windows NT 6.1; Win64; x64; rv:62.0) Gecko/20100101 Firefox/62.0" "-"
9172.20.0.5:8080 192.168.1.2 - - [25/Oct/2018:07:34:31 +0000] "GET / HTTP/1.1" 200 10 "-" "Mozilla/5.0 (Windows NT 6.1; Win64; x64; rv:62.0) Gecko/20100101 Firefox/62.0" "-"
10172.20.0.4:8080 192.168.1.2 - - [25/Oct/2018:07:34:35 +0000] "GET / HTTP/1.1" 200 10 "-" "Mozilla/5.0 (Windows NT 6.1; Win64; x64; rv:62.0) Gecko/20100101 Firefox/62.0" "-"
11172.20.0.3:8080 192.168.1.2 - - [25/Oct/2018:07:34:40 +0000] "GET / HTTP/1.1" 200 10 "-" "Mozilla/5.0 (Windows NT 6.1; Win64; x64; rv:62.0) Gecko/20100101 Firefox/62.0" "-"
12172.20.0.5:8080 192.168.1.2 - - [25/Oct/2018:07:34:41 +0000] "GET / HTTP/1.1" 200 10 "-" "Mozilla/5.0 (Windows NT 6.1; Win64; x64; rv:62.0) Gecko/20100101 Firefox/62.0" "-"