
Logstash数据处理工具
具有实时渠道能力的数据收集引擎,包含输入、过滤、输出模块,一般在过滤模块中做日志格式化的解析工作
日志信息-->logstsh-->json形式
mysql\ hbase\ ES-->logstsh(select * from user)-->ES
logstsh架构 比较耗费性能
搜集--->过滤--->处理
Grok:匹配需要收集的字段信息
Date:处理日期类型
Geoip:添加地理位置信息
Useragent:提取请求用户信息
input | 过滤组件(Grok正则匹配,)| -输出
ES("username")--->logstsh---ES
select * from user
kris1 smile alex
|
logstsh(input/filter)
input(kris1 event smile event alex event) queue队列
filter
input(kris1 event smile event alex event) queue队列
logstash安装
1[root@localhost logstash]# tar -zxvf logstash-6.3.1.tar.gz
2
3创建config目录目的-->自定义过滤文件和插件,保存配置文件信息
4[elk@localhost logstash]$ mkdir config
5[elk@localhost config]$ pwd
6/home/elk/logstash/config
写这个小型配置/脚本;必须包含3部分;
1①.2
2按换行方式输入,输出以json的形式:
3[elk@localhost config]$ vi test1.conf
4input {
5  stdin {codec=>line}
6}
7output {
8stdout {codec=>json}
9}
10heihei
11{"message":"heihei","@timestamp":"2019-03-26T03:05:35.750Z","@version":"1","host":"localhost.localdomain"}
12hello alex
13{"message":"hello alex","@timestamp":"2019-03-26T03:06:11.283Z","@version":"1","host":"localhost.localdomain"}
14
15③
16Stdin
17输入插件:可以管道输入,也可以从终端交互输入(前两个都是终端交互输入)
18通用配置:
19codec:类型为codec
20type:类型为string自定义该事件类型,可用于后续判断
21tags:类型为array,自定义事件的tag,可用于后续判断
22add_field:类型为hash,为该事件添加字段
23
24以管道方式输入
25[elk@localhost config]$ echo "bar\nfoo" | ../logstash-6.3.1/bin/logstash -f test1.conf
26{"@timestamp":"2019-03-25T12:22:43.534Z","host":"localhost.localdomain","message":"bar\\nfoo","@version":"1"}
27
28④
29输入输出,接收方式
30以管道方式灌入数据
31
32type是又添加一个字段,add_field是随机添加一个k v键值对;
33[elk@localhost config]$ vi test2.conf
34input{
35    stdin{
36      codec => "plain"
37      tags => ["test"]
38      type => "std"
39      add_field => {"key" => "value"}}
40}
41output{
42     stdout{
43      codec => "rubydebug"}
44}
45
46[elk@localhost config]$ ../logstash-6.3.1/bin/logstash -f ./test2.conf
47Hello
48{
49    "@timestamp" => 2019-03-27T00:42:18.166Z,
50      "@version" => "1",
51           "key" => "value",
52          "tags" => [
53        [0] "test"
54    ],
55          "host" => "localhost.localdomain",
56          "type" => "std",
57       "message" => "Hello"
58}
59
60⑥ Elasticsearch 读取ES中的数据
61哪个索引中有数据
62从一个ES去同步到另外一个ES中就可以使用logstash去同步
63[elk@localhost config]$ vi es.conf
64input {
65  elasticsearch {
66    hosts => "192.168.1.101"
67    index => "kris"
68    query => '{"query": {"match_all": {} }}'
69  }
70}
71output {
72 stdout {
73  codec => "rubydebug"
74 }
75}
76
77[elk@localhost config]$ ../logstash-6.3.1/bin/logstash -f ./es.conf
78{
79      "@version" => "1",
80           "job" => "java senior engineer and java specialist",
81     "isMarried" => true,
82         "birth" => "1980-05-07",
83           "age" => 28,
84    "@timestamp" => 2019-03-25T13:15:27.762Z,
85      "username" => "alfred"
86}
87{
88      "@version" => "1",
89           "job" => "ruby engineer",
90     "isMarried" => false,
91         "birth" => "1986-08-07",
92           "age" => 23,
93    "@timestamp" => 2019-03-25T13:15:27.789Z,
94      "username" => "lee junior way"
95}
96{
97      "@version" => "1",
98           "job" => "java engineer",
99     "isMarried" => false,
100         "birth" => "1991-12-15",
101           "age" => 18,
102    "@timestamp" => 2019-03-25T13:15:27.790Z,
103      "username" => "alfred way"
104}
105{
106      "@version" => "1",
107           "job" => "java and ruby engineer",
108     "isMarried" => false,
109         "birth" => "1985-08-07",
110           "age" => 22,
111    "@timestamp" => 2019-03-25T13:15:27.790Z,
112      "username" => "lee"
113}
logstsh filter
Filter是logstsh功能强大的原因,它可以对数据进行丰富的处理,比如解析数据、删除字段、类型转换等
date:日期解析
grok:正则匹配解析
dissect:分割符解析
mutate:对字段作处理,比如重命名、删除、替换等
json:按照json解析字段内容到指定字段中
geoip:增加地理位置数据
ruby:利用ruby代码来动态修改logstsh Event
1[elk@localhost config]$ vi filter.conf
2input {
3  stdin {codec => "json"}
4}
5
6filter {
7 date {
8  match => ["logdate","MM dd yyyy HH:mm:ss"]
9 }
10}
11output {
12 stdout {
13  codec => "rubydebug"
14 }
15}
16[elk@localhost config]$ ../logstash-6.3.1/bin/logstash -f ./filter.conf
17jing
18[2019-03-25T23:51:09,341][WARN ][logstash.codecs.jsonlines] JSON parse error, original data now in message field {:error=>#<LogStash::Json::ParserError: Unrecognized token 'jing': was expecting ('true', 'false' or 'null')
19 at [Source: (String)"jing"; line: 1, column: 9]>, :data=>"jing"}
20{
21          "host" => "localhost.localdomain",
22       "message" => "jing",
23      "@version" => "1",
24          "tags" => [
25        [0] "_jsonparsefailure"
26    ],
27    "@timestamp" => 2019-03-26T03:51:09.375Z
28}
Grok 正则匹配
193.180.71.3 - - [17/May/2015:08:05:32 +0000] "GET /downloads/product_1 HTTP/1.1" 304 0 "-" "Debian APT-HTTP/1.3 (0.8.16~exp12ubuntu10.21)"
2[0-9]+.[0-9]+.[0-9].[0-9](93.180.71.3)+ ? ? []...最终把它转换成(已经封装好的正则)
3%{IPORHOST:clientip} %{USER:ident} %{USER:auth} \[%{HTTPDATE:timestamp}\] “%{WORD:verb} %{DATA:request} HTTP/%{NUMBER:httpversion}” %{NUMBER:response:int} (?:-|%{NUMBER:bytes:int}) %{QS:referrer} %{QS:agent}
4形成json格式,message接收到的;clientip、ident、auth、timestamp等这些字段;
5
6input接收hhttp7474端口
793.180.71.3 - - [17/May/2015:08:05:32 +0000] "GET /downloads/product_1 HTTP/1.1" 304 0 "-" "Debian APT-HTTP/1.3 (0.8.16~exp12ubuntu10.21)"
893.180.71.3 - - [17/May/2015:08:05:23 +0000] "GET /downloads/product_1 HTTP/1.1" 304 0 "-" "Debian APT-HTTP/1.3 (0.8.16~exp12ubuntu10.21)"
%{IPORHOST:clientip} %{USER:ident} %{USER:auth} \[%{HTTPDATE:timestamp}\] “%{WORD:verb} %{DATA:request} HTTP/%{NUMBER:httpversion}” %{NUMBER:response:int} (?:-|%{NUMBER:bytes:int}) %{QS:referrer} %{QS:agent}
1[elk@localhost config]$vi grok.conf  ##加\进行转义;
2input {
3  http {port => 7474}
4}
5
6filter {
7 grok {
8  match => {
9   "message" => "%{IPORHOST:clientip} %{USER:ident} %{USER:auth} \[%{HTTPDATE:timestamp}\] \"%{WORD:verb} %{DATA:request} HTTP/%{NUMBER:httpversion}\" %{NUMBER:response:int} (?:-|%{NUMBER:bytes:int}) %{QS:referrer} %{QS:agent}"
10  }
11 }
12}
13output {
14 stdout {
15  codec => "rubydebug"
16 }
17}
18
19[elk@localhost config]$ ../logstash-6.3.1/bin/logstash -f ./grok.conf
20
21发送7474端口的GET请求:
22http://192.168.1.101:7474/93.180.71.3%20-%20-%20[17/May/2015:08:05:32%20+0000]%20%22GET%20/downloads/product_1%20HTTP/1.1%22%20304%200%20%22-%22%20%22Debian%20APT-HTTP/1.3%20(0.8.16~exp12ubuntu10.21)%22
23
24{
25       "message" => "",
26    "@timestamp" => 2019-03-26T07:07:03.183Z,
27          "host" => "192.168.1.5",
28          "tags" => [
29        [0] "_grokparsefailure"
30    ],
31      "@version" => "1",
32       "headers" => {
33                             "http_host" => "192.168.1.101:7474",
34                       "http_user_agent" => "Mozilla/5.0 (Windows NT 6.1; Win64; x64) AppleWebKit/537.36 (KHTML, like Gecko) Chrome/72.0.3626.121 Safari/537.36",
35                  "http_accept_language" => "zh-CN,zh;q=0.9",
36                  "http_accept_encoding" => "gzip, deflate",
37                          "http_version" => "HTTP/1.1",
38                           "http_accept" => "text/html,application/xhtml+xml,application/xml;q=0.9,image/webp,image/apng,*/*;q=0.8",
39                           "request_uri" => "/93.180.71.3%20-%20-%20[17/May/2015:08:05:32%20+0000]%20%22GET%20/downloads/product_1%20HTTP/1.1%22%20304%200%20%22-%22%20%22Debian%20APT-HTTP/1.3%20(0.8.16~exp12ubuntu10.21)%22",
40                       "http_connection" => "keep-alive",
41                          "request_path" => "/93.180.71.3%20-%20-%20[17/May/2015:08:05:32%20+0000]%20%22GET%20/downloads/product_1%20HTTP/1.1%22%20304%200%20%22-%22%20%22Debian%20APT-HTTP/1.3%20(0.8.16~exp12ubuntu10.21)%22",
42                        "request_method" => "GET",
43        "http_upgrade_insecure_requests" => "1"
44    }
45}
46{
47       "message" => "",
48    "@timestamp" => 2019-03-26T07:07:03.403Z,
49          "host" => "192.168.1.5",
50          "tags" => [
51        [0] "_grokparsefailure"
52    ],
53      "@version" => "1",
54       "headers" => {
55                   "http_host" => "192.168.1.101:7474",
56             "http_user_agent" => "Mozilla/5.0 (Windows NT 6.1; Win64; x64) AppleWebKit/537.36 (KHTML, like Gecko) Chrome/72.0.3626.121 Safari/537.36",
57                "http_referer" => "http://192.168.1.101:7474/93.180.71.3%20-%20-%20[17/May/2015:08:05:32%20+0000]%20%22GET%20/downloads/product_1%20HTTP/1.1%22%20304%200%20%22-%22%20%22Debian%20APT-HTTP/1.3%20(0.8.16~exp12ubuntu10.21)%22",
58        "http_accept_language" => "zh-CN,zh;q=0.9",
59        "http_accept_encoding" => "gzip, deflate",
60                "http_version" => "HTTP/1.1",
61                 "http_accept" => "image/webp,image/apng,image/*,*/*;q=0.8",
62                 "request_uri" => "/favicon.ico",
63             "http_connection" => "keep-alive",
64                "request_path" => "/favicon.ico",
65              "request_method" => "GET"
66    }
67}
百度echart
https://echarts.baidu.com/echarts2/doc/example.html
数据可视化演示实战
l 需求:
收集Elasticserach集群的查询语句
分析查询语句的常用语句、响应时长等
l 方案
数据收集:Packetbeat+logstash
数据分析:Kibana+Elasticsearch
准备
l Production Cluster(生产环境)
1、Elasticsearch 192.168.14.13:9200
2、Kibana 192.168.14.15:5601
l Monitoring Cluster(监控环境)
1、Elasticsearch 192.168.14.16:8200
2、Kibana 192.168.14.16:8601
l Logstash\packetbeat
nginx -->log
↓
javaee logstash--->es-->kibana
1.tomcat-->web
2.nginx
3.logstash
4.es
5.kibana
101 102
es tomcat
kibana nginx
logstash
l 启动数据采集集群
启动ES: ./elasticsearch
./kibana #启动
l 启动数据分析集群
(1)启动ES
(2)启动logstash
安装tomcat,把java的web项目manager-test上传到webapps中;
1[elk@localhost tomcat]$ ll
2drwxrwxr-x. 9 elk elk 160 Mar 25 13:02 apache-tomcat-7.0.47
3[elk@localhost tomcat]$ tar -zxvf /home/elk/soft/apache-tomcat-7.0.47.tar.gz -C ./tomcat/
4[elk@localhost apache-tomcat-7.0.47]$ bin/startup.sh
5Using CATALINA_BASE:   /home/elk/tomcat/apache-tomcat-7.0.47
6Using CATALINA_HOME:   /home/elk/tomcat/apache-tomcat-7.0.47
7Using CATALINA_TMPDIR: /home/elk/tomcat/apache-tomcat-7.0.47/temp
8Using JRE_HOME:        /home/elk/jdk/jdk1.8.0_171/jre
9Using CLASSPATH:       /home/elk/tomcat/apache-tomcat-7.0.47/bin/bootstrap.jar:/home/elk/tomcat/apache-tomcat-7.0.47/bin/tomcat-juli.jar
10http://192.168.1.102:8080/
11[elk@localhost apache-tomcat-7.0.47]$ bin/shutdown.sh
12
13http://192.168.1.102:8080/manager-test/tables.html
安装nginx
11、yum install gcc-c++ 安装nginx需要先将官网下载的源码进行编译,编译依赖gcc环境
22、yum install -y pcre pcre-devel      PCRE(Perl Compatible Regular Expressions)是一个Perl库,包括 perl 兼容的正则表达式库。nginx的http模块使用pcre来解析正则表达式,所以需要在linux上安装pcre库。
3注:pcre-devel是使用pcre开发的一个二次开发库。nginx也需要此库。
43、yum install -y zlib zlib-devel     zlib库提供了很多种压缩和解压缩的方式,nginx使用zlib对http包的内容进行gzip,所以需要在linux上安装zlib库。
54、yum install -y openssl openssl-devel
6OpenSSL 是一个强大的安全套接字层密码库,囊括主要的密码算法、常用的密钥和证书封装管理功能及SSL协议,并提供丰富的应用程序供测试或其它目的使用。
7    nginx不仅支持http协议,还支持https(即在ssl协议上传输http),所以需要在linux安装openssl库。
8
9tar -zxvf /home/elk/soft/nginx-1.15.1.tar.gz -C ./nginx/
10./configure --help查询详细参数
11[root@localhost nginx-1.15.1]# ./configure \
12> --prefix=/usr/local/nginx \
13> --pid-path=/var/run/nginx/nginx.pid \
14> --lock-path=/var/lock/nginx.lock \
15> --error-log-path=/var/log/nginx/error.log \
16> --http-log-path=/var/log/nginx/access.log \
17> --with-http_gzip_static_module \
18> --http-client-body-temp-path=/var/temp/nginx/client \
19> --http-proxy-temp-path=/var/temp/nginx/proxy \
20> --http-fastcgi-temp-path=/var/temp/nginx/fastcgi \
21> --http-uwsgi-temp-path=/var/temp/nginx/uwsgi \
22> --http-scgi-temp-path=/var/temp/nginx/scgi
#注意:上边将临时文件目录指定为/var/temp/nginx,需要在/var下创建temp及nginx****目录
1/var/log/nginx/access.log
2 编译安装
3[root@localhost nginx-1.15.1]# make  ##编译下让它执行
4[root@localhost nginx-1.15.1]# make install
安装成功查看安装目录 :
1[root@localhost nginx]# ll
2total 4
3drwxr-xr-x. 2 root root 4096 Mar 25 13:33 conf
4drwxr-xr-x. 2 root root   40 Mar 25 13:33 html
5drwxr-xr-x. 2 root root   19 Mar 25 13:33 sbin
6[root@localhost nginx]# pwd  这个是nginc的实际目录
7/usr/local/nginx
启动nginx
cd /usr/local/nginx/sbin/
./nginx
1[root@localhost conf]# rm -rf nginx.conf
2[root@localhost conf]# cp /home/elk/file/project/nginx.conf ./  ##重写配置下nginx.conf文件;将配置好的复制过来
nginx.conf


1#user  nobody;
2worker_processes  1;
3
4#error_log  logs/error.log;
5#error_log  logs/error.log  notice;
6#error_log  logs/error.log  info;
7
8#pid        logs/nginx.pid;
9
10
11events {
12    worker_connections  1024;
13}
14
15
16http {
17    include       mime.types;
18    default_type  application/octet-stream;
19
20    #log_format  main  '$remote_addr - $remote_user [$time_local] "$request" '
21    #                  '$status $body_bytes_sent "$http_referer" '
22    #                  '"$http_user_agent" "$http_x_forwarded_for"';
23
24    #access_log  logs/access.log  main;
25    log_format  main  '$remote_addr - $remote_user [$time_local] $http_host $request_method "$uri" "$query_string" '
26                      '$status $body_bytes_sent "$http_referer" $upstream_status $upstream_addr $request_time $upstream_response_time '
27                      '"$http_user_agent" "$http_x_forwarded_for"';
28    sendfile        on;
29    #tcp_nopush     on;
30
31    #keepalive_timeout  0;
32    keepalive_timeout  65;
33
34    #gzip  on;
35    upstream manager {
36        server 127.0.0.1:8080 weight=10;
37    }
38
39    server {
40        listen       80;
41        server_name  localhost;
42
43        #charset koi8-r;
44
45        #access_log  logs/host.access.log  main;
46
47        location / {
48            proxy_pass http://manager/manager/index.html;
49            proxy_redirect off;
50        }
51
52        #error_page  404              /404.html;
53
54        # redirect server error pages to the static page /50x.html
55        #
56
57        # proxy the PHP scripts to Apache listening on 127.0.0.1:80
58        #
59        #location ~ \.php$ {
60        #    proxy_pass   http://127.0.0.1;
61        #}
62
63        # pass the PHP scripts to FastCGI server listening on 127.0.0.1:9000
64        #
65        #location ~ \.php$ {
66        #    root           html;
67        #    fastcgi_pass   127.0.0.1:9000;
68        #    fastcgi_index  index.php;
69        #    fastcgi_param  SCRIPT_FILENAME  /scripts$fastcgi_script_name;
70        #    include        fastcgi_params;
71        #}
72
73        # deny access to .htaccess files, if Apache's document root
74        # concurs with nginx's one
75        #
76        #location ~ /\.ht {
77        #    deny  all;
78        #}
79    }
80
81
82    # another virtual host using mix of IP-, name-, and port-based configuration
83    #
84    #server {
85    #    listen       8000;
86    #    listen       somename:8080;
87    #    server_name  somename  alias  another.alias;
88
89    #    location / {
90    #        root   html;
91    #        index  index.html index.htm;
92    #    }
93    #}
94
95
96    # HTTPS server
97    #
98    #server {
99    #    listen       443 ssl;
100    #    server_name  localhost;
101
102    #    ssl_certificate      cert.pem;
103    #    ssl_certificate_key  cert.key;
104
105    #    ssl_session_cache    shared:SSL:1m;
106    #    ssl_session_timeout  5m;
107
108    #    ssl_ciphers  HIGH:!aNULL:!MD5;
109    #    ssl_prefer_server_ciphers  on;
110
111    #    location / {
112    #        root   html;
113    #        index  index.html index.htm;
114    #    }
115    #}
116
117}
View Code
修改下项目地址
1[root@localhost conf]# vi nginx.conf
2  location / {
3            proxy_pass http://manager/manager-test/index.html;
4            proxy_redirect off;
5        }
6
7启动:
8 [root@localhost conf]# pwd
9/usr/local/nginx/conf
10[root@localhost conf]# cd ../sbin/
11[root@localhost sbin]# pwd
12/usr/local/nginx/sbin
13[root@localhost sbin]# ./ngin
14
15http://192.168.1.102/
16刷写网页就会生成日志信息
停止nginx
方式1,快速停止:
cd /usr/local/nginx/sbin
./nginx -s stop
此方式相当于先查出nginx进程id再使用kill命令强制杀掉进程。
方式2,完整停止(建议使用):
cd /usr/local/nginx/sbin
./nginx -s quit
此方式停止步骤是待nginx进程处理任务完毕进行停止。
重启nginx
方式1,先停止再启动(建议使用):
对nginx进行重启相当于先停止nginx再启动nginx,即先执行停止命令再执行启动命令。
如下:
./nginx -s quit
./nginx
方式2,重新加载配置文件:
当nginx的配置文件nginx.conf修改后,要想让配置生效需要重启nginx,使用-s reload不用先停止nginx再启动nginx即可将配置信息在nginx中生效,如下:
./nginx -s reload
测试
nginx安装成功,启动nginx,即可访问虚拟机上的nginx:
到这说明nginx上安装成功。
查询nginx进程:ps aux | grep nginx
主进程id,工作进程id
注意:执行./nginx启动nginx,这里可以-c指定加载的nginx配置文件,如下:
./nginx -c /usr/local/nginx/conf/nginx.conf
如果不指定-c**,nginx在启动时默认加载conf/nginx.conf文件,此文件的地址也可以在编译安装nginx时指定./configure的参数(--conf-path=** 指向配置文件(nginx.conf**))**
实时监控文件的变化
1[root@localhost sbin]# cd /var/log/nginx/
2[root@localhost nginx]# ls
3access.log  error.log
4[root@localhost nginx]# tail -f access.log
logstash的安装配置
1[elk@localhost config]$ vi nginx_logstash.conf  修改下路径
2
3                        patterns_dir => "/home/elk/logstash/config/patterns/"
4                        match => {
5                                "message" => "%{NGINXACCESS}"
6[elk@localhost config]$ ../logstash-6.3.1/bin/logstash -f ./nginx_logstash.conf
7
8[elk@localhost config]$ pwd
9/home/elk/logstash/config
10[elk@localhost config]$ ll
11total 4
12-rw-r--r--. 1 elk elk 1090 Mar 25 13:56 nginx_logstash.conf
13drwxrwxr-x. 2 elk elk   19 Mar 25 13:54 patterns
配置这两个文件即可;
1[elk@localhost config]$ cat patterns/nginx
2NGINXACCESS %{IPORHOST:clientip} %{HTTPDUSER:ident} %{USER:auth} \[%{HTTPDATE:timestamp}\] "(?:%{WORD:verb} %{NOTSPACE:request}(?: HTTP/%{NUMBER:httpversion})?|%{DATA:rawrequest})" %{NUMBER:response} (?:%{NUMBER:bytes}|-)
3NGINXACCESSLOG %{COMMONAPACHELOG} %{QS:referrer} %{QS:agent}
4
5[elk@localhost config]$ vi nginx_logstash.conf
6input {
7        file {
8                path => ["/var/log/nginx/access.log"]
9                type => "nginx_access"
10                #start_position => "beginning"
11        }
12}
13filter {
14        if [type] == "nginx_access" {
15                grok {
16                        patterns_dir => "/home/elk/logstash/config/patterns/"
17                        match => {
18                                "message" => "%{NGINXACCESS}"
19                        }
20                }
21
22                date {
23                        match => ["timestamp","dd/MMM/YYY:HH:mm:ss Z"]
24                }
25
26                if [param] {
27                        ruby {
28                                init => "@kname = ['quote','url_args']"
29                                code => "
30                                        new_event =
31                                        LogStash::Event.new(Hash[@kname.zip(event.get('param').split('?'))])
32                                        new_event.remove('@timestamp')
33                                        event.append(new_event)
34                                "
35                        }
36                }
37
38                if [url_args] {
39                        ruby {
40                                init => "@kname = ['key','value']"
41                                code => "event.set('nested_args',event.get('url_args').split('&').cllect{|i| Hash[@kname.zip(i.split('='))]})"
42                                remove_field => ["url_args","param","quote"]
43                        }
44                }
45
46                mutate {
47                        convert => ["response","integer"]
48                        remove_field => "timestamp"
49                }
50        }
51}
52output {
53        stdout {
54                codec => rubydebug
55        }
56
57        elasticsearch {
58                hosts => ["http://192.168.1.102:9200"]
59                index => "logstash-%{type}-%{+YYYY.MM.dd}"
60        }
61}
62
63启动kibana:
64
65
66[elk@localhost bin]$ ./kibana
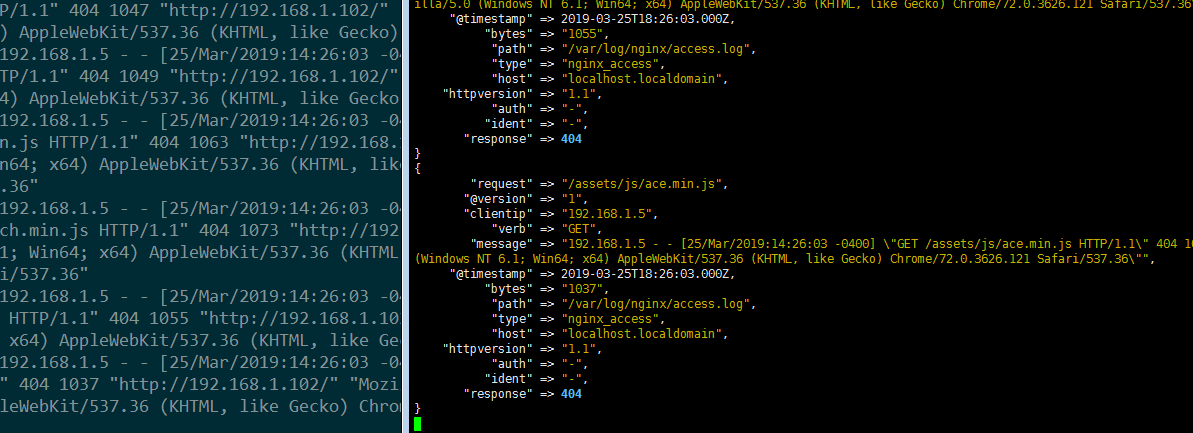
67一刷新网页就会产生log日志:
68{
69        "request" => "/assets/js/ace.min.js",
70       "@version" => "1",
71       "clientip" => "192.168.1.5",
72           "verb" => "GET",
73        "message" => "192.168.1.5 - - [25/Mar/2019:14:01:58 -0400] \"GET /assets/js/ace.min.js HTTP/1.1\" 404 1037 \"http://192.168.1.102/\" \"Mozilla/5.0 (Windows NT 6.1; Win64; x64) AppleWebKit/537.36 (KHTML, like Gecko) Chrome/72.0.3626.121 Safari/537.36\"",
74     "@timestamp" => 2019-03-25T18:01:58.000Z,
75          "bytes" => "1037",
76           "path" => "/var/log/nginx/access.log",
77           "type" => "nginx_access",
78           "host" => "localhost.localdomain",
79    "httpversion" => "1.1",
80           "auth" => "-",
81          "ident" => "-",
82       "response" => 404
83}
84
85elasticsearch的索引是
86elasticsearch {
87        hosts => ["http://192.168.1.101:9200"]
88        index => "logstash-%{type}-%{+YYYY.MM.dd}"
89    }
90
91查询下看到它会生成很多的log信息
92GET logstash-nginx_access-2019.03.25/_search
93log日志-->灌到ES中
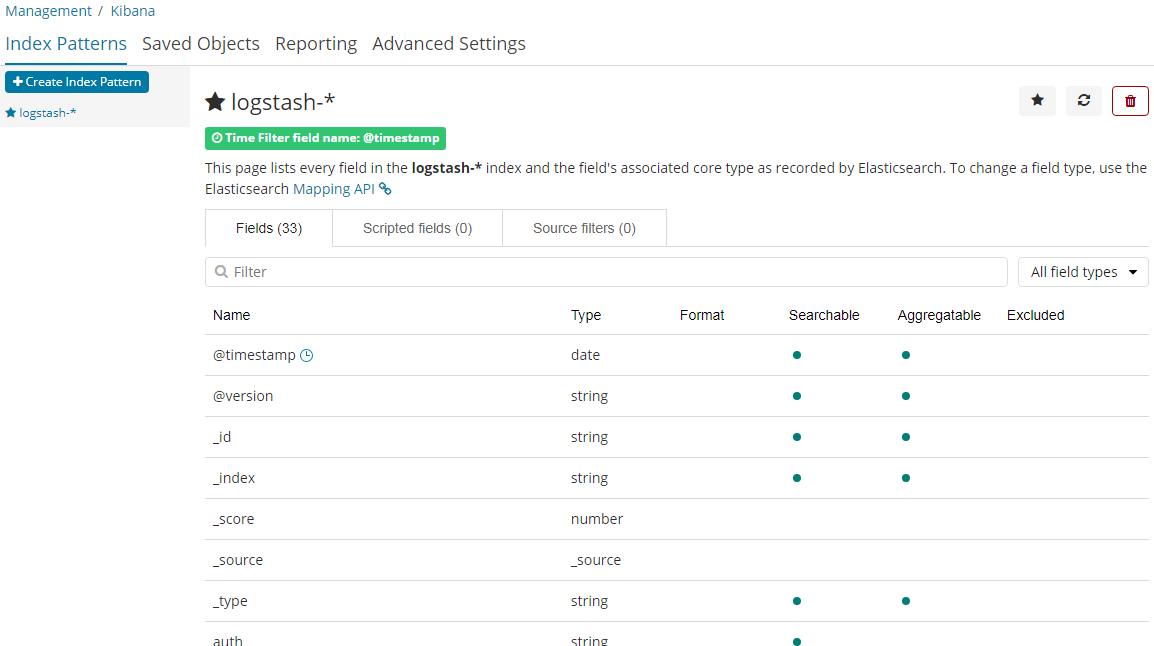
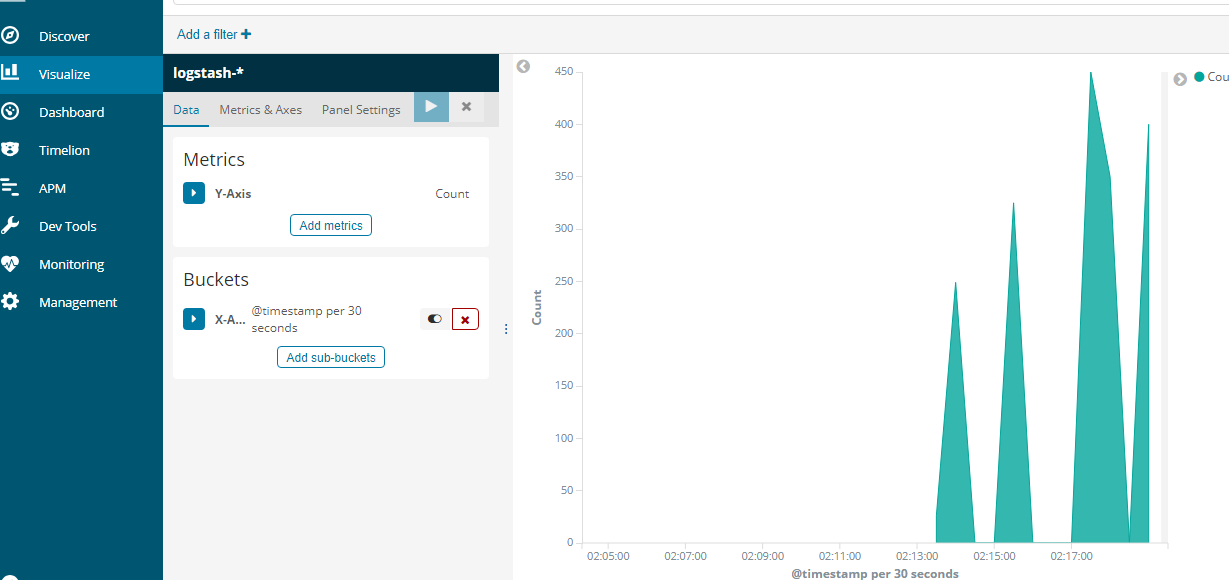
图表展示: 创建logstash的信息
logstash-*
timestamp
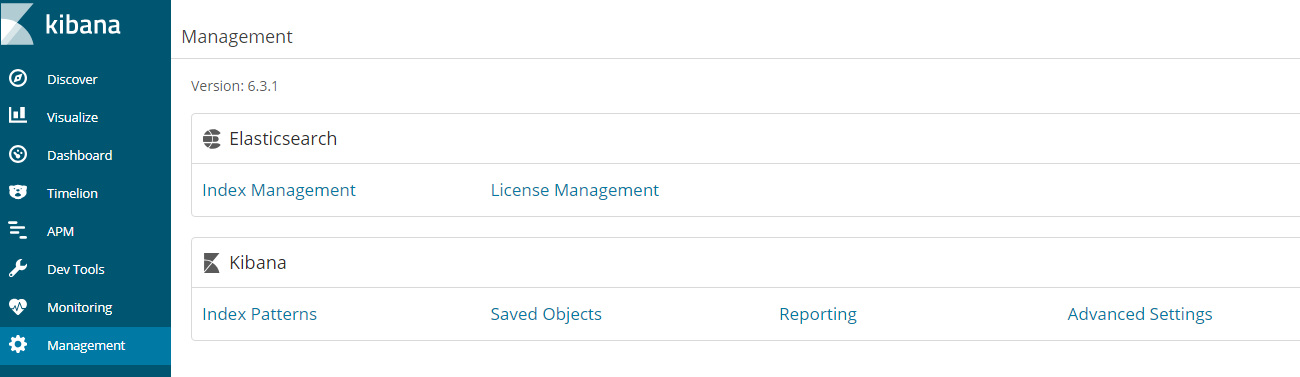
创建索引
创建索引logstash-*
附录:防火墙配置
1、firewalld的基本使用
启动: systemctl start firewalld
关闭: systemctl stop firewalld
查看状态: systemctl status firewalld
开机禁用 : systemctl disable firewalld
开机启用 : systemctl enable firewalld
2.systemctl是CentOS7的服务管理工具中主要的工具,它融合之前service和chkconfig的功能于一体。
启动一个服务:systemctl start firewalld.service
关闭一个服务:systemctl stop firewalld.service
重启一个服务:systemctl restart firewalld.service
显示一个服务的状态:systemctl status firewalld.service
在开机时启用一个服务:systemctl enable firewalld.service
在开机时禁用一个服务:systemctl disable firewalld.service
查看服务是否开机启动:systemctl is-enabled firewalld.service
查看已启动的服务列表:systemctl list-unit-files|grep enabled
查看启动失败的服务列表:systemctl --failed
3.配置firewalld-cmd
查看版本: firewall-cmd --version
查看帮助: firewall-cmd --help
显示状态: firewall-cmd --state
查看所有打开的端口: firewall-cmd --zone=public --list-ports
更新防火墙规则: firewall-cmd --reload
查看区域信息: firewall-cmd --get-active-zones
查看指定接口所属区域: firewall-cmd --get-zone-of-interface=eth0
拒绝所有包:firewall-cmd --panic-on
取消拒绝状态: firewall-cmd --panic-off
查看是否拒绝: firewall-cmd --query-panic
4.那怎么开启一个端口呢
添加 firewall-cmd --zone=public --add-port=80/tcp --permanent (--permanent永久生效,没有此参数重启后失效)
重新载入 firewall-cmd --reload
查看 firewall-cmd --zone= public --query-port=80/tcp
删除 firewall-cmd --zone= public --remove-port=80/tcp --permanent