
10.11 Linux网络相关
ifconfig命令
- 查看网卡IP
如果系统没有该命令可以使用yum安装:
[root@cham2 ~]#yum install -y net-tools
查看网卡IP还可以使用命令:ip addr,这个显示有点乱!
- ifconfig -a
显示所有网卡信息(包括down掉的或者没有IP地址的网卡)
启动/关闭网卡
应用环境:更改单个指定网卡配置后需要重启才能生效,为了避免关闭或重启所有网卡可以对单个网卡执行该命令。
1[root@cham2 ~]# ifdown ens33 && ifup ens33
2成功断开设备 'ens33'。
3成功激活的连接(D-Bus 激活路径:/org/freedesktop/NetworkManager/ActiveConnection/6)
注: 如果网卡正在使用中,不要单独使用ifdown命令!!!解决办法: “# ifdown ens33 && ifup ens33”,使两个命令一起执行!
为虚拟机添加网卡
1[root@cham2 ~]# cd /etc/sysconfig/network-scripts/
2[root@cham2 network-scripts]# ls
3ifcfg-ens33  ifdown-ippp    ifdown-sit       ifup-bnep  ifup-plip    ifup-Team          network-functions-ipv6
4ifcfg-lo     ifdown-ipv6    ifdown-Team      ifup-eth   ifup-plusb   ifup-TeamPort
5ifdown       ifdown-isdn    ifdown-TeamPort  ifup-ib    ifup-post    ifup-tunnel
6ifdown-bnep  ifdown-post    ifdown-tunnel    ifup-ippp  ifup-ppp     ifup-wireless
7ifdown-eth   ifdown-ppp     ifup             ifup-ipv6  ifup-routes  init.ipv6-global
8ifdown-ib    ifdown-routes  ifup-aliases     ifup-isdn  ifup-sit     network-functions
9[root@cham2 network-scripts]# cp ifcfg-ens33 ifcfg-ens37
10[root@cham2 network-scripts]# vi !$
11vi ifcfg-ens33\:0
12
13TYPE=Ethernet
14BOOTPROTO=static
15DEFROUTE=yes
16PEERDNS=yes
17PEERROUTES=yes
18IPV4_FAILURE_FATAL=no
19IPV6INIT=yes
20IPV6_AUTOCONF=yes
21IPV6_DEFROUTE=yes
22IPV6_PEERDNS=yes
23IPV6_PEERROUTES=yes
24IPV6_FAILURE_FATAL=no
25IPV6_ADDR_GEN_MODE=stable-privacy
26NAME=ens33:0
27UUID=ad4d8fdd-1916-47fb-a43e-ee8685229fc4
28DEVICE=ens33:0
29ONBOOT=yes
30IPADDR=192.168.230.150
31NETMASK=255.255.255.0
32~
33~
34说明:更改NAME、DEVICE、IPADDR,系统已经设定网关可DNS,所以在此可以删除GATEWAY和DNS,也可以保留,但是,如果要保留该选项则必须保持其与系统网卡配置一致!
35
36
37[root@cham2 network-scripts]# ifdown ens33 && ifup ens33
38成功断开设备 'ens33'。
39成功激活的连接(D-Bus 激活路径:/org/freedesktop/NetworkManager/ActiveConnection/7)
40[root@cham2 network-scripts]# ifconfig
41ens33: flags=4163<UP,BROADCAST,RUNNING,MULTICAST>  mtu 1500
42        inet 192.168.230.135  netmask 255.255.255.0  broadcast 192.168.230.255
43        inet6 fe80::6f15:52d3:ebeb:e193  prefixlen 64  scopeid 0x20<link>
44        ether 00:0c:29:b6:9f:e3  txqueuelen 1000  (Ethernet)
45        RX packets 100550  bytes 46379597 (44.2 MiB)
46        RX errors 0  dropped 0  overruns 0  frame 0
47        TX packets 112074  bytes 40382050 (38.5 MiB)
48        TX errors 0  dropped 0 overruns 0  carrier 0  collisions 0
49
50ens33:0: flags=4163<UP,BROADCAST,RUNNING,MULTICAST>  mtu 1500
51        inet 192.168.230.150  netmask 255.255.255.0  broadcast 192.168.230.255
52        ether 00:0c:29:b6:9f:e3  txqueuelen 1000  (Ethernet)
53
54lo: flags=73<UP,LOOPBACK,RUNNING>  mtu 65536
55        inet 127.0.0.1  netmask 255.0.0.0
56        inet6 ::1  prefixlen 128  scopeid 0x10<host>
57        loop  txqueuelen 1  (Local Loopback)
58        RX packets 128  bytes 10604 (10.3 KiB)
59        RX errors 0  dropped 0  overruns 0  frame 0
60        TX packets 128  bytes 10604 (10.3 KiB)
61        TX errors 0  dropped 0 overruns 0  carrier 0  collisions 0
62
63[root@cham2 network-scripts]#
64
65检测虚拟网啊IP是否通畅
66
67在Windows系统cmd下ping该IP即可!
查看网卡是否连接
-
方法1:mii-tool [网卡名]
-
方法2:ethtool [网卡名]
[root@cham2 ~]# mii-tool ens33 ens33: negotiated 1000baseT-FD flow-control, link ok 查看:link ok说明网卡连接OK!
[root@cham2 ~]# ethtool ens33 Settings for ens33: Supported ports: [ TP ] Supported link modes: 10baseT/Half 10baseT/Full 100baseT/Half 100baseT/Full 1000baseT/Full Supported pause frame use: No Supports auto-negotiation: Yes Advertised link modes: 10baseT/Half 10baseT/Full 100baseT/Half 100baseT/Full 1000baseT/Full Advertised pause frame use: No Advertised auto-negotiation: Yes Speed: 1000Mb/s Duplex: Full Port: Twisted Pair PHYAD: 0 Transceiver: internal Auto-negotiation: on MDI-X: off (auto) Supports Wake-on: d Wake-on: d Current message level: 0x00000007 (7) drv probe link Link detected: yes 查看:Link detected: yes说明网卡连接OK!
主机名
-
更改主机名&主机名配置文件
更改: [root@cham2 ~]# hostnamectl set-hostname cham002
查看主机名: [root@cham2 ~]# hostname cham002 更改后的主机名要在系统重启之后才会显示!
主机名的配置文件: [root@cham002 ~]# cat /etc/hostname cham002
变成主机名,也可以重新登录 [root@cham2 ~]# bash [root@cham002 ~]#
DNS配置
-
DNS配置文件:/etc/resolv.conf
[root@cham002 ~]# cat /etc/resolv.conf
Generated by NetworkManager
nameserver 119.29.29.29
[root@cham002 ~]# vi /etc/sysconfig/network-scripts/ifcfg-ens33 添加DNS2=8.8.8.8 [root@cham002 ~]# ifdown ens33 && ifup ens33 成功断开设备 'ens33'。 成功激活的连接(D-Bus 激活路径:/org/freedesktop/NetworkManager/ActiveConnection/8) [root@cham002 ~]# cat /etc/resolv.conf
Generated by NetworkManager
nameserver 119.29.29.29 nameserver 8.8.8.8
注: 更改网卡配置即可更改DNS配置文件,更改后需要重启网卡(ifdown/ifup)后生效,也可编辑‘/etc/resolv.conf’临时更改DNS配置,该办法在重启网卡后会被网卡配置文件中的DNS覆盖!
本地域名配置文件文件:/etc/hosts
1[root@cham002 ~]# cat /etc/hosts
2127.0.0.1   localhost localhost.localdomain localhost4 localhost4.localdomain4
3::1         localhost localhost.localdomain localhost6 localhost6.localdomain6
4[root@cham002 ~]# vi /etc/hosts
5增加一行192.168.230.150	www.qq123.com
6
7[root@cham002 ~]# cat /etc/hosts
8127.0.0.1   localhost localhost.localdomain localhost4 localhost4.localdomain4
9::1         localhost localhost.localdomain localhost6 localhost6.localdomain6
10192.168.230.150	www.qq123.com
11
12[root@cham002 ~]# !ping
13ping www.qq123.com
14PING www.qq123.com (192.168.230.150) 56(84) bytes of data.
1564 bytes from www.qq123.com (192.168.230.150): icmp_seq=1 ttl=64 time=0.042 ms
1664 bytes from www.qq123.com (192.168.230.150): icmp_seq=2 ttl=64 time=0.034 ms
1764 bytes from www.qq123.com (192.168.230.150): icmp_seq=3 ttl=64 time=0.033 ms
1864 bytes from www.qq123.com (192.168.230.150): icmp_seq=4 ttl=64 time=0.089 ms
19^C
20--- www.qq123.com ping statistics ---
214 packets transmitted, 4 received, 0% packet loss, time 3000ms
22rtt min/avg/max/mdev = 0.033/0.049/0.089/0.024 ms
说明: 使用vi命令可在该配置文件下可以自定义IP所对应的域名(一个IP对应多个域名或一个域名对应多个IP,用空格隔开,当一个域名对应多个IP时,以配置文件中靠后面的配置为准),但是该域名配置只在本机生效!
10.12 firewalld和netfilter
SELinux防火墙
临时关闭SELinux防火墙:
1[root@cham002 ~]# setenforce 0
2setenforce: SELinux is disabled
永久关闭SELinux防火墙:
编辑配置文件‘/etc/selinux/config’
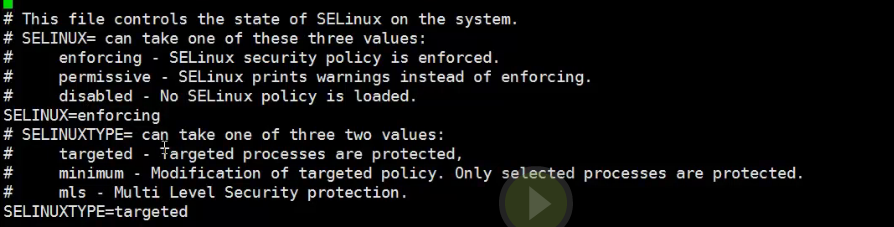
将SELINUX=enforcing改为disabled保存,重启系统即可!
1# This file controls the state of SELinux on the system.
2# SELINUX= can take one of these three values:
3#     enforcing - SELinux security policy is enforced.
4#     permissive - SELinux prints warnings instead of enforcing.
5#     disabled - No SELinux policy is loaded.
6SELINUX=disabled
7# SELINUXTYPE= can take one of three two values:
8#     targeted - Targeted processes are protected,
9#     minimum - Modification of targeted policy. Only selected processes are protected.
10#     mls - Multi Level Security protection.
11SELINUXTYPE=targeted
查看SELinux防火墙状态


1[root@cham002 ~]# getenforce
2Disabled
netfilter(Firewalld)
>Centos7中默认将原来(centos5/6)的防火墙netfileter升级为了firewalld。iptables是它们实现防火墙功能的工具。
为了方便学习,暂时停用firewalld,开启centos6/5的防火墙机制netfilter。
-
停用firewalld
1、关闭firewalld(禁止开机启动) [root@cham002 ~]# systemctl disable firewalld Removed symlink /etc/systemd/system/dbus-org.fedoraproject.FirewallD1.service. Removed symlink /etc/systemd/system/basic.target.wants/firewalld.service.
2、停止firewalld服务 [root@cham002 ~]# systemctl stop firewalld
-
开启netfilter
开启前先安装iptables工具包: [root@cham002 ~]# yum install -y iptables-services 已加载插件:fastestmirror
开启iptables服务: [root@cham002 ~]# systemctl enable iptables Created symlink from /etc/systemd/system/basic.target.wants/iptables.service to /usr/lib/systemd/system/iptables.service. [root@cham002 ~]# systemctl start iptables
说明: 安装完成后默认开启iptables服务。
-
查看iptables规则:iptables -nvL
[root@cham002 ~]# iptables -nvL Chain INPUT (policy ACCEPT 0 packets, 0 bytes) pkts bytes target prot opt in out source destination
29 1940 ACCEPT all -- * * 0.0.0.0/0 0.0.0.0/0 state RELATED,ESTABLISHED 0 0 ACCEPT icmp -- * * 0.0.0.0/0 0.0.0.0/0
0 0 ACCEPT all -- lo * 0.0.0.0/0 0.0.0.0/0
0 0 ACCEPT tcp -- * * 0.0.0.0/0 0.0.0.0/0 state NEW tcp dpt:22 0 0 REJECT all -- * * 0.0.0.0/0 0.0.0.0/0 reject-with icmp-host-prohibitedChain FORWARD (policy ACCEPT 0 packets, 0 bytes) pkts bytes target prot opt in out source destination
0 0 REJECT all -- * * 0.0.0.0/0 0.0.0.0/0 reject-with icmp-host-prohibitedChain OUTPUT (policy ACCEPT 17 packets, 1508 bytes) pkts bytes target prot opt in out source destination
10.13 netfilter 5表及链的介绍
表名
- filter:包过滤,用于防火墙规则。
- nat:地址转换,用于网关路由器。
- mangle:用于给数据包打标记,然后根据标记去操作那些表。(不常用)
- 还有两个不常用的表:raw和security,不多讲述。
规则链名
-
filter的三种链:
- INPUT链:作用于输入本机的数据包。
- OUTPUT链:作用于本机输出的数据包。
- FORWARD链:作用于与本机无关的包。
-
nat的三种链:
- PREROUTING链:作用是在包刚刚到达防火墙时改变它的目的地址,如果需要的话。
- OUTPUT链:改变本地产生的包的目的地址。
- POSTROUTING链:在包离开防火墙之前改变其源地址。
nat表应用(了解内容)
环境:
假设有三台机器(A,B,C),A机器上有一块网卡连接公网IP1;B机器上有两块网卡b1、b2,。b1、b2分别连接公网和私网IP2,、IP3;C机器上有一块网卡连接私网IP4。很明显此时A&B,B&C之间都分别能互通,但是A和C之间是不能直接连通的,只能借助B做媒介才能连通。那么如何设置才能使得A和C之间互通呢?
10.14 iptables语法
>iptables命令是Linux上常用的防火墙软件,是netfilter项目的一部分。可以直接配置,也可以通过许多前端和图形界面配置。
语法: iptables [options] [参数]
Options:
-n:不针对IP反解析主机名
-v:显示更详细的信息
-t:指定表(iptables命令默认作用于filter表)
-L:显示信息
-F:清空所有规则
-A/D:=add/delete,添加/删除一条规则
-I:插入一条规则
-p:指定协议,可以是tcp,udp或icmp
--sport:跟-p一起使用,指定源端口
--dport:跟-p一起使用,指定目标端口
-s:指定源IP(可以是一个IP段)
-d:指定目的IP(可以是一个IP段)
-j:后面跟动作(ACCEPT表示允许包;DROP表示丢掉包;REJECT表示拒绝包)
-i:指定网卡
-Z:把包以及流量计数器清零
-P:=pre,预设策略
service iptables restart重启服务
-
查看规则
1[root@cham002 ~]# iptables -nvL
2Chain INPUT (policy ACCEPT 0 packets, 0 bytes)
3 pkts bytes target     prot opt in     out     source               destination
4   28  1848 ACCEPT     all  --  *      *       0.0.0.0/0            0.0.0.0/0            state RELATED,ESTABLISHED
5    0     0 ACCEPT     icmp --  *      *       0.0.0.0/0            0.0.0.0/0
6    0     0 ACCEPT     all  --  lo     *       0.0.0.0/0            0.0.0.0/0
7    0     0 ACCEPT     tcp  --  *      *       0.0.0.0/0            0.0.0.0/0            state NEW tcp dpt:22
8    0     0 REJECT     all  --  *      *       0.0.0.0/0            0.0.0.0/0            reject-with icmp-host-prohibited
9
10Chain FORWARD (policy ACCEPT 0 packets, 0 bytes)
11 pkts bytes target     prot opt in     out     source               destination
12    0     0 REJECT     all  --  *      *       0.0.0.0/0            0.0.0.0/0            reject-with icmp-host-prohibited
13
14Chain OUTPUT (policy ACCEPT 15 packets, 1428 bytes)
15 pkts bytes target     prot opt in     out     source               destination
16
17
18[root@cham002 ~]# iptables -t nat -nvL
19Chain PREROUTING (policy ACCEPT 0 packets, 0 bytes)
20 pkts bytes target     prot opt in     out     source               destination
21
22Chain INPUT (policy ACCEPT 0 packets, 0 bytes)
23 pkts bytes target     prot opt in     out     source               destination
24
25Chain OUTPUT (policy ACCEPT 0 packets, 0 bytes)
26 pkts bytes target     prot opt in     out     source               destination
27
28Chain POSTROUTING (policy ACCEPT 0 packets, 0 bytes)
29 pkts bytes target     prot opt in     out     source               destination
iptables规则配置文件:/etc/sysconfig/iptables
-
清空规则
[root@cham002 ~]# iptables -F注: 该命令不会清除配置文件内的规则!当更改规则后需要执行命令‘service iptables save’将其保存到配置文件。
-
增加一条规则(-A/I)
-
1  [root@cham002 ~]# iptables -A INPUT -s 192.168.188.1 -p tcp --sport 1234 -d 192.168.188.128 --dport 80 -jDROP
2
3  [root@cham002 ~]# iptables -nvL
4  Chain INPUT (policy ACCEPT 0 packets, 0 bytes)
5   pkts bytes target     prot opt in     out     source               destination
6    304 20360 ACCEPT     all  --  *      *       0.0.0.0/0            0.0.0.0/0            state RELATED,ESTABLISHED
7      0     0 ACCEPT     icmp --  *      *       0.0.0.0/0            0.0.0.0/0
8      0     0 ACCEPT     all  --  lo     *       0.0.0.0/0            0.0.0.0/0
9      0     0 ACCEPT     tcp  --  *      *       0.0.0.0/0            0.0.0.0/0            state NEW tcp dpt:22
10      0     0 REJECT     all  --  *      *       0.0.0.0/0            0.0.0.0/0            reject-with icmp-host-prohibited
11      0     0 DROP       tcp  --  *      *       192.168.188.1        192.168.188.128      tcp spt:1234 dpt:80
12
13  Chain FORWARD (policy ACCEPT 0 packets, 0 bytes)
14   pkts bytes target     prot opt in     out     source               destination
15      0     0 REJECT     all  --  *      *       0.0.0.0/0            0.0.0.0/0            reject-with icmp-host-prohibited
16
17  Chain OUTPUT (policy ACCEPT 23 packets, 2324 bytes)
18   pkts bytes target     prot opt in     out     source               destination
19
20
21
22  [root@cham002 ~]# iptables -I INPUT -p tcp --dport 80 -j DROP
23  [root@cham002 ~]# iptables -nvL
24  Chain INPUT (policy ACCEPT 0 packets, 0 bytes)
25   pkts bytes target     prot opt in     out     source               destination
26      0     0 DROP       tcp  --  *      *       0.0.0.0/0            0.0.0.0/0            tcp dpt:80
27    532 37656 ACCEPT     all  --  *      *       0.0.0.0/0            0.0.0.0/0            state RELATED,ESTABLISHED
28      0     0 ACCEPT     icmp --  *      *       0.0.0.0/0            0.0.0.0/0
29      0     0 ACCEPT     all  --  lo     *       0.0.0.0/0            0.0.0.0/0
30      0     0 ACCEPT     tcp  --  *      *       0.0.0.0/0            0.0.0.0/0            state NEW tcp dpt:22
31      0     0 REJECT     all  --  *      *       0.0.0.0/0            0.0.0.0/0            reject-with icmp-host-prohibited
32      0     0 DROP       tcp  --  *      *       192.168.188.1        192.168.188.128      tcp spt:1234 dpt:80
33
34  Chain FORWARD (policy ACCEPT 0 packets, 0 bytes)
35   pkts bytes target     prot opt in     out     source               destination
36      0     0 REJECT     all  --  *      *       0.0.0.0/0            0.0.0.0/0            reject-with icmp-host-prohibited
37
38  Chain OUTPUT (policy ACCEPT 17 packets, 1508 bytes)
39   pkts bytes target     prot opt in     out     source               destination
40
说明: 增加一条规则,当IP
192.168.188.1、协议为tcp、端口为‘1234’的向IP192.168.188.128、端口为80的机器发送包时执行操作:drop(丢掉包)。
注: 该命令也可以把-A换成-I,两者的区别类似于排队和插队,两种方法插入的规则优先级不同。 -
删除一条规则(-D)
方法1: 知道规则的内容 -
1  [root@cham002 ~]# iptables -D INPUT -s 192.168.188.1 -p tcp --sport 1234 -d 192.168.188.128 --dport 80 -j DROP[root@cham002 ~]# iptables -nvL
2  Chain INPUT (policy ACCEPT 0 packets, 0 bytes)
3   pkts bytes target     prot opt in     out     source               destination
4    918 70764 ACCEPT     all  --  *      *       0.0.0.0/0            0.0.0.0/0            state RELATED,ESTABLISHED
5      0     0 ACCEPT     icmp --  *      *       0.0.0.0/0            0.0.0.0/0
6      0     0 ACCEPT     all  --  lo     *       0.0.0.0/0            0.0.0.0/0
7      0     0 ACCEPT     tcp  --  *      *       0.0.0.0/0            0.0.0.0/0            state NEW tcp dpt:22
8      2   473 REJECT     all  --  *      *       0.0.0.0/0            0.0.0.0/0            reject-with icmp-host-prohibited
9
10  Chain FORWARD (policy ACCEPT 0 packets, 0 bytes)
11   pkts bytes target     prot opt in     out     source               destination
12      0     0 REJECT     all  --  *      *       0.0.0.0/0            0.0.0.0/0            reject-with icmp-host-prohibited
13
14  Chain OUTPUT (policy ACCEPT 4 packets, 720 bytes)
15   pkts bytes target     prot opt in     out     source               destination
注: 要删除一条规则时,必须和写入的规则一致,也就是说,两条iptables命令除了-A/I和-D不一样外,其他地方都一样。
-
方法2: 忘记规则内容
-
首先所以用以下命令查看规则序号:
-
1 [root@cham002 ~]# iptables -nvL --line-number 2 Chain INPUT (policy ACCEPT 0 packets, 0 bytes) 3 num pkts bytes target prot opt in out source destination 4 1 1018 77688 ACCEPT all -- * * 0.0.0.0/0 0.0.0.0/0 state RELATED,ESTABLISHED 5 2 0 0 ACCEPT icmp -- * * 0.0.0.0/0 0.0.0.0/0 6 3 0 0 ACCEPT all -- lo * 0.0.0.0/0 0.0.0.0/0 7 4 0 0 ACCEPT tcp -- * * 0.0.0.0/0 0.0.0.0/0 state NEW tcp dpt:22 8 5 2 473 REJECT all -- * * 0.0.0.0/0 0.0.0.0/0 reject-with icmp-host-prohibited 9 6 0 0 DROP tcp -- * * 192.168.188.1 192.168.188.128 tcp spt:1234 dpt:80 10 11 Chain FORWARD (policy ACCEPT 0 packets, 0 bytes) 12 num pkts bytes target prot opt in out source destination 13 1 0 0 REJECT all -- * * 0.0.0.0/0 0.0.0.0/0 reject-with icmp-host-prohibited 14 15 Chain OUTPUT (policy ACCEPT 41 packets, 4984 bytes) 16 num pkts bytes target prot opt in out source destination 17 18 [root@cham002 ~]# iptables -D INPUT 6 19 [root@cham002 ~]# iptables -nvL --line-number 20 Chain INPUT (policy ACCEPT 0 packets, 0 bytes) 21 num pkts bytes target prot opt in out source destination 22 1 1083 82112 ACCEPT all -- * * 0.0.0.0/0 0.0.0.0/0 state RELATED,ESTABLISHED 23 2 0 0 ACCEPT icmp -- * * 0.0.0.0/0 0.0.0.0/0 24 3 0 0 ACCEPT all -- lo * 0.0.0.0/0 0.0.0.0/0 25 4 0 0 ACCEPT tcp -- * * 0.0.0.0/0 0.0.0.0/0 state NEW tcp dpt:22 26 5 2 473 REJECT all -- * * 0.0.0.0/0 0.0.0.0/0 reject-with icmp-host-prohibited 27 28 Chain FORWARD (policy ACCEPT 0 packets, 0 bytes) 29 num pkts bytes target prot opt in out source destination 30 1 0 0 REJECT all -- * * 0.0.0.0/0 0.0.0.0/0 reject-with icmp-host-prohibited 31 32 Chain OUTPUT (policy ACCEPT 5 packets, 572 bytes) 33 num pkts bytes target prot opt in out source destination -
更改预设策略(-P)

执行命令:
# iptables -P OUTPUT DROP
结果:

注意: 尽量不要随意更改该配置,尤其是在进行远程登录时,一旦执行该命令后将会断开连接。这个策略设定后只能用命令:‘iptables -P OUTPUT ACCEPT’来恢复成原始状态,不能使用-F参数。