
一、安装私服
1.下载 Nexus
方法一:到Nexus 官网下载Nexus
https://www.sonatype.com/
方法二:我的分享
https://download.csdn.net/download/ITlanyue/12736638
2.解压到指定目录(无中文、特殊字符)
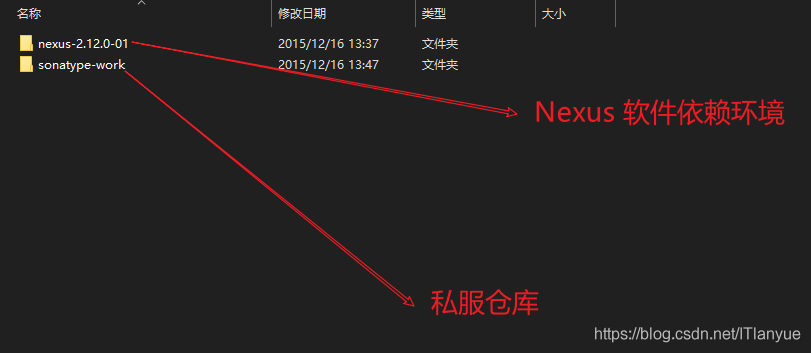
3.安装
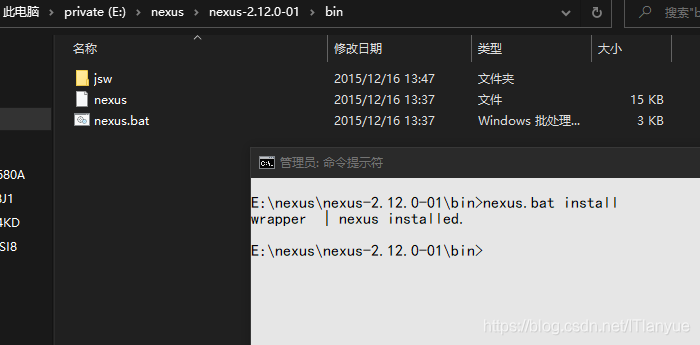
(1)以管理员身份运行 cmd ,进入 nexus 软件的 bin 目录
(2)运行以下命令
nexus.bat install
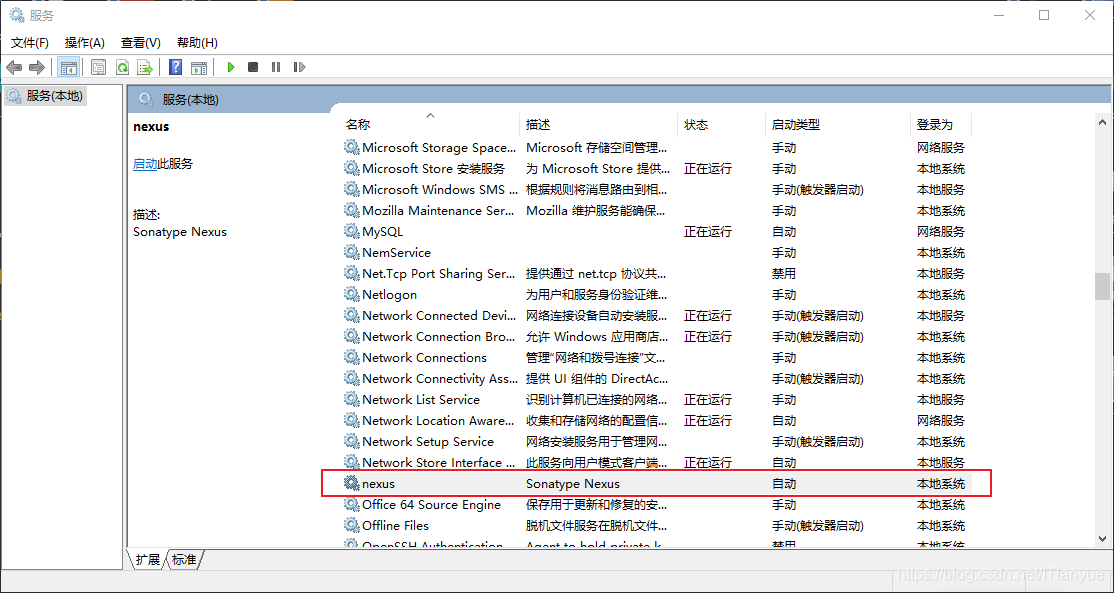
(3)检查服务是否自动
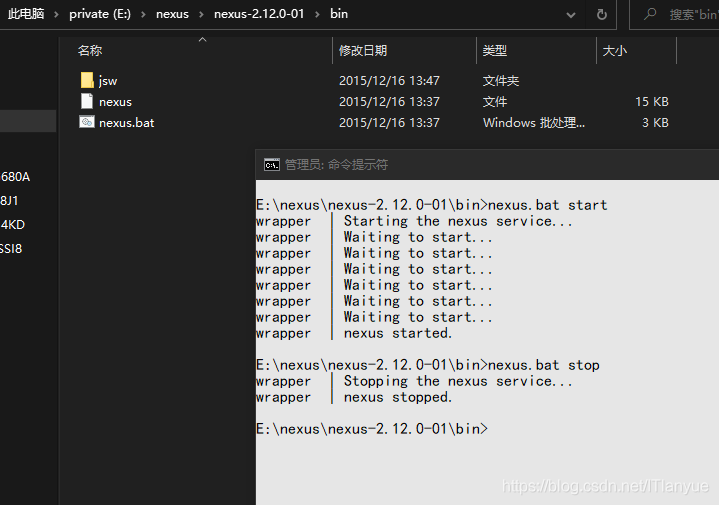
4.启动与关闭
- nexus.bat start ===> 启动服务
- nexus.bat stop ===> 关闭服务
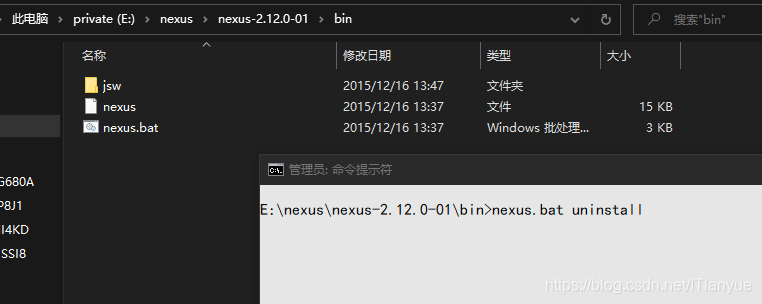
5.卸载
nexus.bat uninstall
6.修改 nexus 服务端口号
通过修改软件 /conf/nexus.properties 配置文件的 application-port 键值修改
7.浏览器访问 nexus UI 界面
浏览器通过以下路径访问(端口默认为 8081 )
http://127.0.0.1:8081/nexus/#welcome
用户名和密码默认如下
- 用户名:admin
- 密码:admin123
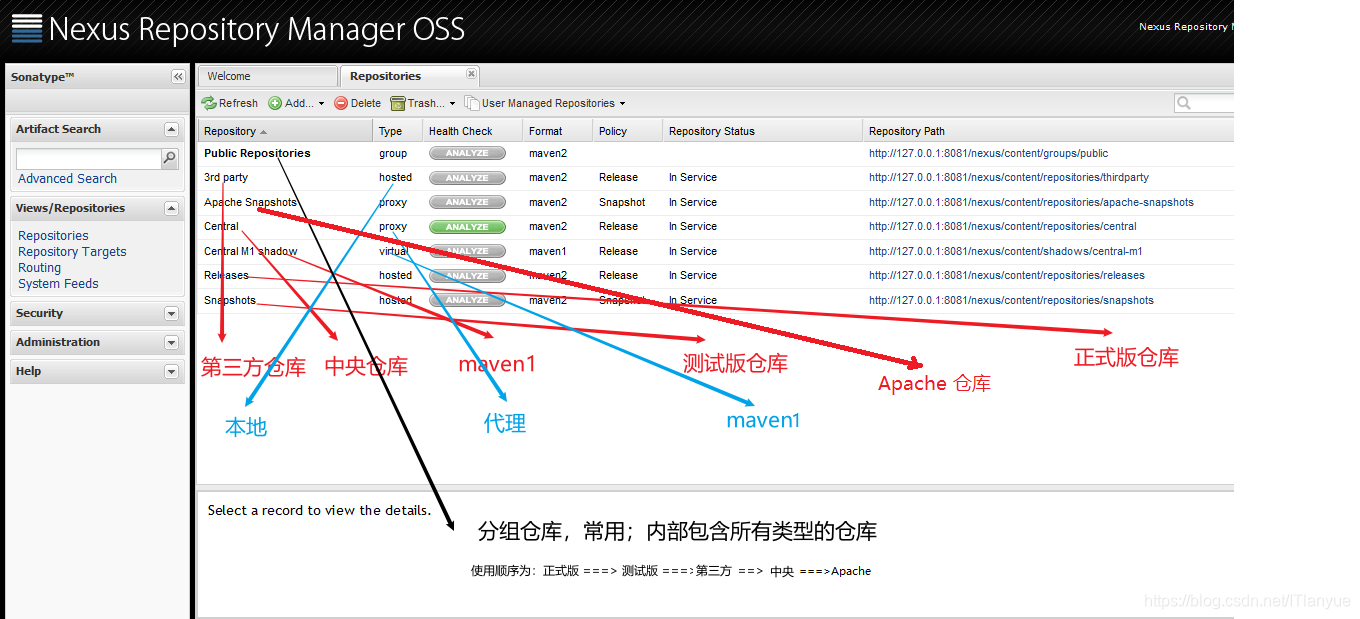
8.nexus 仓库种类
二、本地仓库与私服的上传下载
1.利用 Maven 项目登录私服
在 maven 软件的 settings.xml 配置文件中的 <servers/> 标签内部配置如下标签
1<servers>
2    ......
3    <server>
4        <id>releases</id>
5        <username>admin</username>
6        <password>admin123</password>
7    </server>
8    <server>
9        <id>snapshots</id>
10        <username>admin</username>
11        <password>admin123</password>
12    </server>
13</servers>
2.上传本地项目或模块到私服
(1)在需要上传的子模块的 pom.xml 配置文件中添加如下标签
1<distributionManagement>
2    <repository>
3        <!--id 和 url 需要核对准确-->
4        <id>releases</id>
5        <url>http://localhost:8081/nexus/content/repositories/releases/</url>
6    </repository>
7    <snapshotRepository>
8        <!--id 和 url 需要核对准确-->
9        <id>snapshots</id>
10        <url>http://localhost:8081/nexus/content/repositories/snapshots/</url>
11    </snapshotRepository>
12</distributionManagement>
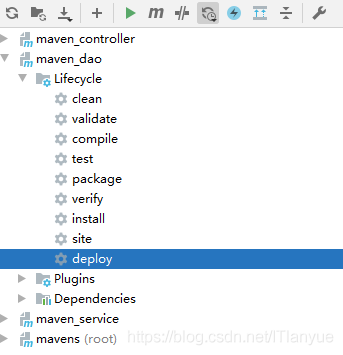
(2)在需要上传的子模块中运行生命周期中的 deploy 生命周期命令
3.从私服下载本地所需的工程或模块
在 maven 的 settings.xml 配置文件中的 <profiles> 标签中添加如下标签
1<!-- 下载jar包配置 -->
2<profile>
3    <!--profile的id -->
4    <id>dev</id>
5    <repositories>
6        <repository> <!--仓库id,repositories可以配置多个仓库,保证id不重复 -->
7            <id>nexus</id> <!--仓库地址,即nexus仓库组的地址 -->
8            <url>http://localhost:8081/nexus/content/groups/public/</url> <!--是否下载releases构件 -->
9            <releases>
10                <enabled>true</enabled>
11            </releases> <!--是否下载snapshots构件 -->
12            <snapshots>
13                <enabled>true</enabled>
14            </snapshots>
15        </repository>
16    </repositories>
17    <pluginRepositories> <!-- 插件仓库,maven的运行依赖插件,也需要从私服下载插件 -->
18        <pluginRepository> <!-- 插件仓库的id不允许重复,如果重复后边配置会覆盖前边 -->
19            <id>public</id>
20            <name>Public Repositories</name>
21            <url>http://localhost:8081/nexus/content/groups/public/</url>
22        </pluginRepository>
23    </pluginRepositories>
24</profile>
25
26
27<!--激活下载-->
28<activeProfiles>
29    <!--id 需要与上面的 id 对应-->
30    <activeProfile>dev</activeProfile>
31</activeProfiles>
三、上传第三方 jar 包到私服
1.安装第三方 jar 包到本地仓库
需要提前知道 第三方 jar包 的坐标
1// 安装第三方jar包到本地仓库
2
3// 方法一:进入jar包所在目录运行
4mvn install:install-file -DgroupId=项目组织名 -DartifactId=项目名 -Dversion=版本号 -Dfile=第三方jar包文件名.jar -Dpackaging=jar
5
6// 方法二:打开cmd直接运行
7mvn install:install-file -DgroupId=项目组织名 -DartifactId=项目名 -Dversion=版本号 -Dpackaging=jar -Dfile=第三方jar包路径+文件名.jar
2.安装第三方 jar 包到私服
在 Maven 软件的 settings.xml 配置文件中的 <servers/> 标签中添加如下代码
1<server>
2    <!--自己私服的第三方包id-->
3    <id>thirdparty</id>
4    <!--用户名;默认为 admin-->
5    <username>admin</username>
6    <!--密码;默认为 admin123-->
7    <password>admin123</password>
8</server>
使用如下命令上传第三方 jar包 到私服
1// 进入jar包所在目录运行
2mvn deploy:deploy-file -DgroupId=第三方jar包项目组织名 -DartifactId=第三方jar包项目名 -Dversion=第三方jar包项目版本号 -Dpackaging=jar -Dfile=第三方jar包文件名.jar -Durl=http://localhost:8081/nexus/content/repositories/thirdparty/ -DrepositoryId=thirdparty
3
4// 打开cmd直接运行
5mvn deploy:deploy-file -DgroupId=第三方jar包项目组织名 -DartifactId=第三方jar包项目名 -Dversion=第三方jar包项目版本号 -Dpackaging=jar -Dfile=第三方jar包路径+文件名.jar -Durl=http://localhost:8081/nexus/content/repositories/thirdparty/ -DrepositoryId=thirdparty