
一、前言
在微服务领域,服务注册与发现是其中很重要的一个模块,主要用于服务治理问题;在分布式Dubbo中常用的服务发现与注册中心是Zookeeper,Cosul与其类似,在SpringCloud刚占领市场的时候,SpringCloud微服务框架默认使用的注册中心组建是Eureka,总所周知,Eureka已经开始闭源了,那么可以替代Eureka的有:Consul、Zookeeper ,这两种比较常用,同样可以很好的与SpringCloud集成,用于替代Eureka,本篇就主要实现SpringCloud整合Consul实现服务注册与发现。
二、Consul是什么
Consul是一个支持多数据中心分布式高可用的服务发现和配置共享的服务软件,采用 Go 语言开发。Consul内置了服务注册与发现框 架、分布一致性协议实现、健康检查、Key/Value存储、多数据中心方案。由于出现得晚些,Consul具有功能完善、部署简单、使用方便等特点。
1. 使用Consul 的优势
- 使用 Raft 算法来保证一致性, 比 ZooKeeper 的 Paxos 算法更简单直接。
- 支持多数据中心,内外网的服务采用不同的端口进行监听。 ZooKeeper 和 etcd 均不提供多数据中心功能的- 支持。
- 支持健康检查,etcd 不提供此功能。
- 支持 http 和 dns 协议接口。ZooKeeper 的集成较为复杂,etcd 只支持 http 协议。
- 官方提供 web 管理界面,etcd 无此功能。
- Consul 1.2 新增 Service Mesh 解决方案。
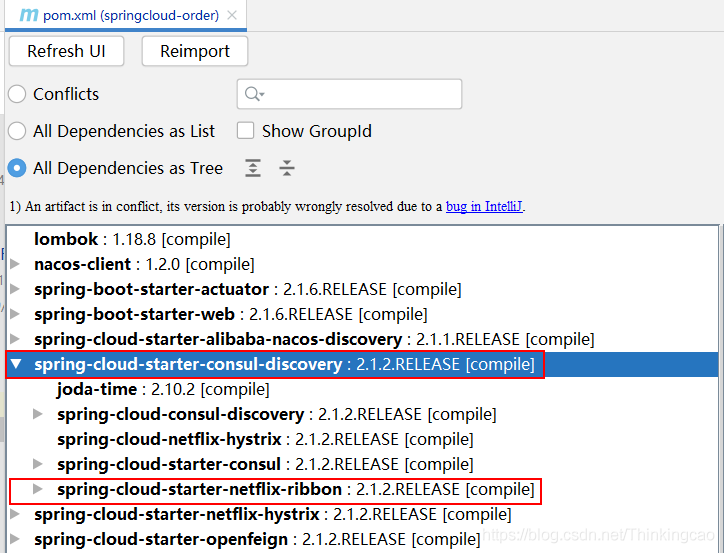
2. Consul默认支持Ribbon负载均衡
三、Consul的安装
1. 下载安装
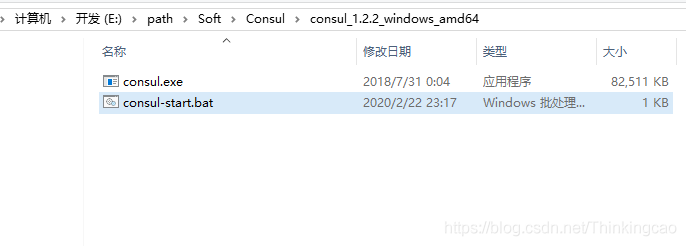
Consul由Go语言开发,因此也继承了Go语言跨平台,易安装的特点,支持Windwos、Linux、macOS,解压即可运行使用;以Windwos为例,去官网下载: https://www.consul.io/downloads.html , 解压后只有一个.exe文件。
2. 运行Consul
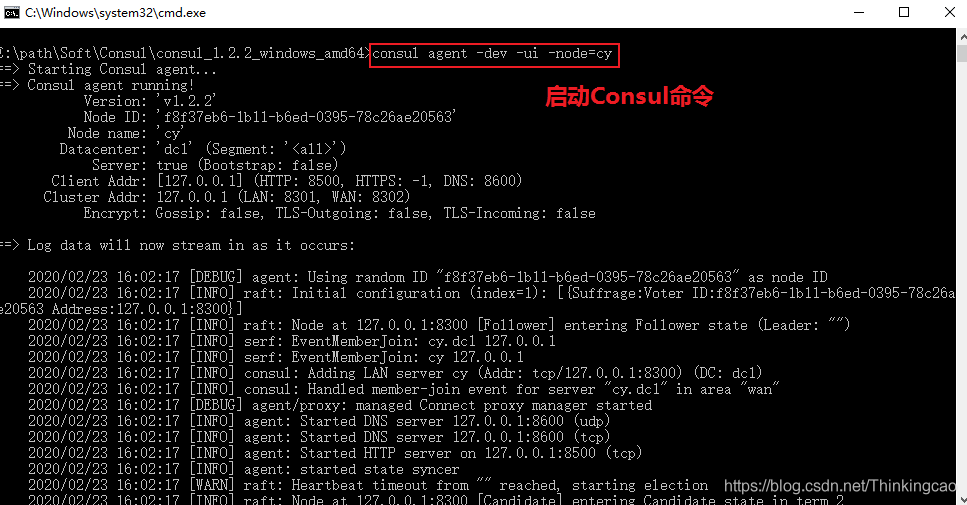
a. 启动Consul命令:
consul agent -dev -ui -node=cy
-dev开发服务器模式启动,-node结点名为cy,-ui可以用界面访问,默认能访问。
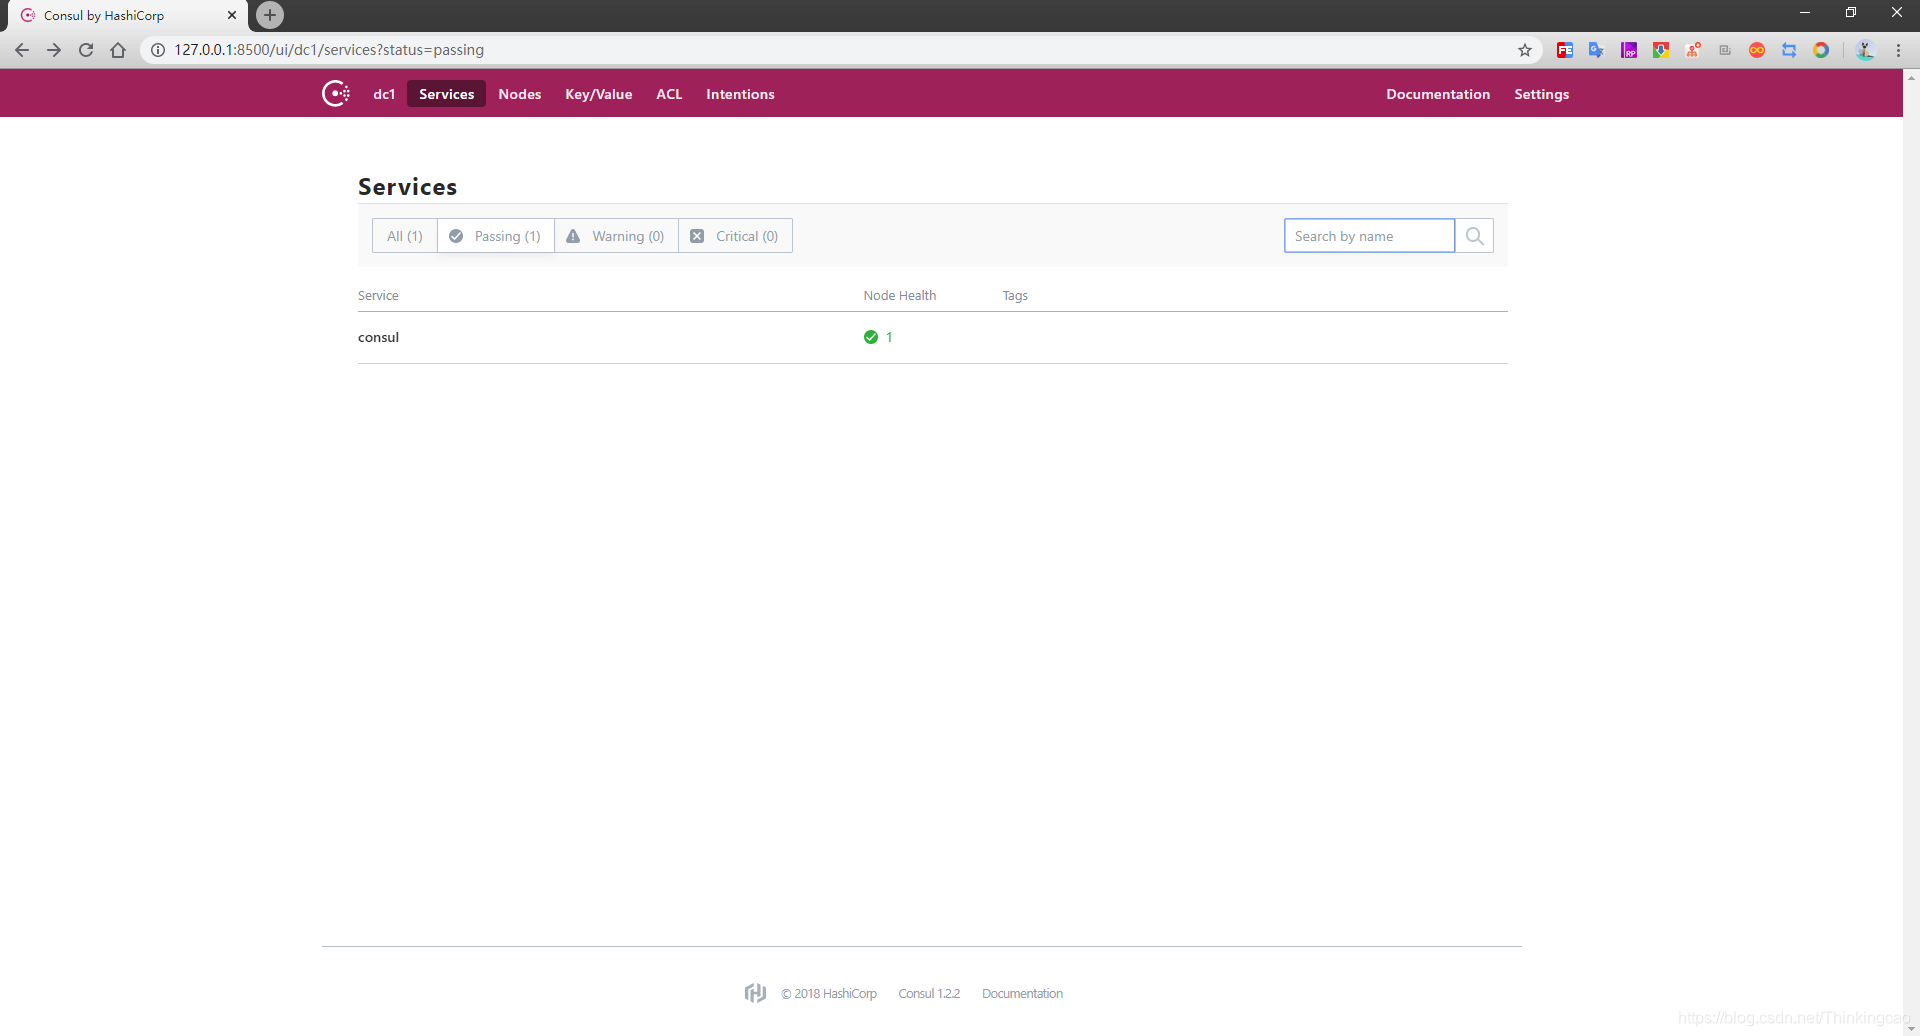
b. 起始访问地址:
访问地址: http://localhost:8500
四、实现思路
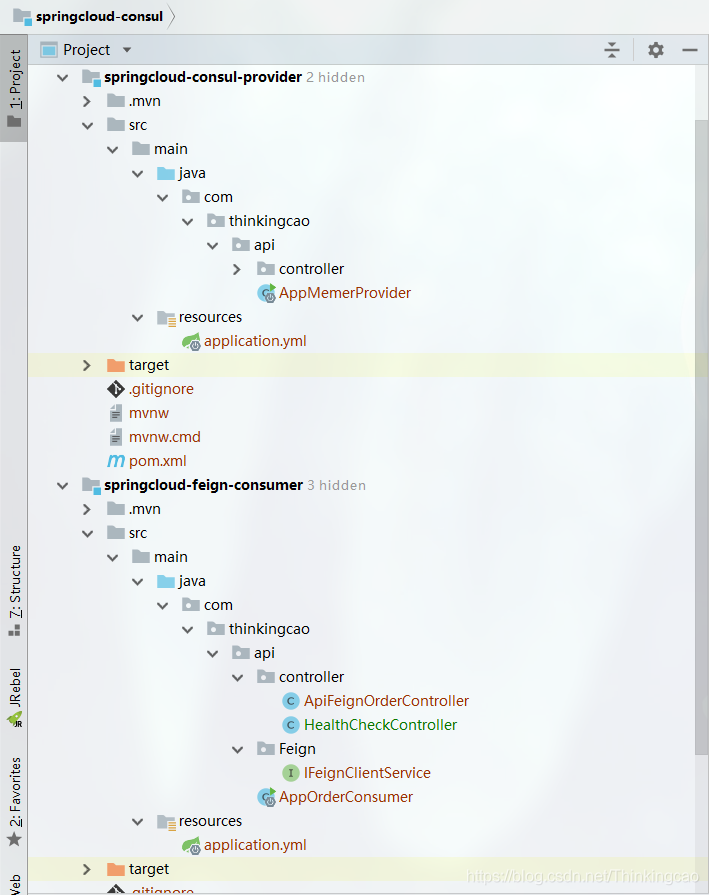
启动Consul后,创建两个基于Consul的客户端服务工程,一个服务提供者和一个服务消费者,使用Feign进行服务消费,客户端配置连接运行的Consul服务,这里先贴一下项目完整结构图;
五、搭建服务提供者springcloud-consul-provider
1.引入pom依赖
1  <!--SpringBoot依赖版本-->
2    <parent>
3        <groupId>org.springframework.boot</groupId>
4        <artifactId>spring-boot-starter-parent</artifactId>
5        <version>2.0.3.RELEASE</version>
6        <relativePath/>
7    </parent>
8
9    <!--项目编码、jdk版本、SpringCloud版本定义-->
10    <properties>
11        <project.build.sourceEncoding>UTF-8</project.build.sourceEncoding>
12        <project.reporting.outputEncoding>UTF-8</project.reporting.outputEncoding>
13        <java.version>1.8</java.version>
14        <spring-cloud.version>Finchley.RELEASE</spring-cloud.version>
15    </properties>
16
17    <!--声明管理SpringCloud版本依赖信息-->
18    <dependencyManagement>
19        <dependencies>
20            <dependency>
21                <groupId>org.springframework.cloud</groupId>
22                <artifactId>spring-cloud-dependencies</artifactId>
23                <version>${
24
25
26   spring-cloud.version}</version>
27                <type>pom</type>
28                <scope>import</scope>
29            </dependency>
30        </dependencies>
31    </dependencyManagement>
32
33    <dependencies>
34        <!-- SpringBootWeb组件 -->
35        <dependency>
36            <groupId>org.springframework.boot</groupId>
37            <artifactId>spring-boot-starter-web</artifactId>
38        </dependency>
39
40        <!--springcloud整合consul组件-->
41        <dependency>
42            <groupId>org.springframework.cloud</groupId>
43            <artifactId>spring-cloud-starter-consul-discovery</artifactId>
44        </dependency>
45
46        <!-- 引入Feign接口公共层-->
47        <!--<dependency>-->
48            <!--<groupId>com.thinkingcao</groupId>-->
49            <!--<artifactId>springcloud-feign-interface</artifactId>-->
50            <!--<version>0.0.1-SNAPSHOT</version>-->
51        <!--</dependency>-->
52
53    </dependencies>
54
55    <!--maven插件-->
56    <build>
57        <plugins>
58            <plugin>
59                <groupId>org.springframework.boot</groupId>
60                <artifactId>spring-boot-maven-plugin</artifactId>
61            </plugin>
62        </plugins>
63    </build>
2. 启动类上加@EnableDiscoveryClient注解
1package com.thinkingcao.api;
2
3import org.springframework.boot.SpringApplication;
4import org.springframework.boot.autoconfigure.SpringBootApplication;
5import org.springframework.cloud.client.discovery.EnableDiscoveryClient;
6
7@SpringBootApplication
8@EnableDiscoveryClient
9public class AppMemerProvider {
10
11
12
13
14    public static void main(String[] args) {
15
16
17
18        SpringApplication.run(AppMemerProvider.class, args);
19    }
20}
3. @EnableDiscoveryClient 与@EnableEurekaClient区别
@EnableDiscoveryClient注解是基于spring-cloud-commons依赖,并且在classpath中实现; 适合于consul、zookeeper注册中心@EnableEurekaClient注解是基于spring-cloud-netflix依赖,只能为eureka作用;
4. 修改application.yml
1##=========服务生产者-会员服务配置========
2##服务在7777端口暴露出来
3server:
4  port: 8764
5
6##配置Spring相关
7spring:
8  ##应用服务名称,切记不能为下划线consul_member_provider,因为Feign不支持
9  application:
10    name: consul-member-provider
11  ##consul注册中心地址
12  cloud:
13    consul:
14      ##Consul所在主机ip
15      host: localhost
16      ##Consul监听的端口
17      port: 8500
18      discovery:
19        ##配置开启服务注册到Consul上
20        register: true
21        ##配置注册到Consul的服务实例名称(Consul里Feign是通过此名称调用,而非spring.application.name)
22        service-name: member-provider
23        ##配置服务健康检查地址,供Consul调用
24        healthCheckPath: /health
25        ##Consul 健康检查频率
26        healthCheckInterval: 15s
5. 提供会员接口ApiConsulMemberController
1package com.thinkingcao.api.controller;
2
3import org.springframework.beans.factory.annotation.Value;
4import org.springframework.web.bind.annotation.RequestMapping;
5import org.springframework.web.bind.annotation.RequestMethod;
6import org.springframework.web.bind.annotation.RequestParam;
7import org.springframework.web.bind.annotation.RestController;
8
9/**
10 * @desc:  服务生产者(会员服务)
11 * @author: cao_wencao
12 * @date: 2020-02-22 23:44
13 */
14@RestController
15public class ApiConsulMemberController {
16
17
18
19
20    @Value("${server.port}")
21    private String serverPort;
22
23    @RequestMapping(value="/getMember", method = RequestMethod.GET)
24    private String getMember(@RequestParam("userName") String userName){
25
26
27
28        return "我是会员服务,订单服务调用会员服务成功啦, 姓名为: " + userName + ", 端口为: " + serverPort;
29    }
30}
6. Consul健康检查接口HealthCheckController
1package com.thinkingcao.api.controller;
2
3import org.springframework.web.bind.annotation.RequestMapping;
4import org.springframework.web.bind.annotation.RestController;
5
6/**
7 * @desc: 提供给Consul健康检查的controller
8 * @auth: cao_wencao
9 * @date: 2020/2/23 0:08
10 */
11@RestController
12public class HealthCheckController {
13
14
15
16
17    //RequestMapping中的url地址需和配置文件中保持一致
18    @RequestMapping("/health")
19    public String healthCheck() {
20
21
22
23        return "ok";
24    }
25}
7. 启动会员服务
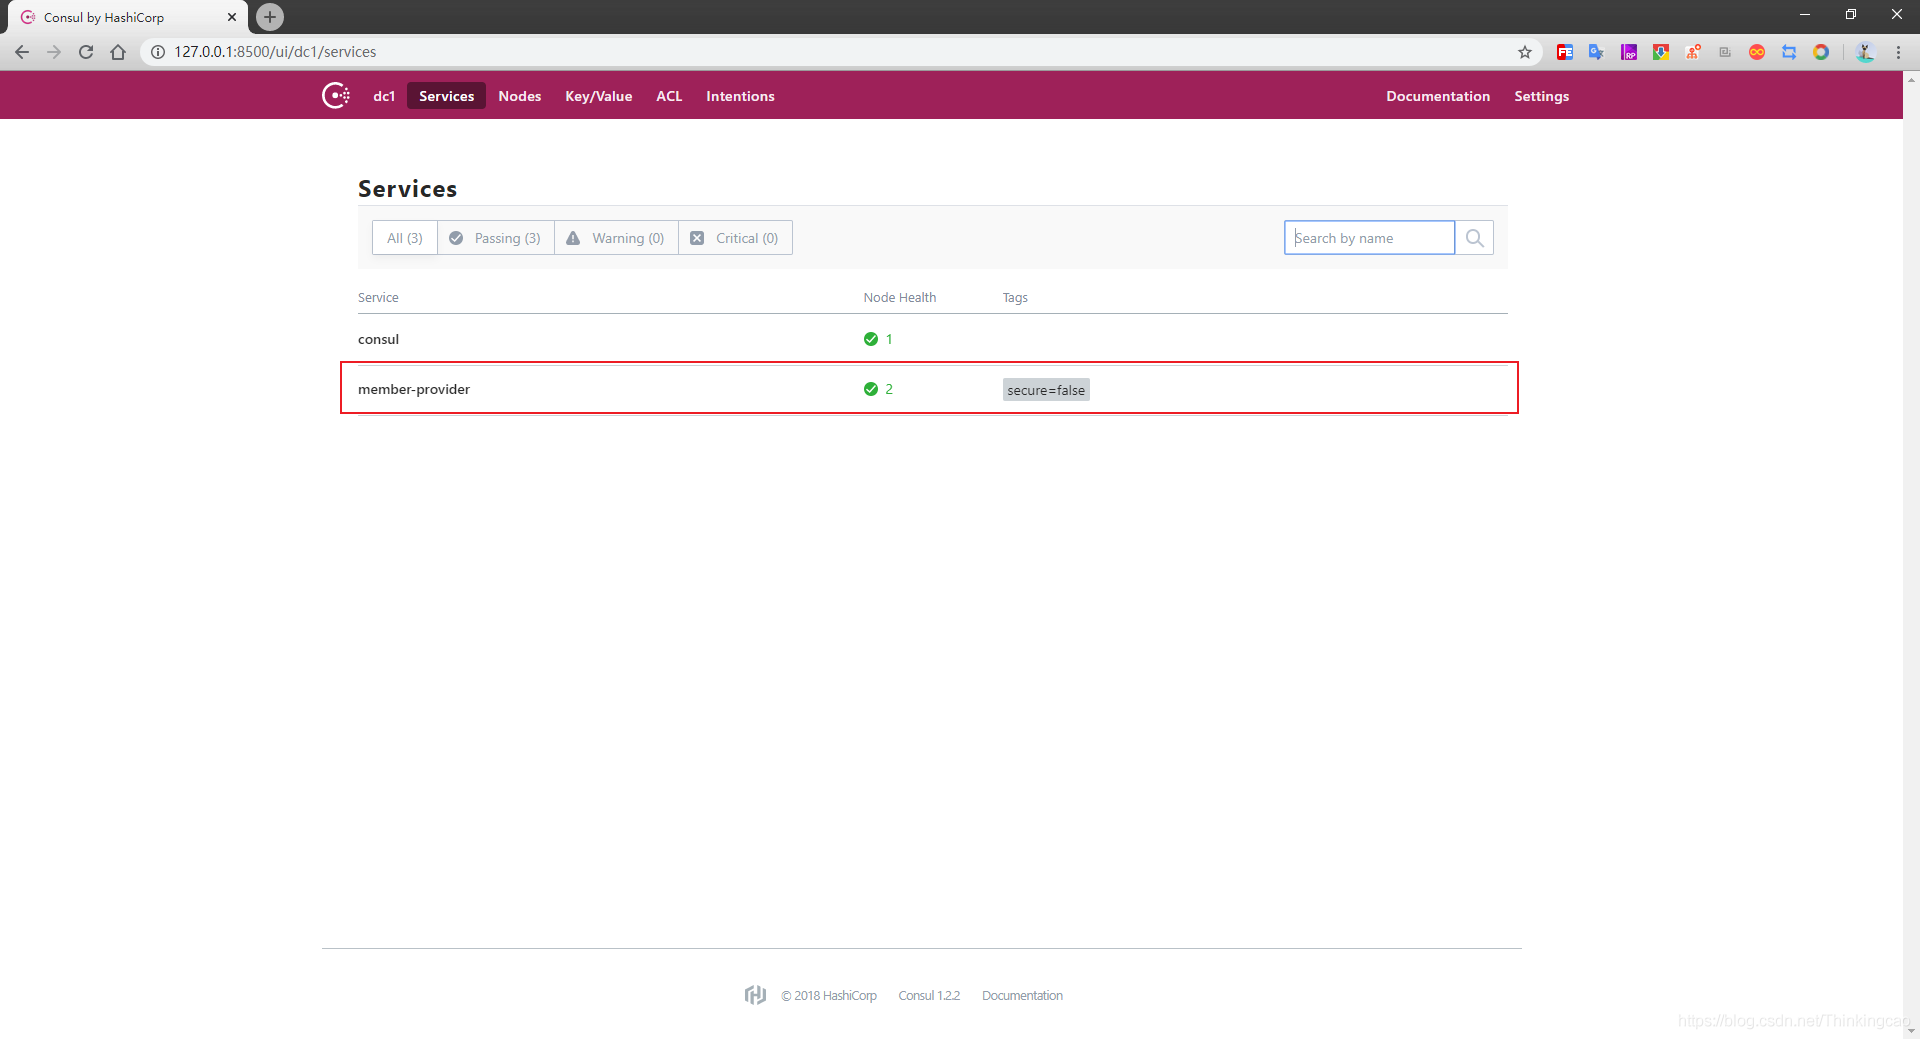
启动springcloud-consul-provider项目,会发现项目实例 member-provider 注册到了 consul 中
六、搭建服务消费者springcloud-feign-consumer
1.引入pom依赖
1 <!--SpringBoot依赖版本-->
2    <parent>
3        <groupId>org.springframework.boot</groupId>
4        <artifactId>spring-boot-starter-parent</artifactId>
5        <version>2.0.3.RELEASE</version>
6        <relativePath/>
7    </parent>
8    <groupId>com.thinkingcao</groupId>
9    <artifactId>springcloud-feign-consumer</artifactId>
10    <version>0.0.1-SNAPSHOT</version>
11    <name>springcloud-feign-consumer</name>
12    <description>SpringCloud整合Feign客户端组件消费服务</description>
13
14    <properties>
15        <java.version>1.8</java.version>
16        <spring-cloud.version>Finchley.RELEASE</spring-cloud.version>
17    </properties>
18
19    <!--声明管理SpringCloud版本依赖信息-->
20    <dependencyManagement>
21        <dependencies>
22            <dependency>
23                <groupId>org.springframework.cloud</groupId>
24                <artifactId>spring-cloud-dependencies</artifactId>
25                <version>${
26
27
28   spring-cloud.version}</version>
29                <type>pom</type>
30                <scope>import</scope>
31            </dependency>
32        </dependencies>
33    </dependencyManagement>
34
35    <dependencies>
36        <!-- SpringBootWeb组件 -->
37        <dependency>
38            <groupId>org.springframework.boot</groupId>
39            <artifactId>spring-boot-starter-web</artifactId>
40        </dependency>
41
42        <!-- springcloud整合Feign客户端组件   -->
43        <dependency>
44            <groupId>org.springframework.cloud</groupId>
45            <artifactId>spring-cloud-starter-openfeign</artifactId>
46        </dependency>
47
48        <!-- 引入Feign接口公共层-->
49        <!--<dependency>-->
50            <!--<groupId>com.thinkingcao</groupId>-->
51            <!--<artifactId>springcloud-feign-interface</artifactId>-->
52            <!--<version>0.0.1-SNAPSHOT</version>-->
53        <!--</dependency>-->
54
55        <!--springcloud整合consul组件-->
56        <dependency>
57            <groupId>org.springframework.cloud</groupId>
58            <artifactId>spring-cloud-starter-consul-discovery</artifactId>
59        </dependency>
60
61        <!-- 健康检查 -->
62        <dependency>
63            <groupId>org.springframework.boot</groupId>
64            <artifactId>spring-boot-starter-actuator</artifactId>
65        </dependency>
66
67        <!--lombok代码简化工具-->
68        <dependency>
69            <groupId>org.projectlombok</groupId>
70            <artifactId>lombok</artifactId>
71        </dependency>
72    </dependencies>
73
74    <build>
75        <plugins>
76            <plugin>
77                <groupId>org.springframework.boot</groupId>
78                <artifactId>spring-boot-maven-plugin</artifactId>
79            </plugin>
80        </plugins>
81    </build>
2. 启动类添加注解
-
在启动类添加
@EnableFeignClients和@EnableDiscoveryClient注解,表示启用Feign客户端调用和Consul服务注册与发现功能package com.thinkingcao.api;
import org.springframework.boot.SpringApplication; import org.springframework.boot.autoconfigure.SpringBootApplication; import org.springframework.cloud.client.discovery.EnableDiscoveryClient; import org.springframework.cloud.openfeign.EnableFeignClients;
@SpringBootApplication @EnableFeignClients @EnableDiscoveryClient public class AppOrderConsumer {
1public static void main(String[] args) {
2
3
4
5    SpringApplication.run(AppOrderConsumer.class, args);
6}
}
3. 编辑application.yml
1##=========服务消费者-订单服务配置========
2#服务端口号
3server:
4  port: 8787
5
6##配置Spring相关
7spring:
8  ##服务名称
9  application:
10    name: consul-order_consumer
11  ##consul注册中心地址
12  cloud:
13    consul:
14      ##Consul所在主机ip
15      host: localhost
16      ##Consul监听的端口
17      port: 8500
18      discovery:
19        ##配置注册到Consul的服务实例名称(Consul里Feign是通过此名称调用,而非spring.application.name)
20        service-name: order-consumer
21        ##配置服务健康检查地址,供Consul调用
22        healthCheckPath: /health
23        ##Consul 健康检查频率
24        healthCheckInterval: 15s
4. 定义 Feign 接口IFeignClientService
-
定义
Feign接口时,其中@FeignClient的value是provide注册在consul中的服务名。RequestMapping对应provider的具体映射。package com.thinkingcao.api.Feign;
import org.springframework.cloud.openfeign.FeignClient; import org.springframework.web.bind.annotation.RequestMapping; import org.springframework.web.bind.annotation.RequestParam;
/**
-
@desc: Feign声明式客户端调用工具
-
@author: cao_wencao
-
@date: 2020-02-22 12:23 */ @FeignClient(value = "member-provider") public interface IFeignClientService {
//通过userId查询会员信息数据 @RequestMapping("/getMember") public String getOrderToMemberInfo(@RequestParam("userName") String userName); }
-
5. 定义Controller调用Feign接口
1package com.thinkingcao.api.controller;
2
3import com.thinkingcao.api.Feign.IFeignClientService;
4import org.springframework.beans.factory.annotation.Autowired;
5import org.springframework.cloud.client.discovery.DiscoveryClient;
6import org.springframework.cloud.client.loadbalancer.LoadBalancerClient;
7import org.springframework.web.bind.annotation.RequestMapping;
8import org.springframework.web.bind.annotation.RequestMethod;
9import org.springframework.web.bind.annotation.RequestParam;
10import org.springframework.web.bind.annotation.RestController;
11
12/**
13 * @desc:  服务消费者(订单服务)
14 * @author: cao_wencao
15 * @date: 2020-02-22 12:30
16 */
17@RestController
18public class ApiFeignOrderController {
19
20
21
22
23    @Autowired
24    private LoadBalancerClient loadBalancerClient;
25
26    @Autowired
27    private DiscoveryClient discoveryClient;
28
29    // @Autowired
30    // private OrderService orderService;
31
32    @Autowired(required = false)
33    private IFeignClientService feignClientService;
34
35    //基于Feign实现订单调用会员 ,并且实现本地负载均衡
36    @RequestMapping(value ="/getMemberInfo",method = RequestMethod.GET)
37    public String getMemberInfo(@RequestParam("userName") String userName) {
38
39
40
41        String memberInfo = feignClientService.getOrderToMemberInfo(userName);
42        return memberInfo;
43    }
44
45     /**
46     * 获取服务实例
47     */
48    @RequestMapping(value = "/discover",method = RequestMethod.GET)
49    public String discover(){
50
51
52
53        String instance = loadBalancerClient.choose("member-provider").getUri().toString();
54        return instance;
55    }
56
57    /**
58     * 获取所有服务
59     */
60    @RequestMapping("/services")
61    public Object services() {
62
63
64
65        return discoveryClient.getInstances("member-provider");
66    }
67}
6. Consul健康检查接口HealthCheckController
1package com.thinkingcao.api.controller;
2
3import org.springframework.web.bind.annotation.RequestMapping;
4import org.springframework.web.bind.annotation.RestController;
5
6/**
7 * @desc: 提供给Consul健康检查的controller
8 * @auth: cao_wencao
9 * @date: 2020/2/23 0:08
10 */
11@RestController
12public class HealthCheckController {
13
14
15
16
17    //RequestMapping中的url地址需和配置文件中保持一致
18    @RequestMapping("/health")
19    public String healthCheck() {
20
21
22
23        return "ok";
24    }
25}
7. 启动订单服务
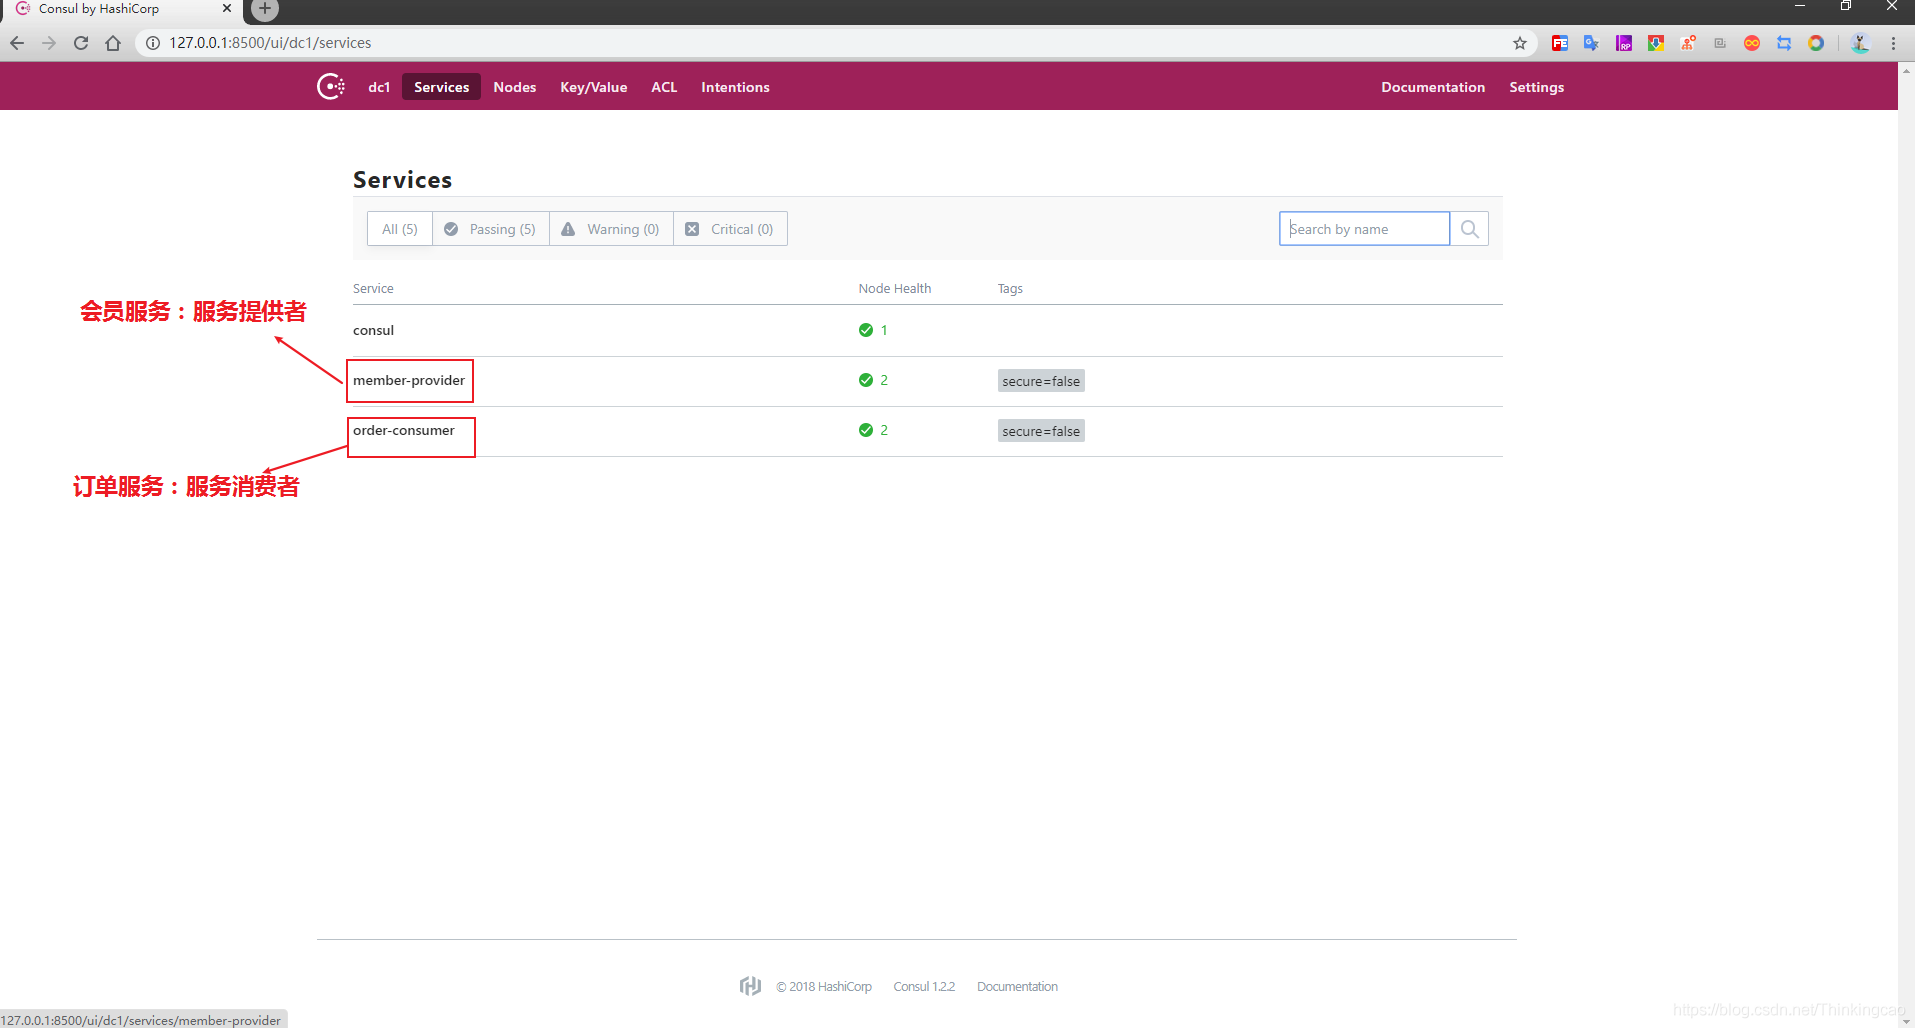
启动springcloud-feign-consumer项目,会发现项目实例 order-consumer注册到了 consul 中,这时候有两个服务都注册其中
七、测试
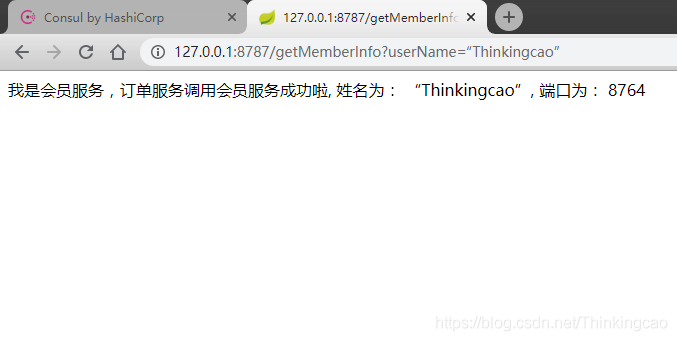
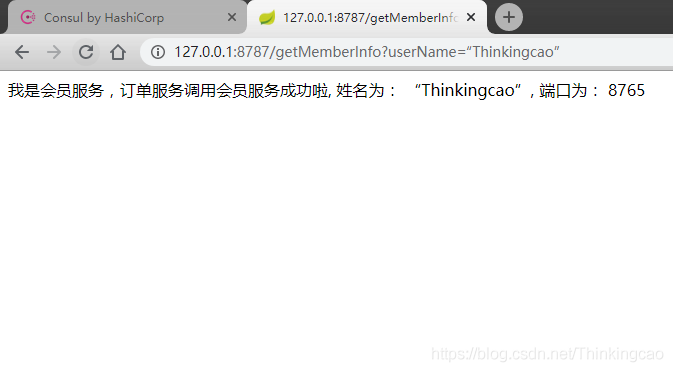
实现订单调用会员服务接口,为了测试Feign+Ribbon+Cosul实现负载均衡效果,需要启动两个会员提供者服务实例;启动会员服务两个实例后,稍等片刻。
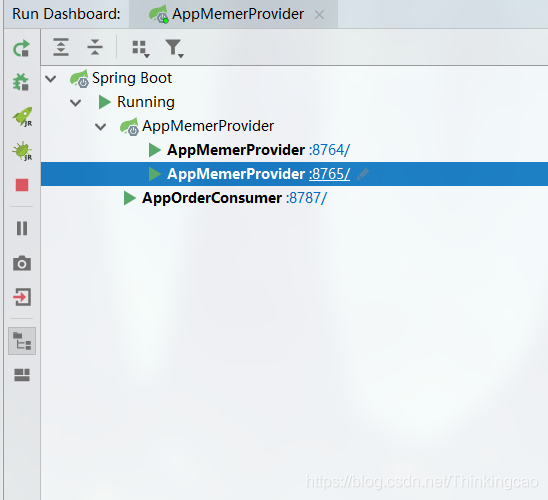
这是浏览器交替显示结果:
我是会员服务,订单服务调用会员服务成功啦, 姓名为: “Thinkingcao”, 端口为: 8764
我是会员服务,订单服务调用会员服务成功啦, 姓名为: “Thinkingcao”, 端口为: 8765
- 访问接口: http://127.0.0.1:8787/services ,获取服务列表信息

八、项目源码
1. 项目源码: https://github.com/Thinkingcao/SpringCloudLearning/tree/master/springcloud-consul
七、SpringCloud系列教程
1.Spring Cloud系列教程(七): Spring Cloud系列教程(七):服务注册与发现ZooKeeper(Finchley版本)
SpringCloud教程汇总: Spring Cloud系列教程(汇总篇):专栏汇总篇(持续更新中)
本文同步分享在 博客“Thinkingcao”(CSDN)。
如有侵权,请联系 support@oschina.cn 删除。
本文参与“OSC源创计划”,欢迎正在阅读的你也加入,一起分享。