
Vue引入mavon-editor插件实现markdown功能
===================================
说明 mavon-editor是一款基于Vue的markdown编辑器,因为当前项目是采用Nuxt,所以这里所展示的教程是针对Nuxt引入mavon-editor插件,如果你只是采用了
Vue,没有用Nuxt框架,那么你可以看mavon-editor官方文档,有详细说明,其实它们只有在引入mavon-editor方式有细微差别,使用都是一样的。mavonEditor官方地址
一、Nuxt引入mavon-editor插件
1、安装
通过命令安装插件
1npm install mavon-editor --save
2
2、在plugins中创建vueMarkdown.js
1import Vue from 'vue'
2import mavonEditor from 'mavon-editor'
3import "mavon-editor/dist/css/index.css";
4Vue.use(mavonEditor)
5
3、在nuxt.config.js中引入
1  plugins: [
2    '~/plugins//vueMarkdown.js',
3  ],
4
这三步也是Nuxt新增插件的标准3步曲了。既然插件已经添加完成,那么接下来就是使用了,使用应该包含两部分:1)编辑markdown文档并保存。2)回显markdown数据。
二、使用mavon-editor编辑
1、源码
1<template>
2  <div class="home">
3    <mavon-editor
4            ref="md"
5            placeholder="请输入文档内容..."
6            :boxShadow="false"
7            style="z-index:1;border: 1px solid #d9d9d9;height:50vh"
8            v-model="content"
9            :toolbars="toolbars"
10          />
11  </div>
12</template>
13
14<script>
15export default {
16  name: "home",
17  components: {},
18  data() {
19    return {
20      content: "",
21      toolbars: {
22        bold: true, // 粗体
23        italic: true, // 斜体
24        header: true, // 标题
25        underline: true, // 下划线
26        strikethrough: true, // 中划线
27        mark: true, // 标记
28        superscript: true, // 上角标
29        subscript: true, // 下角标
30        quote: true, // 引用
31        ol: true, // 有序列表
32        ul: true, // 无序列表
33        link: true, // 链接
34        imagelink: true, // 图片链接
35        code: true, // code
36        table: true, // 表格
37        fullscreen: true, // 全屏编辑
38        readmodel: true, // 沉浸式阅读
39        htmlcode: true, // 展示html源码
40        help: true, // 帮助
41        /* 1.3.5 */
42        undo: true, // 上一步
43        redo: true, // 下一步
44        trash: true, // 清空
45        save: false, // 保存(触发events中的save事件)
46        /* 1.4.2 */
47        navigation: true, // 导航目录
48        /* 2.1.8 */
49        alignleft: true, // 左对齐
50        aligncenter: true, // 居中
51        alignright: true, // 右对齐
52        /* 2.2.1 */
53        subfield: true, // 单双栏模式
54        preview: true // 预览
55      }
56    };
57  },
58  methods: {
59    // 上传图片方法
60    $imgAdd(pos, $file) {
61      console.log(pos, $file);
62    }
63  }
64};
65</script>
66
2、页面展示编辑器效果
页面展示效果如下
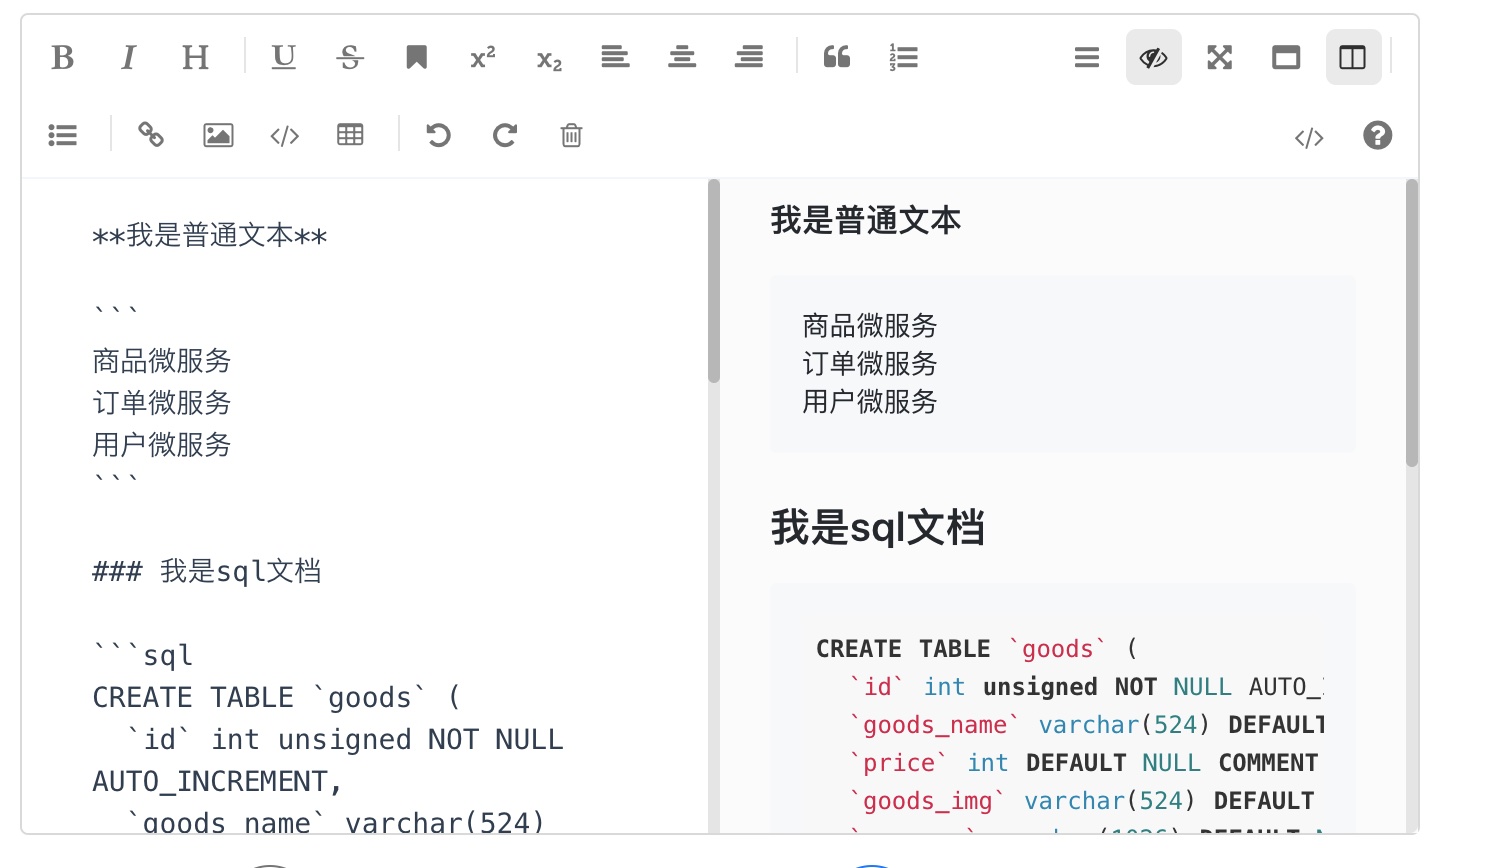
我们可以看到我们已经可以正常使用markdown编辑器了,说明当前插件安装成功,可以用。
三、使用mavon-editor回显
上一步是已经可以编辑,但我们还需要将我们编辑好已经存在数据库的数据,回显在页面。
1、源码
1          <no-ssr>
2          <mavon-editor
3            v-highlight
4            class="md"
5            :value="content"
6            :subfield = "false"
7            :defaultOpen = "'preview'"
8            :toolbarsFlag = "false"
9            :editable="false"
10            :scrollStyle="true"
11           ></mavon-editor>
12        </no-ssr>
13
属性解释
1:value="content":引入要转换的内容
2:subfield = "false":开启单栏模式
3:defaultOpen = "'preview'":默认展示预览区域
4:toolbarsFlag = "false":关闭工具栏
5:editable="false":不允许编辑
6scrollStyle="true":开启滚动条样式(暂时仅支持chrome)
7
2、页面展示效果
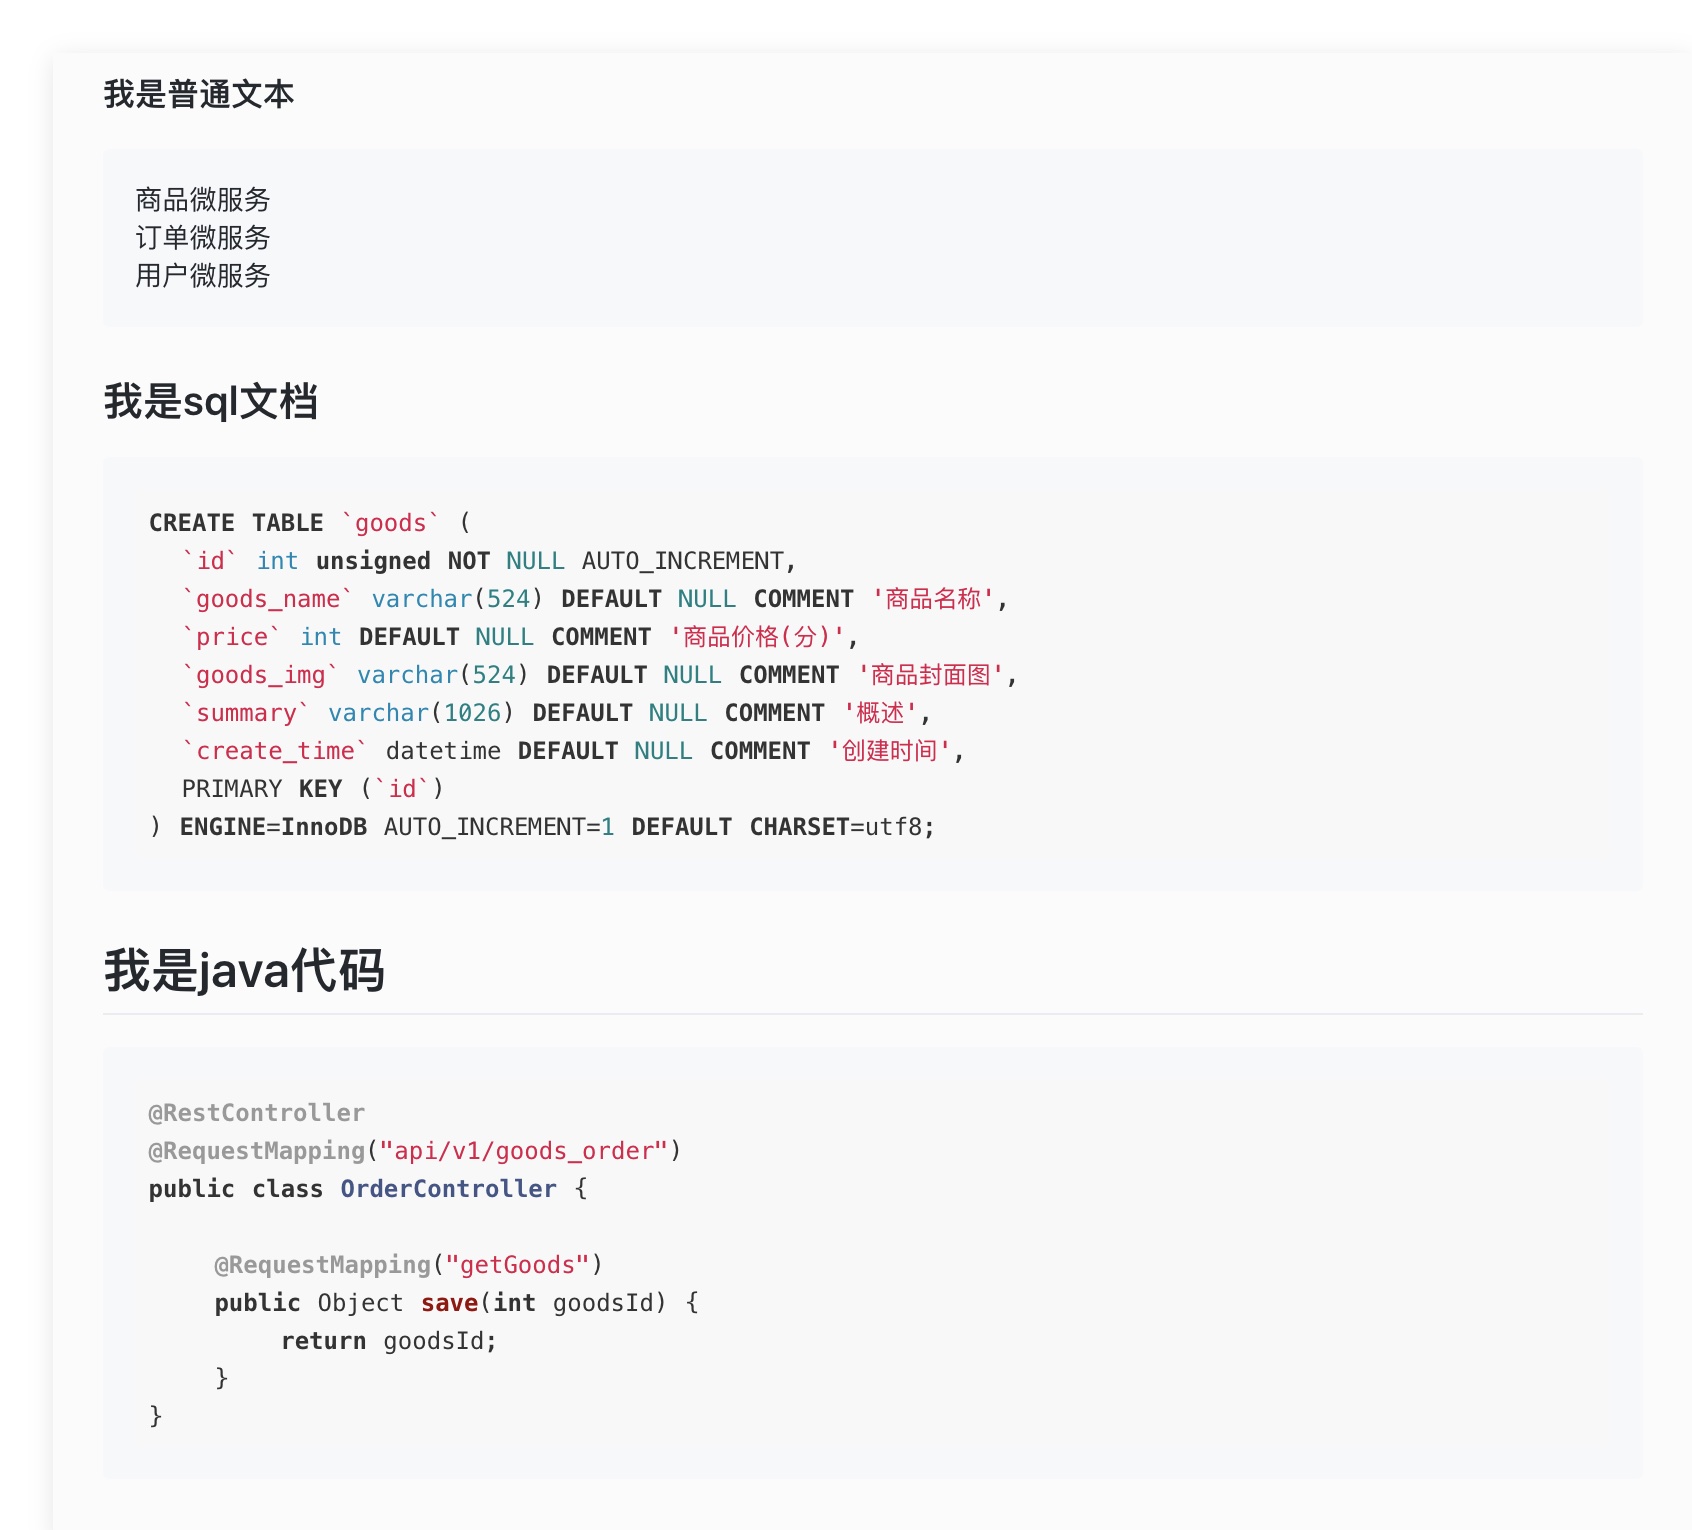
这样一来整个编辑回显的效果这里都展示出来了。
四、代码高亮
上面展示的时候确实已经可以正常回显markdown文档,但还不美观,我们想要的就是只要是代码都能高亮的显示出来,你可以用highlight.js插件,但我在使用中并没有达到我
自己喜欢的样式,所以我这边自己修改了部分css样式。这里把css样式展示如下。
1
2  .markdown-body .lang- {
3    display: block;
4    overflow: auto;
5    padding: 1.3em 2em !important;
6    font-size: 16px !important;
7    background: #272822 !important;
8    color: #FFF;
9    max-height: 700px;
10  }
11
12  .markdown-body .hljs {
13    display: block;
14    overflow: auto;
15    padding: 1.3em 2em !important;
16    font-size: 16px !important;
17    background: #272822 !important;
18    color: #FFF;
19    max-height: 700px;
20  }
21
22  .hljs,
23  .hljs-tag,
24  .hljs-subst {
25    color: #f8f8f2 !important;
26  }
27
28  .hljs-strong,
29  .hljs-emphasis {
30    color: #a8a8a2 !important;
31  }
32
33  .hljs-bullet,
34  .hljs-quote,
35  .hljs-number,
36  .hljs-regexp,
37  .hljs-literal,
38  .hljs-link {
39    color: #ae81ff !important;
40  }
41
42  .hljs-code,
43  .hljs-title,
44  .hljs-section,
45  .hljs-selector-class {
46    color: #a6e22e !important;
47  }
48
49  .hljs-strong {
50    font-weight: bold;
51  }
52
53  .hljs-emphasis {
54    font-style: italic;
55  }
56
57  .hljs-keyword,
58  .hljs-selector-tag,
59  .hljs-name,
60  .hljs-attr {
61    color: #f92672 !important;
62  }
63
64  .hljs-symbol,
65  .hljs-attribute {
66    color: #66d9ef !important;
67  }
68
69  .hljs-params,
70  .hljs-class .hljs-title {
71    color: #f8f8f2 !important;
72  }
73
74  .hljs-string,
75  .hljs-type,
76  .hljs-built_in,
77  .hljs-builtin-name,
78  .hljs-selector-id,
79  .hljs-selector-attr,
80  .hljs-selector-pseudo,
81  .hljs-addition,
82  .hljs-variable,
83  .hljs-template-variable {
84    color: #e6db74 !important;
85  }
86
87  .hljs-comment,
88  .hljs-deletion,
89  .hljs-meta {
90    color: #75715e !important;
91  }
92
93
然后我们再来看页面展示效果
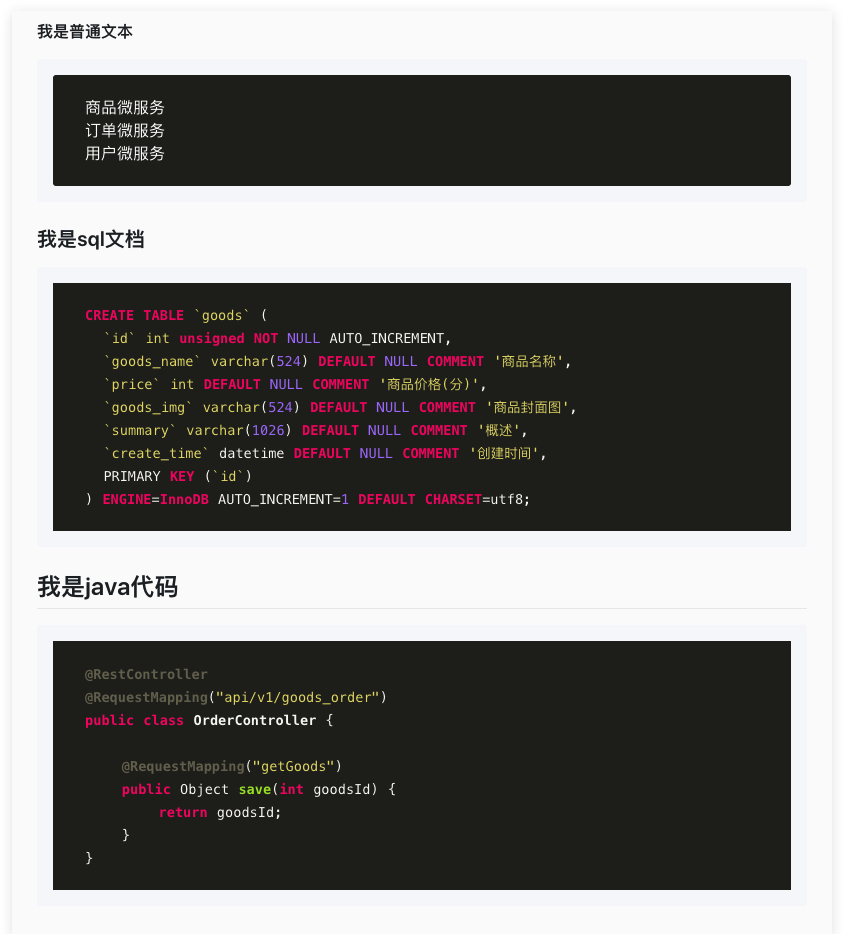
是不是明显感觉代码已经高亮,整体看去的视觉效果比上面的要好多了。
总结 这里有关编辑保存与后台接口交互的逻辑没有粘贴出来,还有如果使用markdown编辑器上传图片这里也没有说明,具体的可以看下官方文档。
参考
1少说多做,句句都会得到别人的重视;多说少做,句句都会受到别人的忽视。(16)
2
本文转自 https://www.cnblogs.com/qdhxhz/p/14865995.html,如有侵权,请联系删除。