
前言
做为一名前端开发人员,掌握vue/react/angular等框架已经是必不可少的技能了,我们都知道,vue或react等MVVM框架提倡组件化开发,这样一方面可以提高组件复用性和可扩展性,另一方面也带来了项目开发的灵活性和可维护,方便多人开发协作.接下来文章将介绍如何使用react,开发一个自定义json编辑器组件.我们这里使用了jsoneditor这个第三方库,官方地址: jsoneditor 通过实现一个json在线编辑器,来学习如何一步步封装自己的组件(不限于react,vue,原理类似).
你将学到:
- react组件封装的基本思路
- SOLID (面向对象设计)原则介绍
- jsoneditor用法
- 使用PropTypes做组件类型检查
设计思路
在介绍组件设计思路之前,有必要介绍一下著名的SOLID原则.
SOLID(单一功能、开闭原则、里氏替换、接口隔离以及依赖反转)是由罗伯特·C·马丁提出的面向对象编程和面向对象设计的五个基本原则。利用这些原则,程序员能更容易和高效的开发一个可维护和扩展的系统。 SOLID被典型的应用在测试驱动开发上,并且是敏捷开发以及自适应软件开发的基本原则的重要组成部分。
-
S 单一功能原则: 规定每个类都应该有一个单一的功能,并且该功能应该由这个类完全封装起来。所有它的服务都应该严密的和该功能保持一致。
-
O 开闭原则: 规定“软件中的对象(类,模块,函数等等)应该对于扩展是开放的,但是对于修改是封闭的”,这意味着一个实体是允许在不改变它的源代码的前提下变更它的行为。遵循这种原则的代码在扩展时并不需要改变。
-
L 里氏替换原则: 派生类(子类)对象可以在程序中代替其基类(超类)对象,是对子类型的特别定义.
-
I 接口隔离原则: 指明应用或者对象应该不依赖于它不使用的方法。接口隔离原则(ISP)拆分非常庞大臃肿的接口成为更小的和更具体的接口,这样应用或对象只需要知道它们感兴趣的方法。这种缩小的接口也被称为角色接口。接口隔离原则(ISP)的目的是系统去耦合,从而容易重构,更改和重新部署。接口隔离原则是在SOLID (面向对象设计)中五个面向对象设计(OOD)的原则之一,类似于在GRASP (面向对象设计)中的高内聚性。
-
D 依赖反转原则: 是指一种特定的解耦 形式,使得高层次的模块不依赖于低层次的模块的实现细节,依赖关系被颠倒(反转),从而使得低层次模块依赖于高层次模块的需求抽象。
掌握好这5个原则将有利于我们开发出更优秀的组件,请默默记住.接下来我们来看看json编辑器的设计思路.
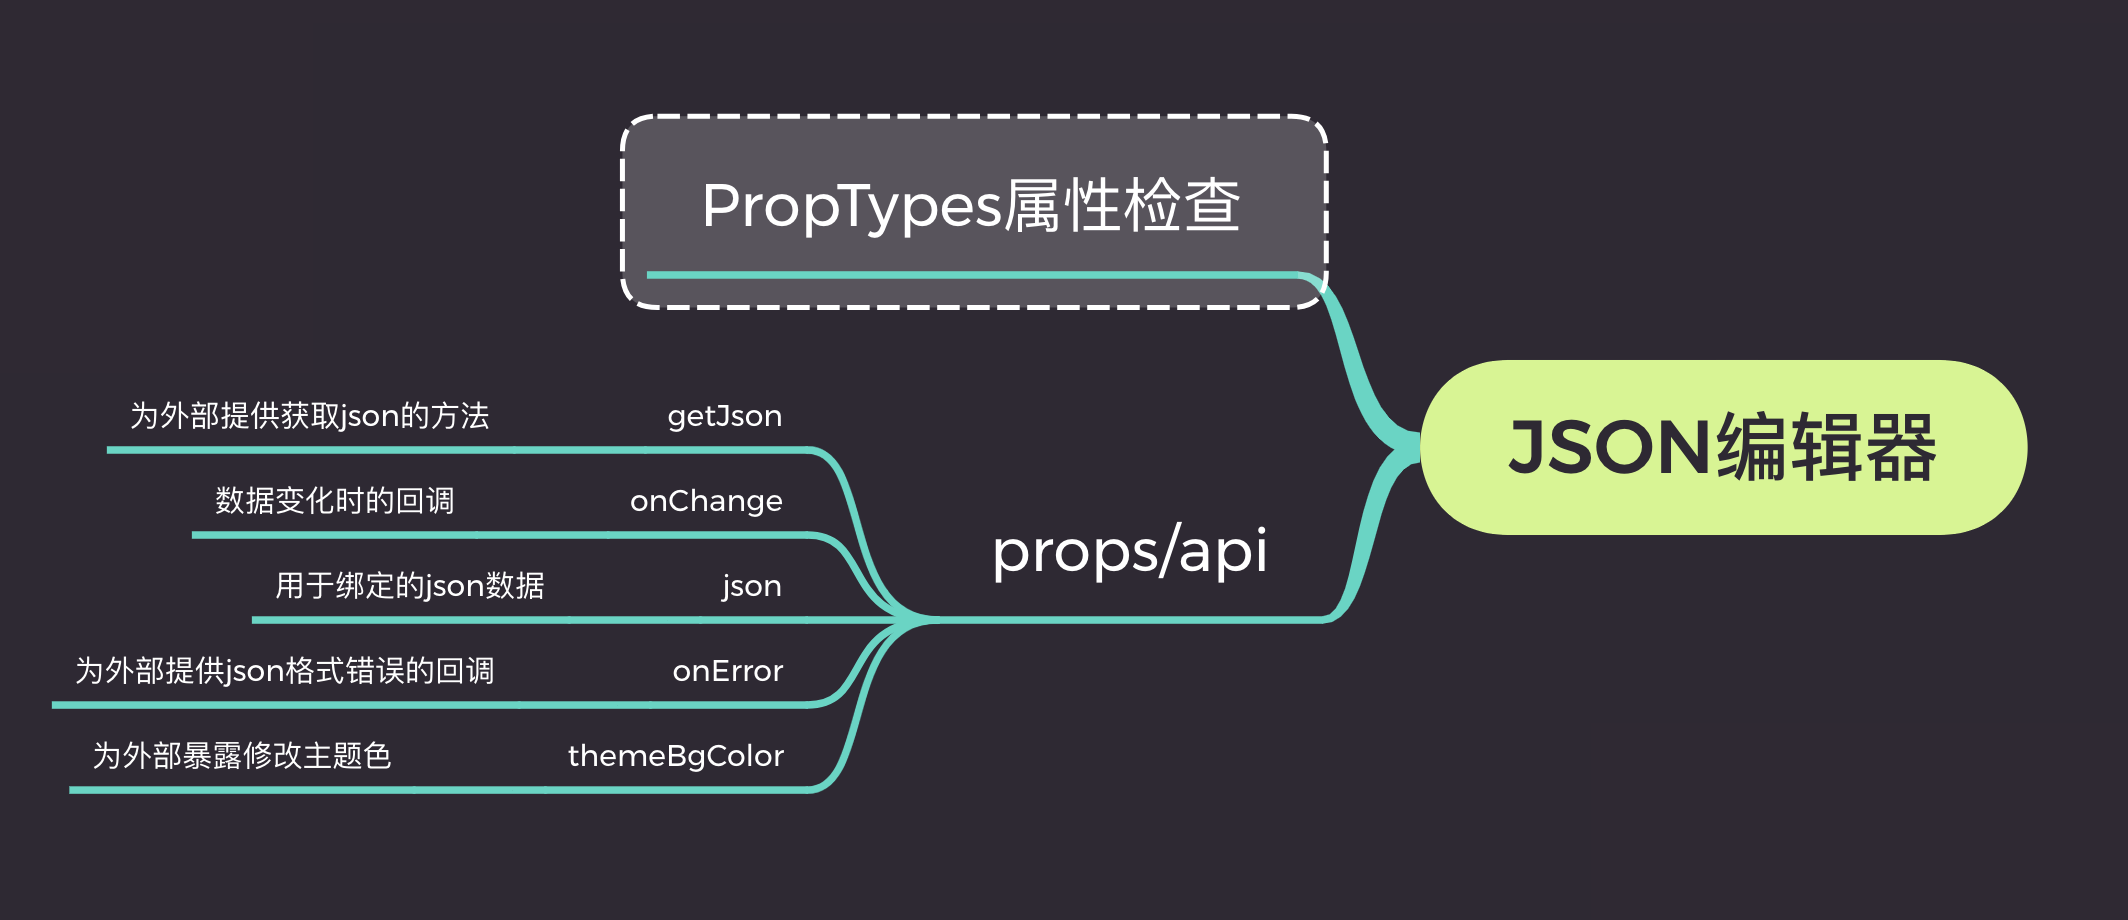 如上所示, 和任何一个输入框一样, 参考antd组件设计方式并兼容antd的form表单, 我们提供了onChange方法.(具体细节下文会详细介绍)
首先利用jsoneditor渲染的基本样式以及API,我们能实现一个基本可用的json编辑器,然后通过对外暴露的json和onChange属性进行数据双向绑定, 通过onError来监控异常或者输入的错误, 通过themeBgColor来修改默认的主题色,通过这几个接口,我们便能完全掌握一个组件的运行情况.
正文
接下来我们就正式开始我们的正文.由于本文的组件是基于react实现的,但是用在vue,angular上,基本模式同样适用.关键就是掌握好不同框架的生命周期.
在学习实现json编辑器组件之前,我们有必要了解一下jsoneditor这个第三方组件的用法与api.
jsoneditor的使用
- 安装
我们先执行npm install安装我们的组件
1npm install jsoneditor
其次手动引入样式文件
1<link href="jsoneditor/dist/jsoneditor.min.css" rel="stylesheet" type="text/css">
这样,我们就能使用它的api了:
1<div id="jsoneditor" style="width: 400px; height: 400px;"></div>
2
3<script>
4    // 创建编辑器
5    var container = document.getElementById("jsoneditor");
6    var editor = new JSONEditor(container);
7
8    // 设置json数据
9    function setJSON () {
10        var json = {
11            "Array": [1, 2, 3],
12            "Boolean": true,
13            "Null": null,
14            "Number": 123,
15            "Object": {"a": "b", "c": "d"},
16            "String": "Hello World"
17        };
18        editor.set(json);
19    }
20
21    // 获取json数据
22    function getJSON() {
23        var json = editor.get();
24        alert(JSON.stringify(json, null, 2));
25    }
26</script>
所以你可能看到如下界面:
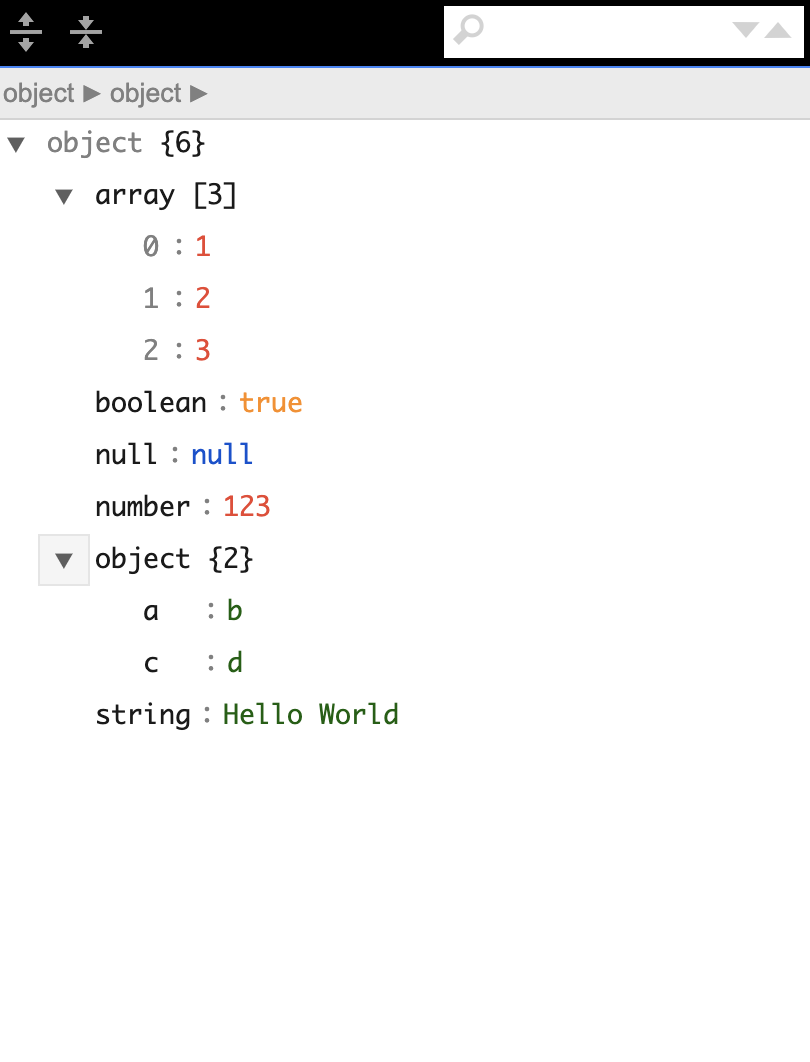 为了能实现实时预览和编辑,光这样还远远不够,我们还需要进行额外的处理.我们需要用到jsoneditor其他的api和技巧.
结合react进行二次封装
基于以上谈论,我们很容易将编辑器封装成react组件, 我们只需要在componentDidMount生命周期里初始化实例即可.react代码可能是这样的:
1import React, { PureComponent } from 'react'
2import JSONEditor from 'jsoneditor'
3
4import 'jsoneditor/dist/jsoneditor.css'
5
6class JsonEditor extends PureComponent {
7  initJsonEditor = () => {
8    const options = {
9      mode: 'code',
10      history: true,
11      onChange: this.onChange,
12      onValidationError: this.onError
13    };
14
15    this.jsoneditor = new JSONEditor(this.container, options)
16    this.jsoneditor.set(this.props.value)
17  }
18
19  componentDidMount () {
20    this.initJsonEditor()
21  }
22
23  componentWillUnmount () {
24    if (this.jsoneditor) {
25      this.jsoneditor.destroy()
26    }
27  }
28
29  render() {
30    return <div className="jsoneditor-react-container" ref={elem => this.container = elem} />
31  }
32}
33export default JsonEditor
至于options里的选项, 我们可以参考jsoneditor的API文档,里面写的很详细, 通过以上代码,我们便可以实现一个基本的react版的json编辑器组件.接下来我们来按照设计思路一步步实现可实时预览的json编辑器组件.
- 实现预览和编辑视图
其实这一点很好实现,我们只需要实例化2个编辑器实例,一个用于预览,一个用于编辑就好了.
1import React, { PureComponent } from 'react'
2import JSONEditor from 'jsoneditor'
3import 'jsoneditor/dist/jsoneditor.css'
4
5class JsonEditor extends PureComponent {
6  onChange = () => {
7    let value = this.jsoneditor.get()
8    this.viewJsoneditor.set(value)
9  }
10
11  initJsonEditor = () => {
12    const options = {
13      mode: 'code',
14      history: true
15    };
16
17    this.jsoneditor = new JSONEditor(this.container, options)
18    this.jsoneditor.set(this.props.value)
19  }
20
21  initViewJsonEditor = () => {
22    const options = {
23      mode: 'view'
24    };
25
26    this.viewJsoneditor = new JSONEditor(this.viewContainer, options)
27    this.viewJsoneditor.set(this.props.value)
28  }
29
30  componentDidMount () {
31    this.initJsonEditor()
32    this.initViewJsonEditor()
33  }
34
35  componentDidUpdate() {
36    if(this.jsoneditor) {
37      this.jsoneditor.update(this.props.value)
38      this.viewJsoneditor.update(this.props.value)
39    }
40  }
41
42  render() {
43    return (
44      <div className="jsonEditWrap">
45        <div className="jsoneditor-react-container" ref={elem => this.container = elem} />
46        <div className="jsoneditor-react-container" ref={elem => this.viewContainer = elem} />
47      </div>
48    );
49  }
50}
51
52export default JsonEditor
这样,我们便能实现一个初步的可实时预览的编辑器.可能效果长这样:
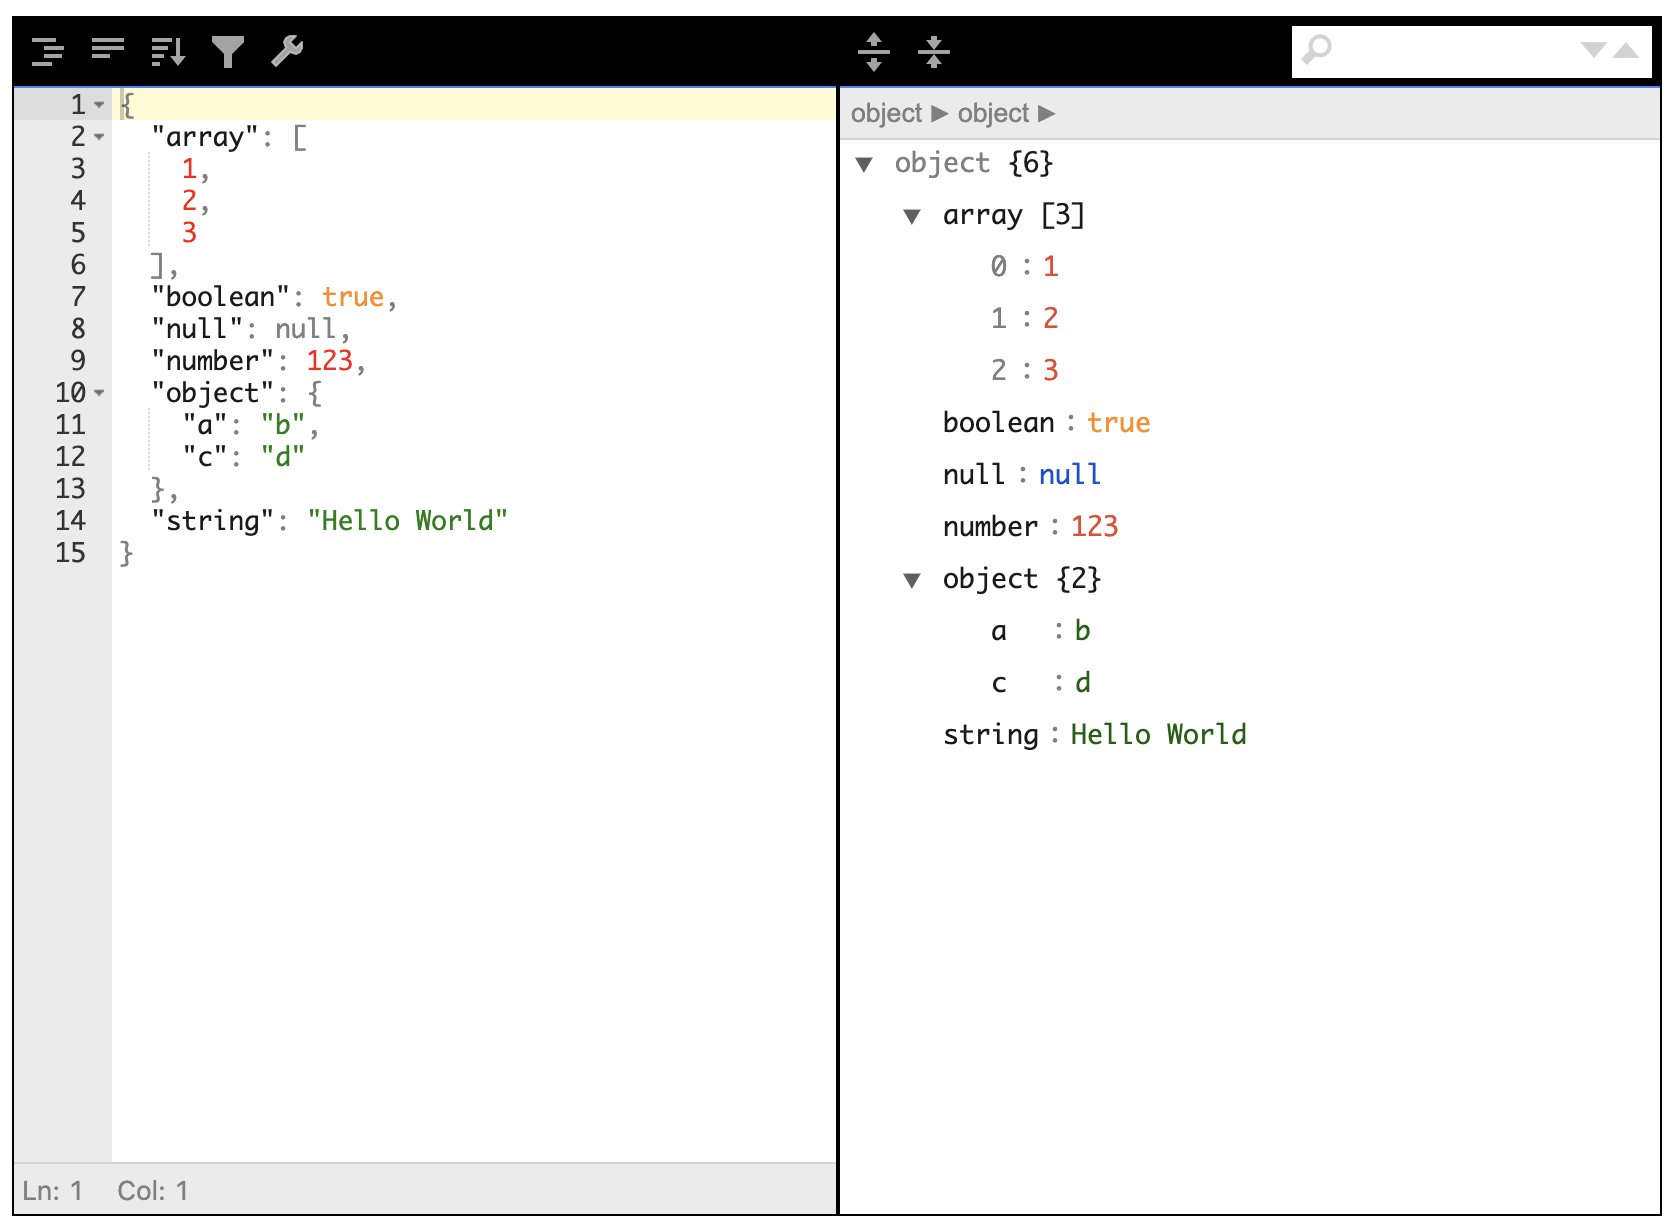 接近于成熟版,但是还有很多细节要处理.
- 对外暴露属性和方法以支持不同场景的需要
1import React, { PureComponent } from 'react'
2import JSONEditor from 'jsoneditor'
3
4import 'jsoneditor/dist/jsoneditor.css'
5
6class JsonEditor extends PureComponent {
7  // 监听输入值的变化
8  onChange = () => {
9    let value = this.jsoneditor.get()
10    this.props.onChange && this.props.onChange(value)
11    this.viewJsoneditor.set(value)
12  }
13  // 对外暴露获取编辑器的json数据
14  getJson = () => {
15    this.props.getJson && this.props.getJson(this.jsoneditor.get())
16  }
17  // 对外提交错误信息
18  onError = (errArr) => {
19    this.props.onError && this.props.onError(errArr)
20  }
21
22  initJsonEditor = () => {
23    const options = {
24      mode: 'code',
25      history: true,
26      onChange: this.onChange,
27      onValidationError: this.onError
28    };
29
30    this.jsoneditor = new JSONEditor(this.container, options)
31    this.jsoneditor.set(this.props.value)
32  }
33
34  initViewJsonEditor = () => {
35    const options = {
36      mode: 'view'
37    };
38
39    this.viewJsoneditor = new JSONEditor(this.viewContainer, options)
40    this.viewJsoneditor.set(this.props.value)
41  }
42
43  componentDidMount () {
44    this.initJsonEditor()
45    this.initViewJsonEditor()
46    // 设置主题色
47    this.container.querySelector('.jsoneditor-menu').style.backgroundColor = this.props.themeBgColor
48    this.container.querySelector('.jsoneditor').style.border = `thin solid ${this.props.themeBgColor}`
49    this.viewContainer.querySelector('.jsoneditor-menu').style.backgroundColor = this.props.themeBgColor
50    this.viewContainer.querySelector('.jsoneditor').style.border = `thin solid ${this.props.themeBgColor}`
51  }
52
53  componentDidUpdate() {
54    if(this.jsoneditor) {
55      this.jsoneditor.update(this.props.json)
56      this.viewJsoneditor.update(this.props.json)
57    }
58  }
59
60  render() {
61    return (
62      <div className="jsonEditWrap">
63        <div className="jsoneditor-react-container" ref={elem => this.container = elem} />
64        <div className="jsoneditor-react-container" ref={elem => this.viewContainer = elem} />
65      </div>
66    );
67  }
68}
69
70export default JsonEditor
通过以上的过程,我们已经完成一大半工作了,剩下的细节和优化工作,比如组件卸载时如何卸载实例, 对组件进行类型检测等,我们继续完成以上问题.
- 使用PropTypes进行类型检测以及在组件卸载时清除实例 类型检测时react内部支持的,安装react的时候会自动帮我们安装PropTypes,具体用法可参考官网地址propTypes文档,其次我们会在react的componentWillUnmount生命周期中清除编辑器的实例以释放内存.完整代码如下:
1import React, { PureComponent } from 'react'
2import JSONEditor from 'jsoneditor'
3import PropTypes from 'prop-types'
4import 'jsoneditor/dist/jsoneditor.css'
5
6/**
7 * JsonEditor
8 * @param {object} json 用于绑定的json数据
9 * @param {func} onChange 变化时的回调
10 * @param {func} getJson 为外部提供回去json的方法
11 * @param {func} onError 为外部提供json格式错误的回调
12 * @param {string} themeBgColor 为外部暴露修改主题色
13 */
14class JsonEditor extends PureComponent {
15  onChange = () => {
16    let value = this.jsoneditor.get()
17    this.props.onChange && this.props.onChange(value)
18    this.viewJsoneditor.set(value)
19  }
20
21  getJson = () => {
22    this.props.getJson && this.props.getJson(this.jsoneditor.get())
23  }
24
25  onError = (errArr) => {
26    this.props.onError && this.props.onError(errArr)
27  }
28
29  initJsonEditor = () => {
30    const options = {
31      mode: 'code',
32      history: true,
33      onChange: this.onChange,
34      onValidationError: this.onError
35    };
36
37    this.jsoneditor = new JSONEditor(this.container, options)
38    this.jsoneditor.set(this.props.value)
39  }
40
41  initViewJsonEditor = () => {
42    const options = {
43      mode: 'view'
44    };
45
46    this.viewJsoneditor = new JSONEditor(this.viewContainer, options)
47    this.viewJsoneditor.set(this.props.value)
48  }
49
50  componentDidMount () {
51    this.initJsonEditor()
52    this.initViewJsonEditor()
53    // 设置主题色
54    this.container.querySelector('.jsoneditor-menu').style.backgroundColor = this.props.themeBgColor
55    this.container.querySelector('.jsoneditor').style.border = `thin solid ${this.props.themeBgColor}`
56    this.viewContainer.querySelector('.jsoneditor-menu').style.backgroundColor = this.props.themeBgColor
57    this.viewContainer.querySelector('.jsoneditor').style.border = `thin solid ${this.props.themeBgColor}`
58  }
59
60  componentWillUnmount () {
61    if (this.jsoneditor) {
62      this.jsoneditor.destroy()
63      this.viewJsoneditor.destroy()
64    }
65  }
66
67  componentDidUpdate() {
68    if(this.jsoneditor) {
69      this.jsoneditor.update(this.props.json)
70      this.viewJsoneditor.update(this.props.json)
71    }
72  }
73
74  render() {
75    return (
76      <div className="jsonEditWrap">
77        <div className="jsoneditor-react-container" ref={elem => this.container = elem} />
78        <div className="jsoneditor-react-container" ref={elem => this.viewContainer = elem} />
79      </div>
80    );
81  }
82}
83
84JsonEditor.propTypes = {
85  json: PropTypes.object,
86  onChange: PropTypes.func,
87  getJson: PropTypes.func,
88  onError: PropTypes.func,
89  themeBgColor: PropTypes.string
90}
91
92export default JsonEditor
由于组件严格遵守开闭原则,所以我们可以提供更加定制的功能在我们的json编辑器中,已实现不同项目的需求.对于组件开发的健壮性探讨,除了使用propTypes外还可以基于typescript开发,这样适合团队开发组件库或者复杂项目组件的追溯和查错.最终效果如下:
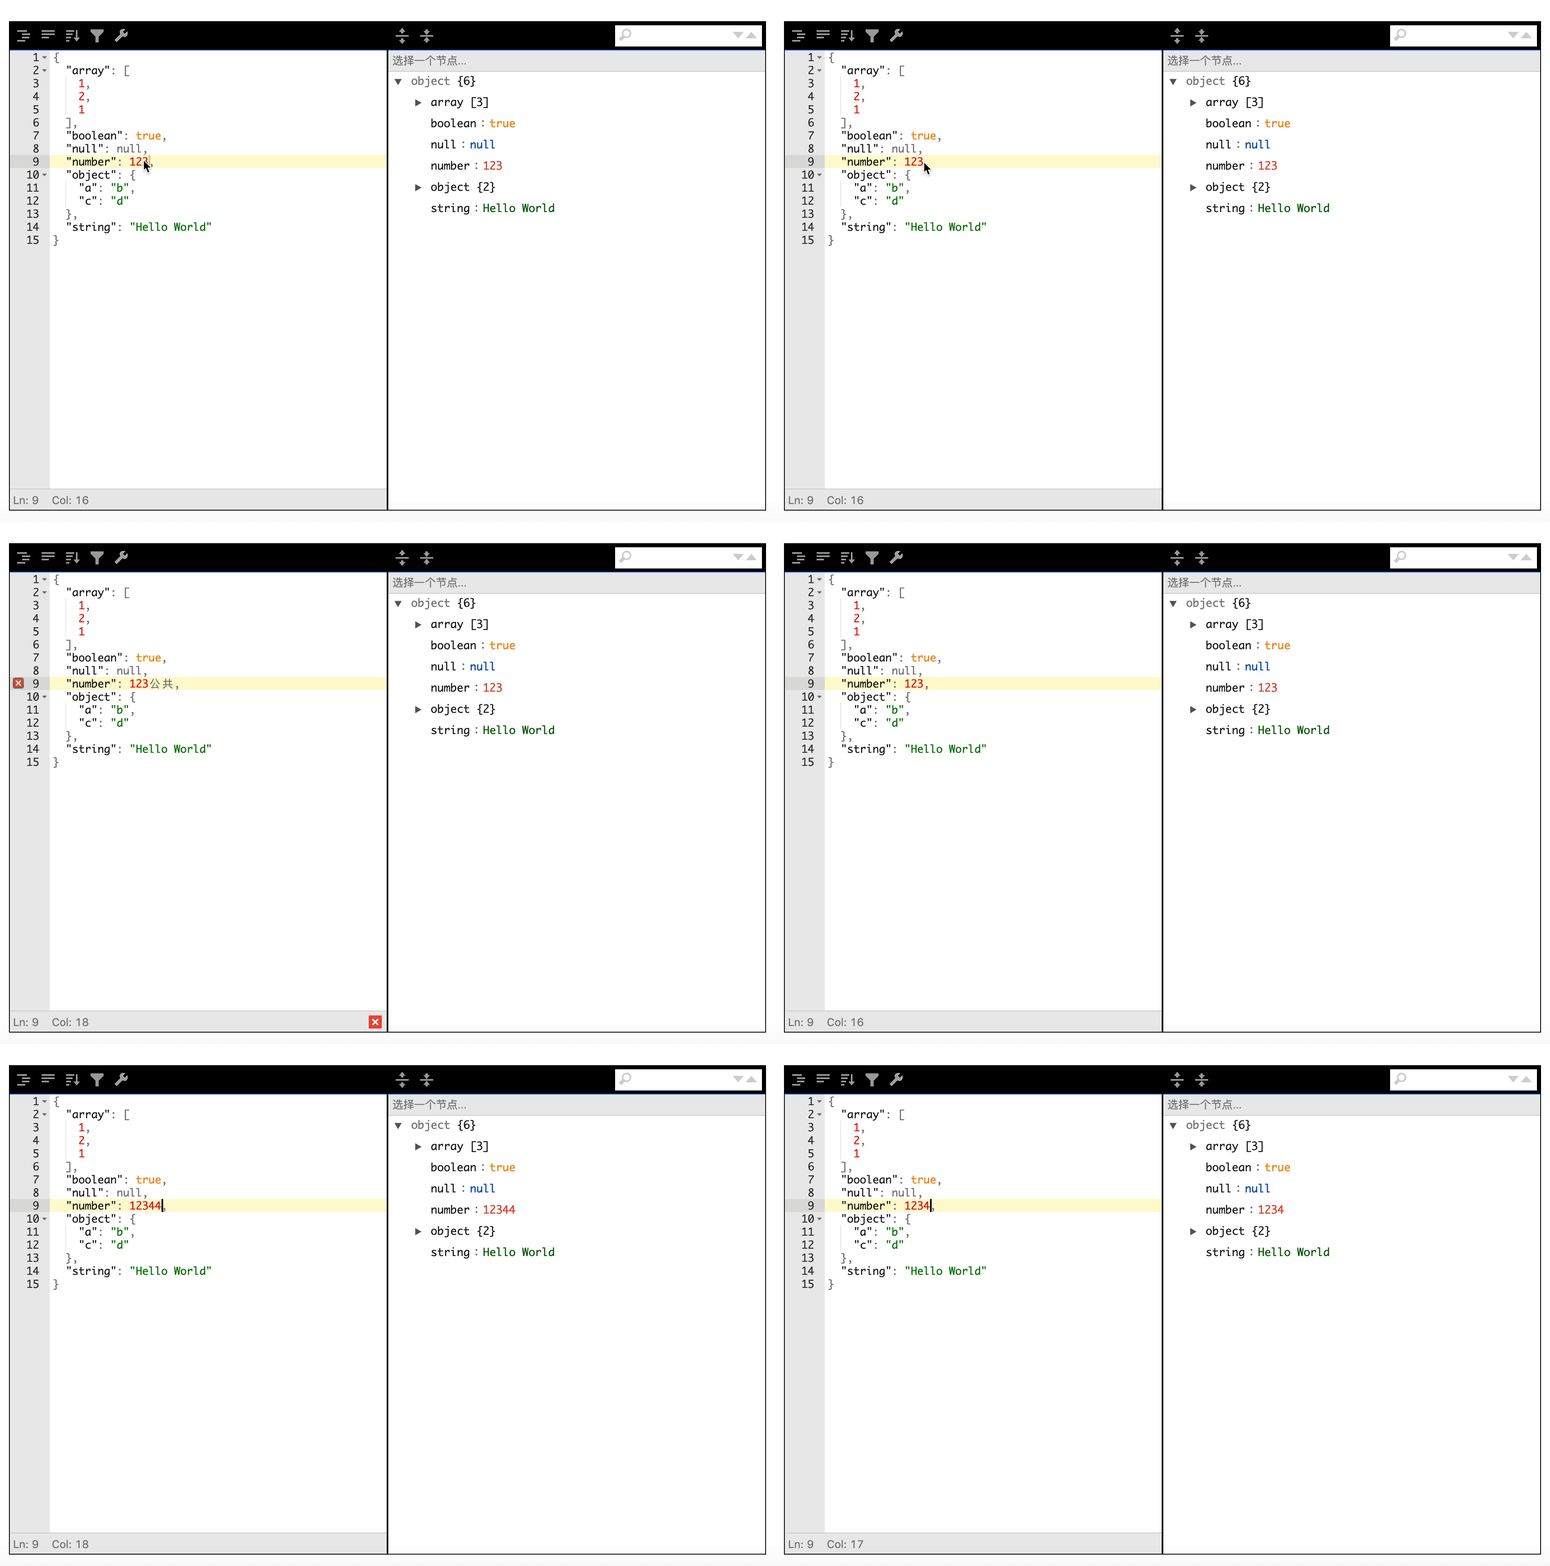
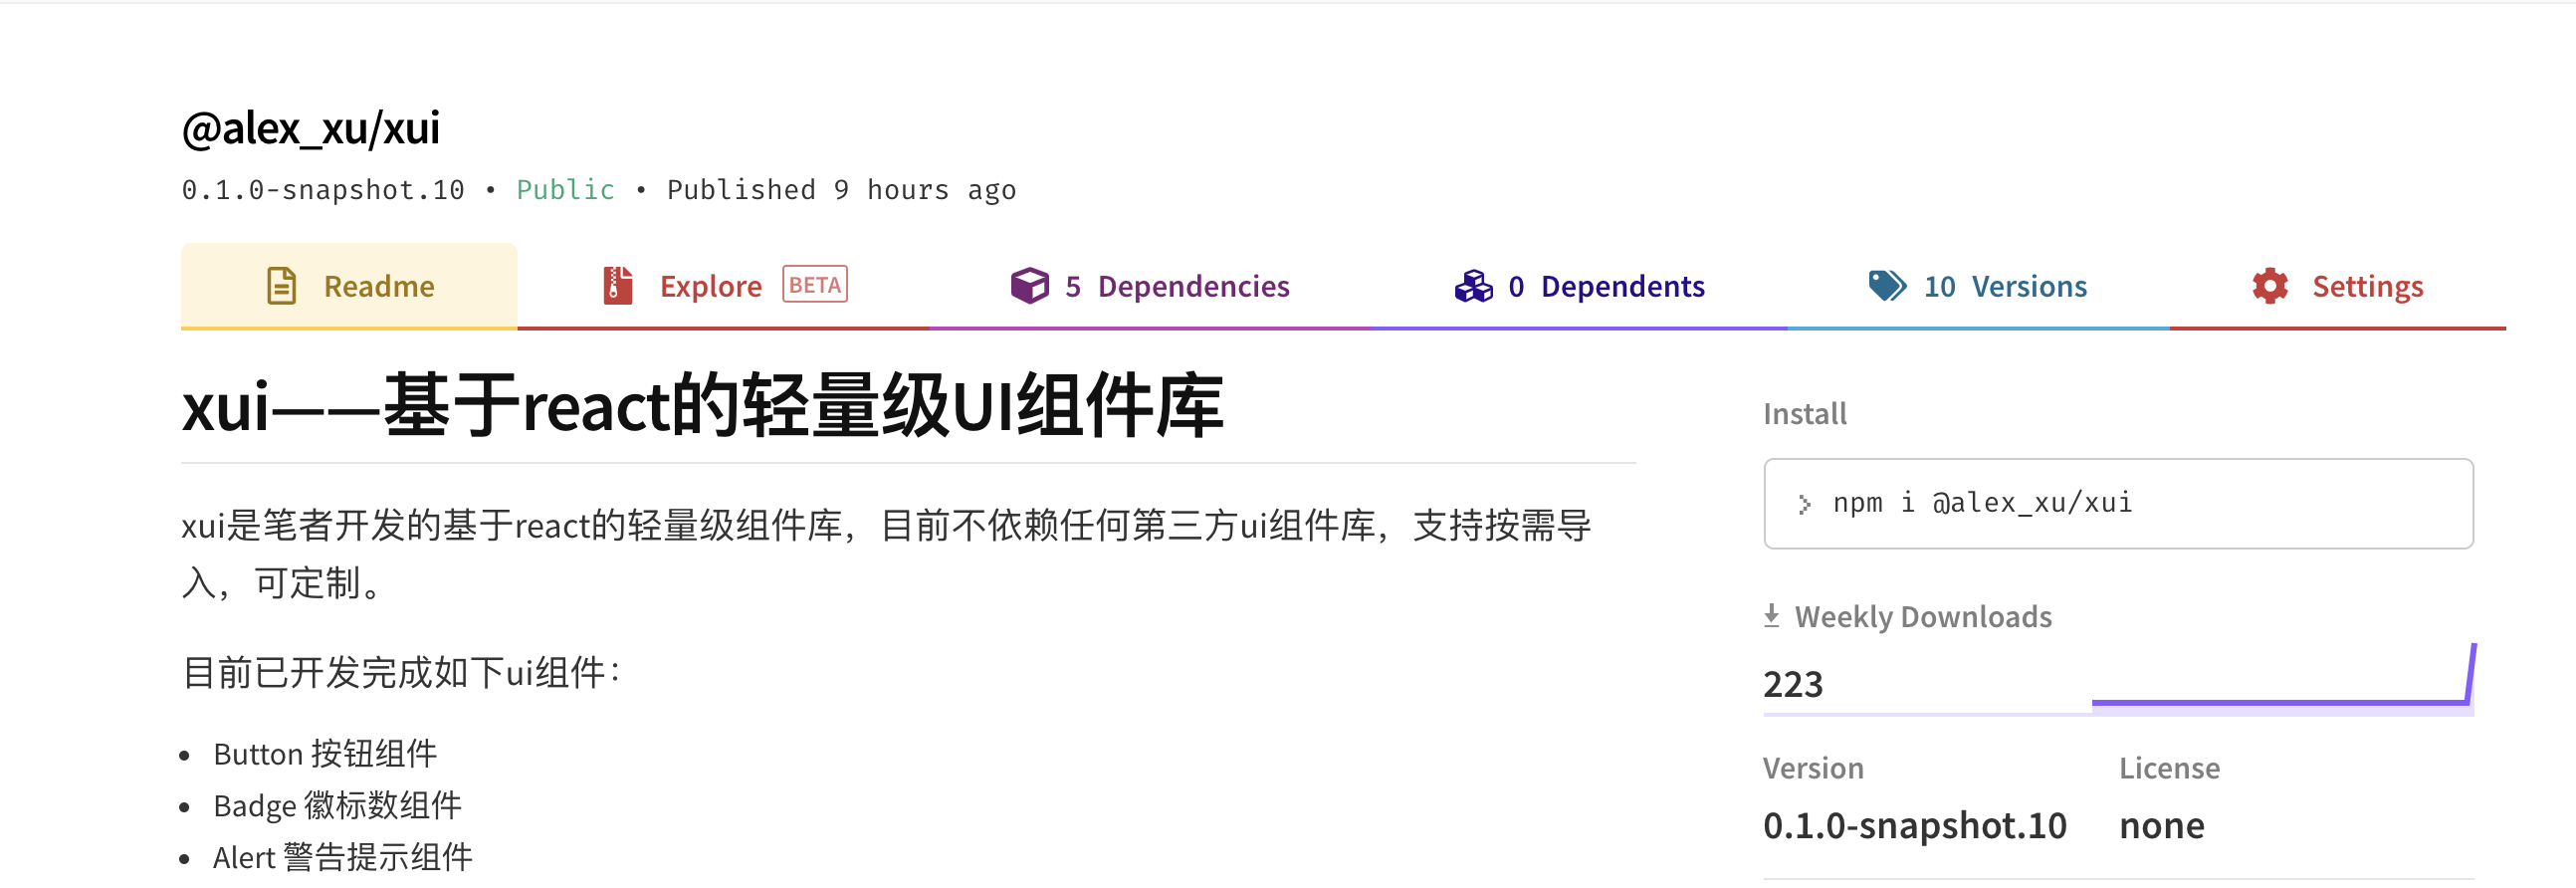
笔者已经将实现过的组件发布到npm上了,大家如果感兴趣可以直接用npm安装后使用,方式如下:
1npm i @alex_xu/xui
2
3// 导入xui
4import {
5  Button,
6  Skeleton,
7  Empty,
8  Progress,
9  Tag,
10  Switch,
11  Drawer,
12  Badge,
13  Alert
14} from '@alex_xu/xui'
该组件库支持按需导入,我们只需要在项目里配置babel-plugin-import即可,具体配置如下:
1// .babelrc
2"plugins": [
3  ["import", { "libraryName": "@alex_xu/xui", "style": true }]
4]
npm库截图如下:
最后
如果想了解更多H5游戏, webpack,node,gulp,css3,javascript,nodeJS,canvas数据可视化等前端知识和实战,欢迎在公众号《趣谈前端》加入我们一起学习讨论,共同探索前端的边界。

更多推荐
- 2019年,盘点一些我出过的前端面试题以及对求职者的建议
- 《前端实战总结》之使用纯css实现网站换肤和焦点图切换动画
- 《前端实战总结》之使用CSS3实现酷炫的3D旋转透视
- 《前端实战总结》之使用pace.js为你的网站添加加载进度条
- 《前端实战总结》之设计模式的应用——备忘录模式
- 《前端实战总结》之使用postMessage实现可插拔的跨域聊天机器人
- 《前端实战总结》之变量提升,函数声明提升及变量作用域详解
- 《前端实战总结》如何在不刷新页面的情况下改变URL
- 一张图教你快速玩转vue-cli3
- vue高级进阶系列——用typescript玩转vue和vuex
- 基于nodeJS从0到1实现一个CMS全栈项目(上)
- 基于nodeJS从0到1实现一个CMS全栈项目(中)
- 基于nodeJS从0到1实现一个CMS全栈项目(下)
- 5分钟教你用nodeJS手写一个mock数据服务器
- 用css3实现惊艳面试官的背景即背景动画(高级附源码)
- 教你用200行代码写一个爱豆拼拼乐H5小游戏(附源码)
- 笛卡尔乘积的javascript版实现和应用