
引言
在一个倡导“快速开发”的团队中,交付日期往往是衡量工作的第一标准。而遇到问题的解决方式也会偏暴力,暴力的方式往往大脑都会厌恶和失声,尤其是在面试官问开发过程中的难点的时候更是无法回答,只能无底气的回一句“感觉开发过程很顺利,并没有碰到什么难以解决的问题。”。
以下便是我想到的非暴力方式来改造原有问题。
问题
需求与问题描述
关键词:
小程序、index list、卡顿、白屏、500条、1M
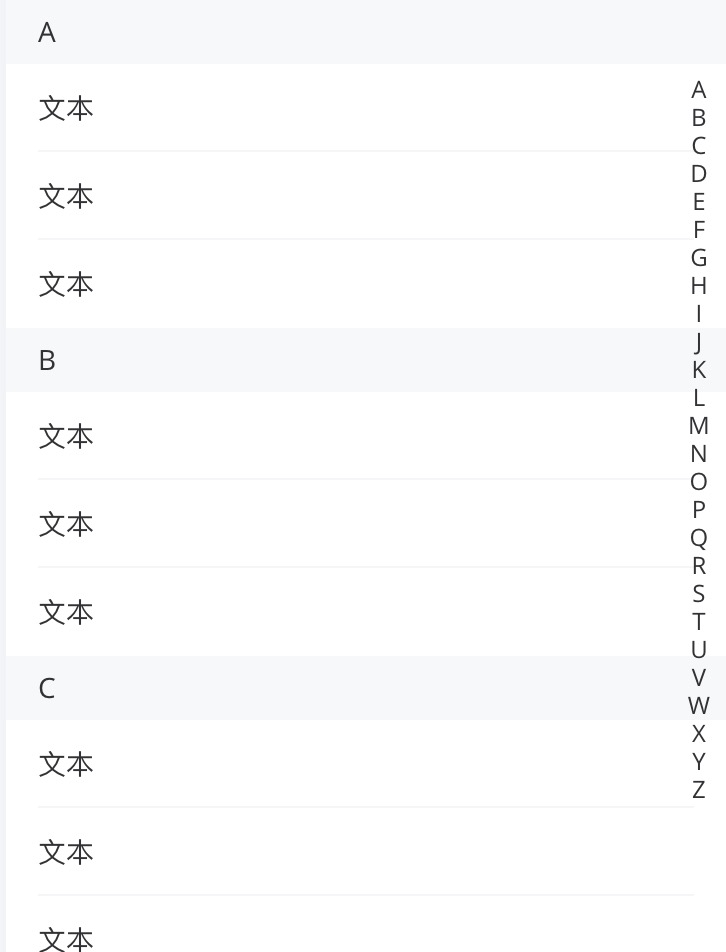
在进行小程序项目开发过程中,遇到索引列表的需求,于是采用vant的IndexBar作为进行开发,完成并发布线上,但是由于item编写的确实不行以及小程序承载最终将问题暴露了出来。经过测试发现当数据大于500条时部分手机已经开始出现卡顿情况,其中对item操作(删除、增加)时卡顿明显;当数据大小大于1MB后更是出现首屏渲染长时间的白屏。IndexList如下图所示。
问题分析
由于表达能力弱上方描述可能不太清楚,所以将关键词提取出来。
小程序: 项目环境index list: 需求卡顿/白屏: 问题500条/1M: 产生问题的前提
从产生问的题前提很容易的产生一个疑问“数据量这么少还能卡?”。我在测试过程中发现的时候也是觉得诧异,这点数据能干什么?在非小程序开发的情况下我一般会见这一块代码单独开一个项目进行测试,但是小程序众所周知的卡,所以我采用了一个非常简单的方式百度“小程序 列表 卡顿”,在搜索的时候我甚至没写“长列表”,但是我还是得到了结果,还是在搜索结果的第一条。搜索结果如下图所示。

2018的提出问题,2019年官方给出了解决方案recycle-view微信小程序长列表卡顿,但是这个只能解决部分问题,对于嵌套数据可能并不能适配。而且内部实现也是按虚拟列表渲染的思路去操作的。
方案和实现
在后续方案实现细节和环境将换成浏览器环境并采用Vue进行编码。
ps: vite + vue 在写demo方面实在是太丝滑了。
前提
采用小程序开发工具进行编码对个人来说较为难受,考虑到方案和实现以及迁移都成本相对低,所以后续实现采用浏览器实现后移植小程序。
开发环境: vscode + vite + vue
mock数据
domo环境,采用mock数据为后续开发提供数据支持。
ps: 暂时不考虑keys顺序问题
mock结构
1
2{
3    "A":[ ... ],
4    ...
5    "Z":[ ... ]
6}
7
mock生成代码如下。
1import { Random } from 'mockjs'
2
3export const indexListData = Array(26).fill('A'.codePointAt()).reduce((pv, indexCode, index) => {
4  const currentCharAt = indexCode + index
5  const currentChar = String.fromCharCode(currentCharAt)
6  pv[currentChar] = Array(Math.random() * 460 | 0).fill(0).map((_, itemIndex) => {
7    const id = currentCharAt + '-' + itemIndex
8    return {
9      id,
10      index: currentChar,
11      pic: "https://image.notbucai.com/logo.png",
12      title: Random.ctitle(5, 20),
13      group: id,
14      content: Random.ctitle(100, 150),
15      user: {
16        id: 123,
17        name: '不才',
18        avatar: 'https://image.notbucai.com/logo.png',
19        age: 12,
20        sex: 1,
21      },
22      createAt: Date.now(),
23      updateAt: Date.now(),
24    }
25  })
26  return pv;
27}, {})
业务代码
渲染图

没有改造之前的代码。只做部分实现,未完全实现
1<template>
2  <div class="list-page-box">
3    <div class="list-box">
4      <div class="group-box" v-for="(value, key) of list" :key="key">
5        <div class="gropu-index">{{ key }}</div>
6        <div class="group-content">
7          <div class="group-item" v-for="item in value" :key="item.id">
8            <img
9              class="group-item-pic"
10              :src="item.pic"
11              alt="123"
12              loading="lazy"
13            />
14            <div class="group-item-content">
15              <h1>{{ item.title }}</h1>
16              <p>{{ item.content }}</p>
17            </div>
18            <div class="group-item-aciton">
19              <button>删除</button>
20            </div>
21          </div>
22        </div>
23      </div>
24    </div>
25    <div class="index-field-box">
26      <div class="index-key-name" v-for="(_, key) of list" :key="key">
27        {{ key }}
28      </div>
29    </div>
30  </div>
31</template>
32
33<script>
34import { reactive } from "vue"
35import { indexListData } from "./mock"
36
37export default {
38  setup () {
39    const list = reactive(indexListData)
40
41    return {
42      list
43    }
44  },
45}
46</script>
47
48<style lang="scss" >
49* {
50  padding: 0;
51  margin: 0;
52}
53.list-page-box {
54  position: relative;
55}
56.list-box {
57  .group-box {
58    margin-bottom: 24px;
59    .gropu-index {
60      background-color: #f4f5f6;
61      padding: 10px;
62      font-weight: bold;
63      position: sticky;
64      top: 0;
65    }
66    .group-content {
67      .group-item {
68        display: flex;
69        align-items: center;
70        justify-content: space-between;
71        padding: 6px 10px;
72
73        .group-item-pic {
74          width: 68px;
75          min-width: 68px;
76          height: 68px;
77          margin-right: 12px;
78        }
79        .group-item-content {
80          display: flex;
81          flex-direction: column;
82          height: 100%;
83          h1 {
84            font-size: 16px;
85            font-weight: bold;
86            color: #333333;
87          }
88          p {
89            color: #666666;
90            font-size: 14px;
91          }
92        }
93
94        .group-item-aciton {
95          min-width: 60px;
96          display: flex;
97          align-items: center;
98          justify-content: end;
99        }
100      }
101    }
102  }
103}
104.index-field-box {
105  position: fixed;
106  top: 0;
107  right: 0;
108  z-index: 10;
109  height: 100%;
110  display: flex;
111  flex-direction: column;
112  align-items: center;
113  justify-content: center;
114}
115</style>
方案
采用虚拟列表,参考云中桥-「前端进阶」高性能渲染十万条数据(虚拟列表)的方案。
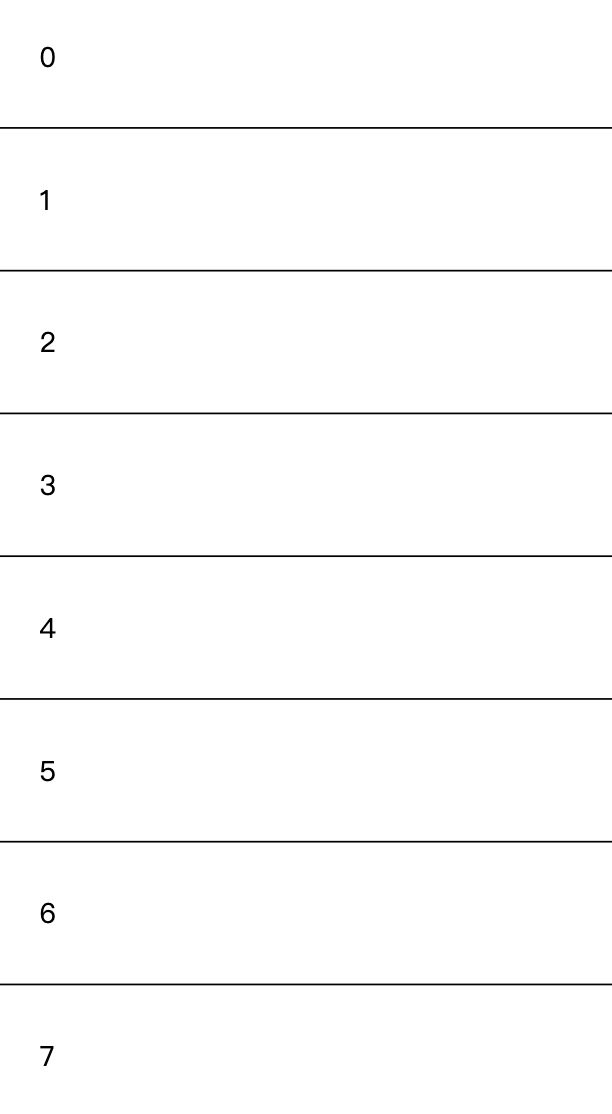
根据上面对虚拟列表的描述,编写了一个简单的虚拟列表,代码如下。
1<template>
2  <div class="list-page-box" ref="scrollRef">
3    <!--暂时固定高度-->
4    <div style="height: 10000px"></div>
5     <!--列表-->
6    <div class="list-box" :style="{ transform: listTransform }">
7      <div class="item" v-for="item in list" :key="item">{{ item }}</div>
8    </div>
9  </div>
10</template>
11
12<script>
13import { computed, onMounted, reactive, ref } from "vue"
14
15export default {
16  setup () {
17    const scrollRef = ref(null)
18    const listTransform = ref("translate3d(0px, 0px, 0px)")
19    // 生成数据
20    const originList = reactive(Array(10000).fill(0).map((_, index) => index))
21    const startIndex = ref(0)
22
23    const list = computed(() => {
24      return originList.slice(startIndex.value, startIndex.value + 10)
25    })
26
27    onMounted(() => {
28      scrollRef.value.addEventListener('scroll', () => {
29        const scrollTop = scrollRef.value.scrollTop
30        // 计算list开始位置
31        const start = scrollTop / 83 | 0
32        startIndex.value = start;
33        // 计算偏移
34        listTransform.value = `translate3d(0px, ${((start * 83)).toFixed(2)}px, 0px)`
35      })
36    })
37
38    return {
39      list,
40      scrollRef,
41      listTransform
42    }
43  },
44}
45</script>
46
47<style lang="scss" >
48.list-page-box {
49  position: relative;
50  height: 100vh;
51  width: 100vw;
52  overflow: hidden;
53  overflow-y: auto;
54}
55.list-box {
56  position: absolute;
57  top: 0;
58  left: 0;
59  right: 0;
60}
61.item {
62  padding: 30px;
63  border-bottom: 1px solid #000;
64}
65</style>
改造难点
在这个改造中主要问题就是当前是一个嵌套的数据列表。
- 需要将原来单层结构改造成双层结构
- 偏移方案,transform 对 sticky 有冲突
- index key的高度问题
- 可视区域多个 index list item
- 点击右侧Index Key跳转到指定位置
实现
通过上方虚拟列表代码进行后续的改造和实现,这里先放实现代码,后面将分别解决上述问题。
1<template>
2  <div class="list-page-box" ref="scrollRef">
3    <div :style="{ height: scrollHeight + 'px' }"></div>
4    <!-- fix: 问题 3 的解决方案 更换成 top 临时解决一下 -->
5    <div class="list-box" :style="{ top: offsetTop + 'px' }">
6      <div class="group-box" v-for="(value, key) of list" :key="key">
7        <div class="gropu-index">{{ key }}</div>
8        <div class="group-content">
9          <div class="group-item" v-for="item in value" :key="item.id">
10            <div class="group-item-pic" style="background: #f5f6f7"></div>
11            <div class="group-item-content">
12              <h1>{{ item.title }}</h1>
13              <p>{{ item.content }}</p>
14            </div>
15            <div class="group-item-aciton">
16              <button>删除</button>
17            </div>
18          </div>
19        </div>
20      </div>
21    </div>
22    <div class="index-field-box">
23      <div
24        class="index-key-name"
25        v-for="key in keys"
26        :key="key"
27        @click.stop.prevent="handleToList(key)"
28      >
29        {{ key }}
30      </div>
31    </div>
32  </div>
33</template>
34
35<script>
36import { computed, onMounted, reactive, ref, watch, watchEffect } from "vue"
37import { indexListData } from "../mock"
38
39// mock index list data
40console.log('indexListData', JSON.stringify(indexListData));
41// todo 封装 问题 (暂时不考虑数据更新后的其他问题)
42// 先去看一些优秀的封装
43// 感觉都是一个想法
44// 传入 数据 -> slot item 这样的话我就懒得封了 md 懒鬼
45// 1. 输入
46//   数据 index 高度 list item 高度
47// 2. 输出
48//   初始化的函数
49//   渲染的数据
50export default {
51  setup () {
52    // 原数据
53    const originList = indexListData
54
55    const scrollRef = ref(null)
56    const scrollTop = ref(0) // todo 需要额外计算偏移
57    // 存储数据最终渲染的高度
58    const scrollHeight = ref(0)
59    const offsetTop = ref(0)
60    // 当前下标
61    const showListIndexs = reactive({
62      key: 'A',
63      index: 0,
64      sonIndex: 0
65    });
66
67    // 临时存储
68    const originListHeight = ref([])
69    const keys = ref([])
70
71    // 需要渲染的数据
72    const list = computed(() => {
73      // 获取key
74      const { key, index, sonIndex } = showListIndexs;
75      // 获取数据
76      // todo 这里的10个元素 后期需要进行计算 目前无所谓
77      const showList = originList[key].slice(sonIndex, sonIndex + 10)
78      // todo 实际上目前的key: value的机构还是有些问题的(无序),这个暂时按下不表
79      const showData = {
80        [key]: showList
81      }
82      // 计算 数据长度不够时的处理
83      // todo 需要再细致化
84      if (showList.length < 10) {
85        // 处理 数据不够时的问题
86        const nextIndex = index + 1
87
88        if (nextIndex >= originListHeight.value.length) return showData
89        const nextHeightData = originListHeight.value[nextIndex];
90        if (!nextHeightData) return showData;
91        const nextKey = nextHeightData.key;
92        const nextShowList = originList[nextKey].slice(0, 10 - showList.length)
93        showData[nextKey] = nextShowList
94      }
95
96      return showData
97    })
98
99    // 监听数据
100    onMounted(() => {
101      scrollRef.value.addEventListener('scroll', () => {
102        const _scrollTop = scrollRef.value.scrollTop
103        // todo 高度计算
104        // 高度偏移需要配合上数据更新才能完成滚动的交互
105        scrollTop.value = _scrollTop
106      })
107    })
108
109    // 用一个生命周期 后期可换成 异步触发
110    onMounted(() => {
111      let total = 0;
112      for (let key in originList) {
113        const value = originList[key]
114        // todo 临时借用
115        keys.value.push(key)
116
117        originListHeight.value.push({
118          index: 42,
119          list: value.length * 80,
120          total: value.length * 80 + 42,
121          key
122        })
123        total += value.length * 80 + 42
124      }
125      scrollHeight.value = total
126    })
127
128    // 只关注 scrollTop 的变化
129    watchEffect(() => {
130      // 分离一下 计算过程 减少列表更新 无意义渲染
131      // 这里主要计算 index
132      if (originListHeight.value.length == 0) {
133        // 分别赋值 减少无意义的list渲染
134        showListIndexs.key = 'A'
135        showListIndexs.index = 0
136        showListIndexs.sonIndex = 0
137        return
138      }
139      // todo
140      // scrollTop 通过scrollTop
141      // 计算之前需要计算原数据(originList)的高度
142      // 目前不考虑 px -> rem 造成的问题
143      // 通过设置的css可知一个item height: 80px;
144      // 但是还需要知道indxKey也就是 class="gropu-index"的高度 height: 42px;
145      // todo 前期单位固定 先完成核心 再考虑动态高度的问题
146      // 1. 找到大方向 也就是 首层数据
147      // 2. 根据大方向 减去 scrollTop 后 计算子数据Index
148      // 3. 数据不够需要 拿到下层数据
149      let total = 0;
150      let index = originListHeight.value.findIndex(item => {
151        // 找到高度和比当前滚动高度 大的第一个
152        let t = total + item.total
153        if (t > scrollTop.value) {
154          return true;
155        }
156        total = t;
157        return false;
158      });
159      // 处理 首次 top 为0的情况
160      // todo 这里还有点小问题 晚点说明
161      if (index === -1) return {
162        key: 'A',
163        sonIndex: 0
164      };
165      const key = originListHeight.value[index].key;
166      // total 为最近的
167      const sonListTop = scrollTop.value - total
168      // 得到子列表开始下标
169      const sonIndex = sonListTop / 80 | 0
170      // console.log('sonIndex',sonIndex);
171      // 计算偏移 ok
172      offsetTop.value = total + sonIndex * 80;
173
174      showListIndexs.key = key
175      showListIndexs.index = index
176      showListIndexs.sonIndex = sonIndex
177    }, [scrollTop])
178
179    return {
180      list,
181      scrollRef,
182      scrollTop,
183      scrollHeight,
184      offsetTop,
185      keys,
186      handleToList (key) {
187        // 由于数据加载后已经对预渲染的高度进行了一个计算
188        // 所以这里只要改变滚动的高度即可完成其他所有操作
189        if (!scrollRef.value) return;
190        // 计算高度
191        let height = 0;
192
193        const heightData = originListHeight.value.find(item => {
194          if (item.key === key) return true;
195          height += item.total;
196          return false;
197        })
198        if (!heightData) return;
199        scrollRef.value.scrollTo(0, height)
200      }
201    }
202  },
203}
204</script>
205
206<style lang="scss" >
207* {
208  padding: 0;
209  margin: 0;
210}
211.list-page-box {
212  position: relative;
213  height: 100vh;
214  width: 100vw;
215  overflow: hidden;
216  overflow-y: auto;
217}
218
219.list-box {
220  position: absolute;
221  top: 0;
222  left: 0;
223  right: 0;
224  .group-box {
225    /* padding-top: 24px; */
226    box-sizing: border-box;
227    .gropu-index {
228      background-color: #f4f5f6;
229      padding: 10px;
230      font-weight: bold;
231      // todo bug
232      position: sticky;
233      top: 0;
234      height: 42px;
235      box-sizing: border-box;
236    }
237    .group-content {
238      .group-item {
239        display: flex;
240        align-items: center;
241        justify-content: space-between;
242        padding: 6px 10px;
243        // 固定的高度
244        height: 80px;
245        box-sizing: border-box;
246        /* 不做其他处理 保证高度一致 */
247        overflow: hidden;
248
249        .group-item-pic {
250          width: 68px;
251          min-width: 68px;
252          height: 68px;
253          margin-right: 12px;
254        }
255        .group-item-content {
256          display: flex;
257          flex-direction: column;
258          height: 100%;
259          h1 {
260            font-size: 16px;
261            font-weight: bold;
262            color: #333333;
263          }
264          p {
265            color: #666666;
266            font-size: 14px;
267          }
268        }
269
270        .group-item-aciton {
271          min-width: 60px;
272          display: flex;
273          align-items: center;
274          justify-content: end;
275        }
276      }
277    }
278  }
279}
280.index-field-box {
281  position: fixed;
282  top: 0;
283  right: 0;
284  z-index: 10;
285  height: 100%;
286  display: flex;
287  flex-direction: column;
288  align-items: center;
289  justify-content: center;
290  padding: 10px;
291}
292</style>
难点解决
渲染位置和偏移位置
由于是双层数据中单个IndexList包含Index和List的高度,所以在拿到数据后先对数据高度进行预测,这里预测方式为固定的item和key高度。
前提: item 高度为80,index 高度为42; 这里后续可以先进行预渲染然后拿到渲染的高度。
高度计算
1// 总高度 用于固定 scroll height
2let total = 0;
3// 循环计算所有高度
4for (let key in originList) {
5    const value = originList[key]
6    // 记录所欲key 用于右侧列表的渲染
7    keys.value.push(key)
8    // 缓存
9    originListHeight.value.push({
10      index: 42,
11      list: value.length * 80,
12      total: value.length * 80 + 42,
13      key
14    })
15    total += value.length * 80 + 42
16}
17scrollHeight.value = total
对于渲染数据的计算是根据滚动位置和数据高度。对于渲染数据来说,双层数据只需要分别计算出第一层和第二层的数据下标即可。
对于第一层只需要计算滚动高和数据高度的大小即可得到。
第二层位置拿到与第一层数据高度和滚动高度的差额再除去单个元素的高度。
1// 只关注 scrollTop 的变化
2watchEffect(() => {
3  // 分离一下 计算过程 减少列表更新 无意义渲染
4  // 这里主要计算 index
5  if (originListHeight.value.length == 0) {
6    // 分别赋值 减少无意义的list渲染
7    showListIndexs.key = 'A'
8    showListIndexs.index = 0
9    showListIndexs.sonIndex = 0
10    return
11  }
12
13  // 找到第一层数据位置
14  let total = 0;
15  let index = originListHeight.value.findIndex(item => {
16    // 找到高度和比当前滚动高度 大的第一个
17    let t = total + item.total
18    if (t > scrollTop.value) {
19      return true;
20    }
21    total = t;
22    return false;
23  });
24  // 处理 首次 top 为0的情况
25  // todo 这里还有点小问题 晚点说明
26  if (index === -1) return {
27    key: 'A',
28    sonIndex: 0
29  };
30  const key = originListHeight.value[index].key;
31  // total 为最近的
32  const sonListTop = scrollTop.value - total
33  // 得到子列表开始下标
34  const sonIndex = sonListTop / 80 | 0
35  // console.log('sonIndex',sonIndex);
36  // 计算偏移 ok
37  offsetTop.value = total + sonIndex * 80;
38
39  showListIndexs.key = key
40  showListIndexs.index = index
41  showListIndexs.sonIndex = sonIndex
42}, [scrollTop])
渲染数据的计算
采用计算属性根据 showListIndexs 的变化来进行更新,通过scrollTop计算位置后,拿到一二层下标进行数据截取,不过滚动位置的变化导致第二层数据可能无法满足渲染整个可视区域。所以需要额外的数据补充的计算,这里补充计算暂时只做两层。
1// 需要渲染的数据
2const list = computed(() => {
3  // 获取key
4  const { key, index, sonIndex } = showListIndexs;
5  // 获取数据
6  // todo 这里的10个元素 后期需要进行计算 目前无所谓
7  const showList = originList[key].slice(sonIndex, sonIndex + 10)
8  // todo 实际上目前的key: value的机构还是有些问题的(无序),这个暂时按下不表
9  const showData = {
10    [key]: showList
11  }
12  // 计算 数据长度不够时的处理
13  // todo 需要再细致化 需要一个循环
14  if (showList.length < 10) {
15    // 处理 数据不够时的问题
16    const nextIndex = index + 1
17
18    if (nextIndex >= originListHeight.value.length) return showData
19    const nextHeightData = originListHeight.value[nextIndex];
20    if (!nextHeightData) return showData;
21    const nextKey = nextHeightData.key;
22    const nextShowList = originList[nextKey].slice(0, 10 - showList.length)
23    showData[nextKey] = nextShowList
24  }
25
26  return showData
27})
右侧点击跳转
由于提前对预渲染高度进行了计算,所以这个问题约等于不存在。
1// 由于数据加载后已经对预渲染的高度进行了一个计算
2// 所以这里只要改变滚动的高度即可完成其他所有操作
3if (!scrollRef.value) return;
4// 计算高度
5let height = 0;
6
7const heightData = originListHeight.value.find(item => {
8  if (item.key === key) return true;
9  height += item.total;
10  return false;
11})
12if (!heightData) return;
13scrollRef.value.scrollTo(0, height)
移植问题
只需要替换监听和滚动位置,即可完成大体功能的移植。所以这里不做细节的描述。