
1、Spring框架的搭建
这个很简单,只需要web容器中注册org.springframework.web.context.ContextLoaderListener,并指定spring加载配置文件,那么spring容器搭建完成。(当然org.springframework的核心jar包需要引入)
当然为了更加易用支持J2EE应用,一般我们还会加上如下:
Spring监听HTTP请求事件:org.springframework.web.context.request.RequestContextListener
1<!-- spring配置文件开始 -->
2	<context-param>
3		<param-name>contextConfigLocation</param-name><!-- spring配置文件,请根据需要选取 -->
4		<param-value>classpath*:webconfig/service-all.xml</param-value>
5	</context-param>
6	<listener><!-- Spring负责监听web容器启动和关闭的事件 --><!-- Spring ApplicationContext载入 -->
7		<listener-class>org.springframework.web.context.ContextLoaderListener</listener-class>
8	</listener>
9	<listener><!-- Spring监听HTTP请求事件 -->
10		<!-- 使spring支持request与session的scope,如: -->
11		<!-- <bean id="loginAction" class="com.foo.LoginAction" scope="request"/> -->
12		<!-- 使用: -->
13		<!-- 1、注解获取:@Autowired HttpServletRequest request; -->
14		<!-- 2、java代码:HttpServletRequest request =
15		((ServletRequestAttributes)RequestContextHolder.getRequestAttributes()).getRequest(); -->
16		<!-- 3、直接在参数中传递:public String sayHi(HttpServletRequest request) -->
17		<listener-class>org.springframework.web.context.request.RequestContextListener</listener-class>
18	</listener>
19	<listener><!-- Spring 刷新Introspector防止内存泄露 -->
20		<listener-class>org.springframework.web.util.IntrospectorCleanupListener</listener-class>
21	</listener>
22	<filter>
23		<filter-name>encodingFilter</filter-name>
24		<filter-class>org.springframework.web.filter.CharacterEncodingFilter</filter-class>
25		<init-param>
26			<param-name>encoding</param-name>
27			<param-value>UTF-8</param-value>
28		</init-param>
29		<init-param>
30			<param-name>forceEncoding</param-name>
31			<param-value>false</param-value>
32		</init-param>
33	</filter>
34	<filter-mapping>
35		<filter-name>encodingFilter</filter-name>
36		<url-pattern>/*</url-pattern>
37	</filter-mapping>
38	<!-- spring配置文件结束 -->
2、Spring MVC的搭建
首先我们知道Spring MVC的核心是org.springframework.web.servlet.DispatcherServlet,所以web容器中少不了它的注册。(当然org.springframework的web、mvc包及其依赖jar包需要引入)
1<!-- spring mvc配置开始 -->
2	<servlet>
3		<servlet-name>Spring-MVC</servlet-name>
4		<servlet-class>org.springframework.web.servlet.DispatcherServlet</servlet-class>
5		<init-param>
6			<param-name>contextConfigLocation</param-name>
7			<param-value>classpath*:spring/spring-mvc.xml</param-value><!-- spring mvc配置文件 -->
8		</init-param>
9		<load-on-startup>1</load-on-startup>
10	</servlet>
11	<servlet-mapping>
12		<servlet-name>Spring-MVC</servlet-name>
13		<url-pattern>*.do</url-pattern>
14	</servlet-mapping>
15	<!-- spring mvc配置结束 -->
同时为了更好使用MVC,spring-mvc.xml需要配置以下:
1)(可选)多部分请求解析器(MultipartResolver)配置,与上传文件有关 需要类库commons-io、commons-fileupload
1<bean id="multipartResolver" class="org.springframework.web.multipart.commons.CommonsMultipartResolver">
2		<property name="defaultEncoding" value="utf-8"></property><!-- 默认编码-->
3		<property name="maxUploadSize" value="104857600"></property><!-- 文件大小最大值-->
4		<property name="maxInMemorySize" value="40960"></property><!-- 内存中的最大值-->
5	</bean>
2)(可选)本地化(LocaleResolver)配置
3)(可选)主题解析器(ThemeResolver)配置
4)(必选)处理器映射器(HandlerMapping)配置,可以配置多个,一般采用RequestMappingHandlerMapping或者自定义
这里我们自定义了一个处理器映射器,继承重写RequestMappingHandlerMapping,支持@RequestMapping无需任何path参数自动装载类名或方法作为url路径匹配。
1<bean id="handlerMapping"
2		class="io.flysium.framework.web.servlet.mvc.method.annotation.CustomHandlerMapping">
3		<property name="order" value="-1" />
4	</bean>
CustomHandlerMapping实现:
1@Override
2	protected RequestMappingInfo getMappingForMethod(Method method, Class handlerType) {
3		RequestMappingInfo info = createRequestMappingInfoDefault(method);
4		if (info != null) {
5			RequestMappingInfo typeInfo = createRequestMappingInfoDefault(handlerType);
6			if (typeInfo != null)
7				info = typeInfo.combine(info);
8		}
9		return info;
10	}
11
12	private RequestMappingInfo createRequestMappingInfoDefault(AnnotatedElement element) {
13		RequestMapping requestMapping = AnnotatedElementUtils.findMergedAnnotation(element,
14				RequestMapping.class);
15		RequestCondition condition = (element instanceof Class)
16				? getCustomTypeCondition((Class) element)
17				: getCustomMethodCondition((Method) element);
18		/**
19		* 以类名和方法名映射请求,参照@RequestMapping
20		* 默认不需要添加任何参数(如:/className/methodName.do)
21		*/
22		String defaultName = (element instanceof Class)
23				? ((Class) element).getSimpleName()
24				: ((Method) element).getName();
25		return requestMapping == null
26				? null
27				: createRequestMappingInfo(requestMapping, condition, defaultName);
28	}
29
30	protected RequestMappingInfo createRequestMappingInfo(RequestMapping annotation,
31			RequestCondition<?> customCondition, String defaultName) {
32		String[] patterns = resolveEmbeddedValuesInPatterns(annotation.value());
33		if (patterns != null && (patterns.length == 0)) {
34			patterns = new String[]{defaultName};
35		}
36		return new RequestMappingInfo(
37				new PatternsRequestCondition(patterns, getUrlPathHelper(), getPathMatcher(),
38						this.useSuffixPatternMatch, this.useTrailingSlashMatch,
39						this.fileExtensions),
40				new RequestMethodsRequestCondition(annotation.method()),
41				new ParamsRequestCondition(annotation.params()),
42				new HeadersRequestCondition(annotation.headers()),
43				new ConsumesRequestCondition(annotation.consumes(), annotation.headers()),
44				new ProducesRequestCondition(annotation.produces(), annotation.headers(),
45						this.contentNegotiationManager),
46				customCondition);
47	}
5)(必选)处理器适配器(HandlerAdapter)配置,可以配置多个,主要是配置messageConverters,其主要作用是映射前台传参与handler处理方法参数。一般扩展RequestMappingHandlerAdapter,或者自定义。如果我们需要json请求的处理,这里必须扩展。同时我们需要注意的是日期格式的转换。
另外Spring 4.2新特性,加之注解会自动注入@ControllerAdvice,可以定义RequestBodyAdvice、ResponseBodyAdvice,可以更方便地在参数处理方面着手自定义。
1<bean id="handlerAdapter"
2	class="org.springframework.web.servlet.mvc.method.annotation.RequestMappingHandlerAdapter">
3	<property name="order" value="-1" />
4	<property name="messageConverters">
5		<list>
6		<!-- <bean class="org.springframework.http.converter.json.MappingJackson2HttpMessageConverter"
7			/> -->
8			<ref bean="mappingJacksonHttpMessageConverter" />
9		</list>
10	</property>
11	<property name="webBindingInitializer">
12		<bean
13			class="org.springframework.web.bind.support.ConfigurableWebBindingInitializer">
14			<property name="conversionService">
15				<!-- 针对普通请求(非application/json) 前台的日期字符串与后台的Java Date对象转化,
16				此情况,应使用spring
17					mvc本身的内置日期处理 -->
18				<!-- 可以在VO属性上加注解:@DateTimeFormat 需要类库joda-time -->
19		<bean
20		class="org.springframework.format.support.FormattingConversionServiceFactoryBean">
21		</bean>
22			</property>
23		</bean>
24	</property>
25</bean>
26<!-- json请求(application/json)返回值Date转String,全局配置 -->
27<bean name="jacksonObjectMapper"
28	class="org.springframework.http.converter.json.Jackson2ObjectMapperFactoryBean">
29	<property name="featuresToDisable">
30		<array>
31		<util:constant
32static-field="com.fasterxml.jackson.databind.SerializationFeature.WRITE_DATES_AS_TIMESTAMPS" />
33		</array>
34	</property>
35	<!-- 如果想自定义,可以在VO属性上加注解:@JsonFormat(shape = JsonFormat.Shape.STRING, pattern
36		= Consts.DATE_PATTERN.DATE_PATTERN_OBLIQUE,timezone = "GMT+8") -->
37	<property name="simpleDateFormat">
38		<value>yyyy-MM-dd HH:mm:ss</value>
39	</property>
40</bean>
41<!--避免IE执行Ajax时,返回JSON出现下载文件 -->
42<!-- 自定义 -->
43<bean id="mappingJacksonHttpMessageConverter"
44	class="io.flysium.framework.http.converter.json.CustomJackson2HttpMessageConverter">
45	<property name="objectMapper" ref="jacksonObjectMapper" />
46	<property name="supportedMediaTypes">
47		<list>
48			<value>text/html;charset=UTF-8</value>
49			<value>application/json;charset=UTF-8</value>
50		</list>
51	</property>
52</bean>
6)(可选)处理器异常解析器(HandlerExceptionResolver)配置,可以配置多个,配置Controller异常抛出后,我们是怎么样处理的,一般需要日志或做反馈的可以自定义。
7)(可选)请求到视图名翻译器(RequestToViewNameTranslator)配置,RequestToViewNameTranslator可以在处理器返回的View为空时使用它根据Request获得viewName。
8)(可选)视图解析器(ViewResolver)配置,可以配置多个,定义跳转的文件的前后缀 ,视图模式配置,主要针对@Controller返回ModelAndView的视图路径解析,动给后面控制器的方法return的字符串 加上前缀和后缀,变成一个 可用的url地址 。
1<bean id="viewResolver"
2		class="org.springframework.web.servlet.view.InternalResourceViewResolver">
3		<property name="prefix" value="/" />
4		<property name="suffix" value=".jsp" />
5		<property name="viewClass"
6			value="org.springframework.web.servlet.view.JstlView" />
7	</bean>
最后给Controller加入组件扫描吧,这样减少xml配置,直接在Java代码中加入注解即可。
1    <!-- 自动扫描类包,将标志Spring注解的类自动转化为Bean,同时完成Bean的注入 -->
2	<!-- 扫描控制器 -->
3	<context:component-scan base-package="io.flysium" use-default-filters="false">
4		<context:include-filter type="annotation"
5			expression="org.springframework.stereotype.Controller" />
6		<context:include-filter type="annotation"
7			expression="org.springframework.web.bind.annotation.RestController" />
8		<context:include-filter type="annotation"
9			expression="org.springframework.web.bind.annotation.ControllerAdvice" />
10	</context:component-scan>
3、Mybatis整合
整合mybatis到Spring框架,我们需要mybatis的jar包,及mybatis-spring整合jar包。然后在Spring容器中注册配置org.mybatis.spring.SqlSessionFactoryBean(需要数据源,及指定Mybatis配置文件)及org.mybatis.spring.SqlSessionTemplate即可。
更多整合请参照Git项目:
SSM:
https://git.oschina.net/svenaugustus/app-ss4m-less
Spring Boot 2 系列:
https://gitee.com/svenaugustus/springboot2-bucket
目前除了ssm,另外整合redis(支持切换单节点配置、主从哨兵配置,集群配置)、spring session方案。
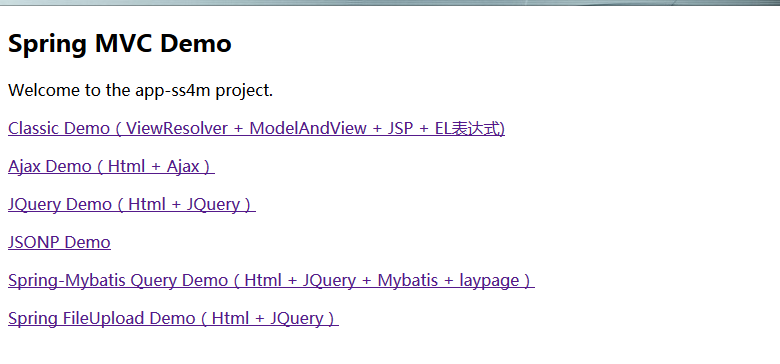
其中包括spring MVC的简单demo,用于学习交流。
@SvenAugustus(https://www.flysium.xyz/)
更多请关注微信公众号【编程不离宗】,专注于分享服务器开发与编程相关的技术干货:
