
后端接口响应慢,通常我们就需要优化代码和sql,如果项目中使用druid连接池,那么我们可以利用其提供的sql监控功能,来帮助我们快速定位慢sql已经sql执行次数等问题,springboot2之后,durid监控配置变的更简单了,不需要额外的代码,只需要添加配置即可。整个项目配置如下:
依赖
1<dependency>
2            <groupId>org.springframework.boot</groupId>
3            <artifactId>spring-boot-starter-web</artifactId>
4        </dependency>
5
6        <dependency>
7            <groupId>com.alibaba</groupId>
8            <artifactId>druid-spring-boot-starter</artifactId>
9            <version>1.1.10</version>
10        </dependency>
11
12        <dependency>
13            <groupId>org.springframework.boot</groupId>
14            <artifactId>spring-boot-starter-data-jpa</artifactId>
15        </dependency>
16
17        <dependency>
18            <groupId>org.postgresql</groupId>
19            <artifactId>postgresql</artifactId>
20            <scope>runtime</scope>
21        </dependency>
22        <dependency>
23            <groupId>org.springframework.boot</groupId>
24            <artifactId>spring-boot-starter-test</artifactId>
25            <scope>test</scope>
26        </dependency>
application.yml
1spring:
2  datasource:
3    druid:
4      url: jdbc:postgresql://127.0.0.1:5432/test01?characterEncoding=utf-8
5      username: admin
6      password: 123456
7      driver-class-name: org.postgresql.Driver
8      initial-size: 1
9      max-active: 20
10      max-wait: 6000
11      pool-prepared-statements: true
12      max-pool-prepared-statement-per-connection-size: 20
13      connection-properties: druid.stat.mergeSql=true;druid.stat.slowSqlMillis=2000
14      min-idle: 1
15      time-between-eviction-runs-millis: 60000
16      min-evictable-idle-time-millis: 300000
17      validation-query: select 1
18      test-while-idle: true
19      test-on-borrow: false
20      test-on-return: false
21      web-stat-filter:
22        enabled: true
23        url-pattern: "/*"
24        exclusions: "*.js,*.gif,*.jpg,*.png,*.css,*.ico,/druid/*"
25        session-stat-max-count: 1000
26        session-stat-enable: true
27        profile-enable: true
28      stat-view-servlet:
29        enabled: true
30        url-pattern: "/druid/*"
31        login-username: root
32        login-password: root
33        allow: 127.0.0.1
34        reset-enable: true
35
36
37
38    type: com.alibaba.druid.pool.DruidDataSource
39    url:
40    username: admin
41    password: 123456
42    driver-class-name:
43    filters: stat,wall,slf4j
44    maxActive: 20
45  jpa:
46    database: postgresql
47    show-sql: true
48    properties:
49      hibernate:
50        temp:
51          use_jdbc_metadata_defaults: false
测试添加的相关类
1package com.junlin.druid.Entity;
2
3import javax.persistence.*;
4import java.io.Serializable;
5
6@Entity
7@Table(name="newtable")
8public class DemoEntity implements Serializable {
9
10    @Id
11    @GeneratedValue
12    @Column(name="id")
13    private int id;
14
15    @Column(name="name")
16    private String name;
17
18    public int getId() {
19        return id;
20    }
21
22    public void setId(int id) {
23        this.id = id;
24    }
25
26    public String getName() {
27        return name;
28    }
29
30    public void setName(String name) {
31        this.name = name;
32    }
33}
34
35package com.junlin.druid.Dao;
36
37import com.junlin.druid.Entity.DemoEntity;
38import org.springframework.data.jpa.repository.JpaRepository;
39
40import java.util.List;
41
42public interface DemoJPA  extends JpaRepository<DemoEntity,Integer> {
43
44    List<DemoEntity> findByName(String name);
45}
46
47package com.junlin.druid.Controller;
48
49import com.junlin.druid.Dao.DemoJPA;
50import com.junlin.druid.Entity.DemoEntity;
51import org.springframework.beans.factory.annotation.Autowired;
52import org.springframework.web.bind.annotation.GetMapping;
53import org.springframework.web.bind.annotation.RestController;
54
55import java.util.List;
56
57
58@RestController
59public class DemoController {
60
61
62    @Autowired
63    private DemoJPA demoJPA;
64
65    @GetMapping("/findName")
66    public Object findEntity(String name){
67        List<DemoEntity> list = demoJPA.findByName(name);
68        return list;
69    }
70}
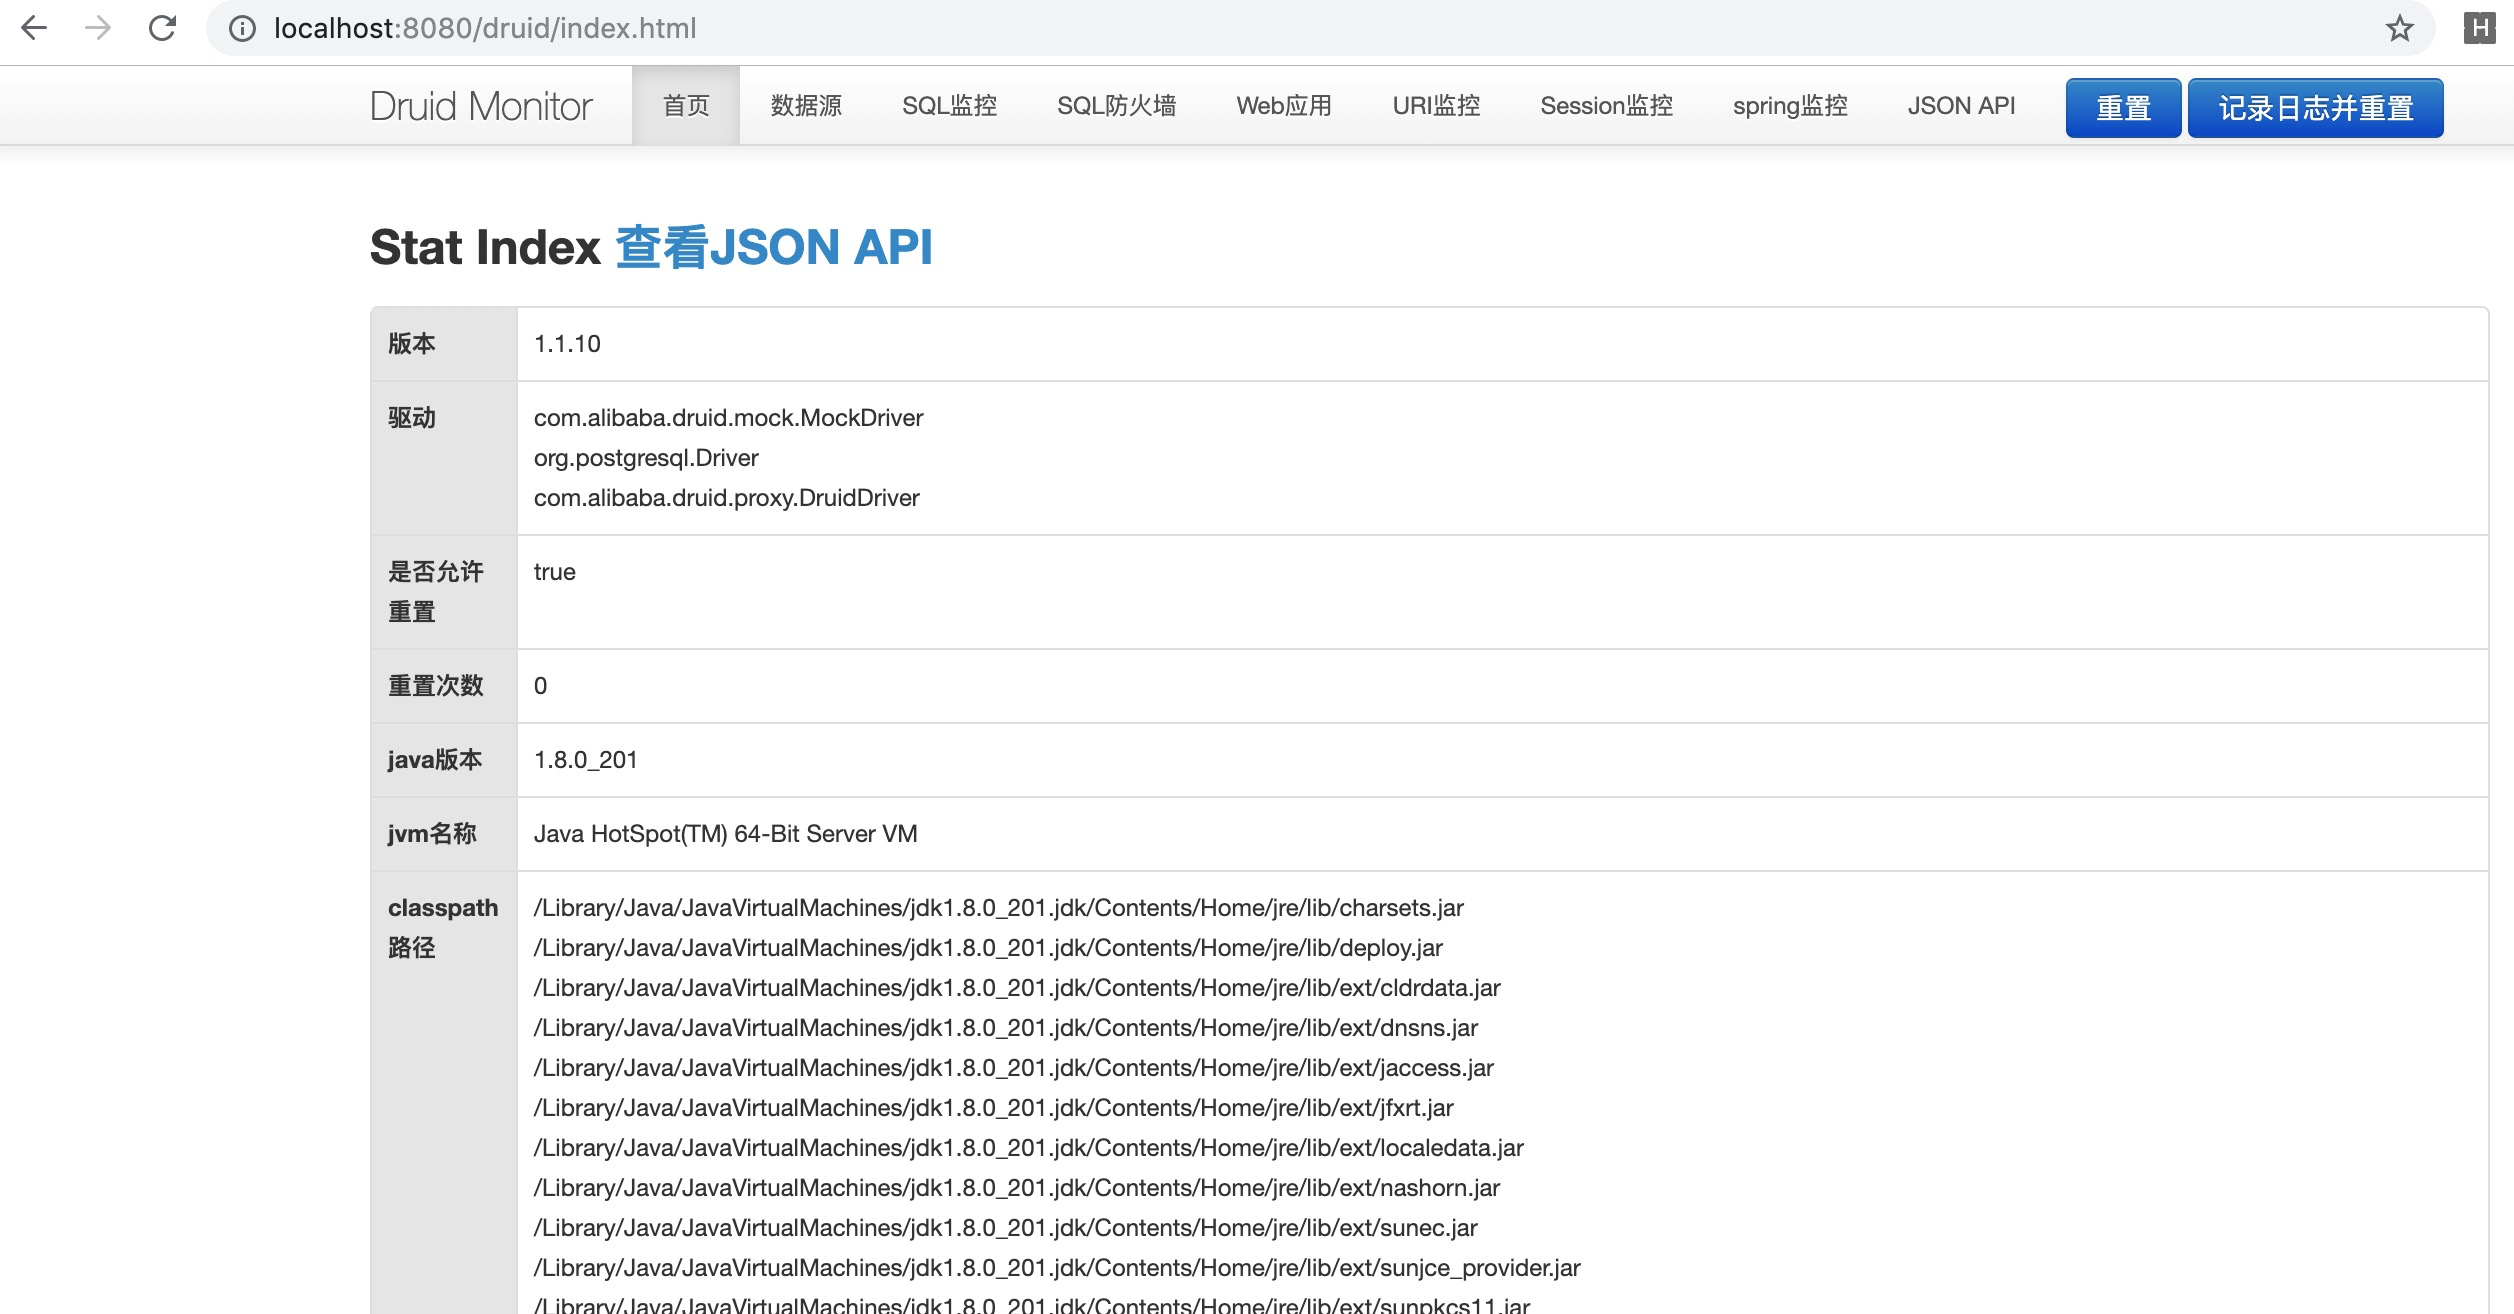
启动项目,访问localhost:8080/druid/,进入登陆页面输入在application.yml配置好的用户和密码(demo中都是root),即可看到监控页面
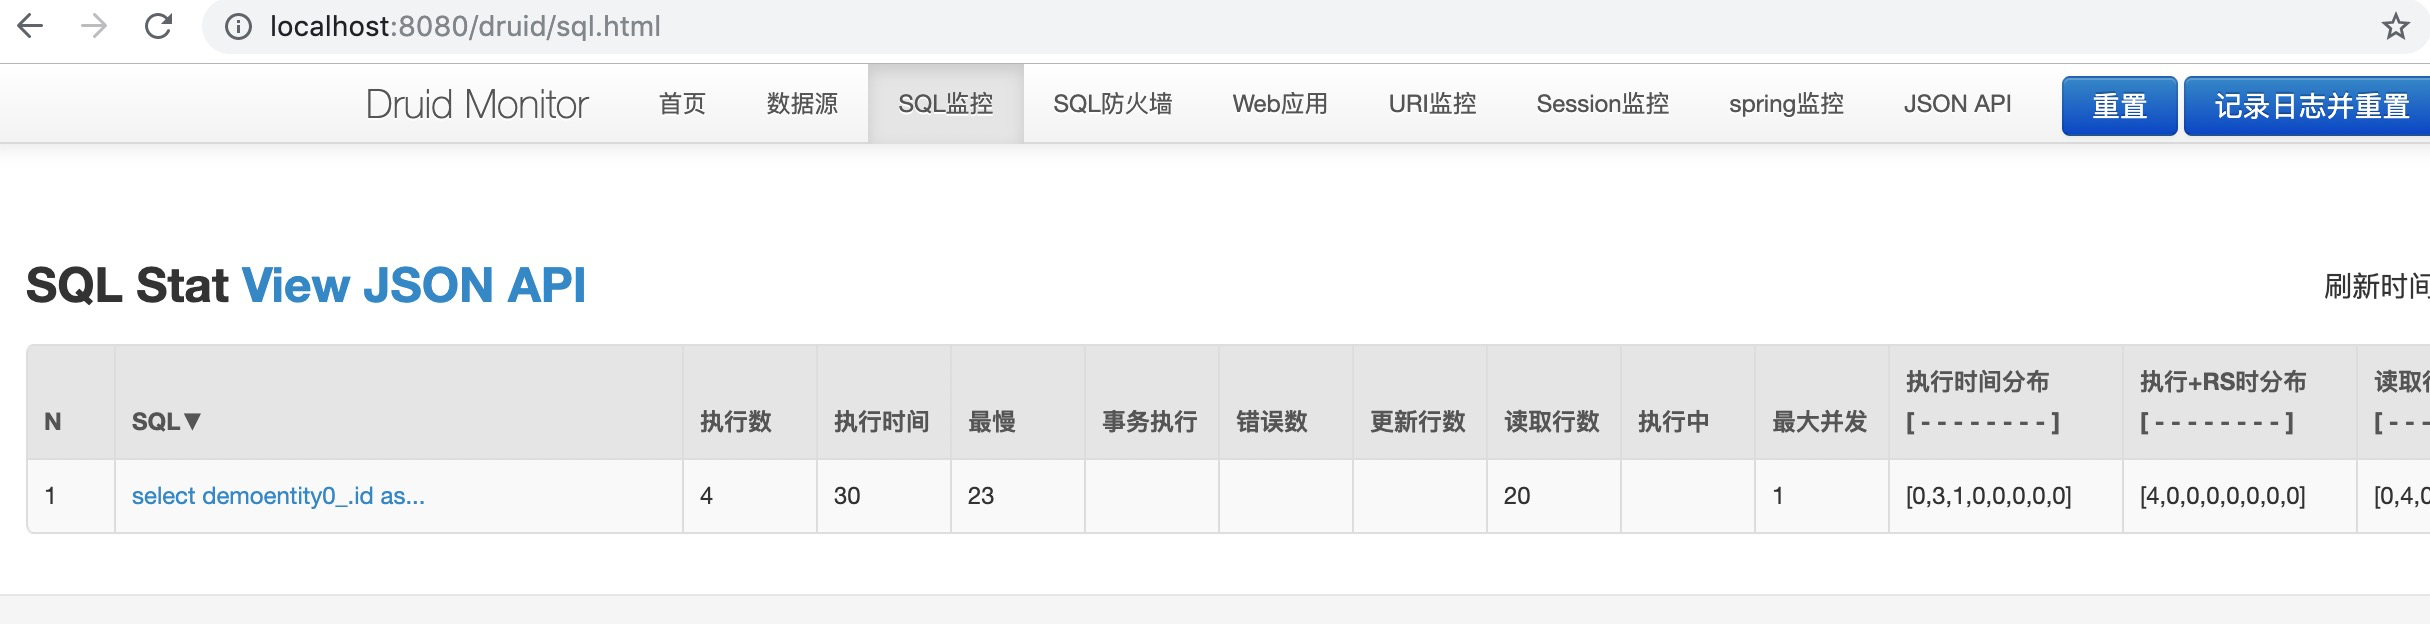
访问一下我们准备好的接口,执行几次sql查询,在监控页面点看sql监控页面,就能看到我们的sql执行情况
其它相关的配置以及页面相关内容可以参考druid官网文档,地址https://github.com/alibaba/druid/wiki/常见问题