
使用pxe方式安装系统,
实验环境
vmware虚拟机两台 一个为服务器用于安装tftp,dhcp,apache2服务
dhcp的虚拟机网络为192.168.10.100/24 服务器主机的系统IP地址为192.168.10.2
allinone为pxe服务器有两块网卡eth0为(vnet3)192.168.10.2/24 eth1用来 连接internet使用nat
首先创建192.168.10.0/24网络由于服务器allinone开启了dhcp服务所以关闭vmware上的dhcp服务如图创建vnet3

配置虚拟机allinone的网络/etc/networking/interfaces
1auto eth0
2iface eth0 inet static
3address 192.168.10.2
4netmask 255.255.255.0
在allinone中安装apache,dhcp,tftp等服务
apt-get install apache2 tftpd-hpa dhcp3-server
/etc/default/tftpd-hpa如下

修改/etc/dhcp/dhcpd.conft添加如下内容
1option domain-name "mydomain";
2ddns-update-style none;
3server-name "bootserver";
4allow booting;
5allow bootp;
6subnet 192.168.10.0 netmask 255.255.255.0 {
7        filename "pxelinux.0";
8    	range 192.168.10.100 192.168.10.200;
9	next-server 192.168.10.2;
10}
修改/etc/xinetd.d/tftp,尤其要注意server_args参数为tftp的主目录
1service tftp
2{
3           socket_type                = dgram
4           protocol                   = udp
5           wait                       = yes
6           user                       = root
7           server                     = /usr/sbin/in.tftpd
8           server_args                = -s /var/lib/tftpboot
9           disable                    = no
10           per_source                 = 11
11           cps                        = 100 2
12           flags                      = IPv4
13}
将下载好的虚拟机ubuntu.iso挂载到/var/www/ubuntu下
sudo mount -o loop ubuntu.iso /var/www/ubuntu
将 /var/www/ubuntu/install/netboot/里的文件都拷到/var/lib/tftpboot/里
cp /var/ubuntu/install/netboot/* /var/lib/tftpboot/

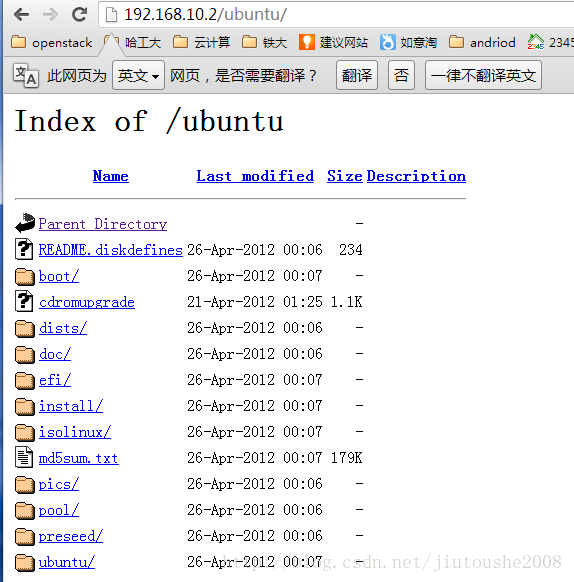
重启apache服务器访问http://192.168.10.2/ubuntu
出现如下画面则表示服务器端安装成功
参考链接http://forum.ubuntu.org.cn/viewtopic.php?t=196261
http://blog.sina.com.cn/s/blog_6340cd9c01015zif.html
http://blog.csdn.net/lvbook/article/details/5445984
http://zhumeng8337797.blog.163.com/blog/static/100768914201131361455361/