
文章目录
- 一、环境说明
-
-
- 1、在gradle中引入依赖
- 2、AndroidManifest中开启网络权限
- 3、搭建测试接口
- 4、编写OkHttp工具类
-
- 二、发送请求
-
-
- 1.发送无参的Get请求
- 2.发送有参的Get请求
- 3.发送无参Post请求
- 4.发送有参Pos请求
- 5.发送Post 的Json数据
-
一、环境说明
1、在gradle中引入依赖
1    implementation 'com.squareup.okhttp3:okhttp:3.12.1'
2    debugImplementation 'com.squareup.okhttp3:logging-interceptor:3.12.1'
2、AndroidManifest中开启网络权限
<uses-permission android:name="android.permission.INTERNET"/>
注意:
在android9.0以后,Android默认禁止使用Http协议,必须使用Https协议,否则会报错误。

所以要使用Http协议的请求必须在AndroidManifest中添加属性,android:usesCleartextTraffic=“true”
3、搭建测试接口
1package com.icodingzy.androidback.controller;
2
3import com.icodingzy.androidback.pojo.User;
4import org.springframework.web.bind.annotation.*;
5
6@RestController
7@RequestMapping("user")
8public class UserController {
9
10
11    /**
12     * GET NoParameter
13     * @return
14     */
15    @GetMapping("getUser")
16    public Object getUser() {
17
18
19        User user = new User();
20        user.setId((int) (Math.random()*100));
21        user.setName("熊顺");
22        user.setStudentId("201815110110" + (int) (Math.random()*100));
23        user.setSex("男");
24        user.setData("Not have Parameter!");
25        return user;
26    }
27
28    /**
29     * GET TakeParameter
30     * @param id userId
31     * @return
32     */
33    @GetMapping("getParamUser")
34    public Object getParamUser(Integer id){
35
36
37        User user = new User();
38        user.setId(id);
39        user.setName("熊顺");
40        user.setStudentId("201815110110" + (int) (Math.random()*100));
41        user.setSex("男");
42        user.setData("parameter is " + id);
43        return user;
44    }
45    /**
46     * Post NoParameter
47     * @return
48     */
49    @PostMapping("postNoParamUser")
50    public Object postNoParamUser(){
51
52
53        User user = new User();
54        user.setId((int) (Math.random()*100));
55        user.setName("熊顺");
56        user.setStudentId("201815110110" + (int) (Math.random()*100));
57        user.setSex("男");
58        user.setData("Not have parameter");
59        return user;
60    }
61    /**
62     * Post TakeParameter
63     * @param id userId
64     * @return
65     */
66    @PostMapping("postParamUser")
67    public Object postParamUser(Integer id){
68
69
70        User user = new User();
71        user.setId(id);
72        user.setName("熊顺");
73        user.setStudentId("201815110110" + (int) (Math.random()*100));
74        user.setSex("男");
75        user.setData("parameter is " + id);
76        return user;
77    }
78    /**
79     * Post ObjectParameter
80     * @return
81     */
82    @PostMapping("postObjectParamUser")
83    public Object postObjectParamUser(@RequestBody User user){
84
85
86        return user;
87    }
88}
接口文档
说明
请求方式
请求参数
请求地址
GET 方式,无参数
GET
无
/user/getUser
GET方式,Int参数
GET
Int(id)
/user/getParamUser
Post方式,无参数
POST
无
/user/postNoParamUser
Post方式,有参数
POST
Int(id)
/user/postParamUser
Post方式,Json化参数
POST
Object(id,name,sex,studentId,sex,data)
/user/postObjectParamUser
4、编写OkHttp工具类
1package com.zhuoyue.travelwh.OkHttpUtil;
2
3
4import android.app.ProgressDialog;
5import android.content.Context;
6import android.util.Log;
7
8
9import com.zhuoyue.travelwh.bean.MsgBean;
10
11import org.greenrobot.eventbus.EventBus;
12
13import java.io.IOException;
14
15import okhttp3.Call;
16import okhttp3.Callback;
17import okhttp3.OkHttpClient;
18import okhttp3.Request;
19import okhttp3.RequestBody;
20import okhttp3.Response;
21
22public class OkHttpUtil {
23
24
25    public static ProgressDialog dialog;
26
27    /**
28     * 发送网络请求
29     * @param url 请求Url
30     * @param context 上下文对象
31     * @param body 请求体,如果有请求体则发送Post请求,反之发送Get请求
32     */
33    public static void getHttpRequset(String url, Context context, RequestBody body) {
34
35
36        startDialog(context);
37        OkHttpClient client = new OkHttpClient();
38
39        Request request = null;
40
41            //Post请求
42        if (body != null) {
43
44
45            request = new Request.Builder()
46                    .url(url)
47                    .post(body)
48                    .build();
49        } else {
50
51
52        //Get请求
53            request = new Request.Builder()
54                    .url(url)
55                    .get()
56                    .build();
57        }
58
59        client.newCall(request).enqueue(new Callback() {
60
61
62            /*请求失败时的回调*/
63            @Override
64            public void onFailure(Call call, IOException e) {
65
66
67                stopDialog();
68                Log.e("onFailure: ", e.getMessage());
69            }
70            /*请求成功时的回调*/
71            @Override
72            public void onResponse(Call call, Response response) throws IOException {
73
74
75                stopDialog();
76                Log.e("ApiData:", response.body().string());
77            }
78        });
79    }
80
81    /**
82     * 显示等待框
83     * @param context
84     */
85    public static void startDialog(Context context) {
86
87
88        dialog = new ProgressDialog(context);
89        dialog.setMessage("数据加载。。。");
90        dialog.setTitle("请稍后");
91        dialog.setCanceledOnTouchOutside(false);
92        dialog.show();
93    }
94
95    /**
96     * 关闭等待框
97     */
98    public static void stopDialog() {
99
100
101        if (dialog != null) {
102
103
104
105            dialog.dismiss();
106        }
107    }
108}
109
二、发送请求
1.发送无参的Get请求
在自己的业务中使用工具类发送网络请求
1	//无参接口
2   private final String url = "http://xxxxxx/user/getParamUser";
3      @Override
4    protected void onCreate(Bundle savedInstanceState) {
5
6
7        super.onCreate(savedInstanceState);
8        setContentView(R.layout.activity_main);
9
10        OkHttpUtil.getHttpRequset(url,this,null);
11    }
打印结果如下
E/ApiData:: {“id”:82,“name”:“熊顺”,“studentId”:“20181511011066”,“sex”:“男”,“data”:“Not have Parameter!”}

2.发送有参的Get请求
OkHttp发送Get请求时,请求参数全部放在url中
1//有参Get接口
2   private final String url = "http://xxxxxx/user/getParamUser";
3      @Override
4    protected void onCreate(Bundle savedInstanceState) {
5
6
7        super.onCreate(savedInstanceState);
8        setContentView(R.layout.activity_main);
9
10        OkHttpUtil.getHttpRequset(url + "?id=9999",this,null);
11    }

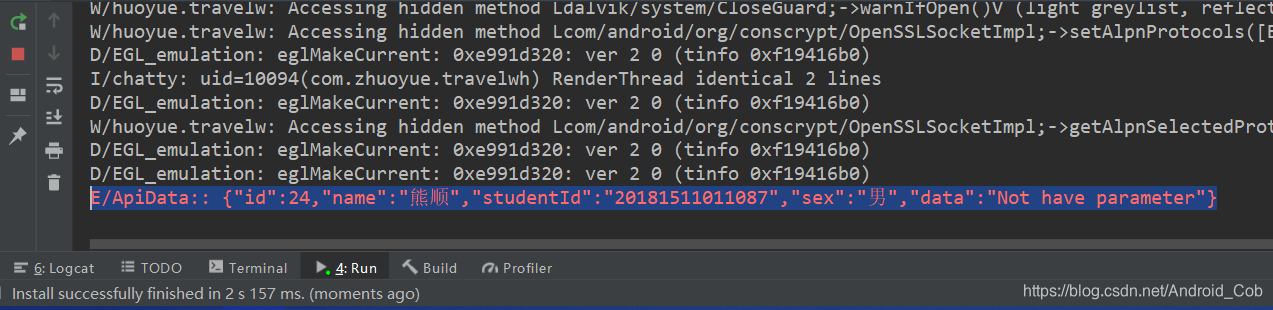
3.发送无参Post请求
发送Post请求时必需要带上请求体
1//无参Post接口
2   private final String url = "http://xxxxxx/user/postNoParamUser";
3      @Override
4    protected void onCreate(Bundle savedInstanceState) {
5
6
7        super.onCreate(savedInstanceState);
8        setContentView(R.layout.activity_main);
9
10        RequestBody body = new FormBody.Builder()
11                        .build();
12                OkHttpUtil.getHttpRequset(url, this, body);
13    }
4.发送有参Pos请求
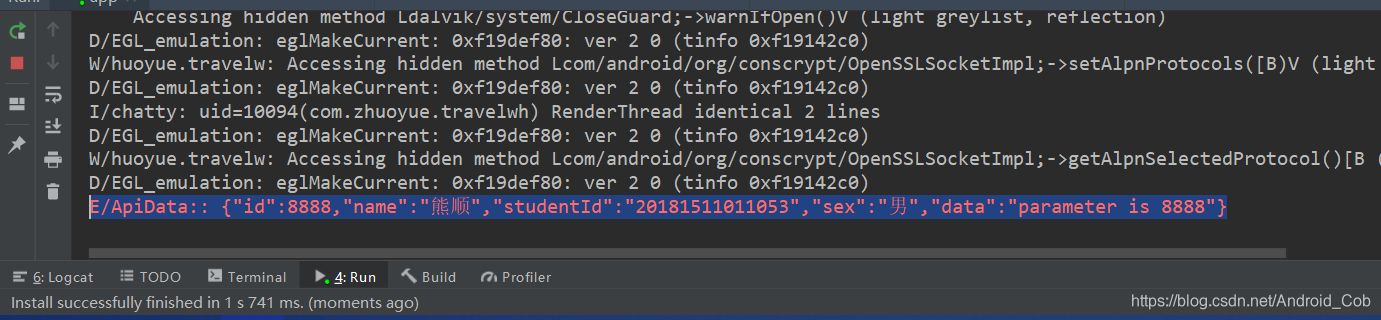
add中固定为String类型
1//有参Post接口
2   private final String url = "http://xxxxxx/user/postParamUser";
3      @Override
4    protected void onCreate(Bundle savedInstanceState) {
5
6
7        super.onCreate(savedInstanceState);
8        setContentView(R.layout.activity_main);
9
10        RequestBody body = new FormBody.Builder()
11                        .add("id","8888")
12                        .build();
13                OkHttpUtil.getHttpRequset(url, this, body);
14    }
5.发送Post 的Json数据
发送Json数据需要借助JSONObject,把数据转换成Json格式
1//Json化参数Post接口
2   private final String url = "http://xxxxxx/user/postObjectParamUser";
3      @Override
4    protected void onCreate(Bundle savedInstanceState) {
5
6
7        super.onCreate(savedInstanceState);
8        setContentView(R.layout.activity_main);
9
10        JSONObject jsonObject = new JSONObject();
11                try {
12
13
14                    jsonObject.put("id",1111111);
15                    jsonObject.put("name","顺");
16                    jsonObject.put("studentId","123123");
17                    jsonObject.put("sex","小萌新");
18                    jsonObject.put("data","I have pan");
19                } catch (JSONException e) {
20
21
22                    e.printStackTrace();
23                }
24                RequestBody body = FormBody.create(MediaType.parse("application/json;charset=utf-8"), jsonObject.toString());
25
26                OkHttpUtil.getHttpRequset(url, this, body);
27    }
